OpenAPI란?
API 설계는 오류가 발생하기 쉬우며 API를 모델링할 때 실수를 찾아 수정하는 것은 매우 어렵고 시간이 많이 걸립니다. Swagger Editor는 OAS(OpenAPI 사양)를 사용하여 API를 설계하기 위해 구축된 최초의 편집기였으며 OAS를 사용하여 API를 구축하는 개발자의 요구 사항을 지속적으로 충족해 왔습니다. 편집기는 실시간으로 디자인을 검증하고 OAS 준수 여부를 확인하며 이동 중에도 시각적 피드백을 제공합니다.
설치
패키지를 설치합니다.
npm install swagger-cli swagger-ui-express yamljs
npm install -D @types/swagger-ui-express @types/yamljs
기본 설정 파일을 위한 폴더와 설정 파일을 생성합니다.
- src/swagger 폴더를 생성
- openapi.yaml 작성
openapi: 3.0.0
info:
  version: 1.0.0
  title: ETH DAPP API docs
  description: ETH DAPP STARTER
  license:
    name: mh
servers:
  - url: http://localhost:{port}
    variables:
      port:
        default: '3001'

#Paths api 경로 지정, paths에 추가한 순서로 작성된다.
paths: {}
index.ts에서 swaggerUI 연동 소스 추가
//swagger 연결
import swaggerUi from 'swagger-ui-express';
import YAML from 'yamljs';
const path = require('path');
const swaggerSpec = YAML.load(path.join(__dirname, '../build/swagger.yaml'))
app.use('/api-docs', swaggerUi.serve, swaggerUi.setup(swaggerSpec));
package.json 파일에 스크립트 추가
"scripts": {
// swagger.yaml로 파일 통합해주는 코드
"api-docs": "swagger-cli bundle ./swagger/openapi.yaml --outfile build/swagger.yaml --type yaml",
// swagger.yaml 파일 생성
"predev": "npm run api-docs",
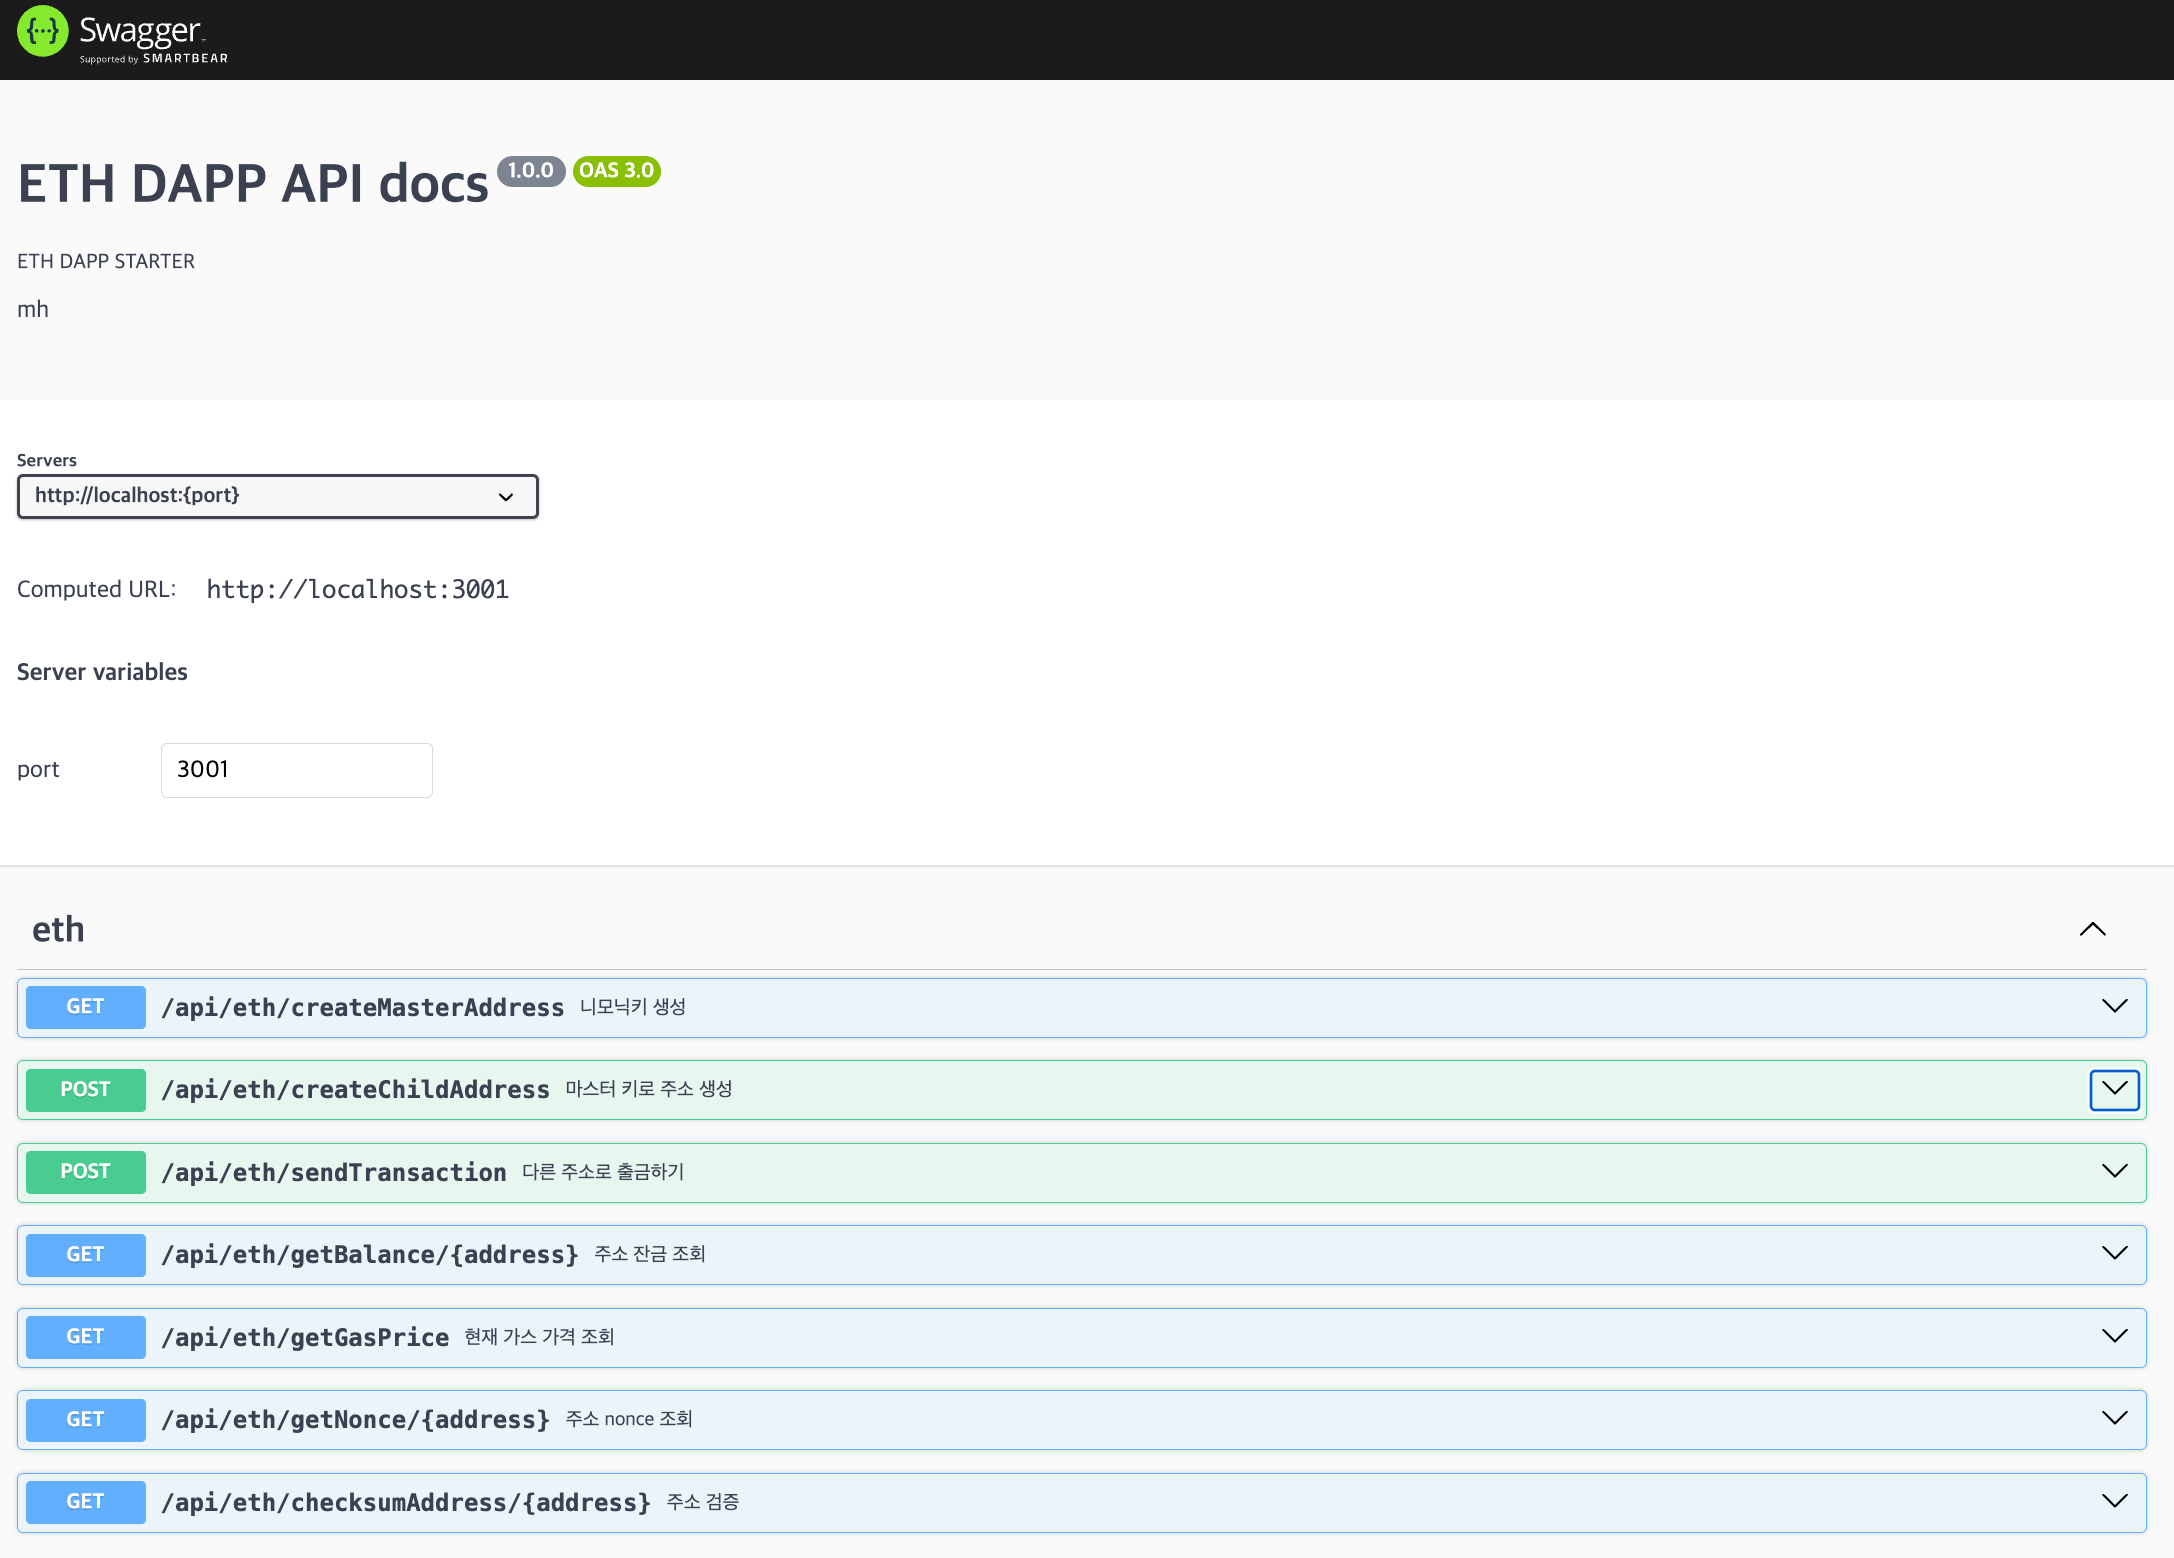
}지금까지의 파일 설정이 모두 완료되면, http://localhost:8000/api-docs 에서 swagger 화면을 볼 수 있습니다.
API 명세 작성
명세 작성은 하나로 합쳐서도 가능하지만, 메인과 서브로 나누어 메인에서는 공통 부분을 각 도메인별로 필요한 부분을 작성하는 것이 보고 이해하기에 좋습니다.
openapi.yaml
openapi: 3.0.0
info:
  version: 1.0.0
  title: ETH DAPP API docs
  description: ETH DAPP STARTER
  license:
    name: test
servers:
  - url: http://localhost:{port}
    variables:
      port:
        default: '3001'

components:
  #Schemas : model 정보
  schemas:
    create:
      properties:
        mnemonic:
          type: string
          description: 니모닉키
        startnum:
          type: number
          description: path 시작 번호
        count:
          type: number
          description: 생성할 주소 갯수
    send:
      properties:
        to:
          type: string
          description: 보낼 주소
        value:
          type: string
          description: 보낼 수량
    Error:
      type: object
      properties:
        success:
          type: boolean
        message:
          type: string
  #Examples
  examples:
    createExample:
      value:
        {
          "mnemonic": " digital.....",
          "startnum": 0,
          "count": 3
        }
    sendExample:
      value:
        {
          "to": "0x9E28854441B...............",
          "value": "0.0002"
        }

  #Responses 재사용되는 애들
  responses:
    successResponse:
      description: successful request with no data
      content:
        application/json:
          schema:
            type: object
            example: {"status": 200, "success": true, "message": "message"}
    BadRequest:
      description: 잘못된 요청
      content:
        application/json:
          schema:
            $ref: "#/components/schemas/Error"
          example:
            success: false
            message: 잘못된 요청
    InternalServerError:
      description: 서버 에러
      content:
        application/json:
          schema:
            $ref: "#/components/schemas/Error"
          example:
            success: false
            message: 서버 내부 오류

#Paths api 경로 지정, paths에 추가한 순서로 작성된다.
paths:
  /api/eth/createMasterAddress:
    $ref: './eth.yaml#/~1createMasterAddress'
  /api/eth/createChildAddress:
    $ref: './eth.yaml#/~1createChildAddress'
  /api/eth/sendTransaction:
    $ref: './eth.yaml#/~1sendTransaction'
  /api/eth/getBalance/{address}:
    $ref: './eth.yaml#/~1getBalance~1{address}'
  /api/eth/getGasPrice:
    $ref: './eth.yaml#/~1getGasPrice'
  /api/eth/getNonce/{address}:
    $ref: './eth.yaml#/~1getNonce~1{address}'
  /api/eth/checksumAddress/{address}:
    $ref: './eth.yaml#/~1checksumAddress~1{address}'
eth.yaml
/createChildAddress:
  post:
    tags:
      - eth
    summary: 마스터 키로 주소 생성
    consumes:
      - application/json
    requestBody:
      x-name: body
      required: true
      content:
        application/json:
          schema:
            $ref: './openapi.yaml#/components/schemas/create'
          examples:
            createExample:
              $ref: './openapi.yaml#/components/examples/createExample'
    responses:
      '200':
        $ref: './openapi.yaml#/components/responses/successResponse'
      '400':
        $ref: './openapi.yaml#/components/responses/BadRequest'
      '500':
        $ref: './openapi.yaml#/components/responses/InternalServerError'
/sendTransaction:
  post:
    tags:
[....위와 같은 형식으로 필요한 내용을 추가한다]
완성
Reference
https://velog.io/@server30sopt/Node.js-Swagger-openapi-3.0.0-%EC%97%B0%EA%B2%B0%ED%95%98%EA%B8%B0-3evmesru
https://swagger.io/docs/specification/api-host-and-base-path/
https://bump.sh/blog/express-api-openapi

안녕하세요. 블로그를 시작하게 되었습니다! 앞으로 유용한 정보와 좋은 내용을 많이 공유할게요:)