PVE 1, 2 서버 두 대를 연결해보겠습니다.
연결에서 마무리되는 것이 아니라 이후 마이그레이션 등을 진행하려면 공유 스토리지 방식으로 구성되어있는 것이 좋습니다.
클러스터(Cluster) : 여러 개의 노드를 묶어 하나처럼 관리
두 서버 간 root 계정으로 sshd 접근이 가능해야 합니다.
cli 명령어 이용
클러스터 생성
# PVE1
pvecm create noyeah-cluster
===
Corosync Cluster Engine Authentication key generator.
Gathering 2048 bits for key from /dev/urandom.
Writing corosync key to /etc/corosync/authkey.
Writing corosync config to /etc/pve/corosync.conf
Restart corosync and cluster filesystem
===
Proxmox 클러스터 설정은 /etc/pve/corosync.conf 파일에 저장되어 있습니다. 이 파일을 지우면 클러스터 내역이 삭제됩니다.
rm -f /etc/pve/corosync.conf클러스터에 PVE 2 추가
# PVE1
pvecm add PVE2_IP
===
Please enter superuser (root) password for 'PVE2_IP': 비밀번호 입력 후 <ENTER>
===

# 연결이 끝나면 상태 확인
pvecm status
===
# PVE2에서 확인 시
Cluster information
-------------------
Name:             noyeah-cluster
Config Version:   2
Transport:        knet
Secure auth:      on

Quorum information
------------------
Date:             Fri Sep  6 11:43:37 2024
Quorum provider:  corosync_votequorum
Nodes:            2
Node ID:          0x00000002
Ring ID:          1.71
Quorate:          Yes

Votequorum information
----------------------
Expected votes:   2
Highest expected: 2
Total votes:      2
Quorum:           2
Flags:            Quorate

Membership information
----------------------
    Nodeid      Votes Name
0x00000001          1 PVE1 IP
0x00000002          1 PVE2 IP (local)
===
웹 UI 이용
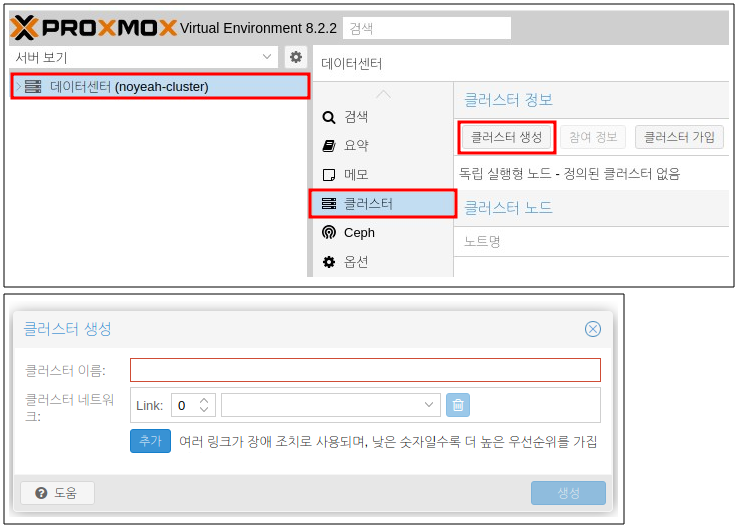
클러스터 생성 (PVE1)
[데이터 센터] → [클러스터] → [클러스터 생성]
기 생성된 클러스터가 있는 경우 버튼이 비활성화 되어 있습니다.
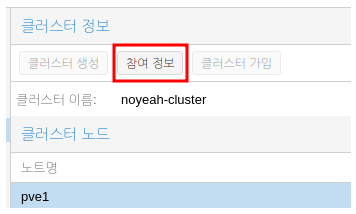
클러스터 정보 확인
클러스터에 정보를 추가하려면 클러스터 메인 PVE에서 정보를 가져와야 합니다.
[데이터 센터] → [클러스터] → [참여 정보]
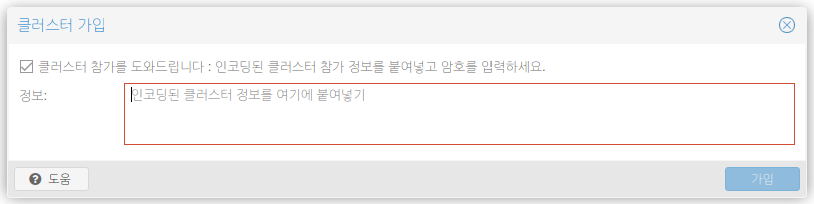
클러스터에 PVE 2 추가 (PVE2)
[데이터 센터] → [클러스터] → [클러스터 가입]

Raiju Hantu Goryo Obake