멘토링 피드백에 맞게 기존 코드 수정하기
1. REST API 규약을 지키는 응답하기
REST API는 HTTP 응답의 status와 header를 의미에 맞게 사용하고, 필요한 경우 body를 포함해 응답해야 한다.
1. 상태 코드 (Status)
2. 헤더 (Header)
3. 바디 (Body)

HTTP/1.1 200 OK
Content-Type: application/json

{
  "id": 1,
  "name": "아이폰"
}
Spring MVC에서는 HTTP 응답을 표현하기 위해 ResponseEntity를 제공한다.
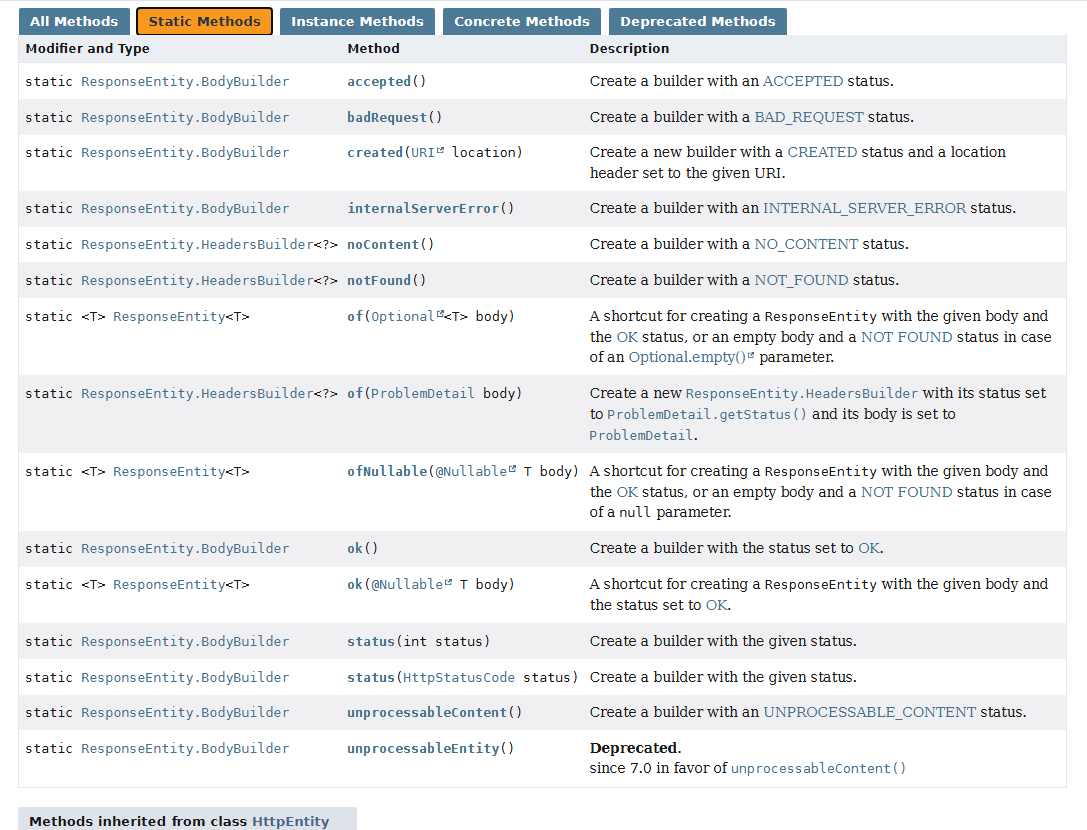
응답 객체를 작성하기 위한 다양한 static 메서드 들이 제공된다. (여기서도 정적 메서드 팩토리 패턴을 차용했음이 보인다.)
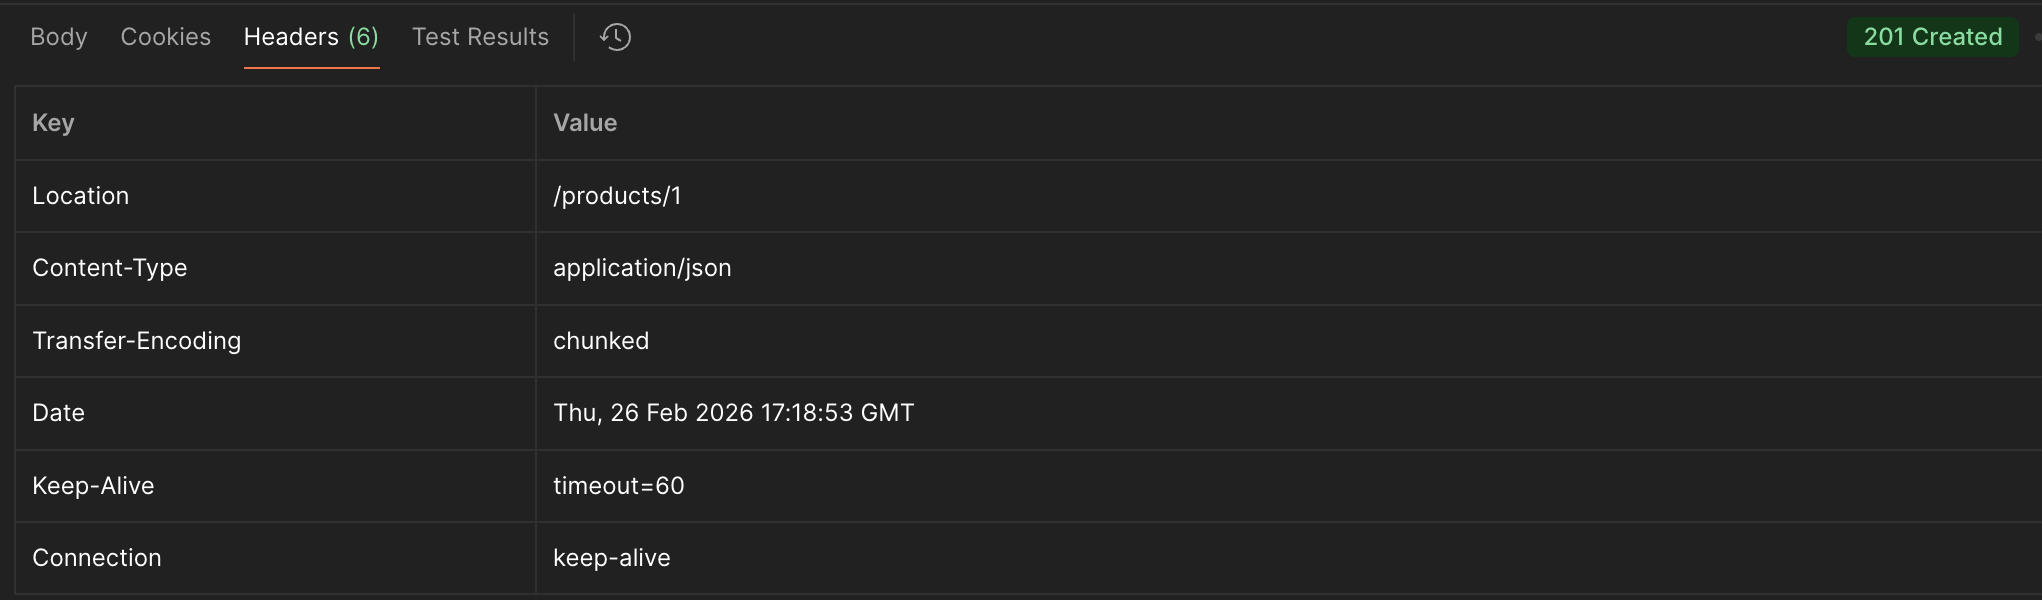
상품 생성
201 Created의 의미:
“요청이 성공했고, 새 리소스가 생성되었으며, 그 위치는 여기다”
HTTP Semantics 문서에서도 201 Created 응답에 대해
Location 헤더에 생성된 리소스의 URI를 포함하는 것을 권장한다.
Spring에서 Servlet 객체를 기반으로 요청 정보를 사용할 수 있게 하는 ServletUriComponentsBuilder와 MvcUriComponentsBuilder를 사용하기도 한다.
URI location = ServletUriComponentsBuilder
            .fromCurrentRequest()   // /products
            .path("/{id}")           // /{id}
            .buildAndExpand(response.getId())
.toUri();created()를 사용해 201 Created 상태 코드와 함께,
생성된 리소스의 위치를 Location 헤더에 포함하여 응답한다.
응답 body에는 생성된 상품 정보를 담아 반환한다.
{
    "id": 1,
    "name": "메론빵",
    "price": 2500,
    "status": "ON_SALE",
    "stock": 2
}
@PostMapping
public ResponseEntity<ProductResponseDto> createProduct(@RequestBody ProductRequestDto requestDto) {
ProductResponseDto savedDto = productService.createProduct(requestDto);
return ResponseEntity
.created(URI.create("/products/" + savedDto.getId()))// 1️⃣ HTTP 상태코드를 201 Created로 설정
// 2️⃣ HTTP Header에 Location을 추가
.body(savedDto);
}
상품 조회
ok()는 200 OK 상태 코드로 응답하며,
조회된 객체를 body에 담아 반환한다.
@GetMapping("/{productId}")
public ResponseEntity<ProductResponseDto> getProduct(@PathVariable Long productId) {
	ProductResponseDto dto = productService.getProduct(productId);
	return ResponseEntity.ok(dto);
}

@GetMapping
public ResponseEntity<List<ProductResponseDto>> getProducts() {
   List<ProductResponseDto> dtos = productService.getProductsNotDisabled();
   return ResponseEntity.ok(dtos);
}
상품 수정 (상태 변경)
PUT 요청을 통해 상품 정보를 수정한다.
수정이 완료되면 200 OK 상태 코드와 함께 수정된 상품 정보를 반환한다.
// 상품 수정 / 상태 변경
@PutMapping("{productId}")
public ResponseEntity<ProductResponseDto> updateProduct(@PathVariable Long productId, @RequestBody ProductRequestDto requestDto) {
	ProductResponseDto dto = productService.updateProduct(productId, requestDto);
	return ResponseEntity.ok(dto);
}

// TODO: 상태 변경 API 분리
상품 삭제
삭제 성공 시 204 No Content 상태 코드로 응답하며,
응답 body는 포함하지 않는다.
build()를 호출해 응답을 완성한다.
// 상품 삭제
@DeleteMapping("/{productId}")
public ResponseEntity<Void> deleteProduct(@PathVariable Long productId) {
	productService.deleteProduct(productId);
    return ResponseEntity.noContent().build();
}
오류 시 응답 (@RestControllerAdvice 활용하기)
@RestControllerAdvice는 @ControllerAdvice + @ResponseBody 으로, 컨트롤러 응답에 대한 예외를 처리할 때 사용된다.
여기서 @ControllerAdvice는 전역 컨트롤러 공통 로직을 처리하는 어노테이션으로,
- 전역 예외 처리 (@ExceptionHandler)
- 전역 바인딩 설정 (@InitBinder)
- 전역 모델 속성 (@ModelAttribute)
등에 사용된다.
@ControllerAdvice 로 Exception Handler를 만들어주면, 컨트롤러 요청 흐름 중에 발생된 예외가 전파되어 잡힌다.
// []에서 발생한 예외가 처리된다.
Client
 ↓
Filter
 ↓
DispatcherServlet
 ↓
Interceptor
 ↓
[ Controller ]
 ↓
[ Service ]
 ↓
[ Repository ]
 ↓
[ Entity / Domain ]
 ↓
Database
예외 처리
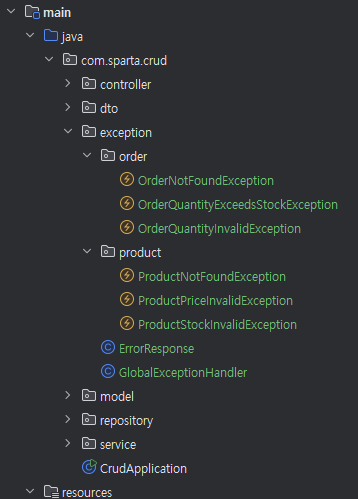
최상위 경로에 exception 패키지로 예외처리와 관련된 파일들을 분리했다.
커스텀 Exception
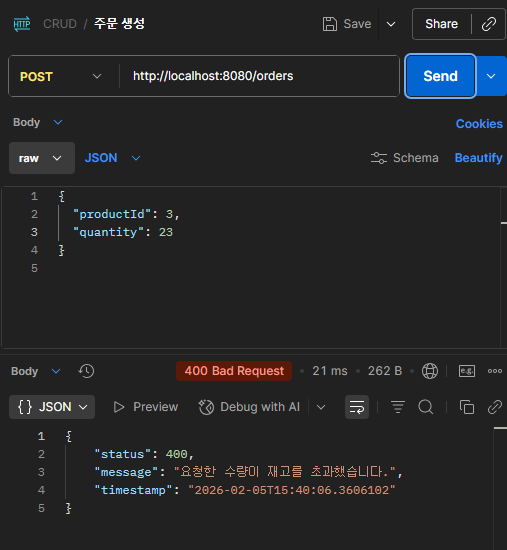
public class OrderQuantityExceedsStockException extends RuntimeException {
    public OrderQuantityExceedsStockException() {
        super("요청한 수량이 재고를 초과했습니다.");
    }

    public OrderQuantityExceedsStockException(int requested, int available) {
        super("요청 수량 " + requested + "이/가 재고 " + available + "을 초과했습니다.");
    }
}
Global Exception Handler
@RequiredArgsConstructor
@Getter
public class ErrorResponse {
    private final int status;
    private final String message;
    private final LocalDateTime timestamp = LocalDateTime.now();
}
@RestControllerAdvice
public class GlobalExceptionHandler {
@ExceptionHandler(OrderQuantityExceedsStockException.class)
public ResponseEntity<ErrorResponse> OrderQuantityExceedsStock(OrderQuantityExceedsStockException e) {
ErrorResponse response = new ErrorResponse(HttpStatus.BAD_REQUEST.value(), e.getMessage());
return ResponseEntity.badRequest().body(response);
}
@ExceptionHandler(ProductStockInvalidException.class)
public ResponseEntity<ErrorResponse> ProductStockInvalid(ProductStockInvalidException e) {
ErrorResponse response = new ErrorResponse(HttpStatus.BAD_REQUEST.value(), e.getMessage());
return ResponseEntity.badRequest().body(response);
}
...
// ✅ 모든 예외 공통 처리 (Fallback)
@ExceptionHandler(Exception.class)
public ResponseEntity<ErrorResponse> handleException(Exception e) {
ErrorResponse response = new ErrorResponse(HttpStatus.INTERNAL_SERVER_ERROR.value(), "서버 오류가 발생했습니다.");
return ResponseEntity.status(HttpStatus.INTERNAL_SERVER_ERROR).body(response);
}
}
같은 예외 처리가 필요한 경우, Fallback 코드와 같이 하나로 묶어서 메서드를 만들어 줄 수 있다.
@Getter
public class HttpException extends RuntimeException{
    private final HttpStatus status;

    protected  HttpException(HttpStatus status, String message){
        super(message);
        this.status = status;
    }

}
@ExceptionHandler(HttpException.class)
public ResponseEntity<ErrorResponse> handleHttp(HttpException e) {
	return ResponseEntity
    	.status(e.getStatus())
    	.body(new ErrorResponse(e.getStatus().value(), e.getMessage()));
    }
❓status를 body에 또 넣는 게 맞나?
모바일·프론트 환경에서 상태코드에 직접 접근하기 어려운 경우가 있고 공통 에러 처리 로직을 단순화하기 위해서 편의상 한번 더 넣어준다.

2. '엔티티가 스스로 책임지는 코드' 만들기
엔티티를 단순한 데이터 덩어리가 아니라
‘행위와 규칙을 가진 객체’로 봐야 한다.
“status를 DELETE로 바꿔” - P.setStatus("DELETE"); ❌
“이 상품을 비활성화해” - P.disable(); ✅
처음에 이 방법을 알게 되었을 때, 순간 JPA의 Dirty Checking이 제대로 동작하는지 의문이 들었다.
JPA는 영속성 컨텍스트에 변경 전 상태를 스냅샷으로 저장하고 트랜잭션 종료 시점에 객체를 직접 비교하기 때문에 setter 메서드를 사용하던 다른 의미있는 메서드를 사용하던 상관이 없다.
setter 메서드의 위험성
도메인 규칙에 맞지 않는 값을 언제든 넣을 수 있다.
product.setPrice(-1000);
product.setStatus("???");
행위 메서드의 장점 :
Entity 메서드 자체에서 도메인 규칙에 맞지 않는 값을 처리 할 수 있고, 행위를 나타내는 의미있는 메서드 이름을 사용할 수 있다.
@Entity
public class Product {

    private int price;

    ...

    public void changePrice(int newPrice) {
        if (newPrice <= 0) {
            throw new IllegalArgumentException("가격은 0보다 커야 합니다.");
        }
        this.price = newPrice;
    }
}
...
product.changePrice(-1000); //ERROR
행위 메서드 구현 - 상품 생성
// Product Entity
	...
   public Product(String name, int price, int stock, String status) {
        validate(price, stock);
        this.name = name;
        this.price = price;
        this.stock = stock;
        this.status = status;
    }

    public static Product create(String name, int price, int stock, String status) {
        Product createdPproduct = new Product(name, price, stock, resolveStatus(status));
        createdPproduct.createdAt = LocalDateTime.now();
        return createdPproduct;
    }
+ Entity 값 검증 (Entity내에서 도메인 규칙에 맞지 않는 값을 처리)
private static String resolveStatus(String status) {
    return (status == null || status.isBlank()) ? "ACTIVE" : status;
}

private static void validate(int price, int stock) {
    if (price < 0) {
        throw new IllegalArgumentException("가격은 0원 이상이어야 합니다.");
    }
    if (stock < 0) {
        throw new IllegalArgumentException("재고는 0개 이상이어야 합니다.");
    }
}
public ProductResponseDto createProduct(ProductRequestDto requestDto) {
Product product = Product.create(
requestDto.getName(),
requestDto.getPrice(),
requestDto.getStock(),
requestDto.getStatusOrDefault()
);
return new ProductResponseDto(productRepository.save(product));
}행위 메서드 구현 - 상품 업데이트
처음엔 product.update(requestDto);처럼 Dto로 한 번에 값을 넘기려고 했지만,
DTO가 Entitiy로 넘어가 도메인이 웹 계층에 종속된다는 문제가 있었다.
계층 분리를 위해 dto에서 값을 빼서 전달한다.
// Product Entity
	...
public void update(String name, int price, int stock, String status) {
    validate(price, stock);

    this.name = name;
    this.price = price;
    this.stock = stock;
    this.status = resolveStatus(status);
    this.updatedAt = LocalDateTime.now();
}
// 상품 수정
@Transactional
public ProductResponseDto updateProduct(Long productId, ProductRequestDto requestDto) {
Product product = this.findProduct(productId);
product.update(
requestDto.getName(),
requestDto.getPrice(),
requestDto.getStock(),
requestDto.getStatus()
);
return new ProductResponseDto(product);
}추가로 유의할 점은, 생성과 달리 JPA에서 DirtyChecking을 해야하기 때문에 기존 객체를 사용하는 인스턴스 메서드로 만들어야 한다.
행위 메서드 구현 - 주문 생성
// Order Entity
private Order(Product product, int quantity) {
    validate(quantity);
    this.product = product;
    this.quantity = quantity;
    this.price = product.getPrice() * quantity;
    this.status = "CREATED";
    this.createdAt = LocalDateTime.now();
    this.updatedAt = LocalDateTime.now();
}

public static Order create(Product product, int quantity) {
    product.decreaseStockByOrder(quantity);
    return new Order(product, quantity);
}
+ Entity값 검증 책임은 영향 받는 쪽에 있다.
주문수량에 따른 재고 검증
Order에서 검증 ❌
Product 에서 검증 ⭕
// Product Entity
public void decreaseStockByOrder(int quantity) {
if (this.stock < quantity) {
throw new IllegalStateException("요청한 수량이 재고를 초과했습니다.");
}
this.stock -= quantity;
this.updatedAt = LocalDateTime.now();
if (this.stock == 0) {
this.status = "NOTINSTOCK";
}
}
// 주문 생성
@Transactional
public OrderResponseDto createOrder(OrderRequestDto requestDto) {
    Product product = productRepository.findById(requestDto.getProductId())
            .orElseThrow(() -> new IllegalArgumentException("상품을 찾을 수 없습니다."));

    Order order = Order.create(product, requestDto.getQuantity());
    orderRepository.save(order);

    return new OrderResponseDto(order);
}