프로젝트 생성하기
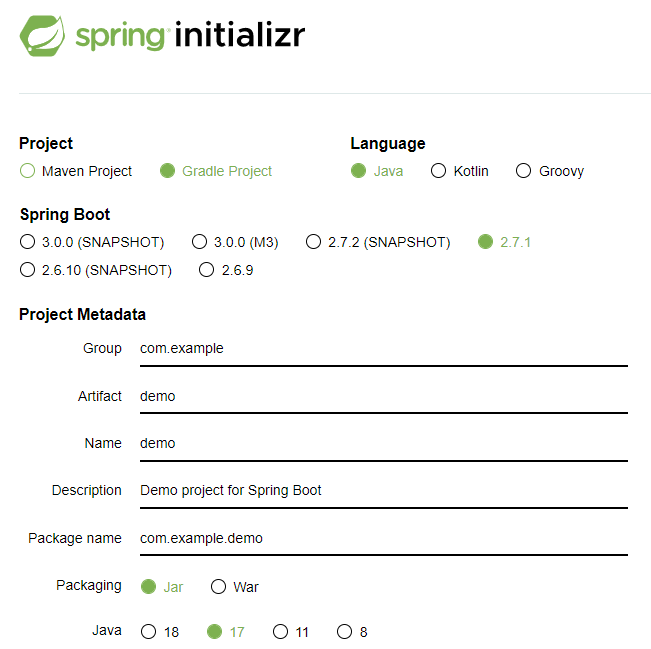
https://start.spring.io/ 에서 spring project를 생성하고 다운 받아 압축을 푼다.
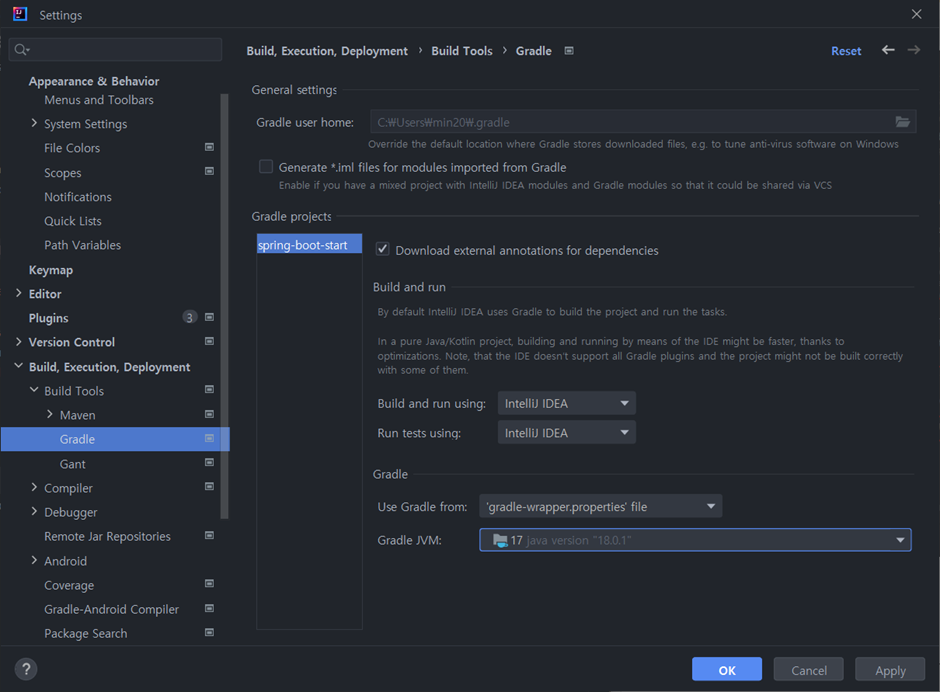
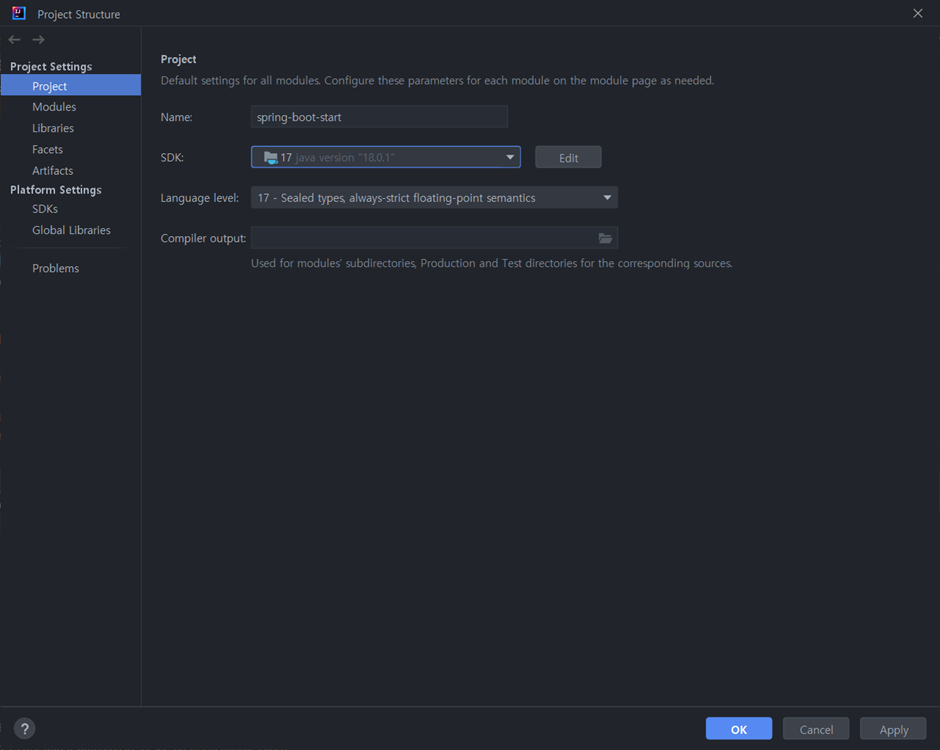
Intellij에서 폴더를 열고, File에서 설정 변경
1) File - Setting - Gradle 설정 변경
2) File - Project Structure: Language Level 설정 변경
초기 setting
SpringBootStartApplication을 실행해 오류가 없으면 프로젝트가 잘 작동되는 것이다.
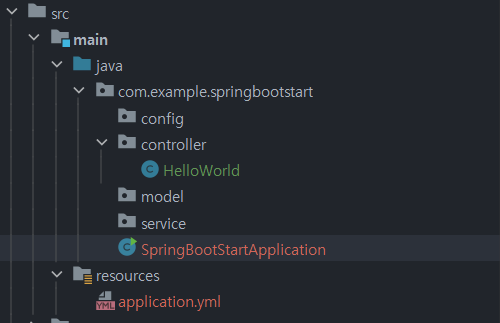
MVC
model, controller 등의 폴더를 생성해 아래에 해당 코드들이 작성되는 파일을 생성하면 된다.
gradle dependencies에 아래 내용 추가
아래 내용을 추가해야 @RestController와 @GetMapping와 같은 annotation 사용 가능
implementation 'org.springframework.boot:spring-boot-starter-web'annotation을 자유롭게 사용하기 위한 dependencies
dependencies {
	implementation 'org.springframework.boot:spring-boot-starter'
	implementation 'org.projectlombok:lombok:1.18.22'
	implementation 'org.projectlombok:lombok:1.18.22'
	testImplementation 'org.springframework.boot:spring-boot-starter-test'
	implementation group: 'com.google.firebase', name: 'firebase-admin', version: '8.1.0'

	implementation 'org.springframework.boot:spring-boot-starter-data-jpa'
	compileOnly 'org.projectlombok:lombok'
	annotationProcessor 'org.projectlombok:lombok'
	implementation 'org.springframework.boot:spring-boot-starter-web'
}
Controller 예시
main > java > com.example.springbootstart > controller 폴더 경로에 HelloWorld.java 파일에 아래 코드를 작성했다
import org.springframework.web.bind.annotation.GetMapping;
import org.springframework.web.bind.annotation.RestController;

@RestController
public class HelloWorld {

    @GetMapping("/test")
    public String test() {
        return "Hello World!";
    }
}
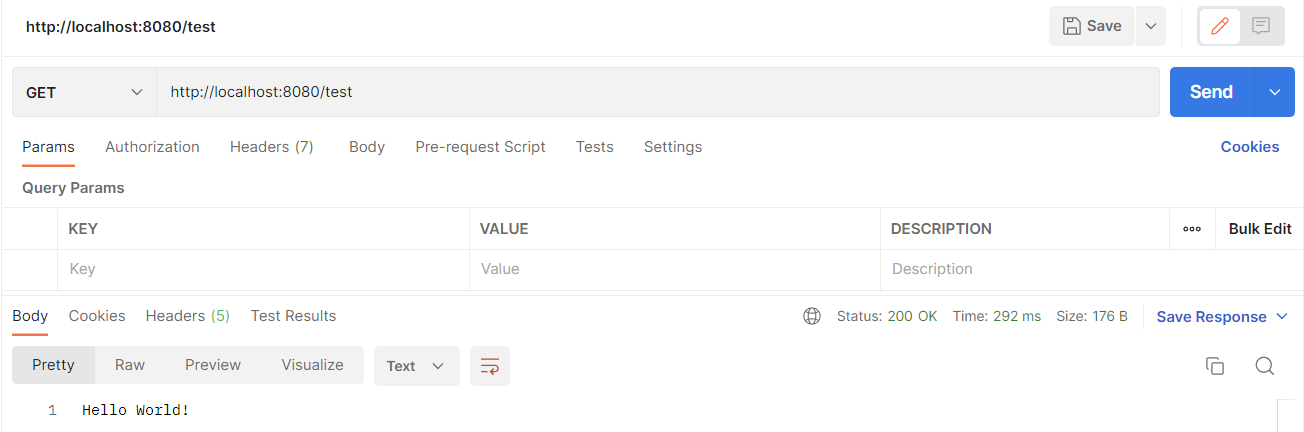
위의 코드를 작성한 뒤 Application을 실행하면 PostMan을 통해 잘 작동하는 것을 확인.
추가 설명: @Controller와 @RestController의 차이점
@RestController: @Controller + @ResponseBody.
- RestController 역할: Json 형태로 객체 데이터를 반환.
최근에 데이터를 응답으로 제공하는 REST API를 개발할 때 주로 사용하며 객체를 ResponseEntity로 감싸서 반환.