통신 방법
- GET: 데이터 받기 (select)
- POST: 데이터 추가 (insert)
- PUT: 데이터 수정 (update)
- DELETE: 데이터 삭제 (delete)
코드
import org.springframework.web.bind.annotation.*;

// 사용자 요청 -> 응답 (HTML 파일)
// @Controller

// 사용자가 요청 -> 응답 (Data)
@RestController
public class HttpControllerTest {

    // http://localhost:8080/http/get (select)
    @GetMapping("/http/get")
    public String getTest() {
        return "get 요청";
    }

    // http://localhost:8080/http/post (insert)
    @PostMapping("/http/post")
    public String postTest() {
        return "post 요청";
    }

    // http://localhost:8080/http/put (update)
    @PutMapping("/http/put")
    public String putTest() {
        return "put 요청";
    }

    // http://localhost:8080/http/delete (delete)
    @DeleteMapping("/http/delete")
    public String deleteTest() {
        return "delete 요청";
    }
}
Member
@NoArgsConstructor
public class Member {
private int id;
private String username;
private String password;
private String email;
public Member(int id, String username, String password, String email) {
this.id = id;
this.username = username;
this.password = password;
this.email = email;
}
public int getId() {
return id;
}
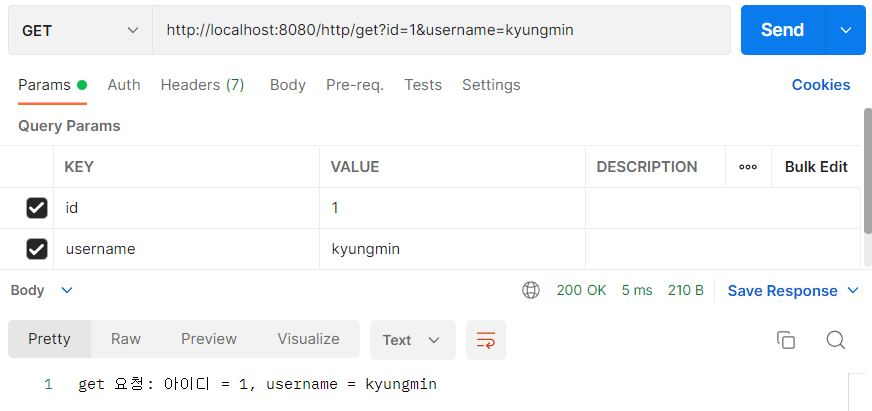
}GET: query string 사용법
RequestParam 어노테이션을 사용한다.
코드 1
// http://localhost:8080/http/get (select)
@GetMapping("/http/get")
public String getTest(@RequestParam int id, @RequestParam String username) {
	return "get 요청: 아이디 = "+id+", username = "+username;
}
코드 2
// http://localhost:8080/http/get2 (select)
@GetMapping("/http/get2")
public String getTest2(Member m) {
	return "get 요청: 아이디 = "+m.getId()+", username = "+m.getUsername();
}
Postman
url: http://localhost:8080/http/get?id=1&username=kyungmin
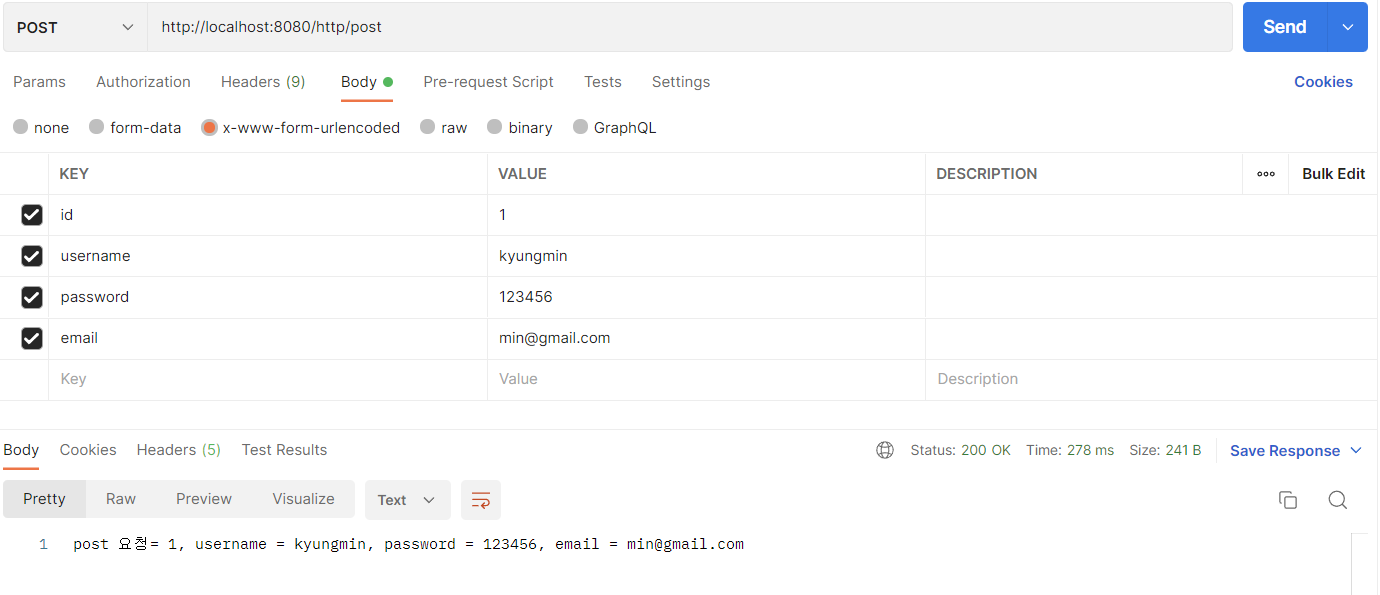
POST: postman의 body 사용
postman의 body에 저장할 정보를 적어주면 post를 할 수 있다.
코드 1 (정석)
// http://localhost:8080/http/post (insert)
@PostMapping("/http/post")
public String postTest(Member m) {
	return "post 요청= "+m.getId()+", username = "+m.getUsername()+", password = "+m.getPassword()+", email = "+m.getEmail();
}
postman
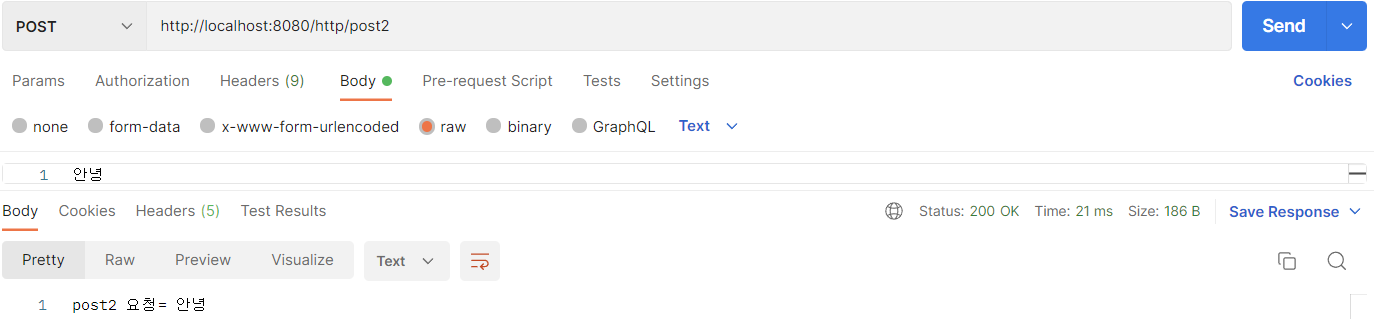
코드 2 (아무 데이터나 post하기)
// http://localhost:8080/http/post2 (insert)
@PostMapping("/http/post2")
public String postTest2(@RequestBody String text) {
	return "post2 요청= "+text;
}
postman
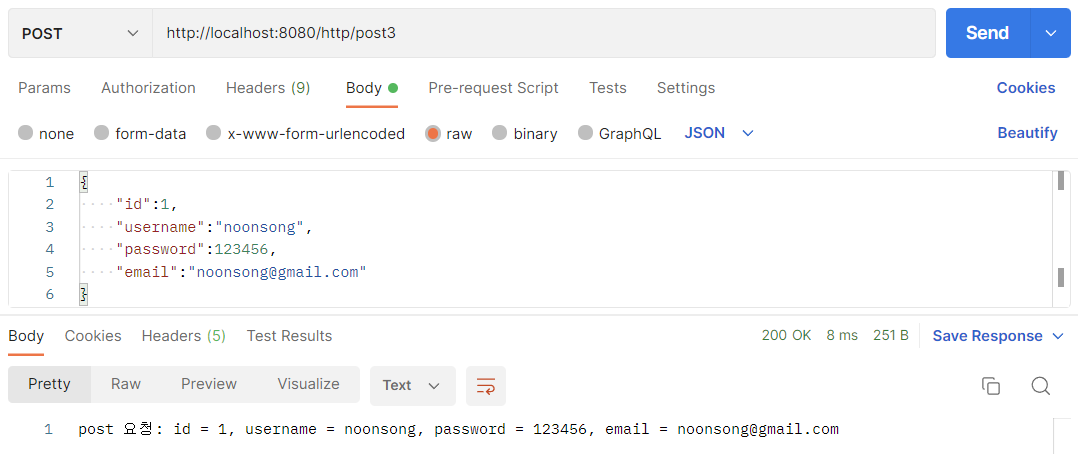
코드 3
// http://localhost:8080/http/post3 (insert)
@PostMapping("/http/post3")
public String postTest2(@RequestBody Member m) {
	return "post 요청: id = "+m.getId()+", username = "+m.getUsername()+", password = "+m.getPassword()+", email = "+m.getEmail();
}
postman
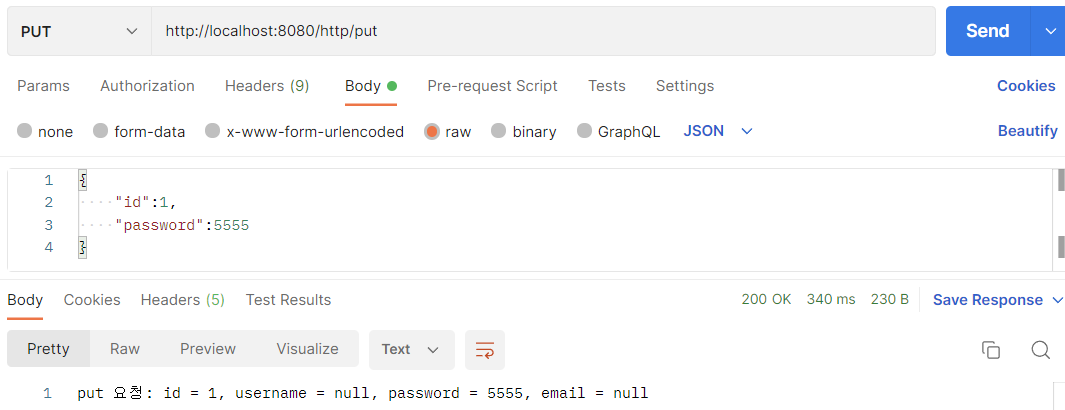
PUT: postman의 body 사용
postman의 body에 저장할 정보를 적어주면 PUT을 할 수 있다.
코드 1
// http://localhost:8080/http/put (update)
@PutMapping("/http/put")
public String putTest(@RequestBody Member m) {
	return "put 요청: id = "+m.getId()+", username = "+m.getUsername()+", password = "+m.getPassword()+", email = "+m.getEmail();
}
postman