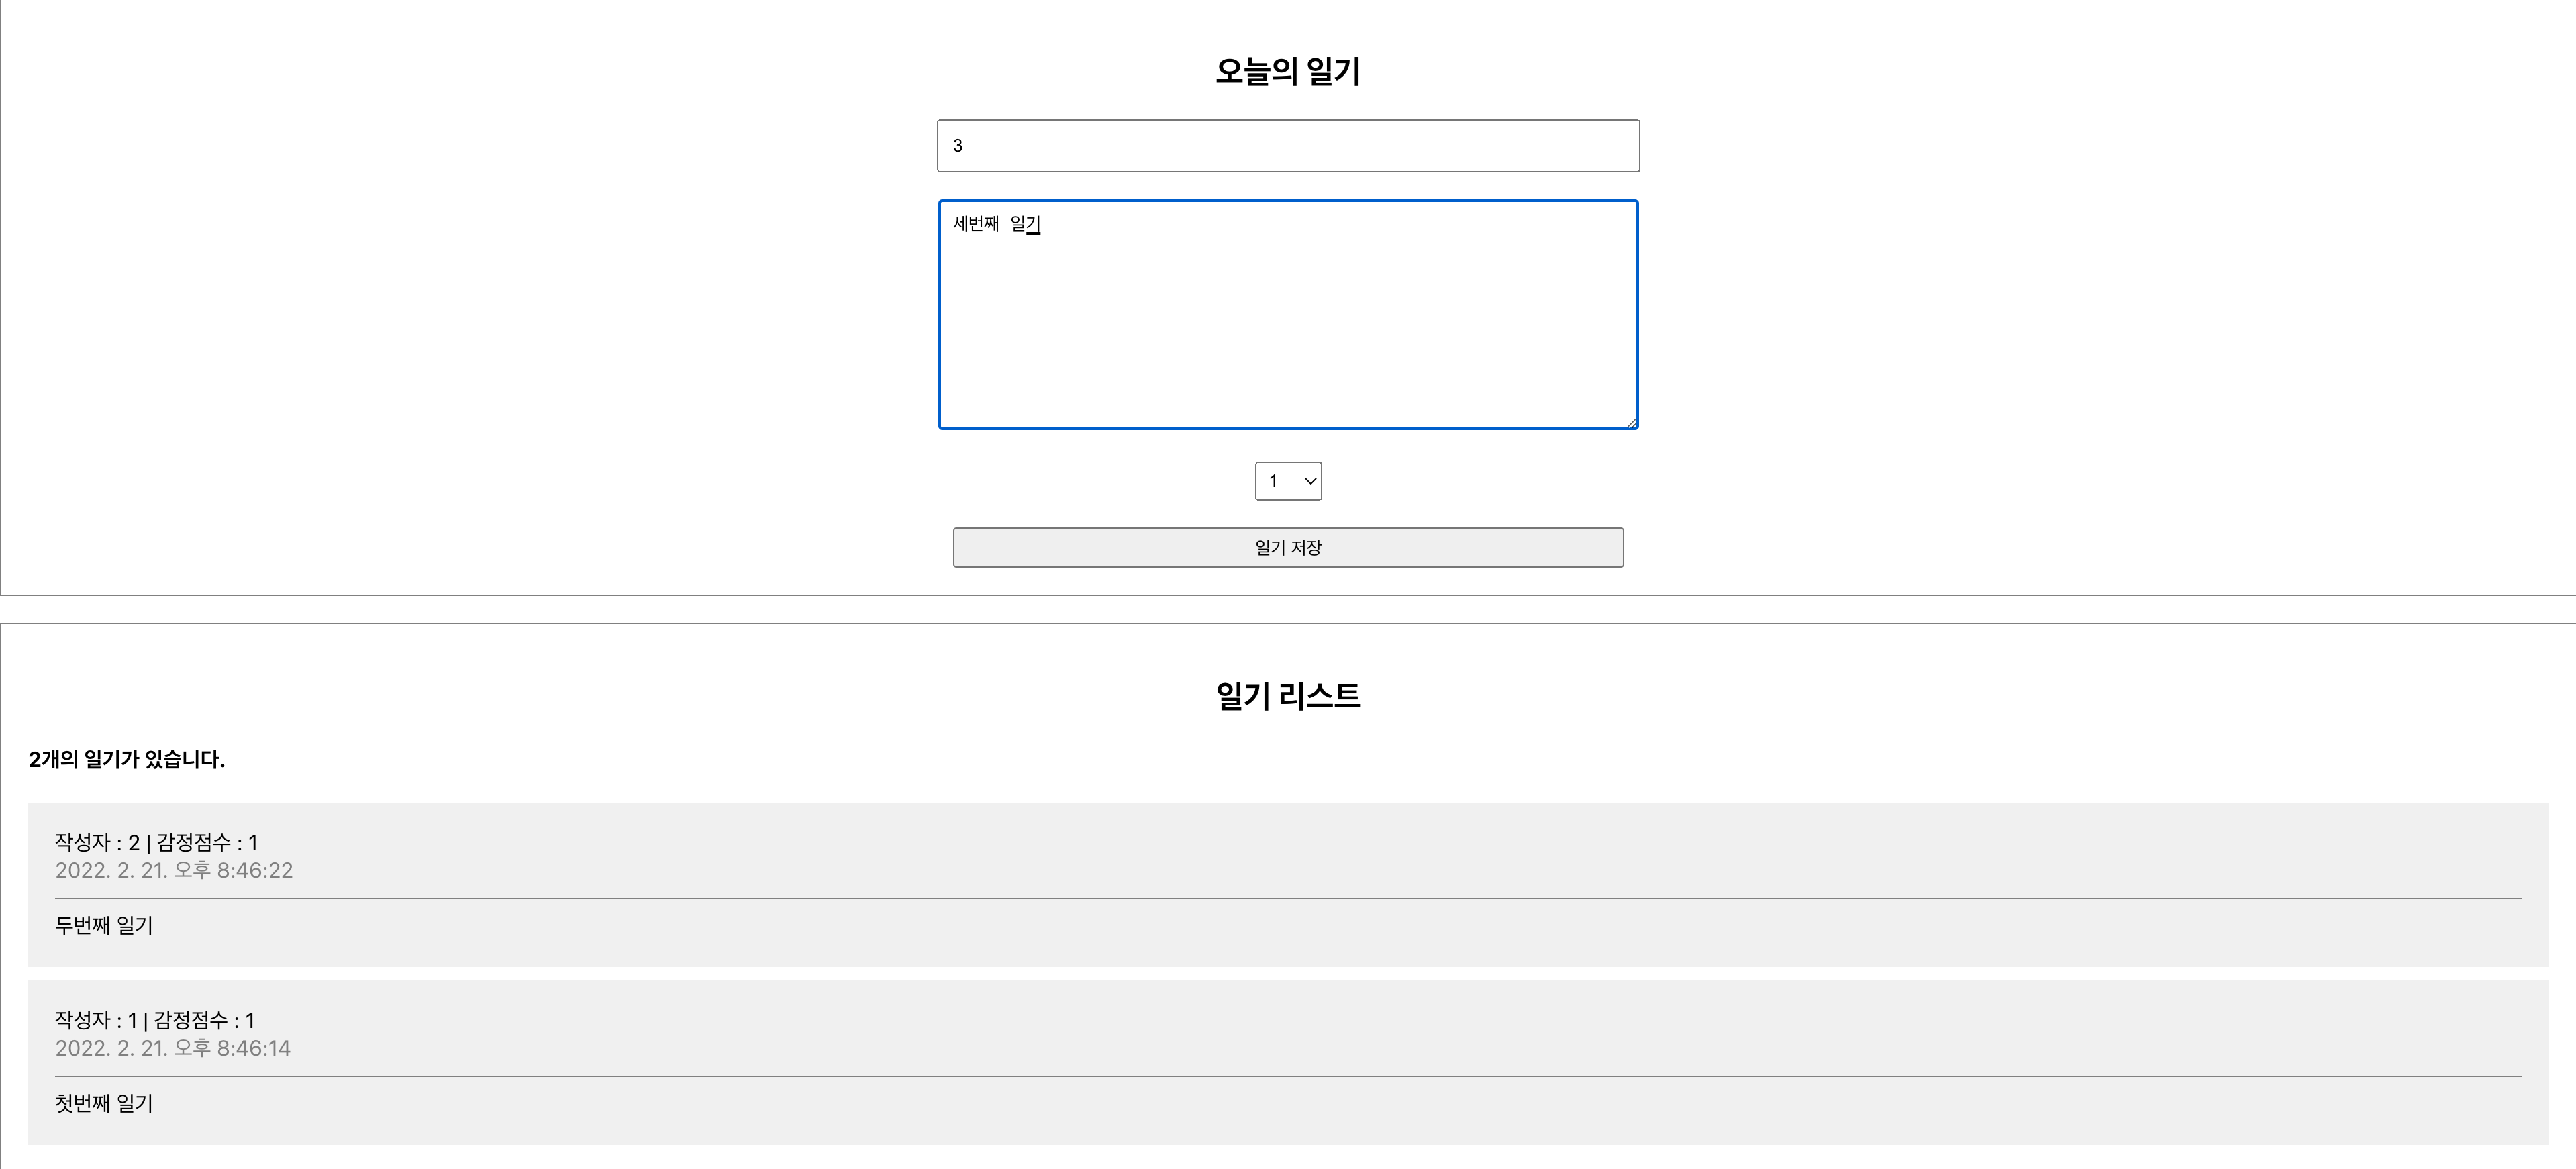
완성본

위와같이 일기 입력란에 입력하고 일기 저장버튼을 누루면 일기리스트에 생기는 기능을 만든다.
App.js
function App() {
  const [data, setData] = useState([]);
  //data = 일기리스트안의

  const dataId = useRef(0);

  const onCreate = (author, content, emotion) => {
    const created_date = new Date().getTime();
    const newItem = {
      author,
      content,
      emotion,
      created_date,
      id : dataId.current,
    };
    dataId.current += 1;
    setData([newItem, ...data]); //...data는 원래데이터 + newItem은 새로운 데이터
  }
  return (
    <div>
      <DiaryEditor onCreate = {onCreate} />
      <DiaryList diaryList = {data} />
    </div>
  );
};

export default App;
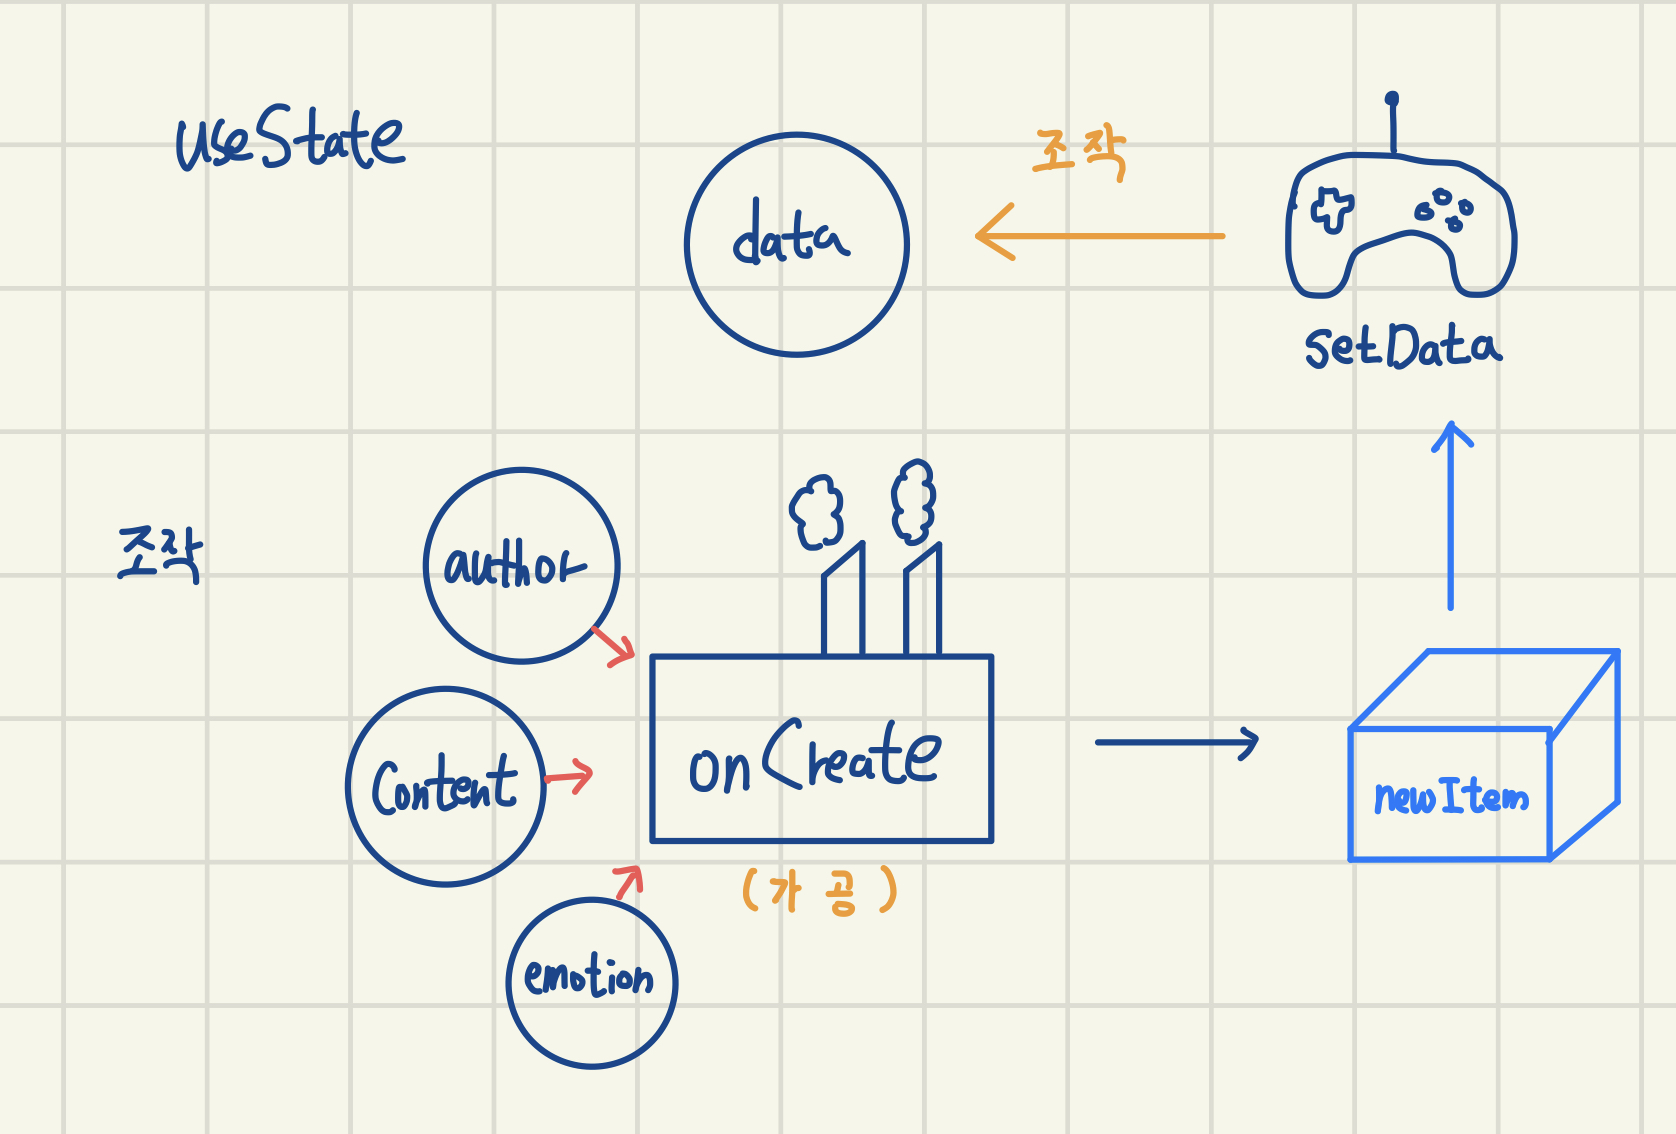
도식화

- useState인 data와 setData를 선언한다.
- onCreate는 author와 content, emotion을 매개변수로 받아 newItem,created_date 등을 만든다.
- 이런 onCreate를 DiaryEditor에 보낸다. data는 DiaryList에 보낸다.
DiaryEditor
const DiaryEditor = ({onCreate}) => {

    const authorInput = useRef();
    const contentInput = useRef();

    const [state, setState] = useState({
        author: "",
        content: "",
        emotion: 1,
    });
const handleSubmit = () => {
if(state.author.length < 1){
authorInput.current.focus();
return;
}
if(state.content.length < 5) {
contentInput.current.focus();
return;
}
onCreate(state.author, state.content, state.emotion);
alert("저장 성공");
setState({ //저장이 성공하면 입력칸을 초기화한다.
author: "",
content: "",
emotion: 1,
});
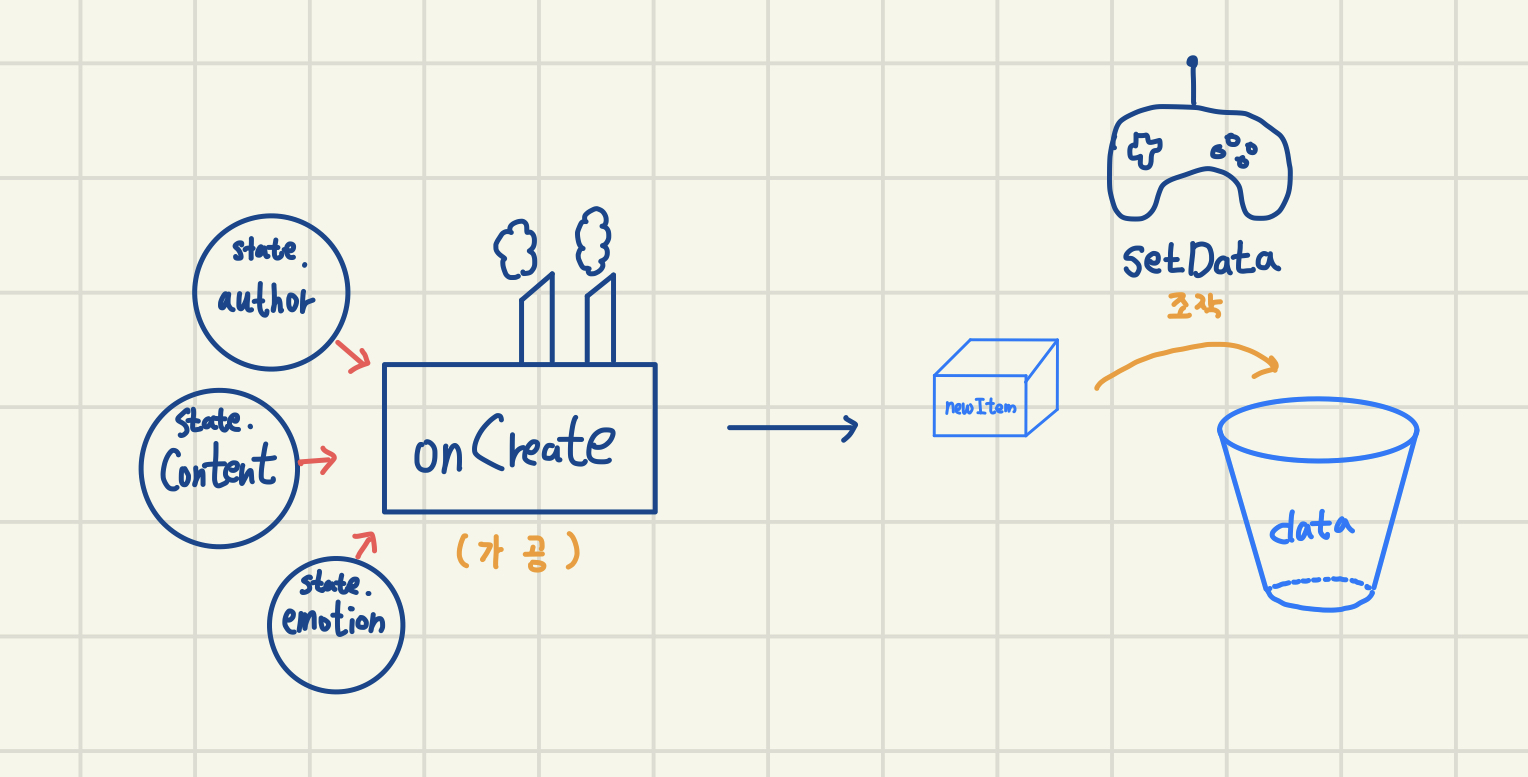
};도식화

- DiaryEditor로 넘어간 onCreate는 DiartEditor의 state.author, state.content, state.emotion를 매개변수로 받는다.
- DiaryEditor가 newItem을 만들어내고 newItem안에있는 setData가 data를 조작한다.
- 이 data는 DiaryList로 넘어가 화면에 뿌린다.