1. JQuery
자바스크립트 라이브러리인 JQuery에 대해 배웠다. 아래처럼 긴 문장을 짧게 줄여주는 도구와 같은 것이다.document.getElementById('title').style.color = 'red';
$('#q1').text(c[1]['name']);이를 활용하여 지난 번 만들어두었던 앨범 페이지와 영화 후기 페이지에 기능을 추가하였다.
(1) 앨범
		function openclose(){
            $('#postingbox').toggle();
        }
        function makeCard() {
            let image = $('#image').val();
            let title = $('#title').val();
            let content = $('#content').val();
            let date = $('#date').val();

            let temp_html = `
            <div class="col">
                <div class="card h-100">
                    <img src="${image}"
                        class="card-img-top" alt="...">
                    <div class="card-body">
                        <h5 class="card-title">${title}</h5>
                        <p class="card-text">${content}</p>
                    </div>
                    <div class="card-footer">
                        <small class="text-body-secondary">${date}</small>
                    </div>
                </div>
            </div>
            `;
            $('#card').append(temp_html);
postingbox를 열고 닫을 수 있도록 JQuery의 toggle을 사용했다. 또 내용을 입력하고 기록하기 버튼을 클릭하면 아래에 카드가 추가된다.
(2) 영화 후기 페이지
        function openclose() {
            $('#postingbox').toggle();
        }
        function card() {
            let image = $('#image').val();
            let title = $('#title').val();
            let comment = $('#comment').val();
            let star = $('#star').val();

            let temp_html = `<div class="col">
                <div class="card h-100">
                    <img src="${image}"
                        class="card-img-top" alt="...">
                    <div class="card-body">
                        <h5 class="card-title">${title}</h5>
                        <p class="card-text">${star}</p>
                        <p class="card-text">${comment}</p>
                    </div>
                </div>
            </div>`;
            $('#card').append(temp_html);
        }
비슷한 기능을 활용하여 기능 구현을 하였다. 다만 드롭다운으로 선택하는 경우 저장된 value 값으로 반환이 되는 차이점이 있다.
2. fetch
다음은 fetch에 대한 실습이다. $(document).ready(function () {
let url = "http://spartacodingclub.shop/sparta_api/weather/seoul";
fetch(url).then(res => res.json()).then(data => {
let temp = data['temp']
if (temp > 20) {
$('#msg_t').text('더워요')
} else {
$('#msg_t').text('추워요')
}
})
}) let url = "http://spartacodingclub.shop/sparta_api/seoulair";
fetch(url).then(res => res.json()).then(data => {
let mise = data['RealtimeCityAir']['row'][0]['IDEX_NM']
$('#msg').text(mise)
})
fetch를 통하여 Open API를 활용하는 법을 학습하였다.
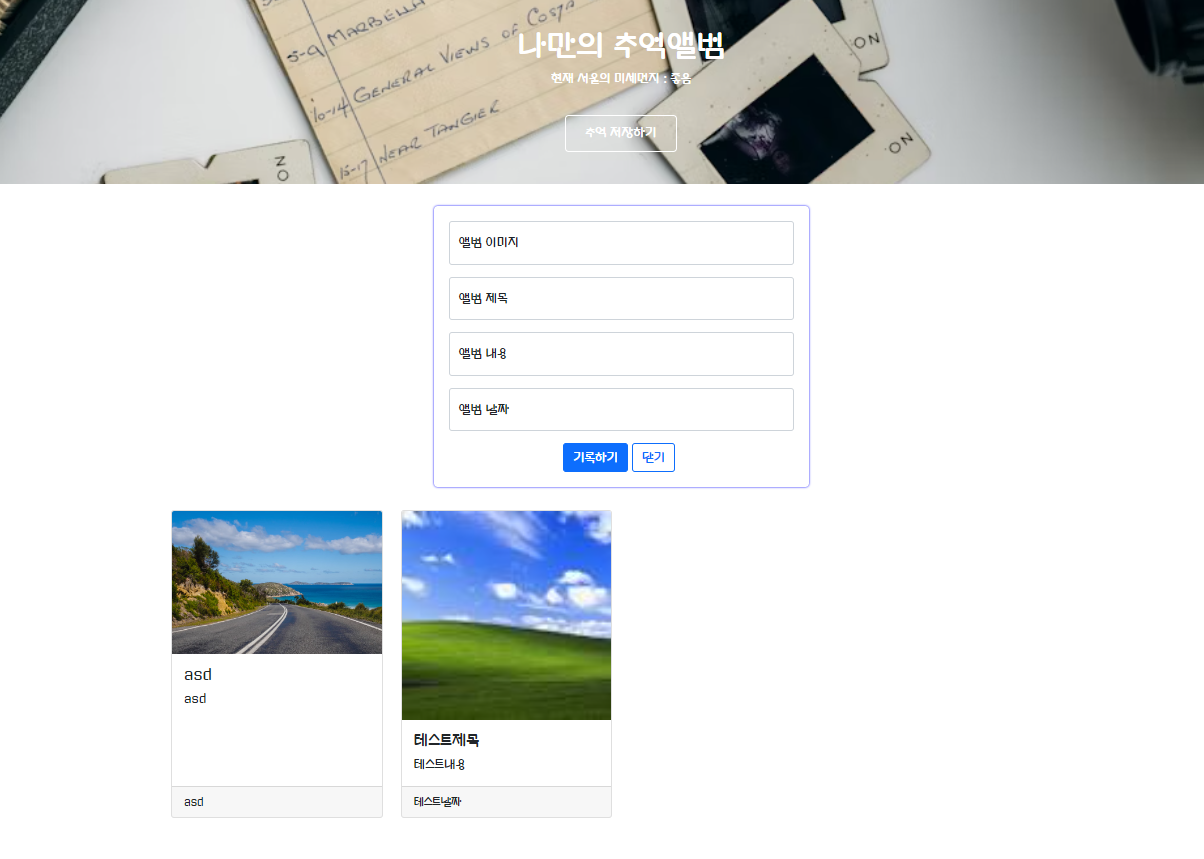
3. firebase
마지막으로 firebase를 연결하여 데이터베이스를 설정하고 앨범에 카드를 등록하고 불러올 수 있도록 하였다.<!DOCTYPE html>
<html lang="en">
<head>
<meta charset="UTF-8">
<meta name="viewport" content="width=device-width, initial-scale=1.0">
<title>나만의 추억앨범</title>
<link href="https://cdn.jsdelivr.net/npm/bootstrap@5.0.2/dist/css/bootstrap.min.css" rel="stylesheet"
integrity="sha384-EVSTQN3/azprG1Anm3QDgpJLIm9Nao0Yz1ztcQTwFspd3yD65VohhpuuCOmLASjC" crossorigin="anonymous">
<script src="https://ajax.googleapis.com/ajax/libs/jquery/3.4.1/jquery.min.js"></script>
<style>
@import url('https://fonts.googleapis.com/css2?family=Gugi&display=swap');
* {
font-family: "Gugi", sans-serif;
}
.mytitle {
height: 250px;
color: white;
display: flex;
flex-direction: column;
align-items: center;
justify-content: center;
background-image: url('https://images.unsplash.com/photo-1511992243105-2992b3fd0410?ixlib=rb-4.0.3&ixid=M3wxMjA3fDB8MHxwaG90by1wYWdlfHx8fGVufDB8fHx8fA%3D%3D&auto=format&fit=crop&w=1470&q=80');
background-position: center;
background-size: cover;
}
.mytitle>button {
width: 150px;
height: 50px;
background-color: transparent;
color: white;
border: 1px solid white;
border-radius: 5px;
margin-top: 20px;
}
.mycards {
width: 1200px;
margin: 30px auto;
}
.mypostingbox {
width: 500px;
margin: 30px auto 0px auto;
padding: 20px;
box-shadow: 0px 0px 3px 0px blue;
border-radius: 5px;
}
.mybutton {
display: flex;
flex-direction: row;
align-items: center;
justify-content: center;
}
.mybutton>button {
margin-right: 5px;
}
</style>
<script type="module">
// Firebase SDK 라이브러리 가져오기
// For Firebase JS SDK v7.20.0 and later, measurementId is optional
// Firebase 인스턴스 초기화
$("#hostingbtn").click(async function () {
let image = $('#image').val();
let title = $('#title').val();
let content = $('#content').val();
let date = $('#date').val();
let doc = {
'image': image,
'title': title,
'content': content,
'date': date
};
await addDoc(collection(db, "albums"), doc);
alert('저장 완료')
window.location.reload()
})
$("#savebtn").click(async function () {
$('#postingbox').toggle();
})
		let url = 	"http://spartacodingclub.shop/sparta_api/seoulair";
        fetch(url).then(res => res.json()).then(data => {
            let mise = data['RealtimeCityAir']['row'][0]['IDEX_NM']
            $('#msg').text(mise)
        })
let docs = await getDocs(collection(db, "albums"));
docs.forEach((doc) => {
let row = doc.data();
let image = row['image']
let title = row['title']
let content = row['content']
let date = row['date']
let temp_html = `
<div class="col">
<div class="card h-100">
<img src="${image}"
class="card-img-top" alt="...">
<div class="card-body">
<h5 class="card-title">${title}</h5>
<p class="card-text">${content}</p>
</div>
<div class="card-footer">
<small class="text-body-secondary">${date}</small>
</div>
</div>
</div>
`;
$('#card').append(temp_html);
});
</script>
</head>
<body>
<div class="mytitle">
<h1>나만의 추억앨범</h1>
<p>현재 서울의 미세먼지 : <span id="msg">나쁨</span></p>
<button id="savebtn">추억 저장하기</button>
</div>
<div class="mypostingbox" id="postingbox">
<div class="form-floating mb-3">
<input type="email" class="form-control" id="image" placeholder="앨범 이미지">
<label for="floatingInput">앨범 이미지</label>
</div>
<div class="form-floating mb-3">
<input type="email" class="form-control" id="title" placeholder="앨범 제목">
<label for="floatingInput">앨범 제목</label>
</div>
<div class="form-floating mb-3">
<input type="email" class="form-control" id="content" placeholder="앨범 내용">
<label for="floatingInput">앨범 내용</label>
</div>
<div class="form-floating mb-3">
<input type="email" class="form-control" id="date" placeholder="앨범 날짜">
<label for="floatingInput">앨범 날짜</label>
</div>
<div class="mybutton">
<button id="hostingbtn" type="button" class="btn btn-primary">기록하기</button>
<button type="button" class="btn btn-outline-primary">닫기</button>
</div>
</div>
<div class="mycards">
<div id="card" class="row row-cols-1 row-cols-md-4 g-4">
</div>
</div>
</body>
</html>아래는 등록된 모습이다.