SNS 미니 프로젝트
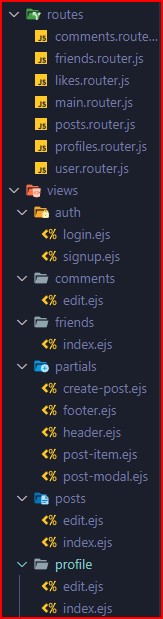
1. 기본 뼈대 폴더 구성 및 모듈 설치
전에 만들었던 프로젝트 클론을 하고, 프로젝트를 진행한다.
깃클론 주소: 깃허브 소스코드
// model 폴더에 comments / posts 파일 생성
- 라우터를 만들고 app.js에서 경로 설정도 해주면 된다.
- npm i connect-flash method-override multer
connect-falsh: alert창 표시같은 것
method-override HTML Form은 post get만 사용되는데 delete put도 가능하게 해주는 모듈
multer 파일 업로드 위한 모듈
2. ejs 파일을 이용해 HTML 뼈대 작성하기
header.ejs에 bootstrap font awesome cdn 삽입
// header.ejs

// bootstarp
    <link
      href="https://cdn.jsdelivr.net/npm/bootstrap@5.3.0-alpha1/dist/css/bootstrap.min.css"
      rel="stylesheet"
      integrity="sha384-GLhlTQ8iRABdZLl6O3oVMWSktQOp6b7In1Zl3/Jr59b6EGGoI1aFkw7cmDA6j6gD"
      crossorigin="anonymous"
    />
    <link
      rel="stylesheet"
      href="https://cdnjs.cloudflare.com/ajax/libs/font-awesome/6.3.0/css/all.min.css"
      integrity="sha512-SzlrxWUlpfuzQ+pcUCosxcglQRNAq/DZjVsC0lE40xsADsfeQoEypE+enwcOiGjk/bSuGGKHEyjSoQ1zVisanQ=="
      crossorigin="anonymous"
      referrerpolicy="no-referrer"
    />
// font-awesome
    <link
      rel="stylesheet"
      href="https://cdnjs.cloudflare.com/ajax/libs/font-awesome/6.5.2/css/all.min.css.css"
    />

// footer.ejs
<script src="https://cdn.jsdelivr.net/npm/@popperjs/core@2.11.6/dist/umd/popper.min.js" integrity="sha384-oBqDVmMz9ATKxIep9tiCxS/Z9fNfEXiDAYTujMAeBAsjFuCZSmKbSSUnQlmh/jp3" crossorigin="anonymous"></script>
<script src="https://cdn.jsdelivr.net/npm/bootstrap@5.3.0-alpha1/dist/js/bootstrap.min.js" integrity="sha384-mQ93GR66B00ZXjt0YO5KlohRA5SY2XofN4zfuZxLkoj1gXtW8ANNCe9d5Y3eG5eD" crossorigin="anonymous"></script>

// signup.ejs 또는 다른 ejs 파일에 header와 footer를 가져오는 법
<%- include('../partials/header') %>
이 부분에는 body 안에 있는 부분만 들어오면 된다.
html / head 부분은 header 또는 footer에
<%- include('../partials/footer') %>
확장 프로그램에서 설치해줘야한다.
3. 모델 스키마 재정의
// user.model.js
const mongoose = require("mongoose");
const bcrypt = require("bcrypt");

const userSchema = mongoose.Schema(
  {
    email: {
      type: String,
      unique: true,
      trim: true,
    },
    password: {
      type: String,
      minLength: 5,
    },
    googleId: {
      type: String,
      unique: true,
      sparse: true,
    },
    kakaoId: {
      type: String,
      unique: true,
      sparse: true,
    },
    username: {
      type: String,
      required: true,
      trim: true,
    },
    firstName: {
      type: String,
      default: "First Name",
    },
    lastName: {
      type: String,
      default: "Last Nanme",
    },
    bio: {
      type: String,
      dafault: "데이터 없음",
    },
    hometown: {
      type: String,
      default: "데이터 없음",
    },
    workplace: {
      type: String,
      default: "데이터 없음",
    },
    education: {
      type: String,
      default: "데이터 없음",
    },
    contact: {
      type: Number,
      default: "01012345678",
    },
    friends: [{ type: String }], // 나의 친구들 배열 안에 넣어줌
    friendRequests: [{ type: String }],
  },
  { timestamps: true } // 유저가 언제 생겼는지 createdAt 표시할 수 있다.
);
// userSchema라는 변수에 mongoose Schema를 생성한다.

const User = mongoose.model("User", userSchema);
// model 메소드를 이용해서 schema를 지정해준다.
// User라는 name으로 userSchema를 넣어준다.

module.exports = User;

// posts.model.js
const mongoose = require("mongoose");

const postSchema = new mongoose.Schema(
  {
    description: String,
    comments: [
      {
        type: mongoose.Schema.Types.ObjectId,
        ref: "Comment", // comments는 Comment model을 참조한다.
      },
    ], // 여러개의 comments를 받아올 수 있다.
    author: {
      id: {
        type: mongoose.Schema.Types.ObjectId,
        ref: "User", // id는 User model을 참조한다.
      },
      username: String,
    },
    image: {
      type: String,
    },
    likes: [{ type: String }],
  },
  {
    timestamps: true,
  }
);

module.exports = mongoose.model("Post", postSchema);

// comment.model.js
const mongoose = require("mongoose");

const commentSchema = new mongoose.Schema(
  {
    text: String,
    author: {
      id: {
        type: mongoose.Schema.Types.ObjectId,
        ref: "User", // User model을 참조한다.
      },
      username: String,
    },
  },
  {
    timestamps: true,
  }
);

module.exports = mongoose.model("Comment", commentSchema);
4. post UI 만들기
// create-post.ejs
<!-- modal은 toogle이고 target은 #newpost다. -->
<div class="card">
    <h5 class="card-header text-start"> 포스트 생성하기</h5>
    <div class="card-body">
        <div class="card-text text-muted create-post"
            data-bs-toggle="modal" data-bs-target="#newpost"
        >
        <!-- 변수를 가지고 올 수 있다. -->
            <%= currentUser.username %>의 생각을 알려주세요.
        </div>
    </div>
</div>

// post-modal.ejs
<div class="modal fade" id="newpost">
    <div class="modal-dialog modal-dialog-centered">
        <div class="modal-content">
            <div class="modal-header">
                <h5>포스트 생성하기</h5>
                <button type="button" class="btn-close close" data-bs-dismiss="modal"></button>
            </div>
            <!-- 이미지 파일 올릴 때 enctype -->
            <form method="POST" action="/posts" enctype="multipart/form-data">
                <div class="modal-body">
                    <div class="form-group">
                        <textarea name="desc" id="desc" class="form-control" row="6" cols="50" placeholder="<%= currentUser.username %>님의 생각을 적어주세요." required></textarea>
                    </div>
                    <div class="form-group mt-1">
                        <input class="form-control" type="file" name="image">
                    </div>
                </div>
                <div class="modal-footer">
                    <button type="submit" class="btn btn-primary">생성하기</button>
                </div>
            </form>
        </div>
    </div>
</div>

//posts index.ejs
<%- include('../partials/header') %>

<div class="container">
    <div style="max-width: 600px; margin: 1rem auto;">
    <%- include('../partials/create-post') %>
    </div>
</div>

<%- include('../partials/post-modal') %>

<%- include('../partials/footer') %>

// posts.router.js
// Post DB에 있는 모든 것들을 찾고 comments 데이터도 보여주고 실행해라
// posts에는 posts 데이터를 가져오고 currentUser에는 현재 로그인 된 유저를 넣어준다.
// ejs에서 사용가능하다.
router.get("/", checkAuthenticated, (req, res) => {
  Post.find().populate('comments').sort({ createdAt: -1 }).exec()
    .then(posts => {
      res.render("posts/index", {
        posts: posts,
        currentUser: req.user
      })
    }).catch(err => {
    console.log(err)
  })

});
5. multer를 이용해서 이미지 파일 업로드
// assets 폴더에 images를 추가해준다.
// post.router.js
const storageEngine = multer.diskStorage({
  destination: (req, file, callback) => {
    callback(null, path.join(__dirname, '../public/assets/images'))
  },
  filename: (req, file, callback) => {
    callback(null, file.originalname)
  }
})

const upload = multer({ storage: storageEngine }).single('image')

// auth 미들웨어를 실행하고, upload 미들웨어를 실행한다.
const upload = multer({ storage: storageEngine }).single('image')

// auth 미들웨어를 실행하고, upload 미들웨어를 실행한다.
const storageEngine = multer.diskStorage({
  destination: (req, file, callback) => {
    callback(null, path.join(__dirname, '../public/assets/images'))
  },
  filename: (req, file, callback) => {
    callback(null, file.originalname)
  }
})

const upload = multer({ storage: storageEngine }).single('image')

// auth 미들웨어를 실행하고, upload 미들웨어를 실행한다.
router.post('/', checkAuthenticated, upload, (req, res) => {
  let name = req.body.name;
  let desc = req.body.desc;
  let image = req.file ? req.file.filename : "";
  Post.create({
    name,
    image,
    description: desc,
    author: {
      id: req.user._id,
      username: req.user.username
    }
  }).then(result => {
    res.redirect('back')
  }).catch(err => {
    console.log('err')
  })
})
6. db에서 포스트 가져와서 나열하기
// posts/index.ejs
<%- include('../partials/header') %>
<div class="container">

    <div style="max-width: 600px; margin: 1rem auto;">
        <%- include('../partials/create-post') %>
    </div>
    <% posts.forEach((post) => { %>
        <!-- 나의 포스트인지 -->
        <% if (post.author.id.equals(currentUser._id) ||
        // 나의 친구의 포스트인지
        currentUser.friends.find(friend => friend === post.author.id.toString())) { %>

        <div style="max-width: 600px; margin: 1rem auto;">
            <%- include('../partials/post-item', { post: post }) %>
        </div>

        <% } %>
    <% }) %>

</div>
      //   include에서도 post를 사용하려면 보내줘야한다.
<%- include('../partials/post-modal') %>

<%- include('../partials/footer') %>
7. post 나열 UI
// post-item.ejs
<div class="card mb-2">
    <div class="card-body text-start">
        <div class="d-flex align-items-center">
            <a href="/profile/<%= post.author.id %>">
                <h5>
                    <%= post.author.username %>
                </h5>
            </a>
            <small class="text-muted ms-auto">
                <%= post.createdAt.toDateString() %>
            </small>
            <% if (post.author.id.equals(currentUser._id)) { %>
            <div class="dropdown">
                <button class="no-outline" type="button" data-bs-toggle="dropdown" aria-expanded="false">
                    <img src="/assets/images/ellipsis.png" height="20px">
                </button>
                <ul class="dropdown-menu">
                    <li><a class="dropdown-item text-center" href="/posts/<%= post._id %>/edit">Edit</a></li>
                    <li>
                        <form class="dropdown-item text-center" action="/posts/<%= post._id %>?_method=DELETE" method="POST">
                            <button type="submit" class="no-outline">Delete</button>
                        </form>
                    </li>
                </ul>
            </div>
            <% } %>
        </div>

        <p class="card-text mt-2">
            <%= post.description %>
        </p>

        <% if (post.image) { %>
            <img class="w-100" src="/assets/images/<%= post.image %>" />
        <% } %>


        <hr class="mt-1" >
        <div class="d-flex justify-content-between">
            <div class="row">
                <form action="/posts/<%= post._id %>/like?_method=PUT" method="POST">
                    <!-- 이미 좋아요를 눌렀는지  -->
                    <% if (post.likes.find(like => like === currentUser._id.toString())) { %>
                        <button type="submit" class="no-outline">
                            <img src="/assets/images/like-1.png" height="20px" >
                            <span class="ms-1"> <%= post.likes.length %></span>
                        </button>
                    <% } else { %>
                        <button type="submit" class="no-outline">
                            <img src="/assets/images/like.png" height="20px" >
                            <span class="ms-1"> <%= post.likes.length %></span>
                        </button>
                    <% } %>
                </form>
            </div>

            <a class="ms-auto pe-2"  data-bs-toggle="collapse" href="#post<%= post._id %>">
                댓글 <%= post.comments.length %>
            </a>
        </div>


        <hr class="mt-1" >
        <div class="collapse show" id="post<%= post._id %>">
            <% if (post.comments.length > 0) { %>
                <div class="card-body comment-section">
                    <% post.comments.forEach((comment) => { %>
                        <div class="d-flex justify-content-between">
                            <div class="font-weight-bold">
                                <%= comment.author.username %>
                            </div>
                            <small>
                                <%= comment.createdAt.toDateString() %>
                            </small>
                        </div>
                        <div class="d-flex justify-content-between mt-2">
                            <p>
                                <%= comment.text %>
                            </p>
                            <% if (comment.author.id.equals(currentUser._id)) { %>
                                <div class="dropdown">
                                    <button class="no-outline" type="button" data-bs-toggle="dropdown">
                                        <img src="/assets/images/ellipsis.png" height="20px" >
                                    </button>
                                    <div class="dropdown-menu">
                                        <a
                                        class="dropdown-item text-center"
                                        href="/posts/<%= post._id %>/comments/<%= comment._id %>/edit">Edit</a>
                                        <form class="dropdown-item text-center"
                                            action="/posts/<%= post._id %>/comments/<%= comment._id %>?_method=DELETE"
                                            method="POST"
                                            >
                                          <button class="no-outline" type="submit">Delete</button>
                                        </form>
                                    </div>
                                </div>
                            <% } %>
                        </div>
                    <% }) %>
                </div>
            <% } %>
        </div>
        <div>
            <form method="POST" action="/posts/<%= post._id %>/comments">
                <div class="form-group">
                    <input  name="text" id="desc" class="comment-section" placeholder="댓글을 작성해주세요." required>
                    <p class="small ms-2"> 엔터를 눌러주세요.</p>
                </div>
            </form>
        </div>

    </div>
</div>
8. connect-flash를 이용해서 알림창 표시
// app.js
const flash = require('connect-flash');
app.use(flash());

// 표시를 띄우고 싶은 곳 header.ejs
  <div class="container">
  <% if (error && error.length > 0) { %>
  <div class="alert alert-danger" role="alert"><%= error %></div>
  <% } %> <% if (success && success.length > 0) { %>
  <div class="alert alert-success" role="alert"><%= success %></div>
  <% } %>
  </div>

// posts.router.js
  Post.create({
    name,
    image,
    description,
    author: {
      id: req.user._id,
      username: req.user.username
    }
  }).then(result => {
    req.flash('success', '포스트 생성 성공') // 포스트가 생성 되면 req.flash에 전달 해준다.
    res.redirect('back')
  }).catch(err => {
    if (err) {
      req.flash('error', '포스트 생성 실패')
      res.redirect('back')
    }
  })
  // 포스트가 생성되면 req.flash('success'를 받아오고 '포스트 생성 성공'이라는 문구를 띄운다.)

 // ejs에서 변수를 받아오려면 render 해줘야한다.
   Post.find().populate('comments').sort({ createdAt: -1 }).exec()
    .then(posts => {
      res.render("posts/index", {
        posts: posts,
        currentUser: req.user,
        success: req.flash('success'),
        error: req.flash('error')
      })
    }).catch(err => {
    console.log(err)
  })

  // app.js
  // 모든 파일에서 변수를 사용할 수 있다.
  app.use((req, res, next) => {
  res.locals.error = req.flash('error')
  res.locals.success = req.flash('success')
  res.locals.currentUser =  req.user,
  console.log(res.locals)
  next()
});
너무 길어져서 링크: sns mini project(2)

개발 경험치 쌓는 곳