iOS13부터는 다크 모드를 사용할 수 있어서 종종 다크 모드를 지원하는 앱을 볼 수 있다. Xcode 툴에서 다크 모드를 다루는 방법과 앱에 적용하는 방법을 알아보자.
1. Dark Mode & Light Mode 설정
기본 Appearance 설정하기
Info.plist에서 Appearance를 설정하면 된다. 다크 모드로 보여주고 싶으면 Dark, 라이트 모드로 보여주고 싶으면 Light를 입력한다.

앱 내에서 Appearance 컨트롤하기
앱 내에서 다크 모드를 On/Off 하기 위해서 UserDefaults를 이용하자.
예를 들어, 사용자가 '다크 모드' 버튼을 클릭하면 아래 코드가 실행되고 현재 ViewController의 Appearance를 확인한 후 그와 반대의 값을 UserDefaults에 저장한다. 그리고 ViewController를 reload한다.
// 다크모드 버튼 클릭 시
@IBAction func darckModeButtonTapped(_ sender: UIButton) {
	if self.overrideUserInterfaceStyle == .light {
		UserDefaults.standard.set("Dark", forKey: "Appearance")
	} else {
		UserDefaults.standard.set("Light", forKey: "Appearance")
	}
	self.viewWillAppear(true)
}
viewWillAppear()가 호출될 때 AppearanceCheck() 함수를 호출하여 해당 ViewController를 다크 모드로 보여줄지 라이트 모드로 보여줄지를 판단한다.
override func viewWillAppear(_ animated: Bool) {
	super.viewWillAppear(animated)
	AppearanceCheck(self)
}
아래가 AppearanceCheck() 함수다.
UserDefaults에 저장된 Appearance 값을 가져와 그에 맞게 ViewController의 overridUserInterfaceStyle을 설정한다.
// UserDefaults에 저장된 값을 통해 다크모드 확인하는 함수
func AppearanceCheck(_ viewController: UIViewController) {
    guard let appearance = UserDefaults.standard.string(forKey: "Appearance") else { return }
    if appearance == "Dark" {
        viewController.overrideUserInterfaceStyle = .dark
        if #available(iOS 13.0, *) {
            UIApplication.shared.statusBarStyle = .lightContent
        } else {
            UIApplication.shared.statusBarStyle = .default
        }
    } else {
        viewController.overrideUserInterfaceStyle = .light
        if #available(iOS 13.0, *) {
            UIApplication.shared.statusBarStyle = .darkContent
        } else {
            UIApplication.shared.statusBarStyle = .default
        }
    }
}
여기서 중요한 게 statusBarStyle도 설정해 줘야 상태 바의 글씨가 제대로 보인다. info.plist에서 View controller-based status bar appearance 값을 NO로 설정한다.

ViewController가 여러 개라면 해당 ViewController의 viewWillAppear() 안에 AppearanceCheck(self)를 적어주면 사용자가 정의한 값에 따라 다크 모드가 적용될 것이다.
2. Appearance Change
시뮬레이터에서 Appearance 바꾸기
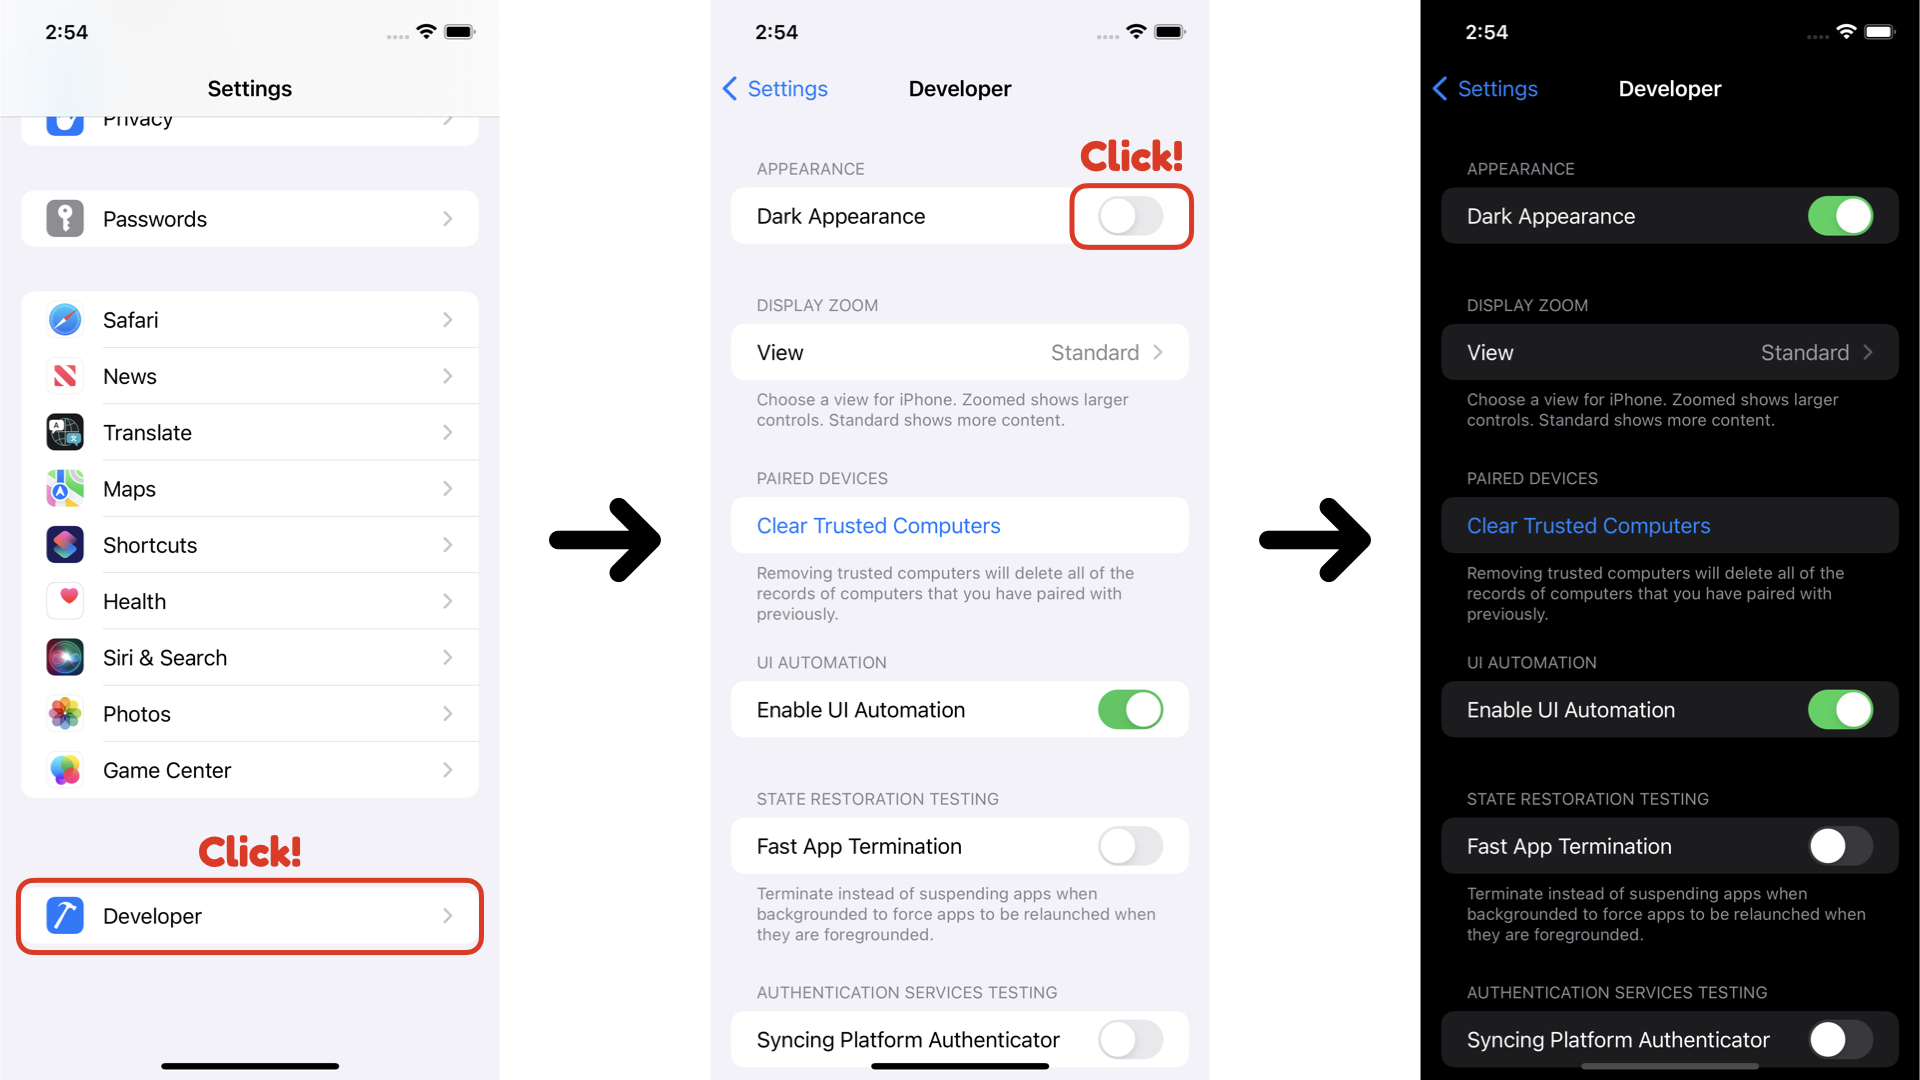
Settings ➜ Developer ➜ Dark Appearance 에서 전환할 수 있다.

스토리보드에서 Appearance 바꾸기
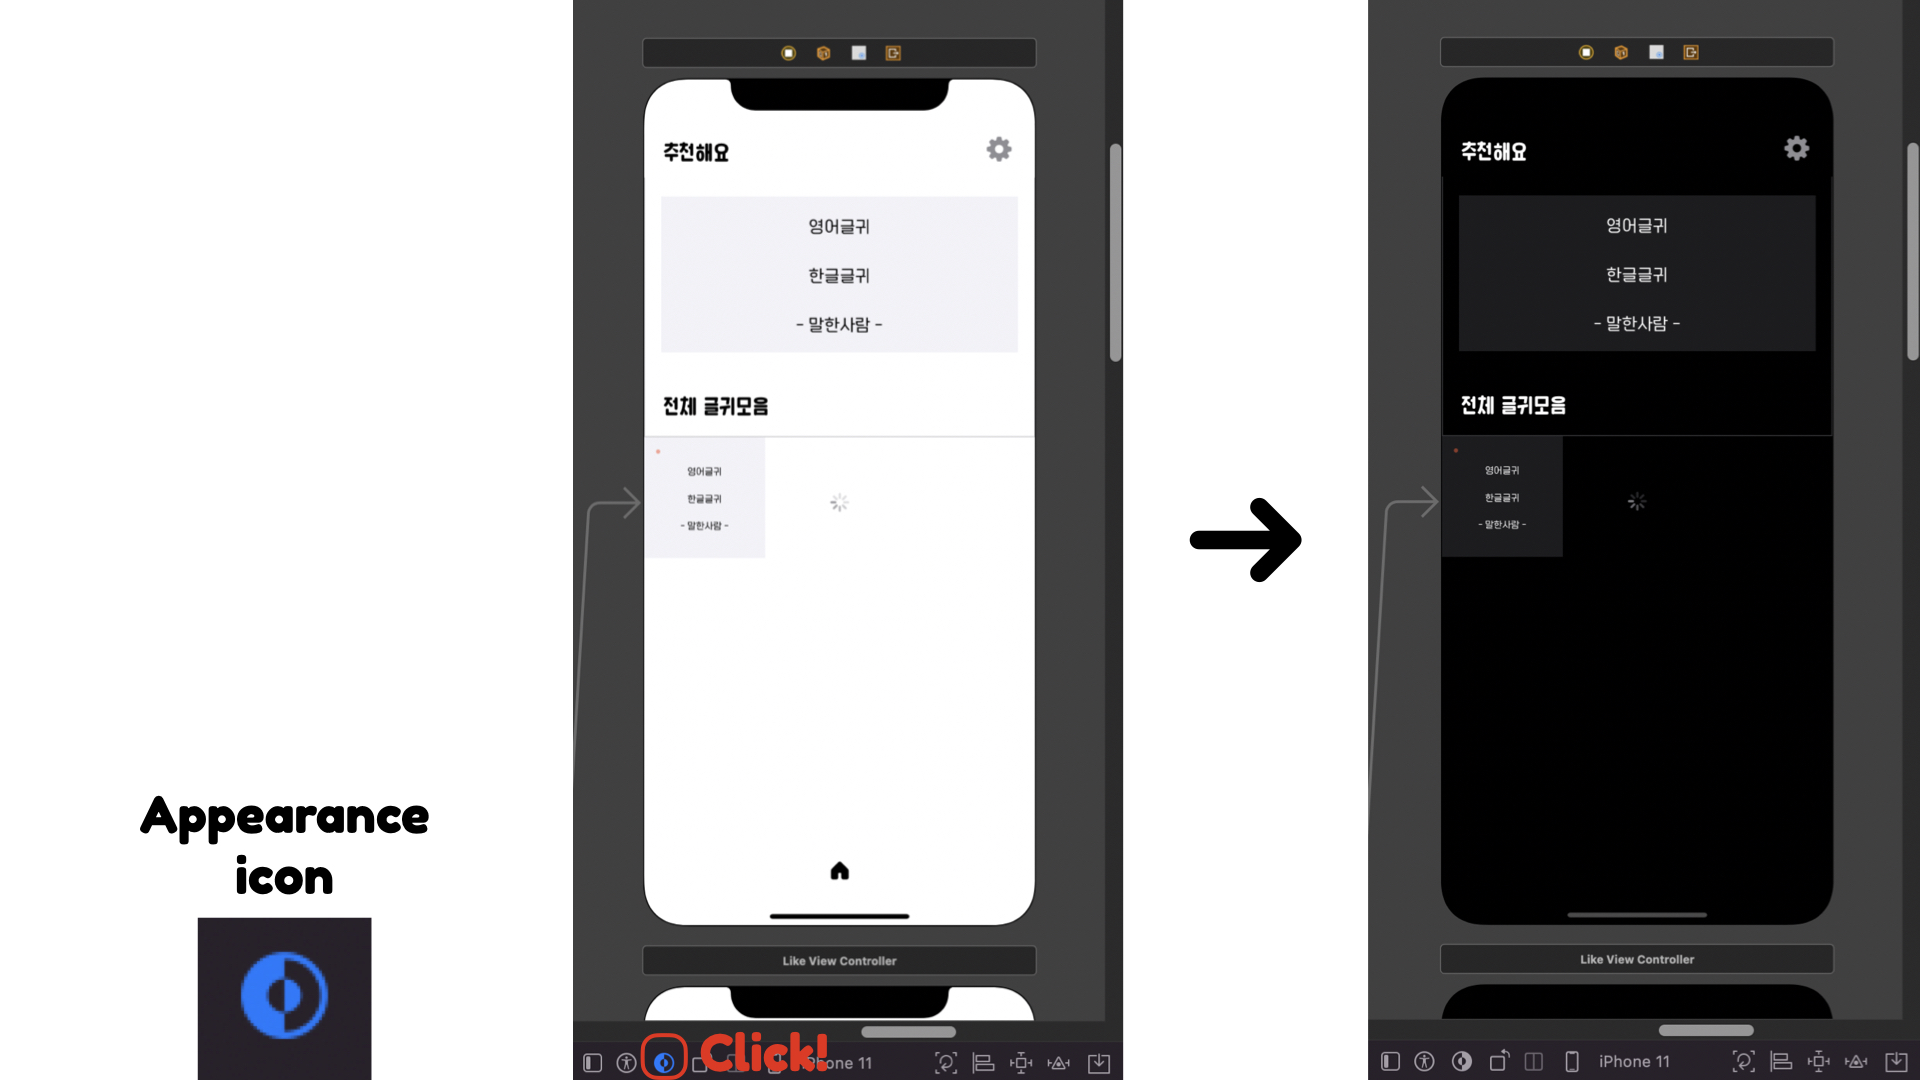
스토리보드 하단에 있는 Appearance Icon으로 전환할 수 있다.

💙 참고한 블로그 💙
https://tom7930.tistory.com/59
http://labs.brandi.co.kr/2019/12/19/kimjh.html
