윈도우 서버에 GitLab-Runner를 설치하여, Git의 소스를 다운 받아 Build하고 Deploy 한다.
1. Environment
- Windows
- GitLab
- GitLab-Runner
- Maven
- Apache-Ant
2. 서버에 GitLab Runner 설치
GitLab Runner는 GitLab으로부터 소스를 다운 받아 Build 하고 Deploy해주는 역할을 한다.
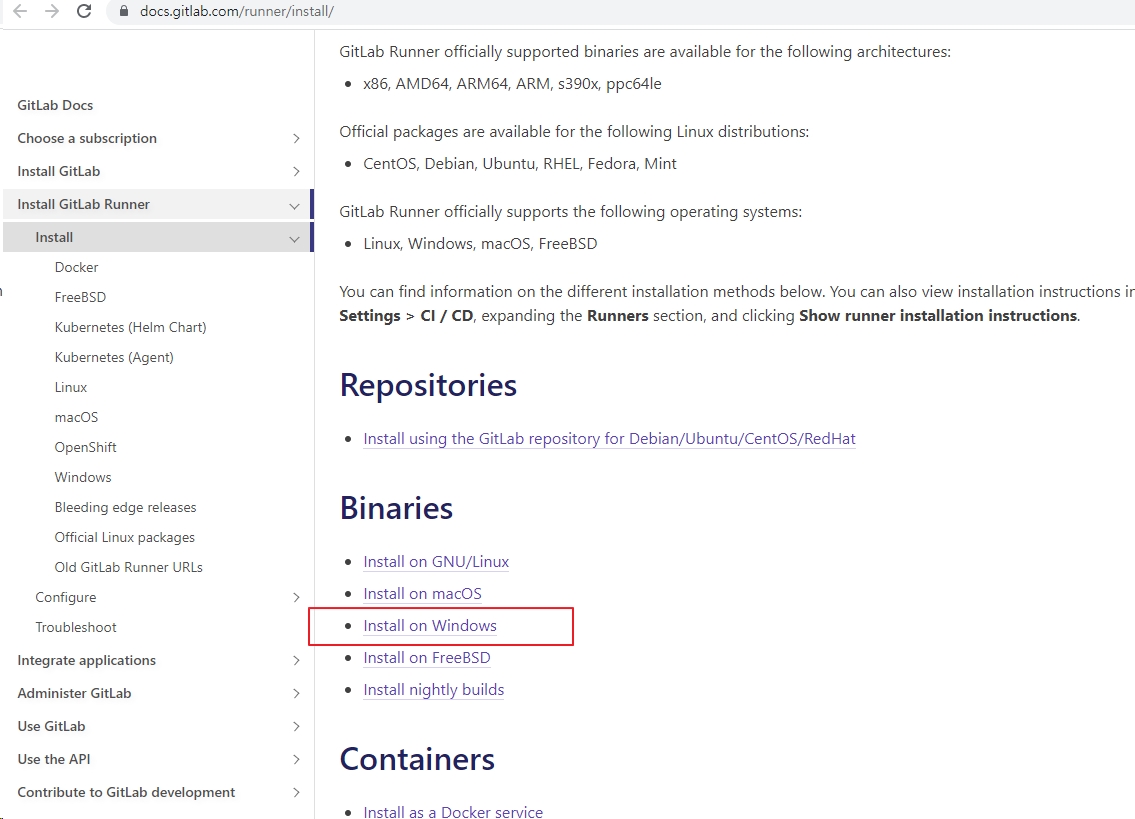
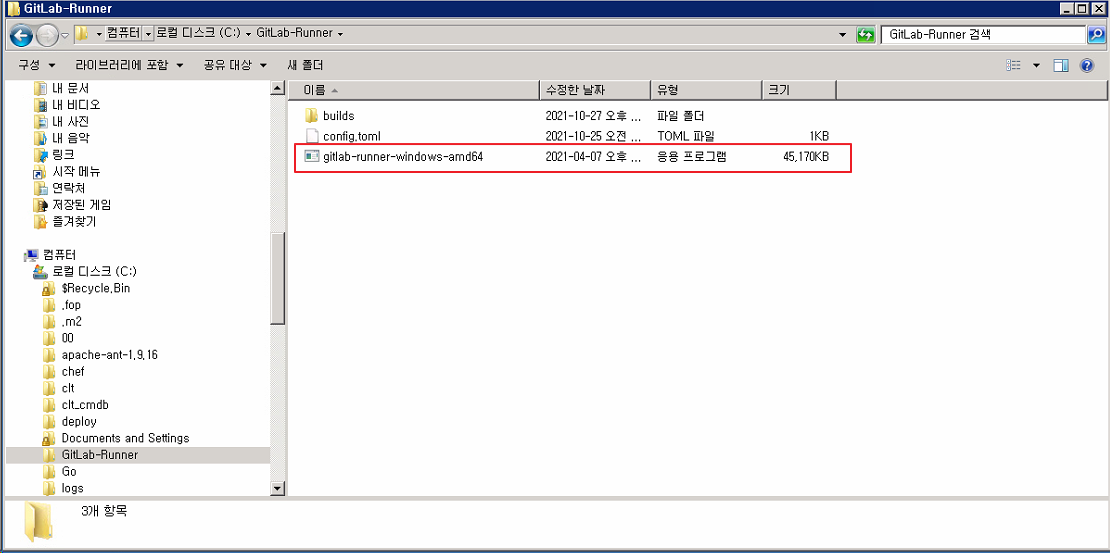
아래 들어가서 GitLab Runner를 다운받아 Window Server에 설치한다.
https://docs.gitlab.com/runner/install/
3. GitLab에 Runner 등록
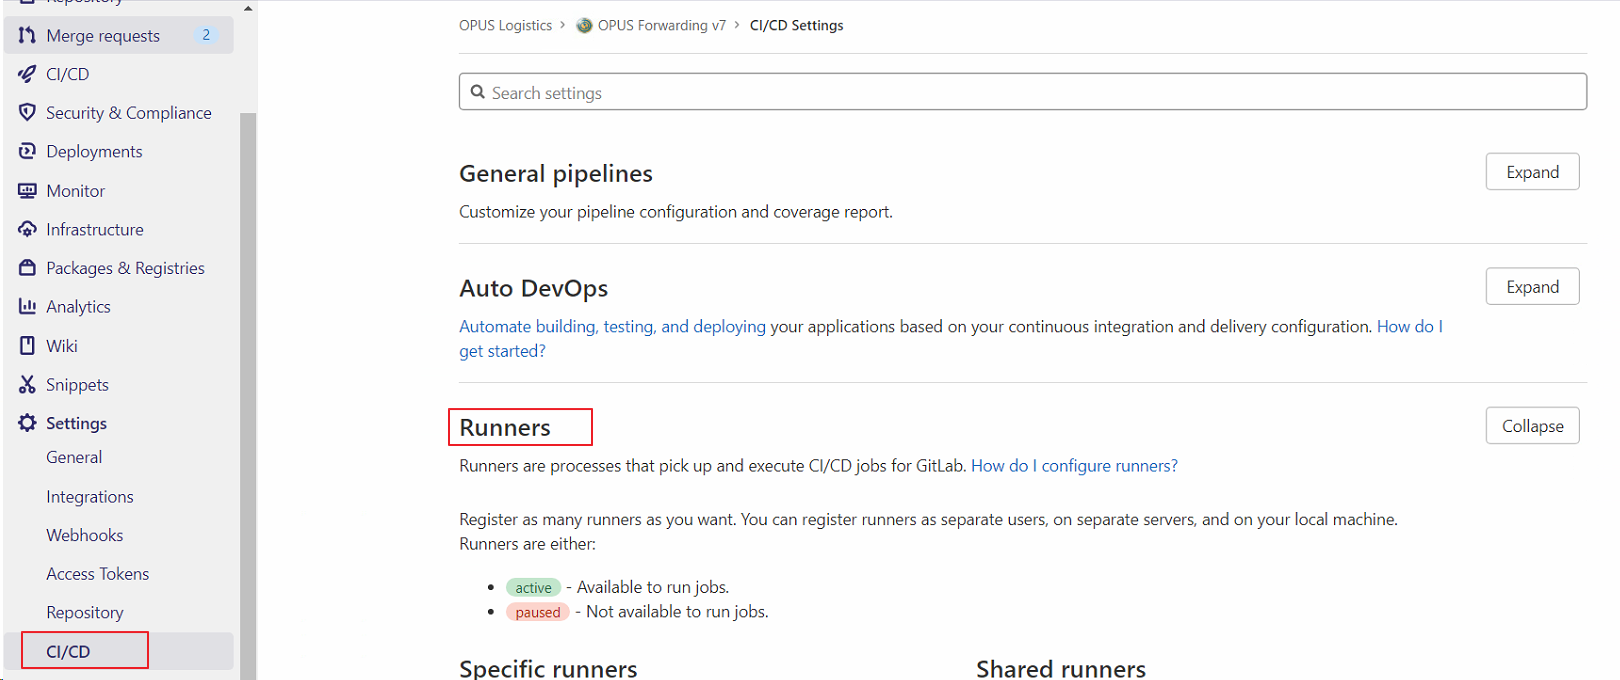
GitLab에서 CI/CD 등록 정보 확인
GitLab의 Settings > CI/CD > Runner의 Expand를 클릭하면 Runner에 관련된 정보가 나온다.
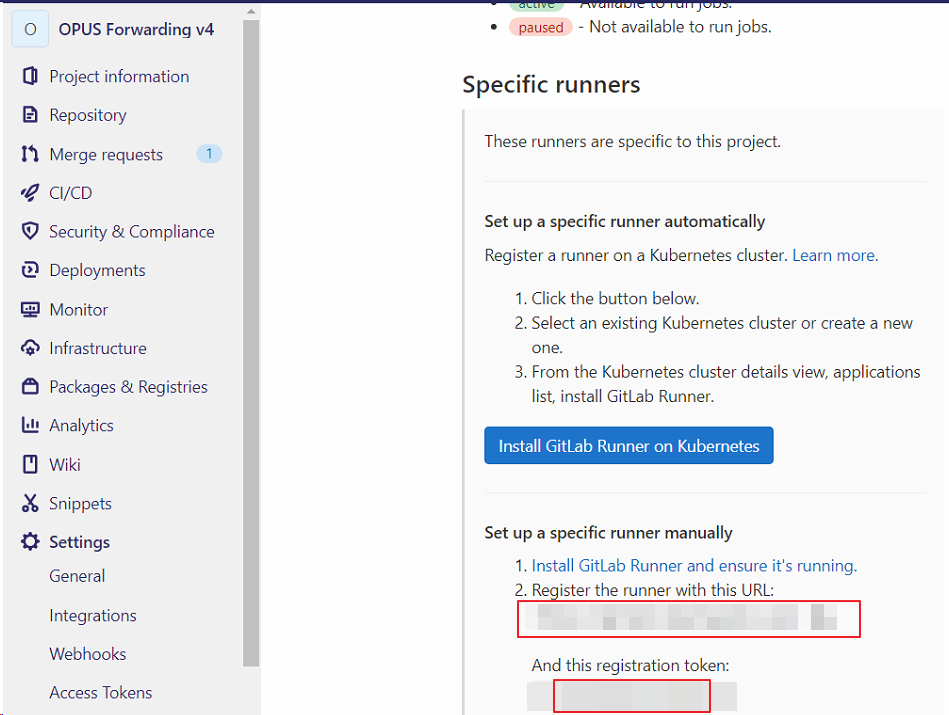
Runner를 GitLab에 등록해주기 위해, GitLab서버 URL과 Token을 확인한다.
GitLab Runner 등록 실행
Runner 를 다운로드 받은 디렉토리로 이동하여 관리자 권한으로 cmd 창을 연 후 아래와 같이 Runner 를 등록해준다.
C:\Gitlab-Runner>gitlab-runner-windows-amd64.exe register
Runtime platform arch=amd64 os=windows pid=14956 revision=34d8ad75 version=13.6.0~beta.126.g34d8ad75
GitLab 서버 URL
Runner 가 명령을 실행받을 GitLab서버 URL을 입력한다.
Please enter the gitlab-ci coordinator URL (e.g. https://gitlab.com/):
https://gitlab.com
GitLab Token
GitLab CI 에서 발급된 Token 을 입력한다.
Please enter the gitlab-ci token for this runner:
xxxxxxxxxxxxxxxxxxxx
Runner Description
Runner Description을 적는다.
Please enter the gitlab-ci description for this runner:
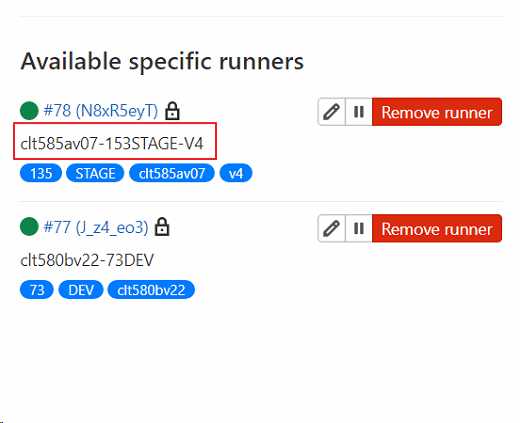
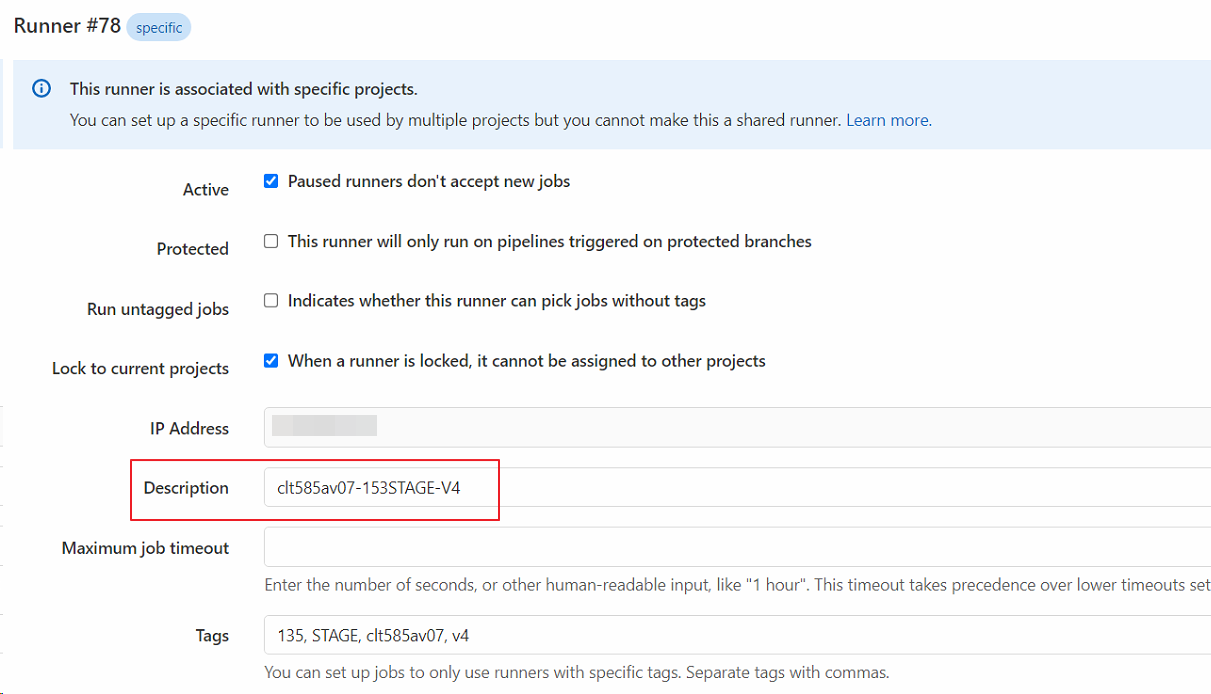
[win10]: clt585av07-153STAGE-V4
정상적으로 연동되면 CI/CD 확인 시 Runner 의 Description이 노출된다.
나중에 GitLab UI에서 Description을 변경할 수 있다.
Runner Tag
.gitlab-ci.yml의 Script를 실행할 Runner를 설정할 때 사용하므로, 매우 중요하다.
Please enter the gitlab-ci tags for this runner (comma separated):
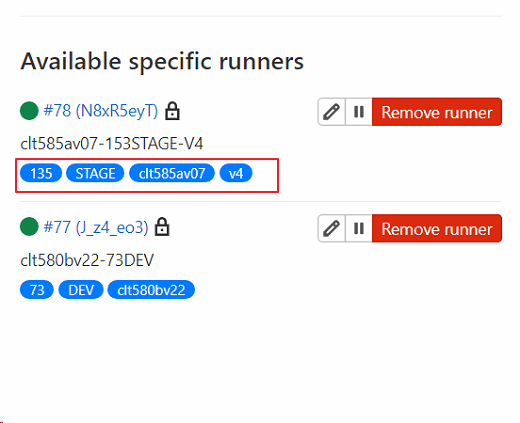
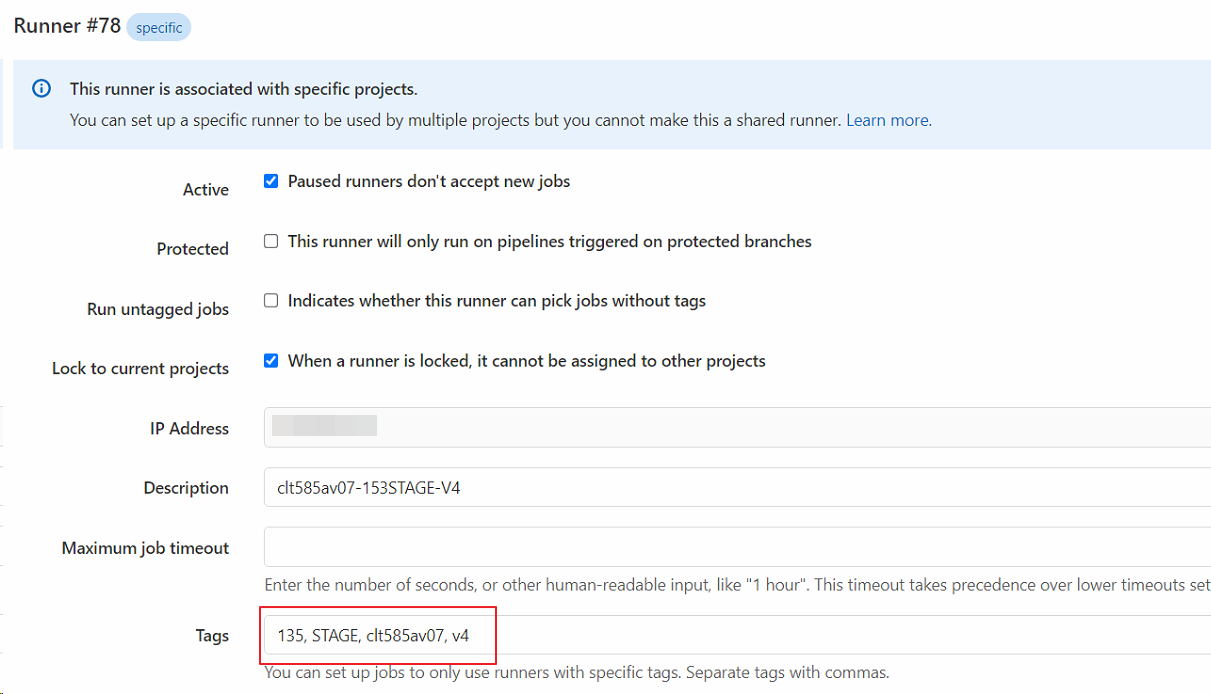
135, STAGE, clt585av07, v4
정상적으로 연동되면 CI/CD 확인 시 Runner 의 Tag로 노출된다.
나중에 GitLab UI에서 Tag를 변경할 수 있다.
.gitlab-ci.yml에서 실행할 Runner를 선택할 때, 아래와 같이 Runner의 tag를 이용한다.
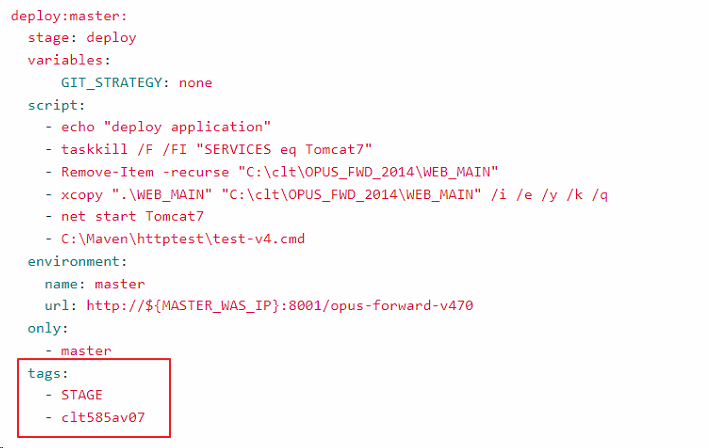
전부 실행하면 cmd 창이 아래와 같이 나온다.

config.toml
이제 C:\Gitlab-Runner 에 가보면 방금 설정한 내용들이 기록된 config.toml 파일이 하나 생성되어 있을 것이다.

Config.toml을 편집으로 열어보면 아래와 같이 확인할 수 있다.
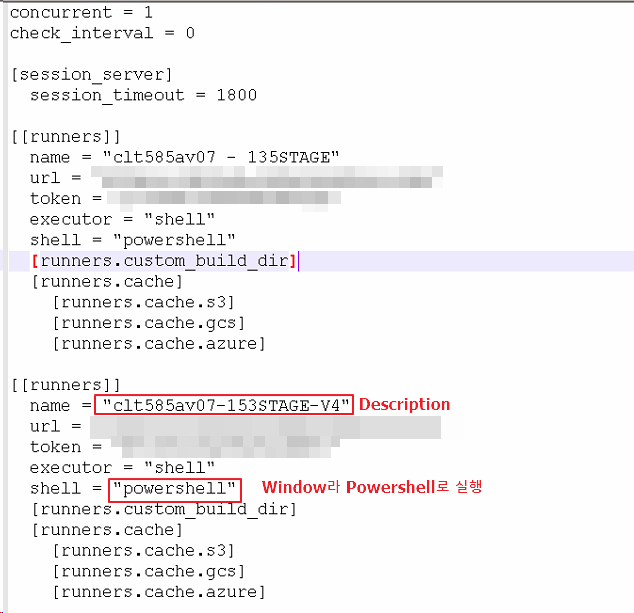
GitLab Runner 등록 확인
GitLab의 Settings > CI/CD > Runner의 Expand를 클릭하면 등록된 Runner를 확인할 수 있다.
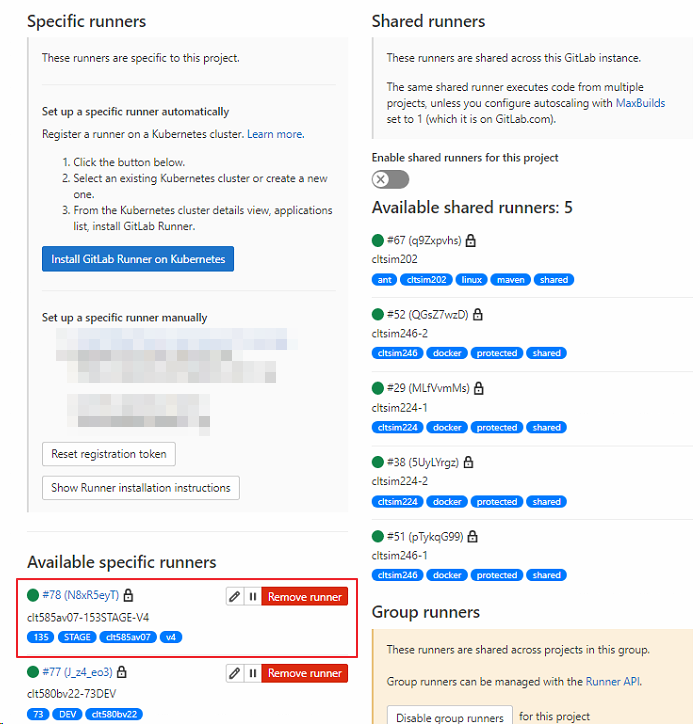
참고로, Shared Runner는 GitLab 서버에 구성된 Runner로 여러 프로젝트가 Share해서 사용한다. Shared Runner로 선택하면 비어있는 Shared Runner 중 아무거나 하나 선택해서 사용한다.
GitLab Runner 실행
Gitlab-runner Windows Service가 생성되고 실행된다.
./gitlab-runner.exe install
./gitlab-runner.exe start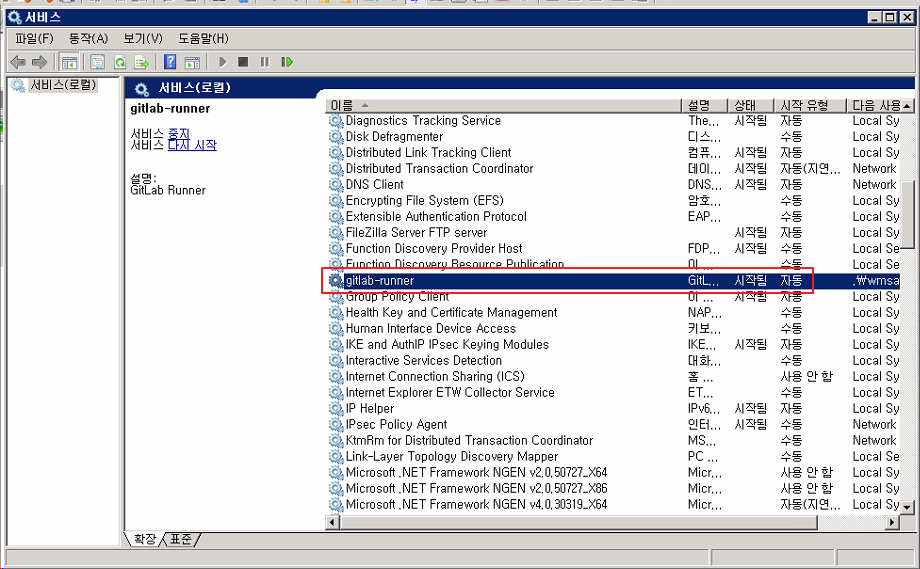
4. Build 프로그램 설치
GitLab Runner가 Build할 때 사용할 수 있도록, 소스가 Maven Build를 사용하면 Maven을 Ant Build를 사용하면 Apahce-Ant를 설치해준다. Build 프로그램을 설치하면, .gitlab-ci.yml에서 스크립트로 소스를 Build할 때 사용된다.
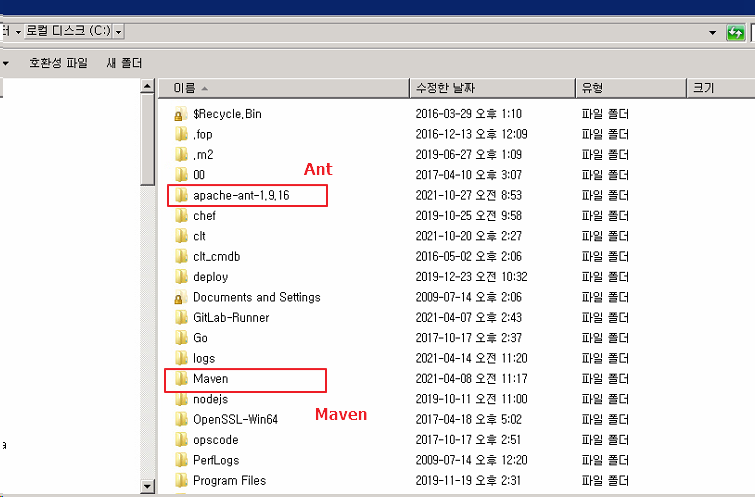
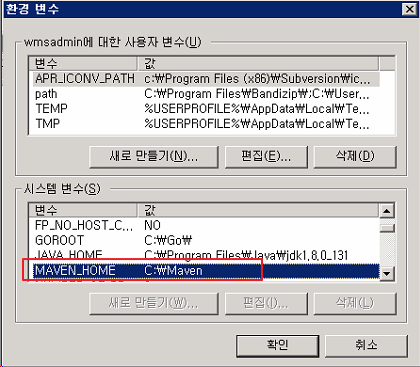
PowerShell에서 Apache-Ant와 Maven을 사용할 수 있도록 환경변수 설정을 해준다.
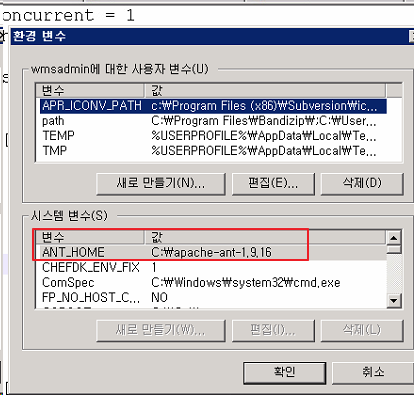
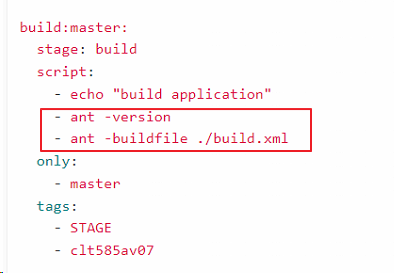
Ant Build
Ant Build할 때 Shell Script
Maven Build
Maven Build할 때 Shell Script


덕분에 gitlab runner 빌드 성공시켰습니다. 감사합니다.