Reflection
객체를 통해 클래스의 정보를 분석해 내는 프로그램 기법을 말합니다.
DI를 해줄 때 아래와 같이 @AutoWried 어노테이션을 달아줬습니다.
근데 여기서 accountRepository의 값이 어떻게 null이 아닐 수 있는지 궁금했었는데, reflection을 공부하면서 궁금증을 해결할 수 있었습니다.
1 2 3 4 5 6 7 8 9 10 | public class AccountService { @AutoWired AccountRepository accountRepository; public void join() { System.out.println("Service.join called"); accountRepository.save(); } } | cs |
간단한 DI FRAME WORK 만들기
자바의 reflect을 통해서 클래스파일의 정보를 가져올 수 있으면, DI 기능을 해주는 나만의 DI 프레임웤을 만들 수 있습니다.
아래와 같이 instance를 만들어주는 메소드가 있습니다.
ClassType을 인자로 받아서 해당 클래스의 instance를 만들고 이를 return 해줍니다.
1 2 3 4 5 6 7 8 9 10 11 12 13 14 | public class ContainerService { public static <T> T getObject(Class<T> classType) { return createInstance(classType); } private static <T> T createInstance(Class<T> classType) { try { return classType.getConstructor(null).newInstance(); } catch (Exception e) { throw new RuntimeException(); } } } | cs |
아래의 테스트 코드를 작성해보면 잘 통과하는것을 볼 수 있습니다.
1 2 3 4 5 6 7 | public class ContainerServiceTest { @Test public void getObject_BookRepository() { BookRepository bookRepository = ContainerService.getObject(BookRepository.class); assertNotNull(bookRepository); } | cs |


그런데, BookService 클래스를 만들어서 BookRepo를 DI받고 test 코드를 실행해보면 아래와 같이 error가 발생합니다.
1 2 3 4 5 6 7 8 | import me.whiteship.di.Inject; public class BookService { @Inject BookRepository bookRepository; } | cs |
1 2 3 4 5 6 7 8 9 | package me.whiteship.di; import java.lang.annotation.Retention; import java.lang.annotation.RetentionPolicy; @Retention(RetentionPolicy.RUNTIME) public @interface Inject { } | cs |
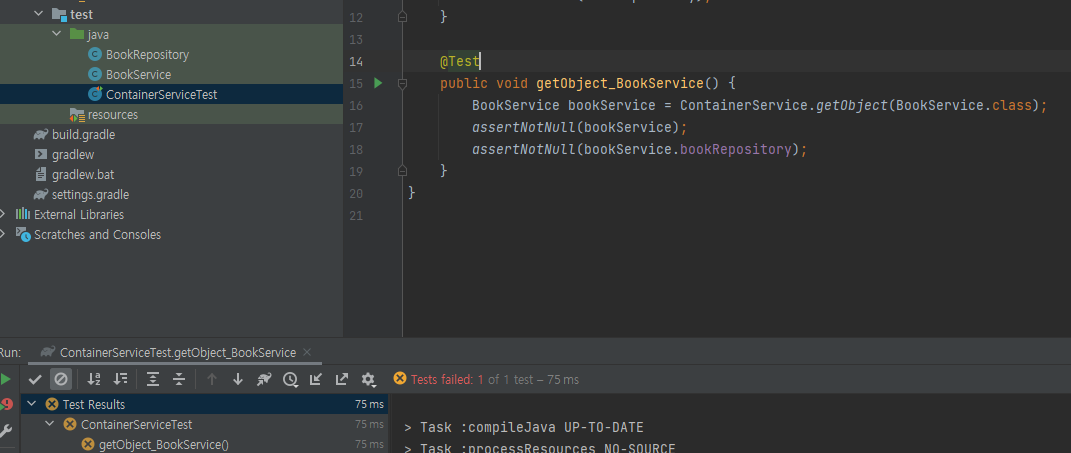
BookService에서 Inject 해 준 BookRepository의 값이 null이 때문입니다. 이것까지 처리해서 아래와 같이 설정해줍니다.
getDeclaredFields로 해당 클래스의 각 클래스 변수들을 반환해줍니다.
getAnnotation으로 객체의 어노테이션을 확인후에 inject가 되어있으면 인스턴스를 만들어주고 해당 인스턴스 변수가 private일 수도 있으니, 접근할 수 있도록 Accessible로 만들어줍니다. 그 뒤에 인스턴스안에 주입해줍니다.
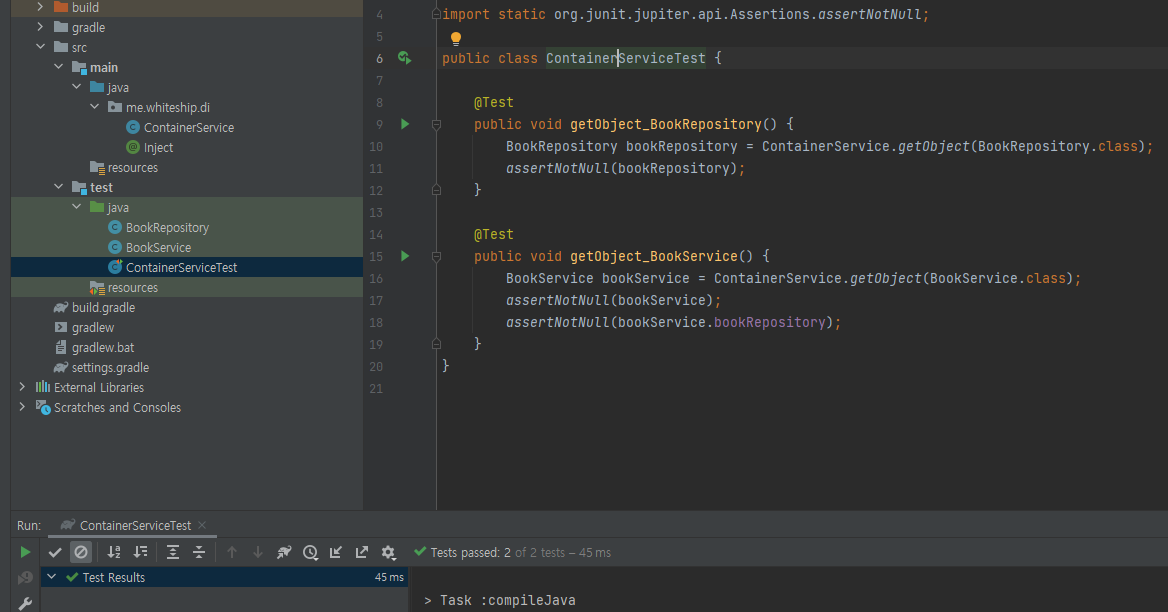
1 2 3 4 5 6 7 8 9 10 11 12 13 14 15 16 17 18 19 20 21 22 23 24 25 26 27 28 29 30 31 32 33 34 35 | package me.whiteship.di; import java.util.Arrays; public class ContainerService { public static <T> T getObject(Class<T> classType) { T instance = createInstance((classType)); Arrays.stream(classType.getDeclaredFields()).forEach(f -> { if (f.getAnnotation(Inject.class) != null) { Object fieldInstance = createInstance(f.getType()); f.setAccessible(true); try { f.set(instance, fieldInstance); } catch (IllegalAccessException e) { throw new RuntimeException(e); } } }); return instance; } private static <T> T createInstance(Class<T> classType) { try { return classType.getConstructor(null).newInstance(); } catch (Exception e) { throw new RuntimeException(); } } } | cs |
전부 통과하는것을 확인할 수 있습니다.
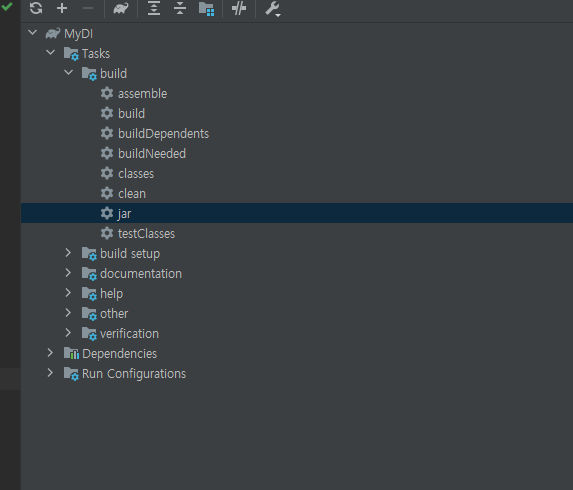
이제 아래의 그림과 같이 jar 부분을 클릭해서 JAR 파일을 만들어줍니다.
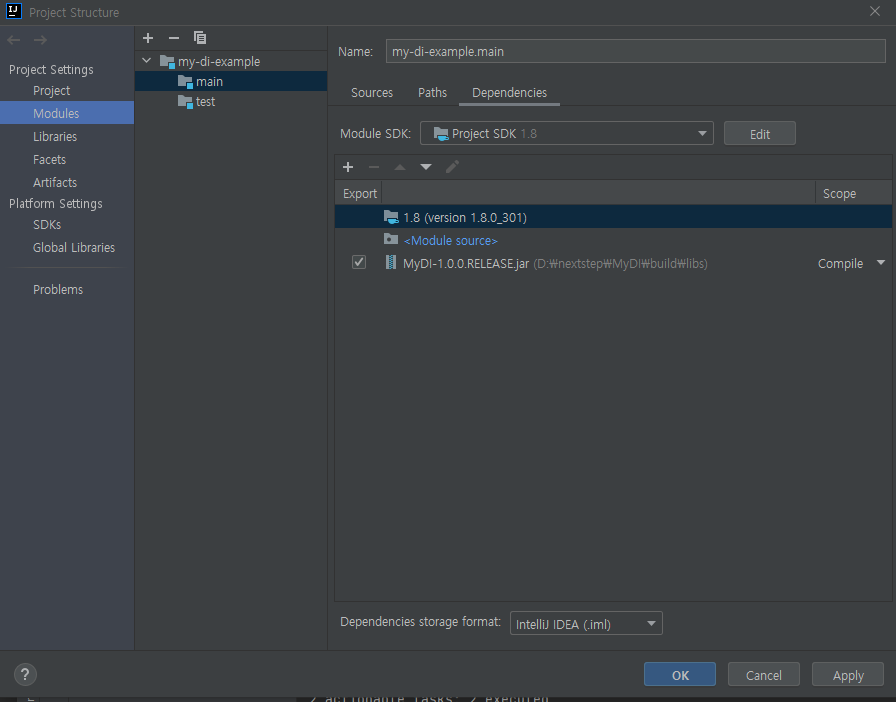
그 다음 새로운 프로젝트를 만들어서 방금 만든 JAR 파일을 주입해줍니다.
아래의 그림과 같이 project structure에서 + 버튼을 누르고 jar파일을 주입해주면 됩니다.
그 다음 아래의 코드를 추가해줍니다.
1 2 3 4 5 6 7 8 9 10 11 12 13 | import me.whiteship.di.Inject; public class AccountService { @Inject AccountRepository accountRepository; public void join() { System.out.println("Service.join called"); accountRepository.save(); } } | cs |
1 2 3 4 5 6 | public class AccountRepository { public void save() { System.out.println("repo.save called"); } } | cs |
1 2 3 4 5 6 7 8 9 | import me.whiteship.di.ContainerService; public class main { public static void main(String[] args) { AccountService accountService = ContainerService.getObject(AccountService.class); accountService.join(); } } | cs |
main문을 실행하면 DI가 잘 되는것을 확인할 수 있습니다.
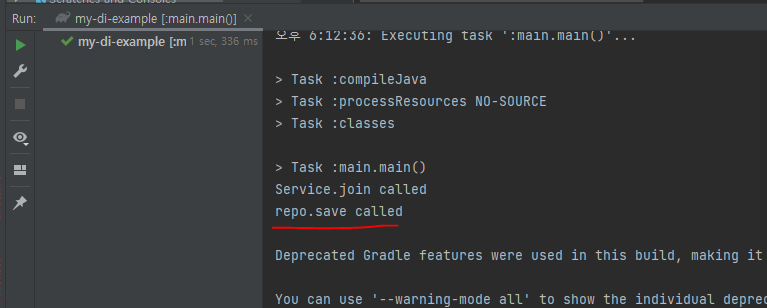
비록 스프링프레임웤처럼 Singleton 관리나 다양한 기능들은 없지만 나만의 프레임웤을 만들 수 있었습니다.
참고자료 : https://www.inflearn.com/course/the-java-code-manipulation

