목표
만들고자하는 건 여러 일기의 리스트를 MainVC에 표현하는 것입니다.
처음 빌드 했을 때 이미 있던 Diary 리스트의 정보를 tableView에 표현하는 것은 물론이고 생성, 수정 또는 삭제를 했을 때 tableView의 내용을 갱신을 해야합니다.
이번 포스트에서는 수정 및 삭제는 다루지 않고 생성만 다루도록 하겠습니다. 만약 수정과 삭제를 구현한다면 해당 일기를 클릭했을 때 나오는 세부사항 VC도 만들어야할 것 같습니다.
Storyboard
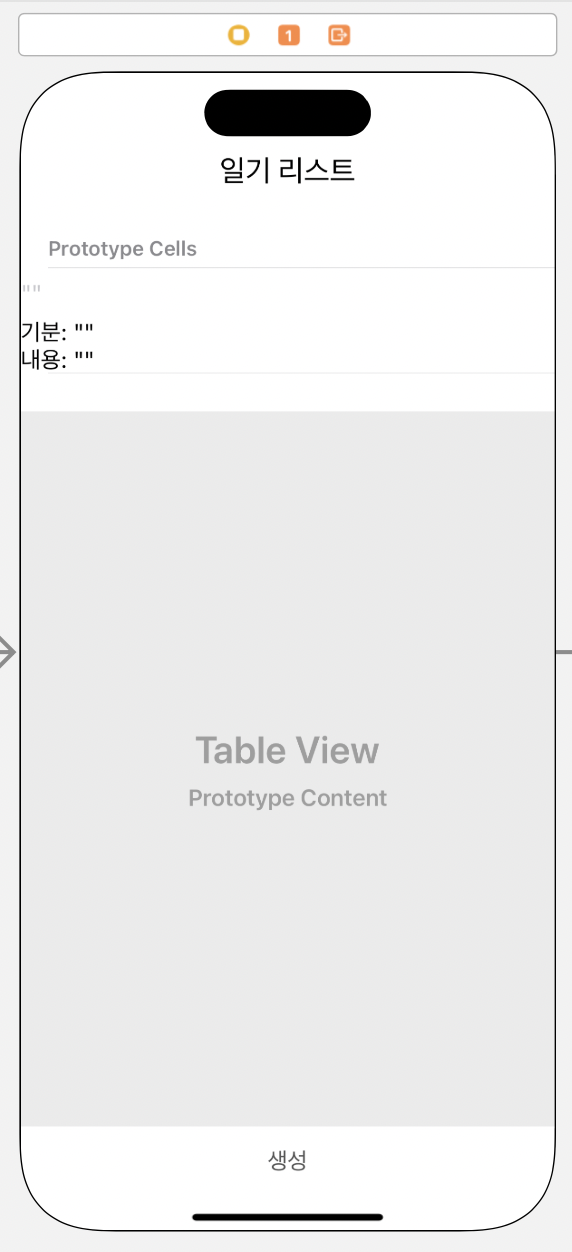
MainVC에 TableView와 그 안에다가 TableViewCell을 만들었습니다.
저는 날짜, 기분 그리고 내용 이 세가지 정보를 TableView를 통해 표현하기 위해 TableViewCell을 위와 같이 만들었습니다.
TableView
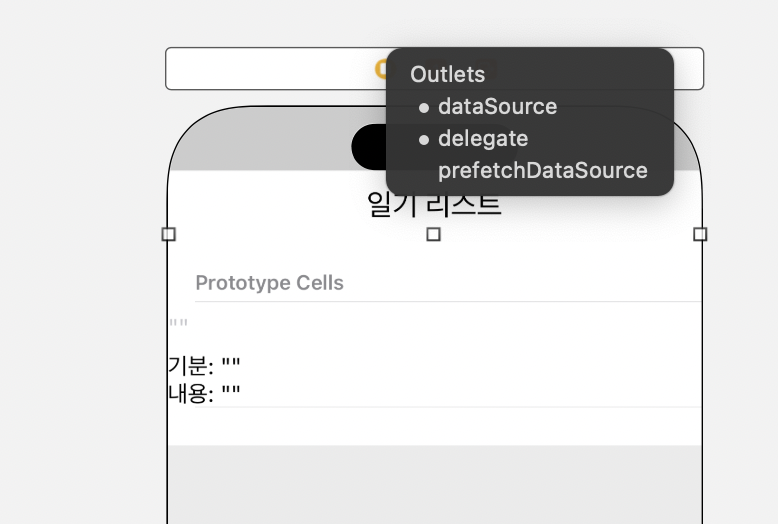
이 tableView의 dataSource와 매커니즘을 MainVC가 맡기 위해서 컨트롤 키+마우스 입력으로 Main View Controller(맨 왼쪽)에 연결시켜줬습니다.
TableViewCell
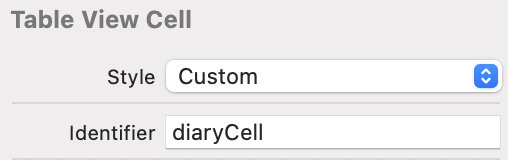
Identifier를 입력했습니다.
ViewController
class MainViewController: UIViewController, SendDataDelegate, UITableViewDelegate, UITableViewDataSource {

    private let diaryListViewModel = DiaryListViewModel()

    @IBOutlet weak var diaryListTableView: UITableView!
    func tableView(_ tableView: UITableView, numberOfRowsInSection section: Int) -> Int {
        return diaryListViewModel.diaryList.count
    }
    func tableView(_ tableView: UITableView, heightForRowAt indexPath: IndexPath) -> CGFloat {
        return 100.0
    }
    func tableView(_ tableView: UITableView, cellForRowAt indexPath: IndexPath) -> UITableViewCell {
        guard let cell = tableView.dequeueReusableCell(withIdentifier: "diaryCell", for: indexPath) as? DiaryTableViewCell else {return UITableViewCell()}

        let dateFormatter = DateFormatter()
        dateFormatter.dateFormat = "yyyy-MM-dd HH:mm:ss"

        cell.diaryTableViewCellDate.text = dateFormatter.string(from: diaryListViewModel.diaryList[indexPath.row].date)
        cell.diaryTableViewCellEmotion.text = diaryListViewModel.diaryList[indexPath.row].emotion
        cell.diaryTableViewCellContent.text = diaryListViewModel.diaryList[indexPath.row].content

        return cell
    }
    func receiveData(date:Date, emotion:String?, content:String, doCalendar:Bool) {
        diaryListViewModel.createDiaryData(date, emotion: emotion, content: content)
        diaryListTableView.reloadData()

    }
}
class DiaryTableViewCell: UITableViewCell{

    @IBOutlet weak var diaryTableViewCellDate: UILabel!

    @IBOutlet weak var diaryTableViewCellEmotion: UILabel!

    @IBOutlet weak var diaryTableViewCellContent: UILabel!

}
class DiaryTableViewCell: UITableViewCell{

    @IBOutlet weak var diaryTableViewCellDate: UILabel!

    @IBOutlet weak var diaryTableViewCellEmotion: UILabel!

    @IBOutlet weak var diaryTableViewCellContent: UILabel!

}
방금 만든 셀의 클래스입니다. 이후에 cell마다 outlet들의 text를 변경시킬겁니다.
class MainViewController: UIViewController, SendDataDelegate, UITableViewDelegate, UITableViewDataSource 아까 TableView의 Delgate와 DataSource를 VC에 연결했기 때문에 MainVC는 UITableViewDelegate과 UITableViewDataSource를 상속받아야합니다.
그에 따라 필수적으로 오버라이드해야 하는 메서드는 다음과 같습니다.
	func tableView(_ tableView: UITableView, numberOfRowsInSection section: Int) -> Int {
        return diaryListViewModel.diaryList.count
    }
    func tableView(_ tableView: UITableView, cellForRowAt indexPath: IndexPath) -> UITableViewCell {
        guard let cell = tableView.dequeueReusableCell(withIdentifier: "diaryCell", for: indexPath) as? DiaryTableViewCell else {return UITableViewCell()}

        let dateFormatter = DateFormatter()
        dateFormatter.dateFormat = "yyyy-MM-dd HH:mm:ss"

        cell.diaryTableViewCellDate.text = dateFormatter.string(from: diaryListViewModel.diaryList[indexPath.row].date)
        cell.diaryTableViewCellEmotion.text = diaryListViewModel.diaryList[indexPath.row].emotion
        cell.diaryTableViewCellContent.text = diaryListViewModel.diaryList[indexPath.row].content

        return cell
    }
func tableView(_ tableView: UITableView, numberOfRowsInSection section: Int) -> Int {
return diaryListViewModel.diaryList.count
}tableView의 Length를 정하는 메서드입니다.
저는 리턴 값으로 viewModel의 리스트의 길이(diaryListViewModel.diaryList.count)로 했습니다. (ViewModel 코드는 아래에 있습니다.)
	func tableView(_ tableView: UITableView, cellForRowAt indexPath: IndexPath) -> UITableViewCell {
        guard let cell = tableView.dequeueReusableCell(withIdentifier: "diaryCell", for: indexPath) as? DiaryTableViewCell else {return UITableViewCell()}

        let dateFormatter = DateFormatter()
        dateFormatter.dateFormat = "yyyy-MM-dd HH:mm:ss"

        cell.diaryTableViewCellDate.text = dateFormatter.string(from: diaryListViewModel.diaryList[indexPath.row].date)
        cell.diaryTableViewCellEmotion.text = diaryListViewModel.diaryList[indexPath.row].emotion
        cell.diaryTableViewCellContent.text = diaryListViewModel.diaryList[indexPath.row].content

        return cell
    }
핵심적인 코드들만 살펴볼게요.
guard let cell = tableView.dequeueReusableCell(withIdentifier: "diaryCell", for: indexPath) as? DiaryTableViewCell else {return UITableViewCell()}
tableView의 indexPath에 해당하는 cell을 diaryCell 형태로 만듭니다.
		cell.diaryTableViewCellDate.text = dateFormatter.string(from: diaryListViewModel.diaryList[indexPath.row].date)
        cell.diaryTableViewCellEmotion.text = diaryListViewModel.diaryList[indexPath.row].emotion
        cell.diaryTableViewCellContent.text = diaryListViewModel.diaryList[indexPath.row].content
그리고 셀의 Outlet Text를 변경시켜줍니다.
*(ViewModel)
class DiaryListViewModel: NSObject{
    var diary: Diary!
    var diaryList: [Diary]!
    override init() {
        let dateFormatter = DateFormatter()
        dateFormatter.dateFormat = "yyyy-MM-dd HH:mm:ss"
        diaryList = []
    }
    func createDiaryData(_ date:Date, emotion: String?, content: String){
        diary = Diary(date: date, emotion: emotion, content: content)
        print("DiaryList appended ( \(date), \(content) ) in DiaryCreateViewModel")
        diaryList.append(diary)
    }
}
결과
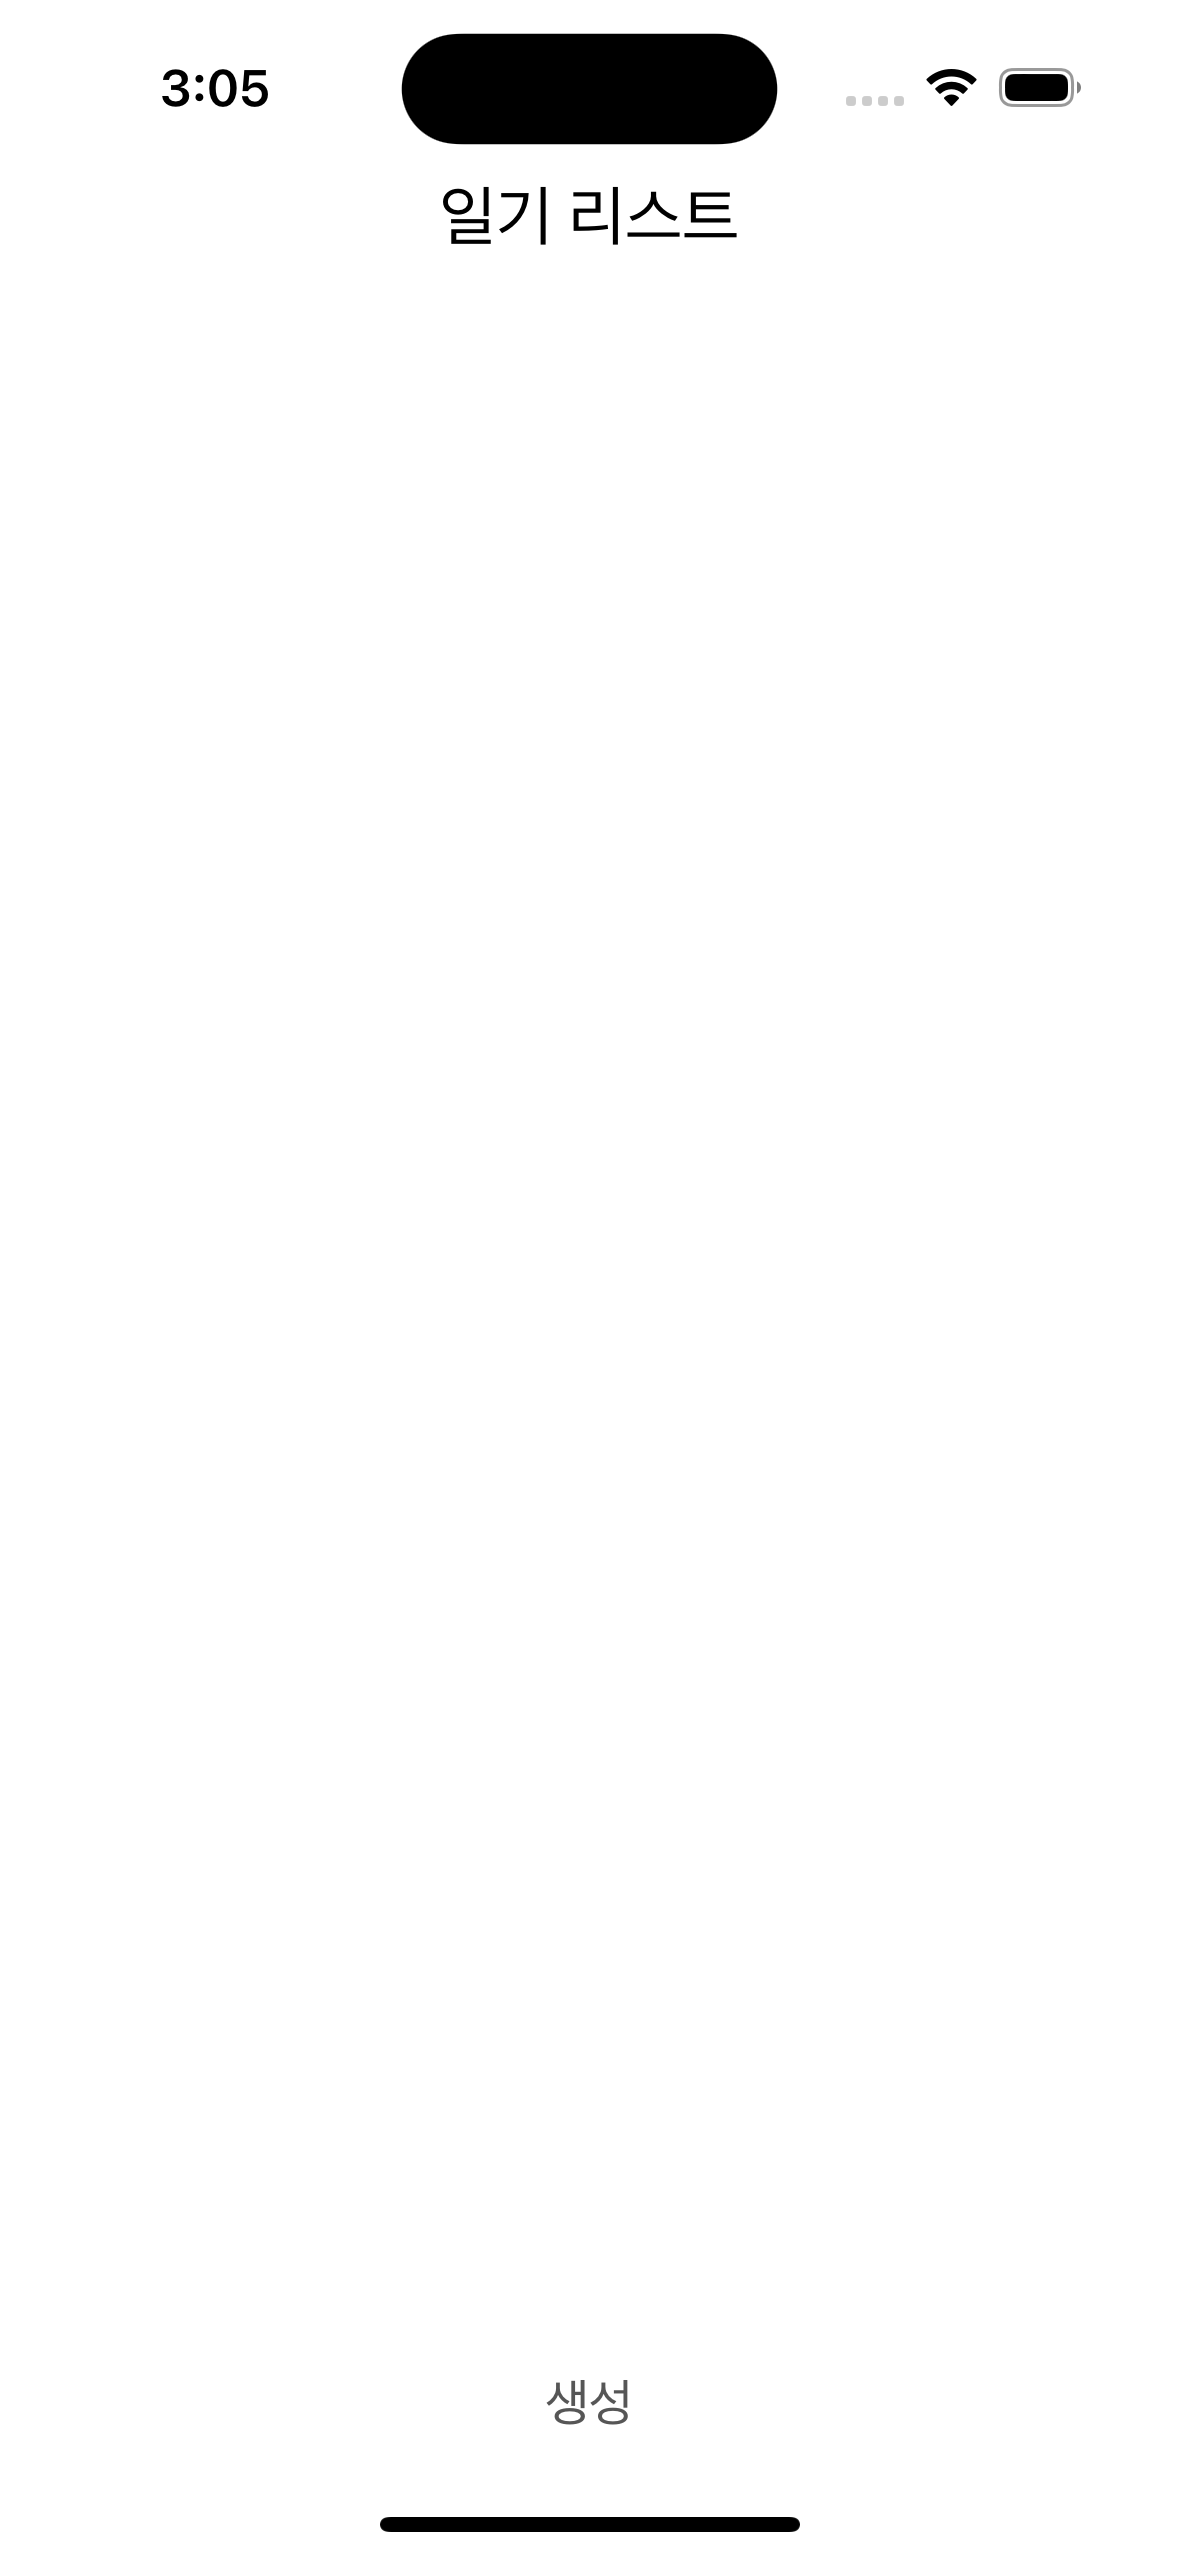

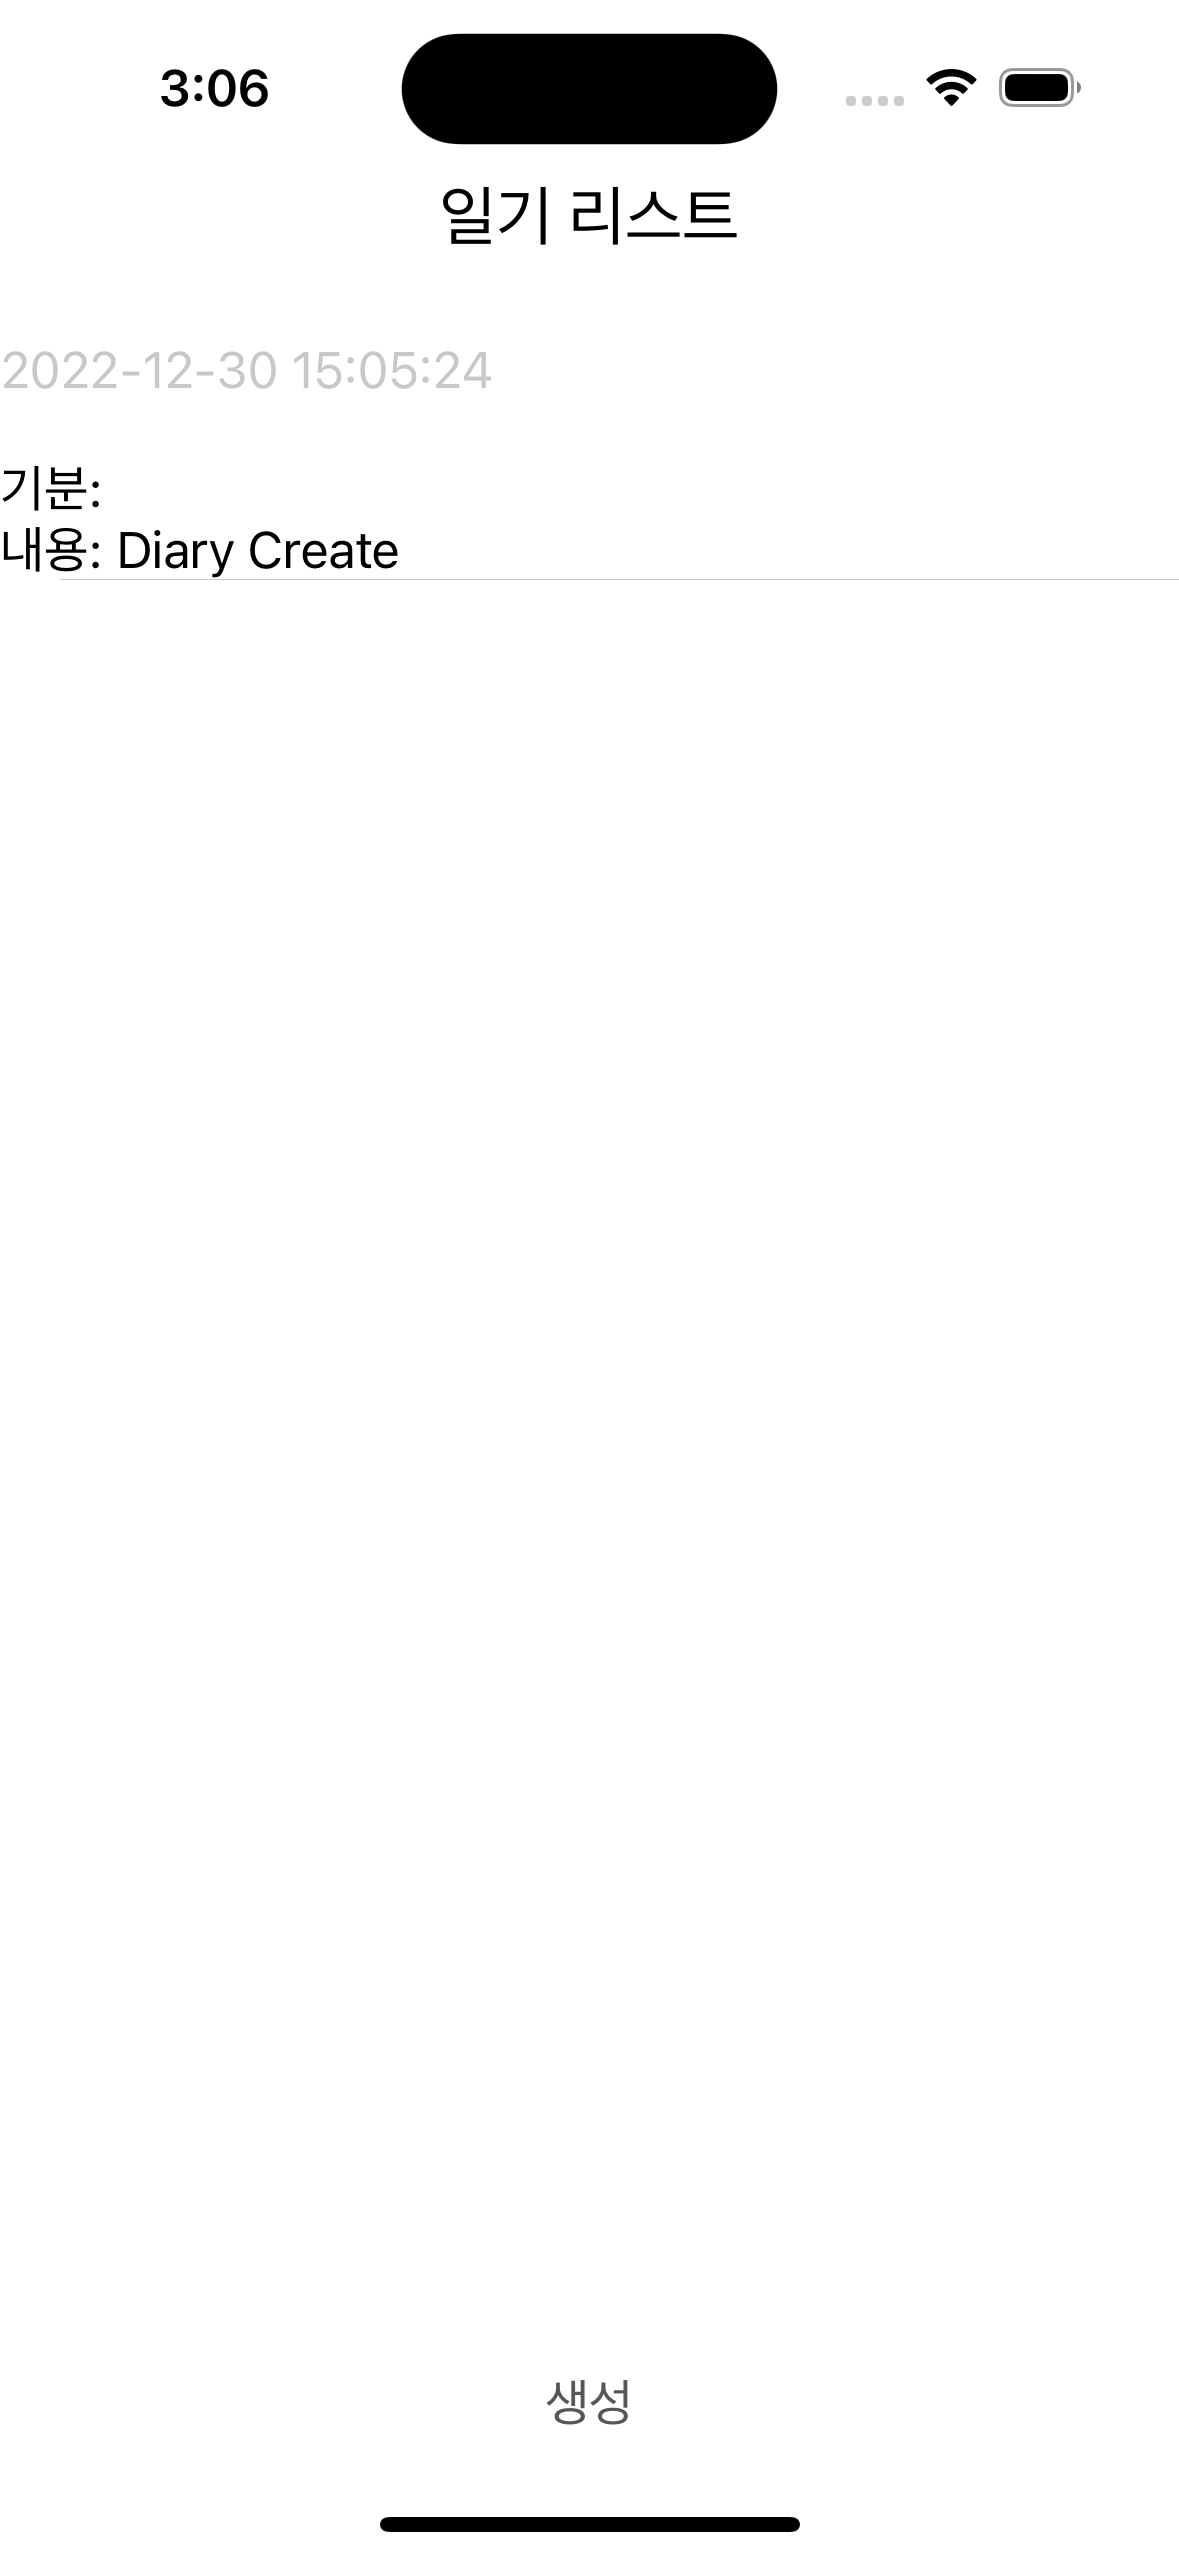
성공적으로 tableView가 생성되었습니다.
아직은 시뮬레이터를 껐다 키면 데이터가 날라갑니다. 이후에 Sqlite를 사용해서 로컬 저장소에 저장을 시키도록 하겠습니다..
