로그인
서버쪽
@app.route('/sign_in', methods=['POST'])
def sign_in():
# 로그인
username_receive = request.form['username_give']
password_receive = request.form['password_give']

pw_hash = hashlib.sha256(password_receive.encode('utf-8')).hexdigest()
result = db.users.find_one({'username': username_receive, 'password': pw_hash})

if result is not None:
    payload = {
     'id': username_receive,
     'exp': datetime.utcnow() + timedelta(seconds=60 * 60 * 24)  # 로그인 24시간 유지
    }
    token = jwt.encode(payload, SECRET_KEY, algorithm='HS256').decode('utf-8')

    return jsonify({'result': 'success', 'token': token})
# 찾지 못하면
else:
    return jsonify({'result': 'fail', 'msg': '아이디/비밀번호가 일치하지 않습니다.'})
발행 된 토큰 확인 방법:
검사 > application에 있는지 확인
css link 사용시 bulma link보다 밑에 작성해야된다.
-bulma css는 이미 적용되 있고 그것을 우리가 수정해야하는 관정이기 때문
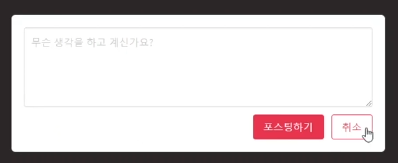
포스팅 모달
- 실제로 글을 적을 수 있는 포스팅 모달은 우선 모습을 만들고 숨겨놓았다가 포스팅 칸을 클릭하면 나타납니다. 바깥 배경 영역이나 X표, 취소 버튼을 클릭하면 사라집니다. 나타나고 사라지는 것은
is-active클래스를 이용해 제어가 가능합니다.

포스트작성시 api 사용 예제
posts = list(db.posts.find({}).sort("date", -1).limit(20))
for post in posts:
post["_id"] = str(post["_id"])
조건에 상관없이 최근에 작성 된 20개를 가져오고 각각을 문자열로 바꾼다.!