
OpenLayers
: 오픈 소스에서 제공하는 웹 브라우저에서 지도 데이터를 표시하기 위한 자바스크립트 라이브러리
OpenLayers 구글링이 힘들어 직접 작성하는 글 ^^,,,, 누군가한테 도움이 되기를 바라며 🙏
✨ 오늘의 목표 !
✔ 화면에 지도 띄우기 (지도 - vworld API 사용)
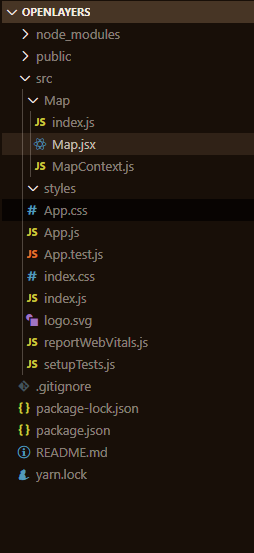
💻 패키지 구조
💻 프로젝트 생성 및 실행
- 프로젝트를 먼저 생성하여야 하는데 필자는 CRA를 통하여 프로젝트를 구성했다.
npx create-react-app openlayers (openlayers = 프로젝트명) // 프로젝트명은 소문자로만!
cd openlayers
npm start
- OpenLayers 라이브러리 설치
yarn add ol💻 코드 작성
- MapContext 생성 (Context에 대한 설명은 여기에서 !)
 // src>Map>MapContext.js (Map 폴더를 추가하여 그 안에 .js 파일로 추가해주었다.)

import React from "react";
const MapContext = new React.createContext({});
export default MapContext;
- Provider 생성
// src>Map>Map.jsx

import React, { useState, useEffect } from 'react'
import MapContext from './MapContext'
import 'ol/ol.css'
import { Map as OlMap, View } from 'ol'
import { defaults as defaultControls, FullScreen } from 'ol/control'
import { fromLonLat, get as getProjection } from 'ol/proj'
import { Tile as TileLayer } from 'ol/layer'
import { XYZ } from 'ol/source'
import {
  DragRotateAndZoom,
  defaults as defaultInteractions,
} from 'ol/interaction'

const Map = ({ children }) => {
  const [mapObj, setMapObj] = useState({})

  useEffect(() => {
  //Map 객체 생성 및 vworld 지도 설정
    const map = new OlMap({
      controls: defaultControls({ zoom: false, rotate: false }).extend([
        new FullScreen(),
      ]),
      interactions: defaultInteractions().extend([new DragRotateAndZoom()]),
      layers: [
        new TileLayer({
          source: new XYZ({ //인증키는 vworld에서 발급 가능
            url: 'http://api.vworld.kr/req/wmts/1.0.0/인증키/Base/{z}/{y}/{x}.png',
          }),
        }),
      ],
      target: 'map',
      view: new View({
        projection: getProjection('EPSG:3857'),
        center: fromLonLat(
          [126.9779228388393, 37.56643948208262], //[경도, 위도] 값 설정! 필자는 시청으로 설정
          getProjection('EPSG:3857')
        ),
        zoom: 15,
      }),
    })

    setMapObj({ map })
    return () => map.setTarget(undefined)
  }, [])

  return <MapContext.Provider value={mapObj}>{children}</MapContext.Provider>
}

export default Map
- 생성한 Provider 가져오기 !
// src>Map>index.js

export {default} from "./Map"
- Provider에 저장된 객체 사용
// src>index.js

import React from 'react';
import ReactDOM from 'react-dom';
import './index.css';
import App from './App';
import reportWebVitals from './reportWebVitals';
import Map from './Map'; //context.Provider를 가져옴

ReactDOM.render(
  <React.StrictMode>
    <Map> //provider에 저장된 객체를 사용하기 위해  APP을 감쌌다.
    <App />
    </Map>
  </React.StrictMode>,
  document.getElementById('root')
);

// If you want to start measuring performance in your app, pass a function
// to log results (for example: reportWebVitals(console.log))
// or send to an analytics endpoint. Learn more: https://bit.ly/CRA-vitals
reportWebVitals();
- Map 띄우기 !
// src>App.js

import logo from './logo.svg'
import './App.css'
import { useContext, useState } from 'react'
import MapContext from './Map/MapContext'

function App() {
  const { map } = useContext(MapContext)

  return (
    <>
      <div id="map" style={{ position: 'relative', width: '100%', height: '100vh' }}>
      </div>
    </>
  )
}

export default App
🔽 완성화면 (왼쪽 상단에 버튼들 구현은 다음시간에 ^____^)


2년차 프론트엔드 개발자입니다 🐣👩🏻💻

감사합니다.^^ 큰도움 되었습니다.