fetch Api
앞서 말했듯이 비동기 통신을 하는 이유는 api 등을 통해서 외부 데이터를 가져오는 것입니다. fetch api를 써서 외부 데이터를 편하게 가져올 수 있습니다. fetch api는 api로부터 데이터를 받아와서 Promise를 리턴합니다.
try catch finally ?
try catch finally 키워드를 이용해서 예외처리를 이용할 수 있습니다. try 블록에는 실행하고자 하는 코드를 적고, catch블록에서는 try블록의 코드가 만약에 실패한다면 실행할 코드를 적습니다. finally블록에서는 try/catch 어느 쪽 블록의 코드가 실행되건 간에 상관없이 마지막으로 실행될 코드를 적습니다. 에러 발생 여부 상관없이 리소스를 해제할 때 사용합니다.
openMyFile();
try {
  writeMyFile(theData); // 성공했으면 하는 코드
} catch (e) {
  handleError(e); // try블록에서 오류가 발생하면 처리함
} finally {
  closeMyFile(); // 항상 리소스 해제
}
async/await키워드, fetch, try.. catch를 이용해서 poke api를 이용해 보겠습니다.
//제대로 동작하는 코드
const getPokemon = async () => {
  try {
    const res = await fetch(`https://pokeapi.co/api/v2/pokemon/22`);
    const data = await res.json();
    console.log(data);
  } catch (e) {
    console.log(`${e} has ocurred`);
  } finally {
    console.log("it's done");
  }
};

getPokemon();
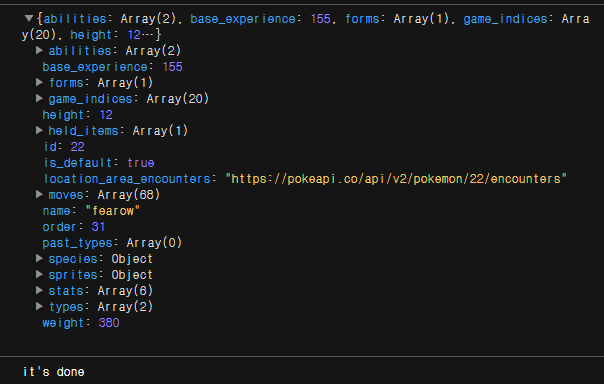
fetch api가 정상적으로 동작해서 데이터를 api로부터 받아오고 finally블록의 코드가 실행된 것을 볼 수 있습니다.
아래의 코드는 id자리에 문자를 넣어서 일부러 에러를 일으킨 코드입니다.
//catch블록으로 넘어가는 코드
const getPokemon = async () => {
  try {
    const res = await fetch(`https://pokeapi.co/api/v2/pokemon/rrrrr`);
    const data = await res.json();
    console.log(data);
  } catch (e) {
    console.log(`${e} has ocurred`);
  } finally {
    console.log("it's done");
  }
};

getPokemon();

일부러 제대로 동작하지 않도록 url을 건드렸습니다 제대로 동작하지 않았으므로 catch블록의 코드가 실행됩니다, 데이터를 api로 받아오지는 못했어도 finally블록의 코드는 실행되는 것을 볼 수 있습니다.

UX광인이 되고싶어요