Firebase Storage setup
1. Firebase 서비스 계정 생성
- 새 프로젝트 생성
- 프로젝트 설정 -> 서비스 계정 -> Firebase Admin SDK -> 자바 선택 -> 새 비공개 키 생성
- 다운로드 한 파일명 변경 ex) serviceAccountKey.json

2. Storage 생성
- 빌드 -> Storage -> 시작하기 -> 테스트 모드에서 시작
3. 스프링 프로젝트 resources 폴더에 seviceAccountKey.json 추가
4. build.gradle에 firebase 추가
implementation group: 'com.google.firebase', name: 'firebase-admin', version: '8.0.1'
5. FirebaseConfig 생성
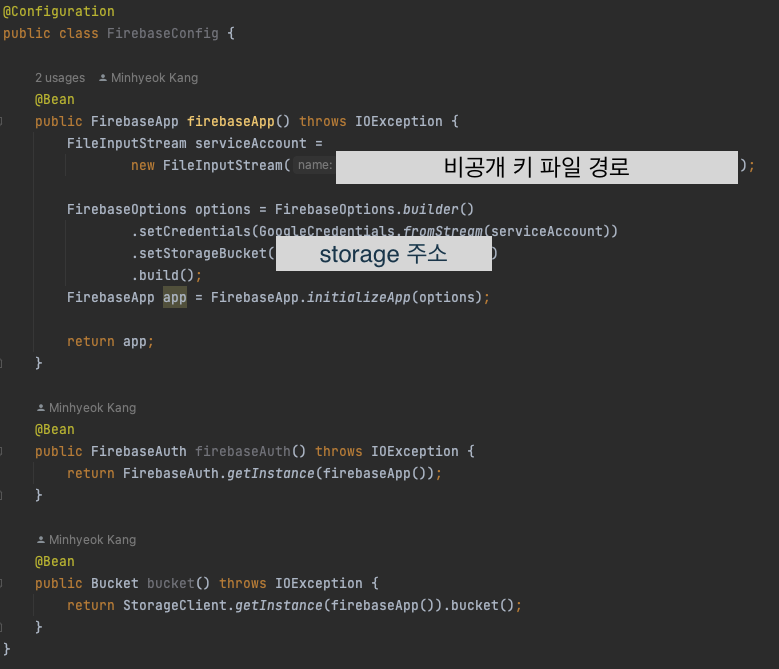
- storage 주소 : gs://(storage 주소) - gs:// 입력하지 않는다.
파일 업로드 구현
1. File을 입력받고 저장
- MultipartFile(http form-data) 사용
@PostMapping("/me/profile")
    public User updateProfile(**@RequestParam MultipartFile image,**
                              Authentication authentication) {
        User user = (User) authentication.getPrincipal();
        log.info("user: {}", user);
        return userService.updateProfile(user, image.getBytes());
    }
- Bucke 사용하여 저장
- Firebase Storage 저장 위치를 정하고 가져온다
public User updateProfile(User user, byte[] image) {
String blob = "/users/"+user.getUid()+"/profile"
try {
if(bucket.get(blob) != null) {
bucket.get(blob).delete();
}
bucket.create(blob, image);
user.updateProfile("/users/"+user.getUid()+"/profile");
userRepository.save(user);
return user;
} catch (IOException e) {
log.error(user.getUid() + " profile upload faild", e);
throw new CustomException(ErrorCode.IMAGE_UPLOAD_FAILED);
}
}
- 저장한 주소로 Image를 가져오는 API 생성해야 된다.
2. 파일 보내주기
@GetMapping("/users/{uid}/profile")
    public byte[] downloadProfile(@PathVariable String uid) {
        return userService.getProfile(uid);
    }
- byte[]를 통해 파일을 보내줄 수 있다.
- Service
public byte[] getProfile(String uid) {
        return bucket.get("/users/"+uid+"/profile").getContent();
    }