
사용자 정의 템플릿 태그를 활용하여 해시태그 기능을 구현해보자!
⭐️ 모델 관계 설정 (M:N)
- Hashtag 모델 작성하고 기존 테이블에 ManyToManyField로 연결
- 새로 작성한 Hashtag 모델은 Article 모델보다 위에 작성을 해야한다.
article_id,hashtag_id를 필드로 갖는articles_article_hashtags라는 중개 모델이 생성됨
# articles/models.py

# Hashtag 모델 작성
class Hashtag(models.Model):
    content = models.TextField(unique=True)
    def __str__(self):
        return self.content

class Article(models.Model):
	# 기존 테이블에 ManyToManyField로 연결
    hashtags = models.ManyToManyField(Hashtag, blank=True)
    user = models.ForeignKey(settings.AUTH_USER_MODEL, on_delete=models.CASCADE)
    title = models.CharField(max_length=10)
    content = models.TextField()
    created_at = models.DateTimeField(auto_now_add=True)
    updated_at = models.DateTimeField(auto_now=True)

    def __str__(self):
        return self.title
unique arguments
True인 경우 이 필드는 테이블 전체에서 고유한 값임을 의미- 유효성 검사 단계에서 실행되며 중복 데이터를 저장하려고 하면
.save()메서드로 인해IntegrityError발생
⭐️ URL 및 view 작성
# articles/urls.py

from django.urls import path
from . import views

app_name = 'articles'
urlpatterns = [
    ...,
    path('<int:hash_pk>/hashtag/', views.hashtag, name='hashtag'),
]
# articles/views.py
from .models import Hashtag
@login_required
def hashtag(request, hash_pk):
hashtag = get_object_or_404(Hashtag, pk=hash_pk)
articles = hashtag.article_set.order_by('-pk')
context = {
'hashtag': hashtag,
'articles': articles,
}
return render(request, 'articles/hashtag.html', context)Create 함수 수정
#으로 시작하는 단어를 찾아 게시글과 Hashtag 모델에 데이터 추가- get_or_create 메서드 활용
get_or_create(): 모델 객체를 생성할 때 이미 있는 객체라면 가져오고 없으면 생성- (hashtag, created) 튜플 형태로 저장
- hashtag 에는 검색 또는 생성된 객체가 저장되며 created에는 새 객체 생성 여부를 지정하는 boolean 값이 저장됨
- 해시태그 내용을 데이터베이스에 저장한 이후 반환 받은 객체를 통해 게시글과 해시태그 사이 관계 생성
- add 메서드 활용
- 관계 설정 이후 detail 페이지로 redirect → #이 포함된 형태의 글 작성
# articles/views.py

@login_required
@require_http_methods(['GET', 'POST'])
def create(request):
    if request.method == 'POST':
        form = ArticleForm(request.POST)
        if form.is_valid():
            article = form.save(commit=False)
            article.user = request.user
            article.save()
			# 최종 저장된 content를 조작하기 위해 article.save()보다 아래에 작성
            for word in article.content.split():  # content를 공백기준 리스트로 변경
                if word.startswith('#'):  # '#' 로 시작하는 요소 선택
                   hashtag, created = Hashtag.objects.get_or_create(content=word)
                   article.hashtags.add(hashtag)
            return redirect('articles:detail', article.pk)
    else:
        form = ArticleForm()
    context = {
        'form': form,
    }
    return render(request, 'articles/create.html', context)
update 함수 수정
- 기존에 있던 hashtag를 삭제한 후 create 함수와 동일한 작업 수행
@login_required
@require_http_methods(['GET', 'POST'])
def update(request, pk):
    article = get_object_or_404(Article, pk=pk)
    if request.user == article.user:
        if request.method == 'POST':
            form = ArticleForm(request.POST, instance=article)
            if form.is_valid():
                form.save()
                article.hashtags.clear()  # 기존에 있던 hashtag 삭제
                for word in article.content.split():
                    if word.startswith('#'):
                        hashtag, created = Hashtag.objects.get_or_create(content=word)
                        article.hashtags.add(hashtag)
                return redirect('articles:detail', article.pk)
        else:
            form = ArticleForm(instance=article)
    else:
        return redirect('articles:index')
    context = {
        'article': article,
        'form': form,
    }
    return render(request, 'articles/update.html', context)
⭐️ template 작성
- 해시태그를 클릭했을 때 해당 해시태그를 가진 게시물들만 모아서 보여주는 페이지 작성하기
<!-- hashtag.html -->

{% extends 'base.html' %}

{% block content %}
  <div>
    <h2>{{ hashtag.content }}</h2>
    <p>{{ articles|length }}개의 게시글</p>
  </div>

  <hr>

  <div>
    <h2>{{ hashtag.content }}(을)를 태그한 글</h2>
    {% for article in articles %}
      <h3>{{ article.pk }}번 게시글</h3>
      <h3>{{ article.title }}</h3>
      <p>{{ article.comment_set.all|length }}개의 댓글</p>
      <a href="{% url 'articles:detail' article.pk %}">상세글로 바로 가기</a>
      <hr>
    {% endfor %}
  </div>
{% endblock %}
⭐️ 사용자 정의 템플릿 태그
- article의 content 중에서 해시태그에 해당되는 부분만 링크로 연결하기 위해 custom filter 필요
https://docs.djangoproject.com/ko/3.2/howto/custom-template-tags/
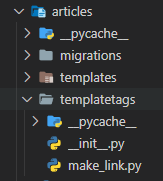
templatetags 패키지 생성하기
- 앱 폴더 내에 templatetag 폴더 만들고
__init__.py,make_link.py (사용자 정의 필터 함수를 작성할 파일)생성
__init__.py- 해당 폴더가 파이썬 패키지라는 것을 명시해주는 것
- 내용은 없어도 상관 없음
사용자 정의 템플릿 필터 작성하기
- template 모듈 import
- 유효한 tag library를 만들기 위한 모듈 레벨의 인스턴스 객체인 register 변수 작성
# articles/templatetags/make_link.py

from django import template

register = template.Library()
함수 정의하기
- 커스텀 필터의 인자로 들어오는 데이터에서 # 문자와 그 뒤에 오는 문자를 구분하여 반환하는 로직이 담긴 함수 포함하도록 작성
# articles/templatetags/make_link.py

from django import template

register = template.Library()

@register.filter
def hashtag_link(word):
    content = word.content + ' '
    hashtags = word.hashtags.all()
    for hashtag in hashtags:
        content = content.replace(hashtag.content + ' ', f'<a href="/articles/{hashtag.pk}/hashtag/">{hashtag.content}</a> ')
return content # 원하는 문자열로 치환이 완료된 content 리턴- templatetags 폴더를 추가하고 난 후에는 서버를 재시작해야 정상적으로 적용됨 (그래도 안되면 가상환경도 껐다 켜보기!)
작성한 템플릿 태그 적용하기
detail.html에 load 태그를 통해 작성한 템플릿 태그 불러옴{% load make_link %}
|를 사용해 필터를 적용하고 safe 필터를 통해 출력 전 추가 HTML Escape가 필요하지 않은 형태의 문자열로 표시- 해당 링크를 통해
hashtag.html로 이동하게 된다.
<!-- detail.html -->

{% extends 'base.html' %}

<!-- 작성한 템플릿 태그 불러오기 -->
{% load make_link %}

{% block content %}
  <h2>DETAIL</h2>
  <h3>{{ article.pk }} 번째 글</h3>
  <hr>
  <p>제목 : {{ article.title }}</p>

  <!-- 링크 연결 -->
  <p>내용 : {{ article|hashtag_link|safe }}</p>

  <p>작성시각 : {{ article.created_at }}</p>
  <p>수정시각 : {{ article.updated_at }}</p>
  <hr>
  ...,
{% endblock content %}
코드로 꿈을 펼치는 개발자의 이야기, 노력과 열정이 가득한 곳 🌈