
Swagger
- Swagger는 API 설계와 문서화를 위한 오픈 소스 도구로, RESTful API를 작성하는 데 사용된다.
- API 문서를 통해 개발자들이 API를 보다 쉽게 이해하고 사용할 수 있도록 문서를 작성하고, 테스트하고, 실행할 수 있다.
NestJS 프로젝트에 Swagger 적용하기
swagger 설치
npm install --save @nestjs/swaggerSwaggerModule 초기화
- 문서의 기본을 구성하는 제목, 설명, 버전 등과 같은 속성을 설정하고 API 문서를 초기화한다.
- 아래와 같은 값으로 설정하면
http://localhost:3000/api에서 Swagger UI를 확인할 수 있다. - 인증 방식을 config 에 추가해주어야 한다.
- 쿠키 인증인 경우 :
.addCookieAuth() - bearer token 인증인경우 :
.addBearerAuth()
- 쿠키 인증인 경우 :
- 인증 정보를 유지하기 위해서는
persistAuthorization: true옵션을 추가해주어야 한다.- swagger에서 한 번 인증을 거치면 인증 정보를 저장하여 다른 API를 호출할 때 인증 정보 입력하지 않아도 됨
main.ts
import { NestFactory } from '@nestjs/core';
import { AppModule } from './app.module';
import { DocumentBuilder, SwaggerModule } from '@nestjs/swagger';

async function bootstrap() {
  const app = await NestFactory.create(AppModule);
  const config = new DocumentBuilder()
    .setTitle('API 문서 제목')
    .setDescription('API 문서 설명')
    .setVersion('1.0')
    .addCookieAuth()  // 쿠키 인증 방식 추가
    .addServer(process.env.HOST)
    .build();

  // config를 바탕으로 swagger document 생성
  const document = SwaggerModule.createDocument(app, config);

  // Swagger UI 경로 설정
  SwaggerModule.setup('api', app, document, {
    swaggerOptions: { persistAuthorization: true }, // 인증 정보를 유지
  });

  await app.listen(3000);
}
bootstrap();
Swagger 사용하기 - 주요 annotation
DTO
Swagger annotation
@ApiProperty- 모델 속성을 설명하는 데 사용
- 속성에 대한 설명, 예제 값, 유형 등을 정의할 수 있음.
import { ApiProperty } from '@nestjs/swagger';@ApiProperty({ description: '아이디', example: 'username' })
username: string;@ApiPropertyOptional- 선택적(optional)인 모델 속성을 설명하는 데 사용됨.
@ApiProperty와 동일한 기능을 가지지만, 선택적인 속성임을 명시
import { ApiPropertyOptional } from '@nestjs/swagger';@ApiPropertyOptional({ description: '연락처', example: '010-1234-5678' })
contact?: string;Class Transformer와 Class Validator 어노테이션을 함께 사용하면 효율적인 API 문서화를 구현할 수 있다.
Class Validator는 DTO의 유효성 검사를 정의하는 데 사용되고, Class Transformer는 데이터 직렬화와 역직렬화를 제어하는 데 사용된다.
Class Transformer annotation
- 객체 직렬화와 역직렬화 과정을 제어하고, 객체 데이터를 변환하여 클라이언트와 서버 간의 데이터 전송을 효율적으로 관리하기 위해 사용
@Exclude- 이 어노테이션이 사용된 클래스는 직렬화 과정에서 기본적으로 모든 속성을 제외한다.
- 이후
@Expose어노테이션을 사용하여 특정 속성만 포함시킬 수 있다.
import { Exclude } from 'class-transformer';
@Exclude()
export class UserDTO {
// 클래스 내용
}@Expose@Exclude된 클래스에서 특정 속성을 직렬화 과정에 포함시킨다.- 이 어노테이션은 직렬화 또는 역직렬화 과정에서 속성을 포함시키는 데 사용된다.
import { Expose } from 'class-transformer';@Expose()
@ApiProperty({ description: '아이디', example: 'username' })
username: string;사용 예시
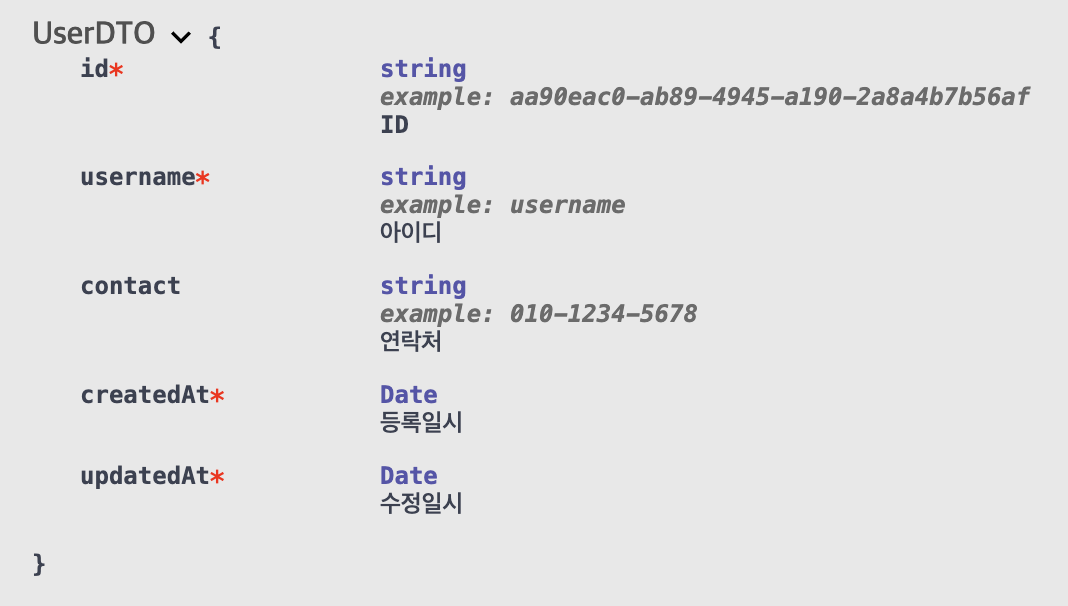
import { ApiProperty, ApiPropertyOptional } from '@nestjs/swagger';
import { Exclude, Expose } from 'class-transformer';
import { randomUUID } from 'crypto';
@Exclude()
export class UserDTO {
@Expose()
@ApiProperty({ description: 'ID', example: randomUUID() })
id: string;
@Expose()
@ApiProperty({ description: '아이디', example: 'username' })
username: string;
@Expose()
@ApiPropertyOptional({ description: '연락처', example: '010-1234-5678' })
contact: string;
@Expose()
@ApiProperty({ description: '등록일시', type: 'Date' })
createdAt: Date;
@Expose()
@ApiProperty({ description: '수정일시', type: 'Date' })
updatedAt: Date;
}- 위와 같이 작성하는 경우 swagger에 아래와 같이 표시된다.
Class Validator annotation
- 데이터 유효성 검사를 통해 데이터의 무결성과 일관성을 보장하기 위해 사용
@IsNotEmpty- 값이 비어 있지 않은지 검사
import { IsNotEmpty } from 'class-validator';@IsNotEmpty({ message: '아이디를 입력해 주세요.' })
username: string;@IsOptional- 값이 선택적임을 명시하며, 값이 없을 경우 유효성 검사를 건너뜀
import { IsOptional } from 'class-validator';@IsOptional()
contact?: string;- 타입 검사 :
@IsString,@IsNumber,@IsEmail
@IsString() // 값이 문자열인지 검사
username: string;
@IsNumber() // 값이 숫자인지 검사
age: number;
@IsEmail({}, { message: '유효한 이메일 주소를 입력해 주세요.' }) // 값이 이메일 형식인지 검사
email: string;- 문자열 길이 검사 :
@MinLength,@MaxLength
@MinLength(8, { message: '비밀번호는 최소 8자 이상이어야 합니다.' })
password: string;
@MaxLength(20, { message: '사용자 이름은 최대 20자까지 가능합니다.' })
username: string;@Validate- 커스텀 유효성 검사를 사용할 때 사용
@Validate(PasswordMatch, { message: '비밀번호가 일치하지 않습니다.' })
passwordConfirm: string;사용 예시
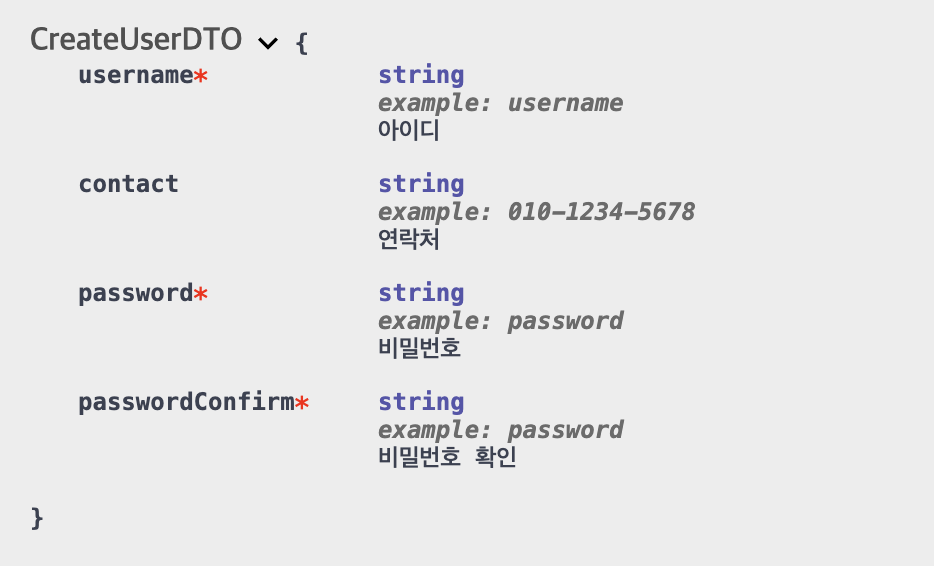
import { ApiProperty, ApiPropertyOptional } from '@nestjs/swagger';
import { IsNotEmpty, IsOptional, MinLength, Validate } from 'class-validator';
import { PasswordMatch } from '../validators/password-match.validator';
export class CreateUserDTO {
@IsNotEmpty({ message: '아이디를 입력해 주세요.' })
@ApiProperty({ description: '아이디', example: 'username' })
username: string;
@IsOptional()
@ApiPropertyOptional({ description: '연락처', example: '010-1234-5678' })
contact?: string;
@IsNotEmpty({ message: '비밀번호를 입력해 주세요.' })
@MinLength(8, { message: '비밀번호는 최소 8자 이상이어야 합니다.' })
@ApiProperty({ description: '비밀번호', example: 'password' })
password: string;
@IsNotEmpty({ message: '비밀번호를 다시 한 번 입력해 주세요.' })
@Validate(PasswordMatch, { message: '비밀번호가 일치하지 않습니다.' })
@ApiProperty({ description: '비밀번호 확인', example: 'password' })
passwordConfirm: string;
}
- 위와 같이 작성하는 경우 swagger에 아래와 같이 표시된다.
Endpoint (Controller)
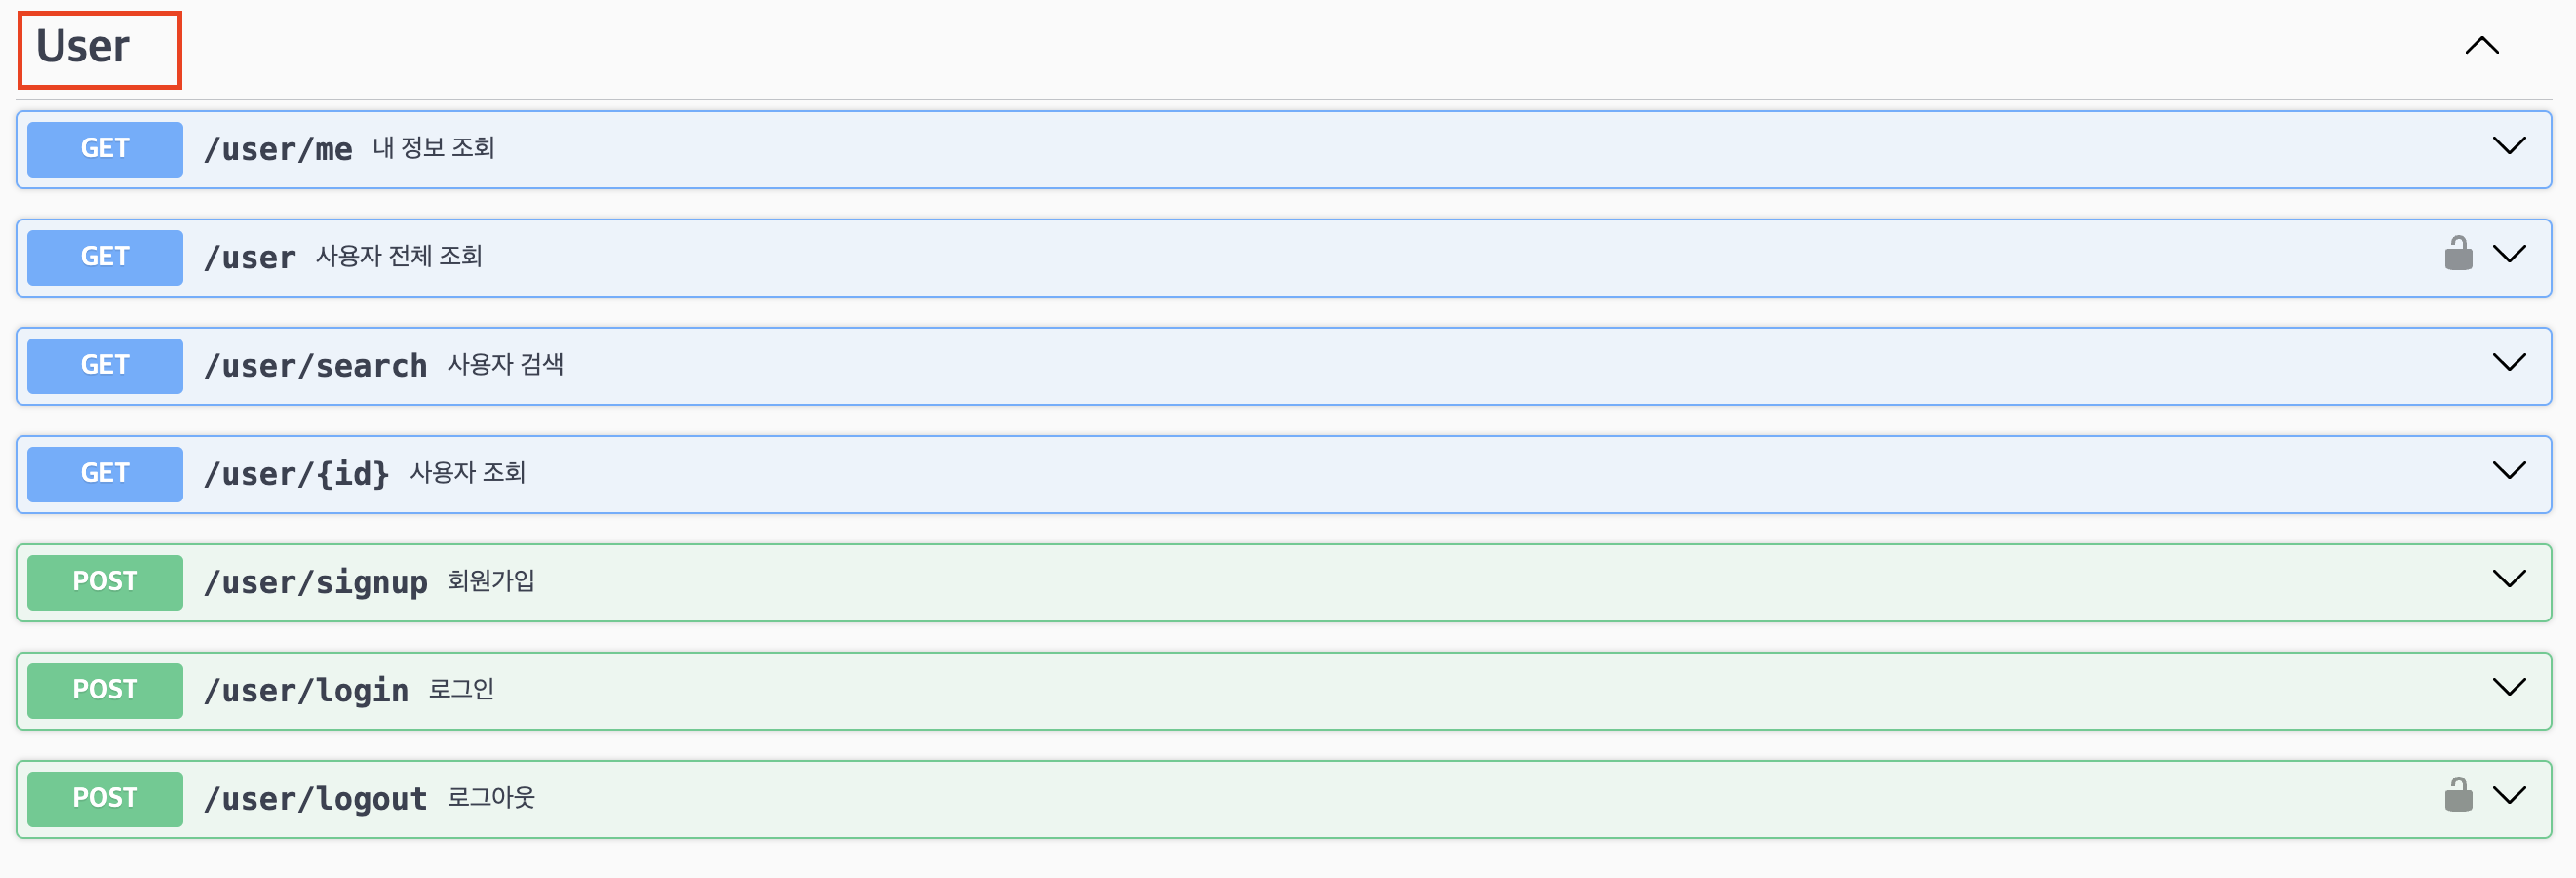
@ApiTags- 컨트롤러를 태그로 그룹화하여 Swagger UI에서 논리적으로 분류하는 데 사용
@ApiTags('users')
@Controller('users')
export class UsersController {
  // logic
}
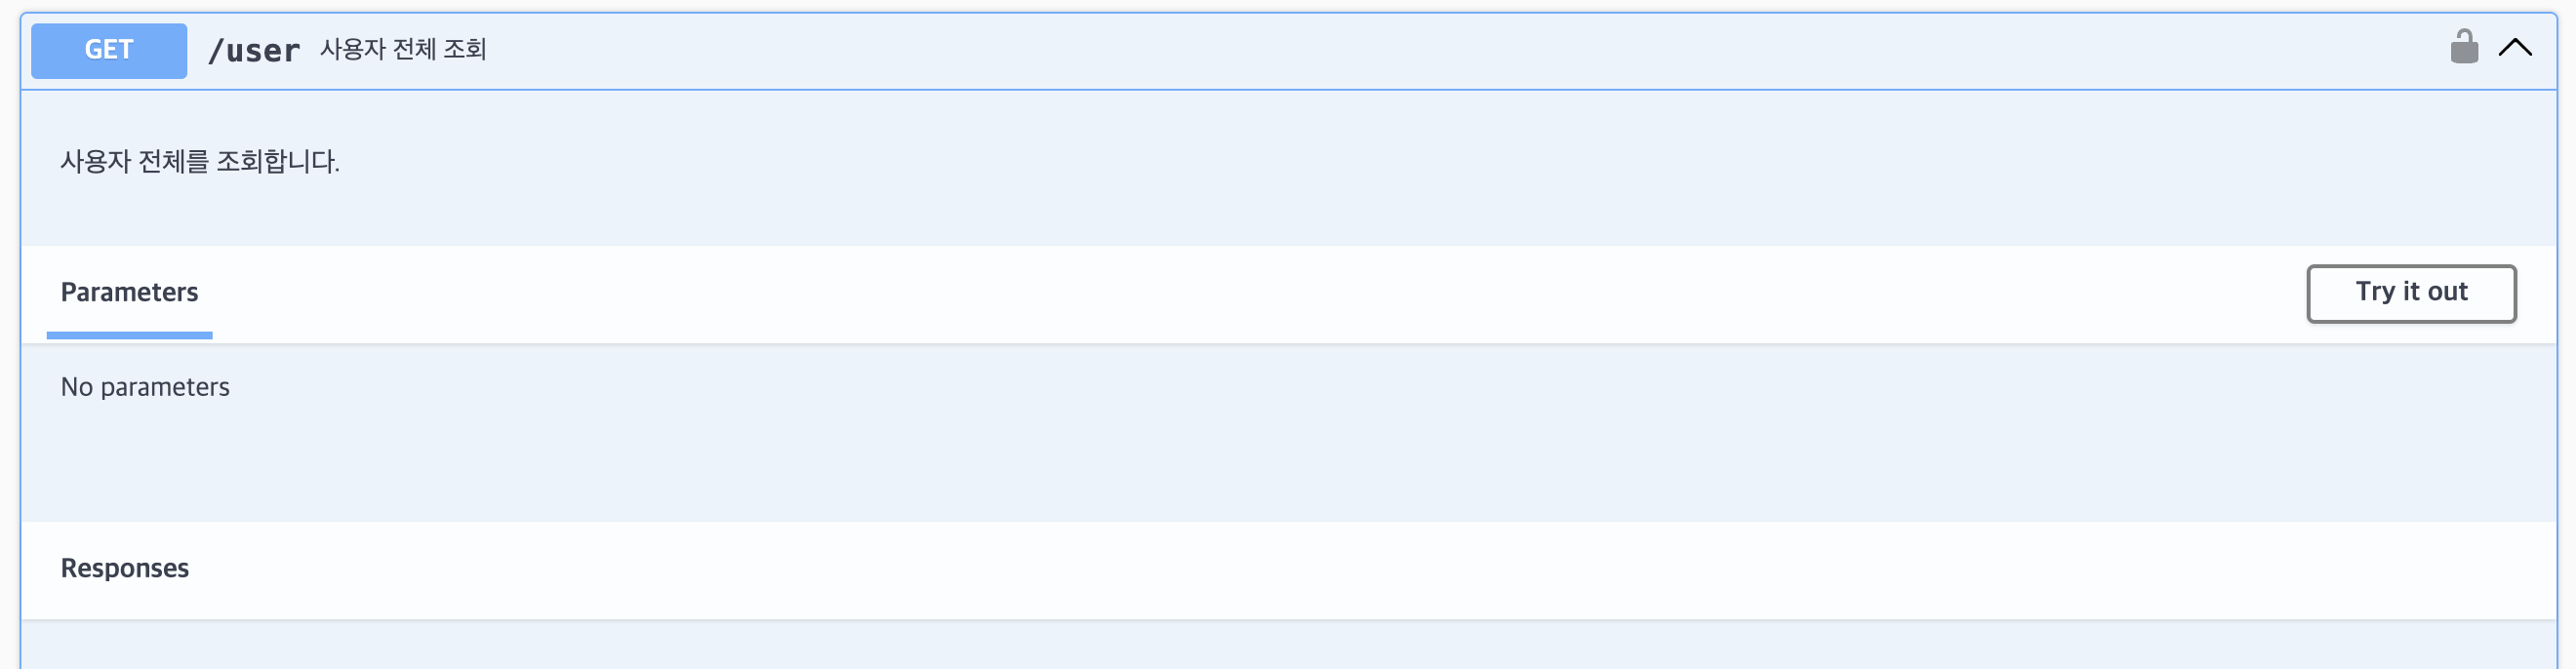
@ApiOperation- 특정 엔드포인트의 동작(operation)을 설명하는 데 사용
@Get()
@ApiOperation({
  summary: '사용자 전체 조회',
  description: '사용자 전체를 조회합니다.',
})
async findAll() {
  // logic
}
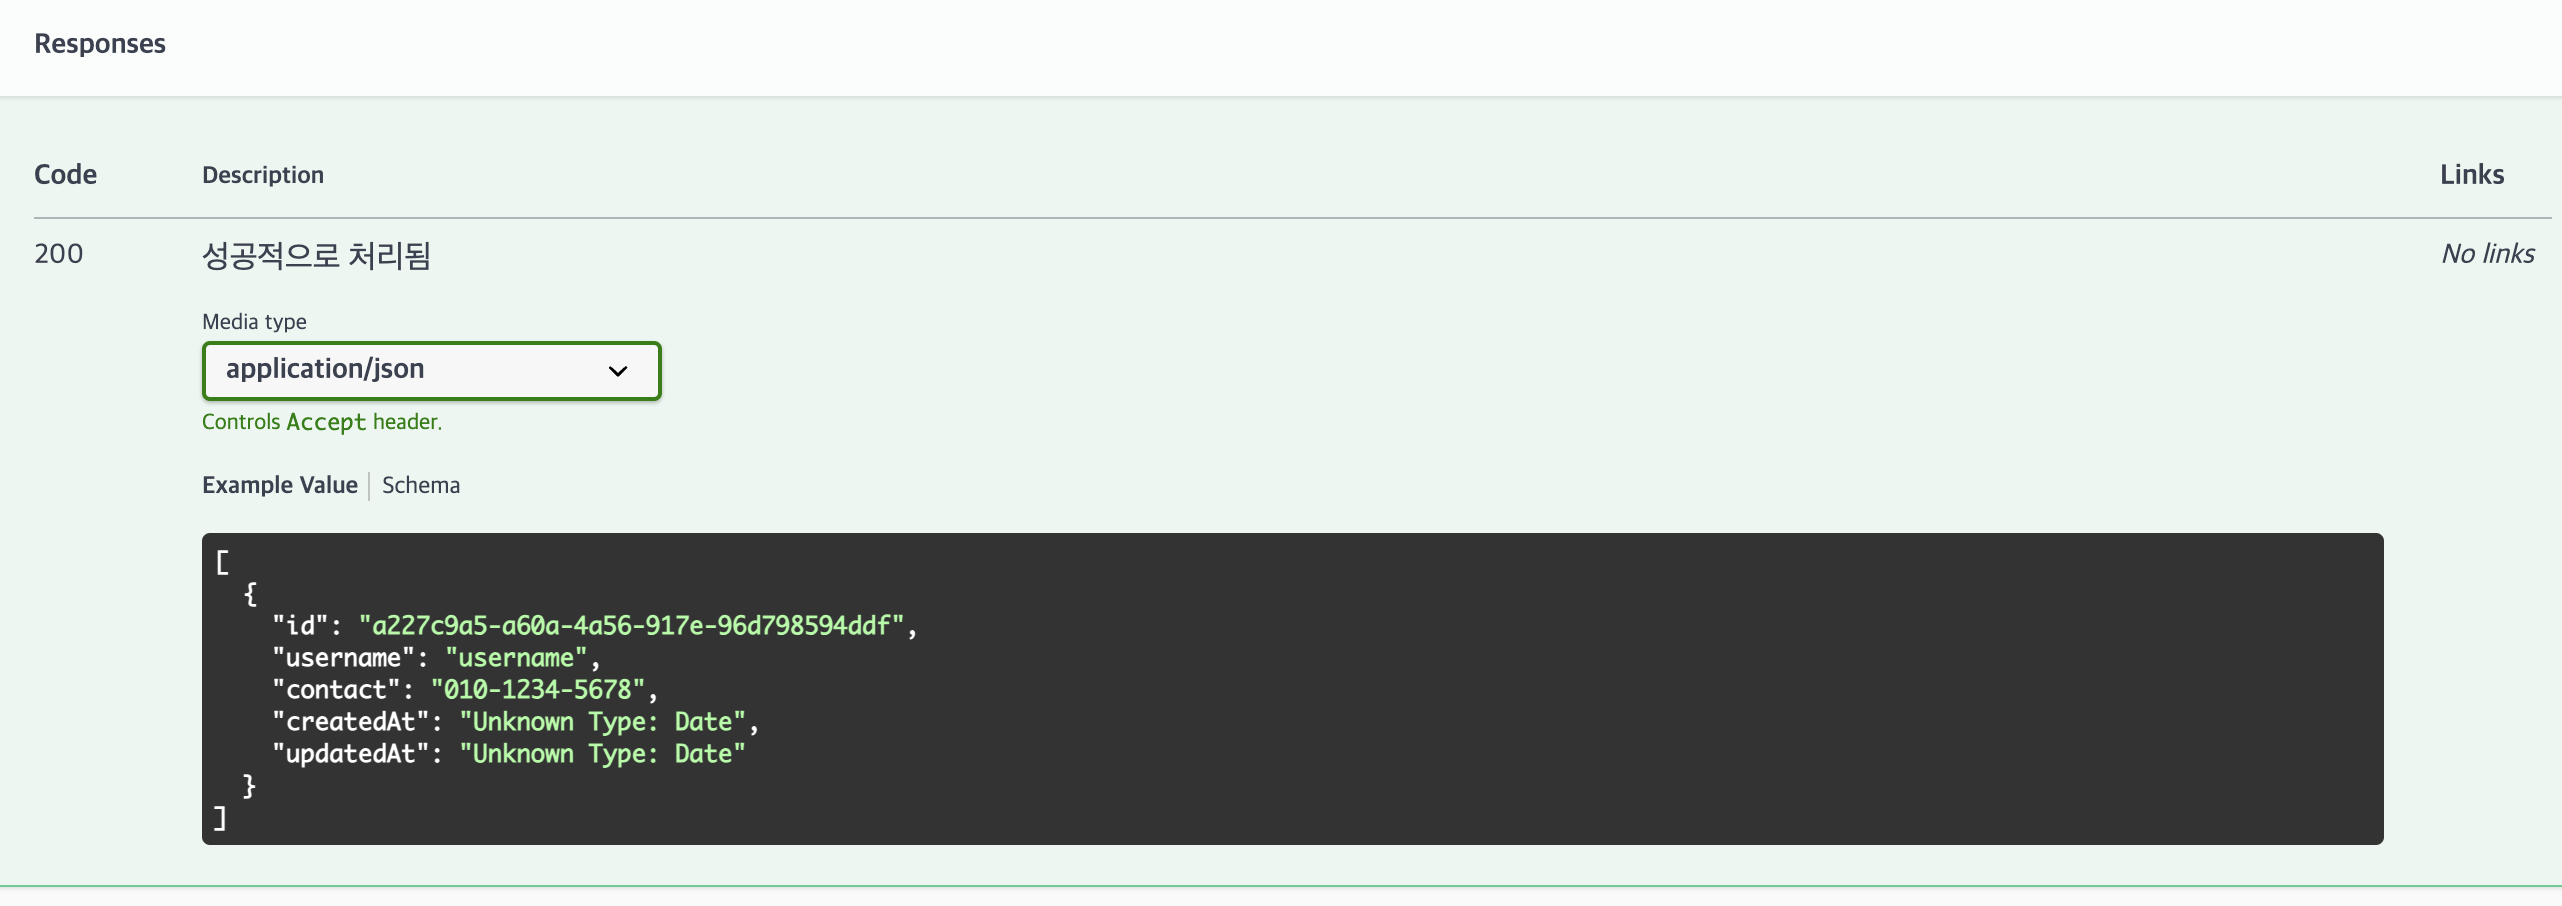
@ApiResponse()- 특정 엔드포인트의 응답을 상세하게 설명하기 위해 사용
- 응답 상태 코드와 그에 따른 응답 구조를 정의할 수 있음
- 주요 속성
- status: HTTP 상태 코드
- description: 응답에 대한 설명
- type: 응답 데이터 타입
- scheme: 응답 스키마,
type대신 사용하며, 더 복잡한 구조를 정의할 때 유용 - example: 응답 예제
@Post('signup')
@ApiOperation({
  summary: '회원가입',
  description: '회원가입합니다.',
})
@ApiResponse({
  status: 200,
  description: '성공적으로 처리됨',
  schema: {
    type: 'array',
    items: { $ref: getSchemaPath(UserDTO) },
  },
})
async create(@Body() body: CreateUserDTO) {
 // logic
}
@ApiResponse는 모든 상태 코드에 대한 응답을 설명하는데 사용되며, 모든 HTTP 상태 코드에 사용할 수 있다.@ApiCreatedResponse,@ApiOkResponse과 같이 특정 상태코드을 나타내는데 특화되어 있는 어노테이션을 사용하면, 코드의 가독성을 높일 수 있다.- 상태별 다양한 Response annotation은 여기에서 확인할 수 있다.
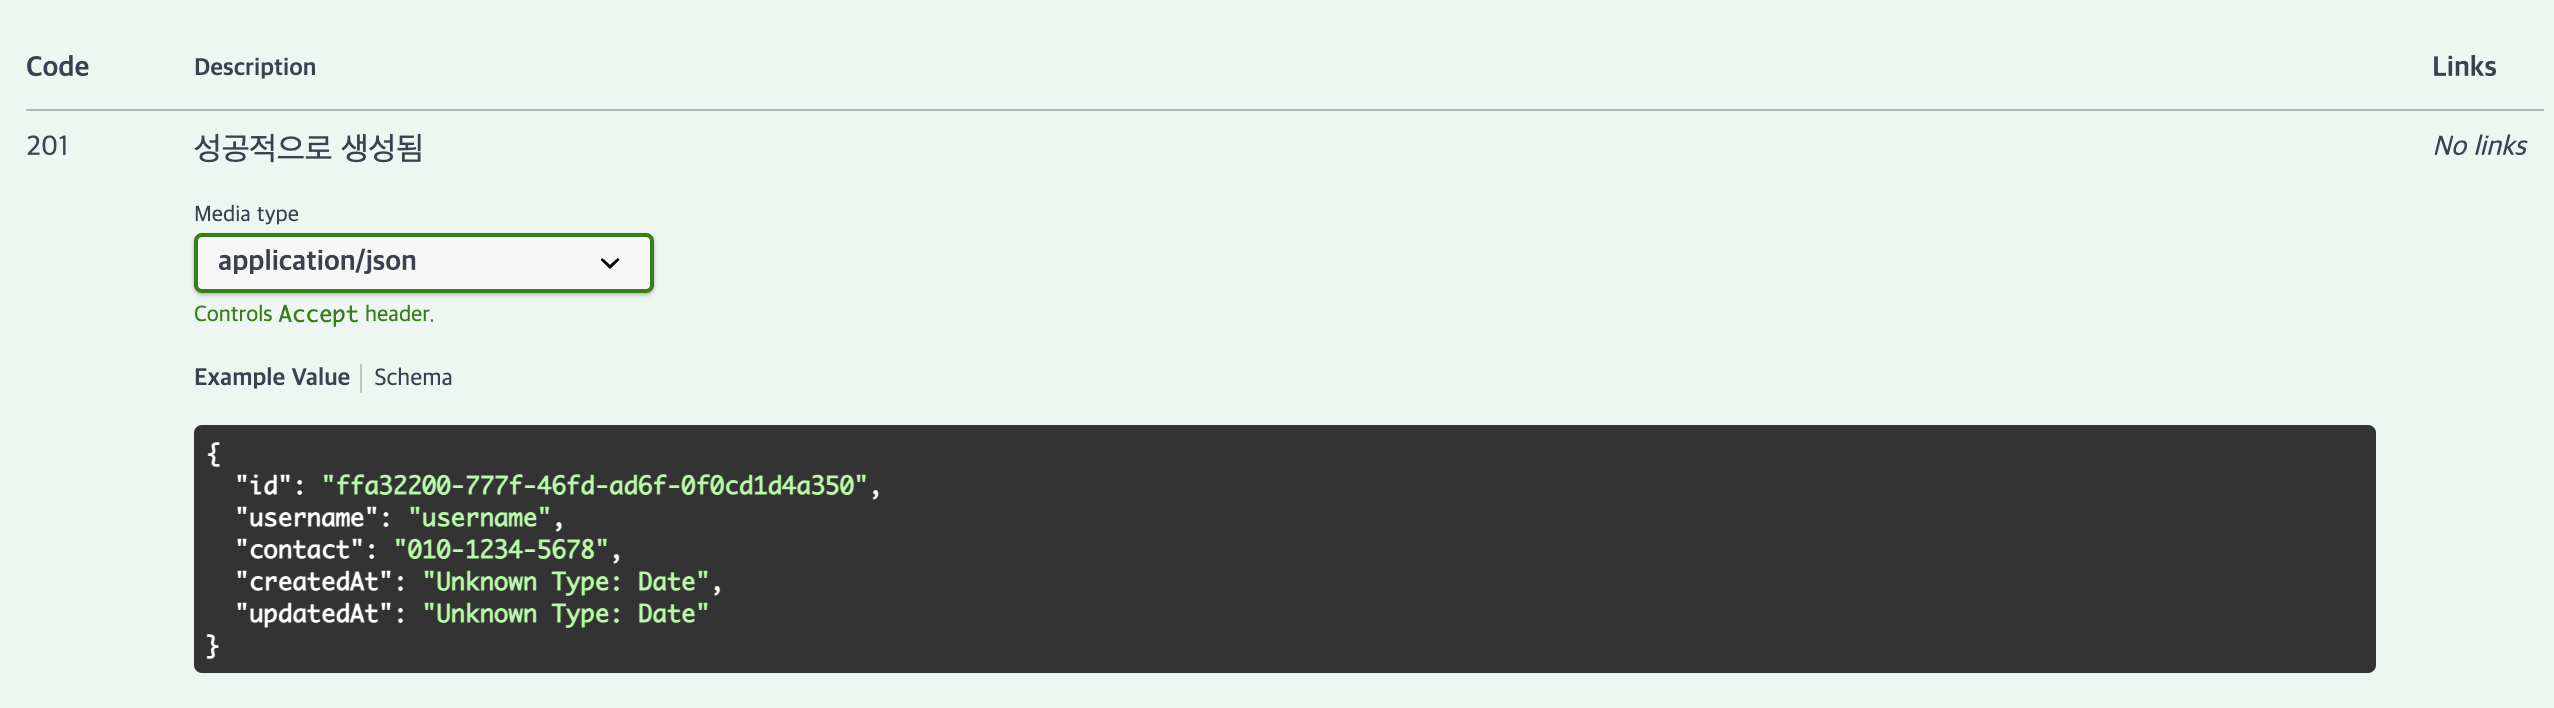
@ApiCreatedResponse- 엔드포인트가 성공적으로 리소스를 생성했을 때의 응답을 설명
- 주로 HTTP 201 상태 코드를 나타냄
  @Post('signup')
  @ApiOperation({
    summary: '회원가입',
    description: '회원가입합니다.',
  })
  @ApiCreatedResponse({
    description: '성공적으로 생성됨',
    type: UserDTO,
  })
  async create(@Body() body: CreateUserDTO) {
    // logic
  }
@ApiOkResponse- 엔드포인트가 성공적으로 요청을 처리했을 때의 응답을 설명
- 주로 HTTP 200 상태 코드를 나타냄
@ApiOkResponse({
  description: '성공적으로 처리됨',
  type: UserDTO,
})
@Get(':id')
getUser(@Param('id') id: string) {
  // logic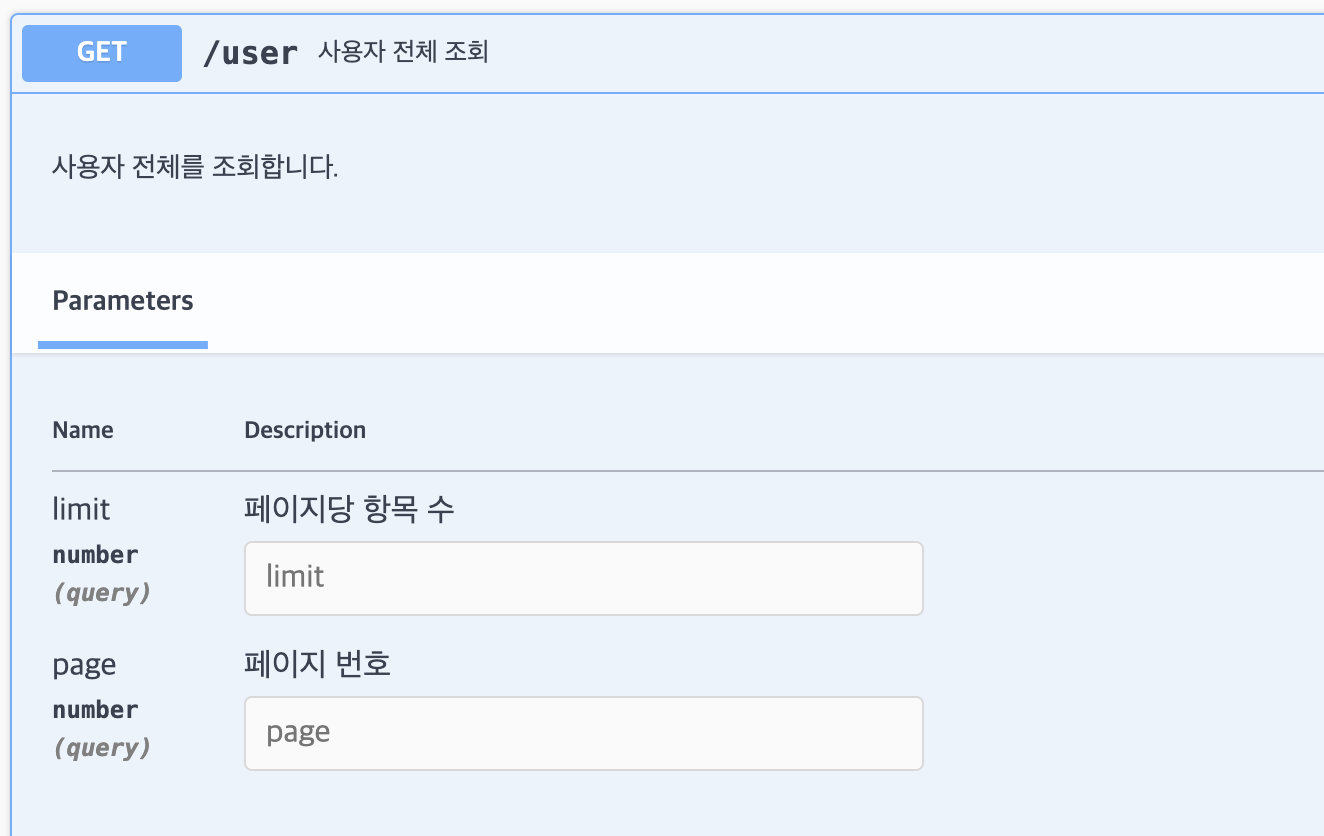
}@ApiQuery: 쿼리 파라미터를 설명하는 데 사용- name: 쿼리 파라미터의 이름.
- required: 필수 여부를 나타냄.
- description: 쿼리 파라미터에 대한 설명.
- type: 쿼리 파라미터의 데이터 타입.
@ApiQuery({ name: 'page', required: false, description: '페이지 번호', type: Number })
@ApiQuery({ name: 'limit', required: false, description: '페이지당 항목 수', type: Number })
@Get()
getUsers(@Query('page') page: number, @Query('limit') limit: number) {
  // logic
}
@ApiParam- 엔드포인트의 경로 파라미터를 설명하는 데 사용
- 경로 파라미터는 URL의 일부로 전달되는 값을 의미
- 예를 들어,
/users/:id에서id가 경로 파라미터
- 예를 들어,
- 주요 속성
- name: 경로 파라미터의 이름.
- required: 필수 여부를 나타냅니다. 기본값은
true - description: 파라미터에 대한 설명.
- type: 파라미터의 데이터 타입 (기본적으로
String).
@ApiOperation({ summary: '사용자 정보 가져오기', description: '특정 사용자의 정보를 가져옵니다.' })
@ApiParam({ name: 'id', required: true, description: '사용자 ID', type: String })
@Get(':id')
getUser(@Param('id') id: string) {
  // logic to get user
}
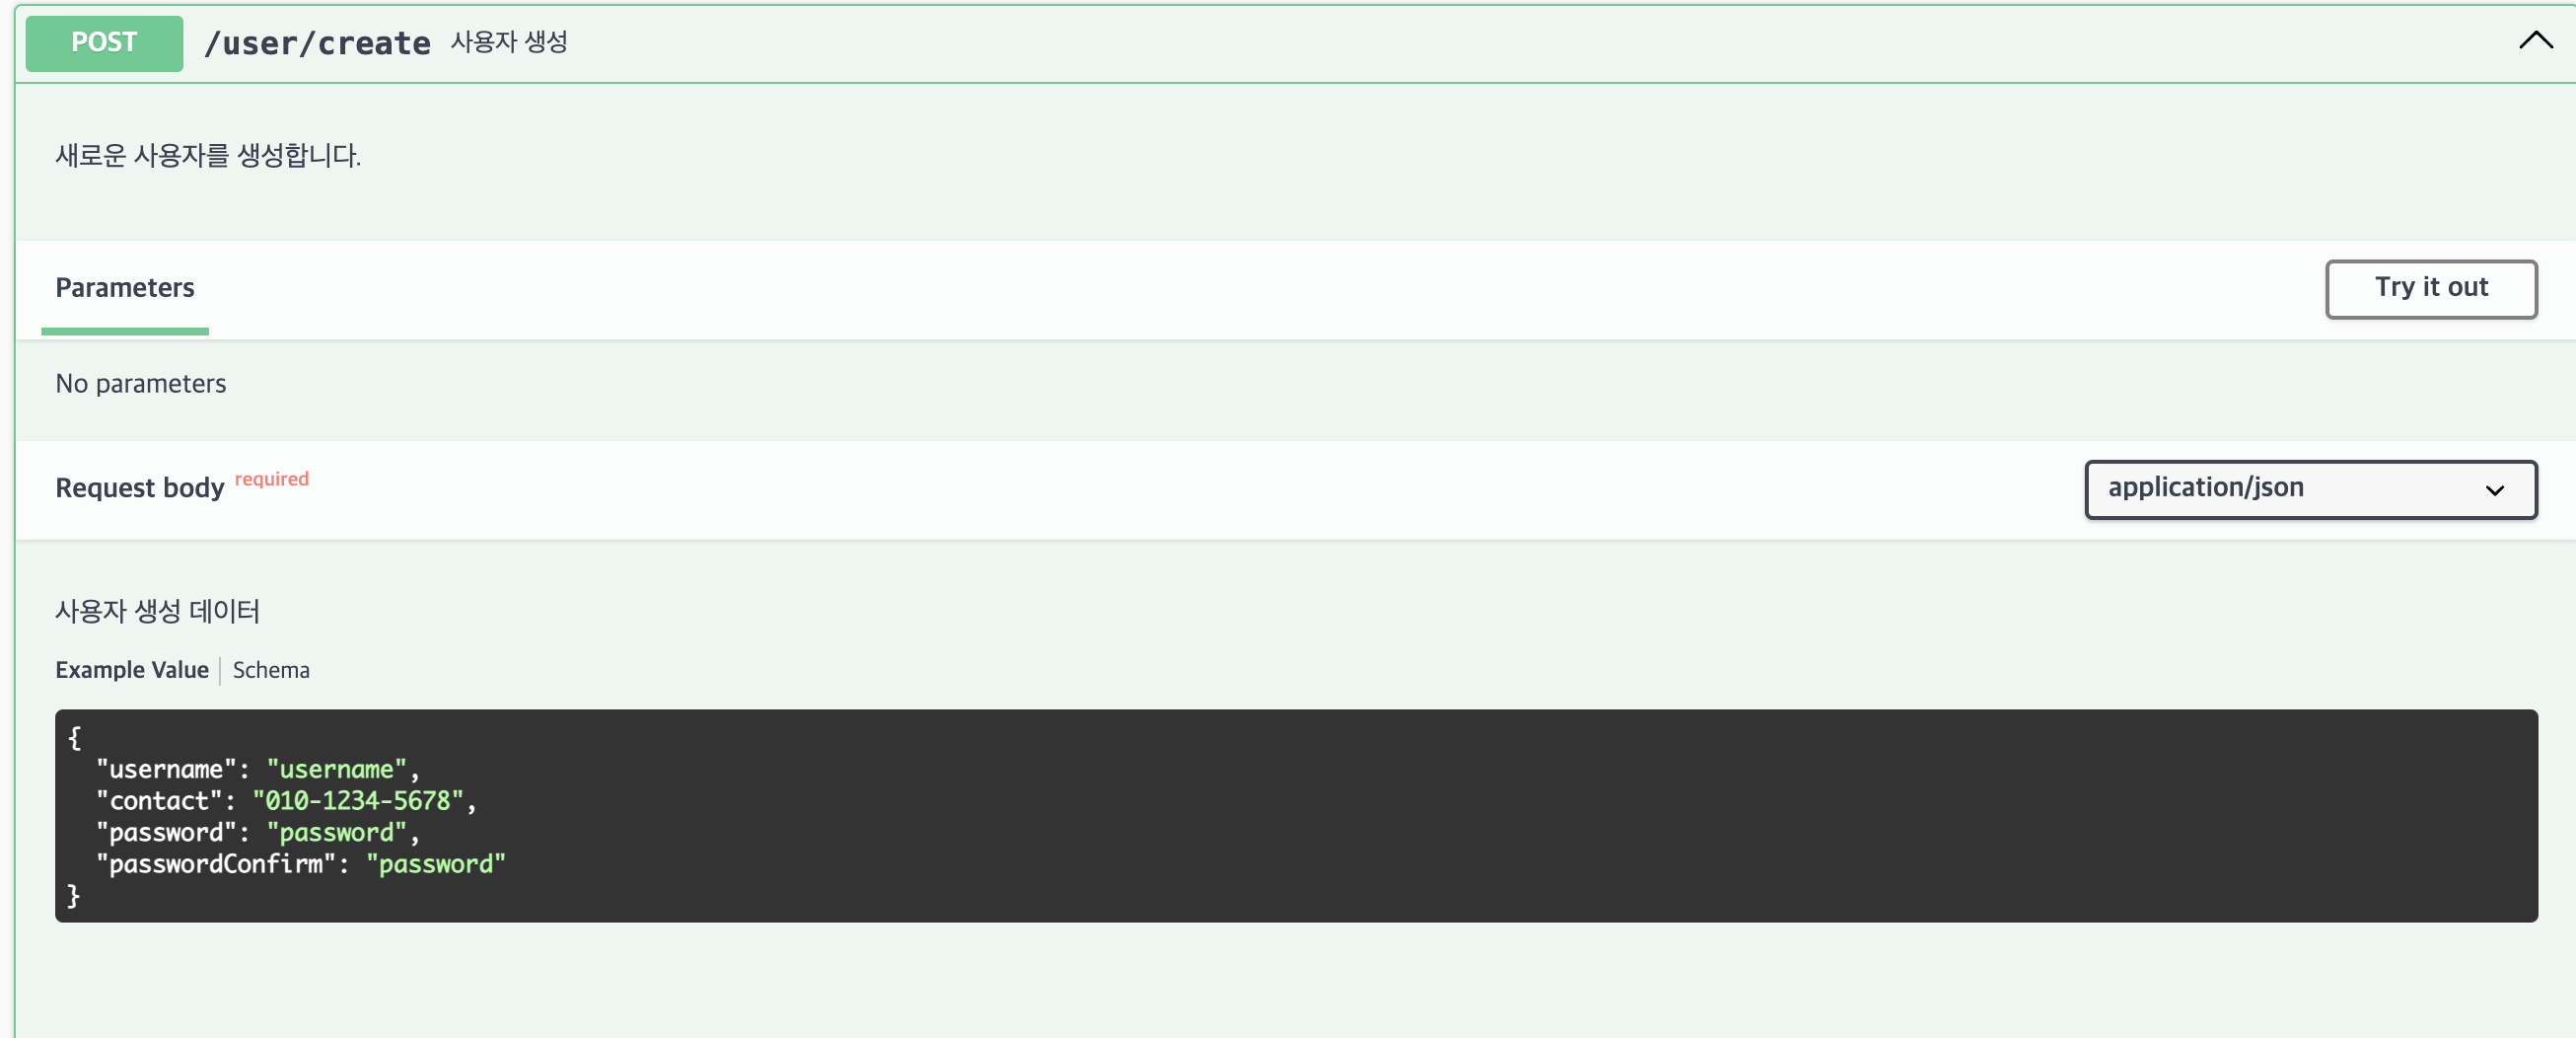
@ApiBody- 엔드포인트의 요청 본문을 설명하는 데 사용
- 일반적으로 POST, PUT, PATCH 요청에서 사용
- 주요 속성
- description: 요청 본문에 대한 설명.
- type: 요청 본문의 데이터 타입. 보통 DTO 클래스를 지정
- required: 요청 본문의 필수 여부를 나타냅니다. 기본값은
true - examples: 요청 본문에 대한 예제를 제공
  @ApiOperation({ summary: '사용자 생성', description: '새로운 사용자를 생성합니다.' })
  @ApiBody({ description: '사용자 생성 데이터', type: CreateUserDTO })
  @Post('create')
  create(@Body() createUserDto: CreateUserDTO) {
    // logic to create user
  }
References
NestJs 프로젝트에서 Swagger 사용하기
[Nest.js] swagger 적용하기
Documentation | NestJS - A progressive Node.js framework
jhyeok.com

코드로 꿈을 펼치는 개발자의 이야기, 노력과 열정이 가득한 곳 🌈