📌 Today I Learned (TIL) - 콜라 문제 해결, SceneDelegate, SnapKit
오늘은 알고리즘 문제를 해결하면서 발생한 오류를 수정하고,
앱 개발 입문 강의를 들으며, 개발에서 중요한 개념인 SceneDelegate와
코드베이스 기반 실습을 진행하며, 서드파티 라이브러리인 SnapKit을 공부했다.
🏆 1일 1 알고리즘 풀기!
🥤 콜라 문제
- 프로그래머스 알고리즘 콜라 문제 링크 이동
🔹 문제 설명
오래전 유행했던 콜라 문제가 있다.
콜라 빈 병 a개를 가져가면 b개의 새 콜라를 받을 수 있을 때, n개의 빈 병을 처음 가지고 있다면 총 몇 개의 콜라를 받을 수 있는지 계산하는 문제이다.
🔹 첫 시도
import Foundation

func solution(_ a:Int, _ b:Int, _ n:Int) -> Int {
    var emptyBottle: Int = n // 가지고 있는 빈병
    var newCoke: Int = 0 // 새로 받는 콜라
    var rest: Int = 0// 나머지
    var totalNewCoke: Int = 0 // 새로받은 모든 콜라의 개수

    while true {
        rest = emptyBottle % a // 새로 받은 콜라를 a로 나눈 나머지
        newCoke = emptyBottle / a // 새로 받은 콜라 a로 나눈 몫

        if newCoke == 0 { // 새로 받은 콜라가 없으면 종료
            break
        }

        if rest != 0 { // 교환 받지 못한 빈병이 있을때
            //totalNewCoke = totalNewCoke + newCoke + rest
            totalNewCoke = totalNewCoke + newCoke
            emptyBottle = newCoke + rest // 빈병에 더하기
        } else {
            totalNewCoke = totalNewCoke + newCoke
            emptyBottle = newCoke
        }
    }
    return totalNewCoke
}- 아무렇게 머리속에서 그려지는 그대로 코드로 옮겨 적다 보니 정말 드럽다.🫨
🔹 두번째
func solution(_ a:Int, _ b:Int, _ n:Int) -> Int {
    var emptyBottle: Int = n // 가지고 있는 빈병
    var newCoke: Int = 0 // 새로 받는 콜라
    var rest: Int = 0// 나머지
    var totalNewCoke: Int = 0 // 새로받은 모든 콜라의 개수

    while true {
        rest = emptyBottle % a // 새로 받은 콜라를 a로 나눈 나머지
        newCoke = emptyBottle / a // 새로 받은 콜라 a로 나눈 몫

        if rest != 0 { // 교환 받지 못한 빈병이 있을때
            //totalNewCoke = totalNewCoke + newCoke + rest
            totalNewCoke = totalNewCoke + newCoke
            emptyBottle = newCoke + rest // 빈병에 더하기
        } else {
            totalNewCoke = totalNewCoke + newCoke
            emptyBottle = newCoke
        }

        if emptyBottle < a {
            break
        }
    }
    return totalNewCoke
}- 첫번째 코드에서 조건을 변경했다.
newCoke == 0👉newCoke == 0
🔹 세번째
func solution(_ a:Int, _ b:Int, _ n:Int) -> Int {
    var emptyBottle: Int = n // 가지고 있는 빈병
    var newCoke: Int = 0 // 새로 받는 콜라
    var rest: Int = 0// 나머지
    var totalNewCoke: Int = 0 // 새로받은 모든 콜라의 개수

    while emptyBottle >= a {
        rest = emptyBottle % a // 새로 받은 콜라를 a로 나눈 나머지
        newCoke = emptyBottle / a // 새로 받은 콜라 a로 나눈 몫
        totalNewCoke = totalNewCoke + newCoke
        emptyBottle = newCoke + rest // 빈병에 더하기
    }
    return totalNewCoke
}- 두번째 코드를 자세히 보니 멍청 포인트가 한둘이 아니였다 😮💨
- 변경점
- 기존에는 if문을 써서 새로 받는 콜라가 없으면 break 문으로 종료했지만, while 문 조건에 넣었다.
while emptyBottle >= a - 교환받지 못하고 남은 병만 있을때만 빈병 갯수를 더했는데, 생각해보니 무조건 더하는게 맞다.
if문제거
- 기존에는 if문을 써서 새로 받는 콜라가 없으면 break 문으로 종료했지만, while 문 조건에 넣었다.
- 고치고 난 후 확 줄어든 코드를 보고 뿌듯했다. 데헷 😝
- 근데..예제에서는 분명 성공하는데 제출하면 틀렸습니다! 라고 나온다..
❌ 틀린 코드 분석
작성한 코드에서 다음과 같은 실수를 발견했다.
- 새 콜라는 받는 수식에서 오류 발견!
newCoke = emptyBottle / a은 단순히 새 콜라를 받기 위해 줘야되는 빈병의 수로만 나눔!!!!!!!- 새 콜라를 받기 위해 줘야되는 빈병의 수
a로 나누고 새로 받는 콜라의 갯수b를 곱하지 않았다. (newCoke = emptyBottle / a) * b가 되어야 됨
func solution(_ a:Int, _ b:Int, _ n:Int) -> Int {
    var emptyBottle: Int = n // 가지고 있는 빈병
    var newCoke: Int = 0 // 새로 받는 콜라
    var rest: Int = 0// 나머지
    var totalNewCoke: Int = 0 // 새로받은 모든 콜라의 개수

    while emptyBottle >= a {
        rest = emptyBottle % a * b// 새로 받은 콜라를 a로 나눈 나머지
        newCoke = emptyBottle / a // 새로 받은 콜라 a로 나눈 몫
        totalNewCoke = totalNewCoke + newCoke
        emptyBottle = newCoke + rest // 빈병에 더하기
    }
    return totalNewCoke
}
✅ 해결 방법
a로 나눈 몫(emptyBottle / a)을b와 곱하여 새로운 콜라 개수를 구함.- 나머지(
emptyBottle % a)를 계산하여 빈 병 개수를 갱신. while루프를 통해 빈 병이 부족할 때까지 반복.
최종적으로 이 방법으로 올바른 결과를 얻을 수 있었다.
혼자서 생각 못하고 지피티한테 물어봐서 왜 틀리는지 알아냄...멍청멍청😳😭😩🫣
🔹 최종 코드
import Foundation

func solution(_ a:Int, _ b:Int, _ n:Int) -> Int {
    var emptyBottle: Int = n // 가지고 있는 빈병
    var newCoke: Int = 0 // 새로 받는 콜라
    var rest: Int = 0// 나머지
    var totalNewCoke: Int = 0 // 새로받은 모든 콜라의 개수

    while emptyBottle >= a {
        rest = emptyBottle % a // 새로 받은 콜라를 a로 나눈 나머지
        newCoke = (emptyBottle / a) * b // 새로 받은 콜라 a로 나눈 몫

        totalNewCoke = totalNewCoke + newCoke
        emptyBottle = newCoke + rest // 빈병에 더하기
    }
    return totalNewCoke
}- 혹시나 하는 마음에 GPT 에게 개선 해보라고 했다...
🔹 지피티가 만든 최종
func solution(_ a:Int, _ b:Int, _ n:Int) -> Int {
    var emptyBottle = n // 현재 가지고 있는 빈 병 개수
    var totalNewCoke = 0 // 총 받은 콜라 개수

    while emptyBottle >= a { // 빈 병 개수가 교환 기준(a)보다 많을 때만 반복
        let newCoke = (emptyBottle / a) * b // 교환으로 받은 콜라 개수
        totalNewCoke += newCoke // 받은 콜라 개수 더하기
        emptyBottle = (emptyBottle % a) + newCoke // 남은 빈 병 + 새로 받은 콜라의 빈 병
    }

    return totalNewCoke
}- 이렇게 더 줄어 들수가 있구나... 갓피티..
🧐 앱 개발 입문 강의
📱 SceneDelegate에서 window의 역할
앱 개발을 하면서 SceneDelegate에서 var window: UIWindow?가 무엇인지 이해하는 것이 중요했다.
🔹 window란? (아직 잘 모르겠다...)
- 앱이 화면에 표시하는 기본 창
ViewController를 루트 뷰로 설정하는 역할- 다중 윈도우 지원을 가능하게 함 (iPadOS 등에서 유용)
🔹 scene(_:willConnectTo:options:) 코드 분석
앱 실행 시 첫 화면을 설정하는 중요한 함수이다.
func scene(_ scene: UIScene,
           willConnectTo session: UISceneSession,
           options connectionOptions: UIScene.ConnectionOptions) {

    // `scene`을 UIWindowScene으로 변환 (iPadOS 및 다중 윈도우 지원을 위해 필요)
    guard let windowScene = (scene as? UIWindowScene) else { return }

    // 새로운 UIWindow 생성 (앱의 UI를 표시할 창)
    let window = UIWindow(windowScene: windowScene)

    // 앱의 첫 번째 화면을 담당할 루트 뷰 컨트롤러 설정
    window.rootViewController = ViewController()

    // 화면에 창을 표시
    window.makeKeyAndVisible()

    // 생성한 window를 SceneDelegate의 window 변수에 저장
    self.window = window
}
📌 코드 설명
scene을UIWindowScene으로 변환하여 다중 윈도우를 지원하도록 처리.UIWindow를 생성하여 앱의 UI를 표시할 창을 준비.rootViewController를 설정하여 앱의 첫 화면을 표시.makeKeyAndVisible()을 호출하여 창을 활성화.
📌 주요 동작 흐름
-
scene을 UIWindowScene으로 변환
- scene이 UIWindowScene인지 확인한 후 변환.
- iPadOS의 멀티 윈도우 기능을 지원하려면 필수.
-
새로운 UIWindow 생성
- 변환된 windowScene을 기반으로 UIWindow 생성.
- 즉, 앱이 표시할 "창"을 만드는 과정.
-
루트 뷰 컨트롤러 설정
- window.rootViewController = ViewController()
- 앱이 실행되면 이 ViewController가 첫 화면으로 나타남.
-
창을 활성화하고 표시
- window.makeKeyAndVisible()
- 화면에서 창을 보이도록 설정.
-
self.window에 저장
- SceneDelegate의 window 프로퍼티에 저장하여 앱에서 계속 관리 가능하도록 함.
📲 SnapKit을 활용한 오토레이아웃
오토레이아웃을 코드로 설정하는 것은 번거롭지만, SnapKit을 사용하면 훨씬 간결하게 작성할 수 있다.
🔹 SnapKit이란?
- 오토레이아웃을 간편하게 설정하는 Swift 라이브러리
NSLayoutConstraint보다 훨씬 직관적- 체인 방식(Chaining)으로 코드 가독성 향상
SnapKit 사용 예제
❌ 기존 오토레이아웃 코드 (SnapKit 없이)
let label = UILabel()
label.translatesAutoresizingMaskIntoConstraints = false
view.addSubview(label)

NSLayoutConstraint.activate([
    label.centerXAnchor.constraint(equalTo: view.centerXAnchor),
    label.centerYAnchor.constraint(equalTo: view.centerYAnchor),
    label.widthAnchor.constraint(equalToConstant: 200),
    label.heightAnchor.constraint(equalToConstant: 50)
])
✅ SnapKit 적용 코드
import SnapKit

let label = UILabel()
view.addSubview(label)

label.snp.makeConstraints { make in
    make.center.equalToSuperview()
    make.width.equalTo(200)
    make.height.equalTo(50)
}- 훨씬 짧고 가독성이 좋아졌다!
SnapKit 활용한 실습
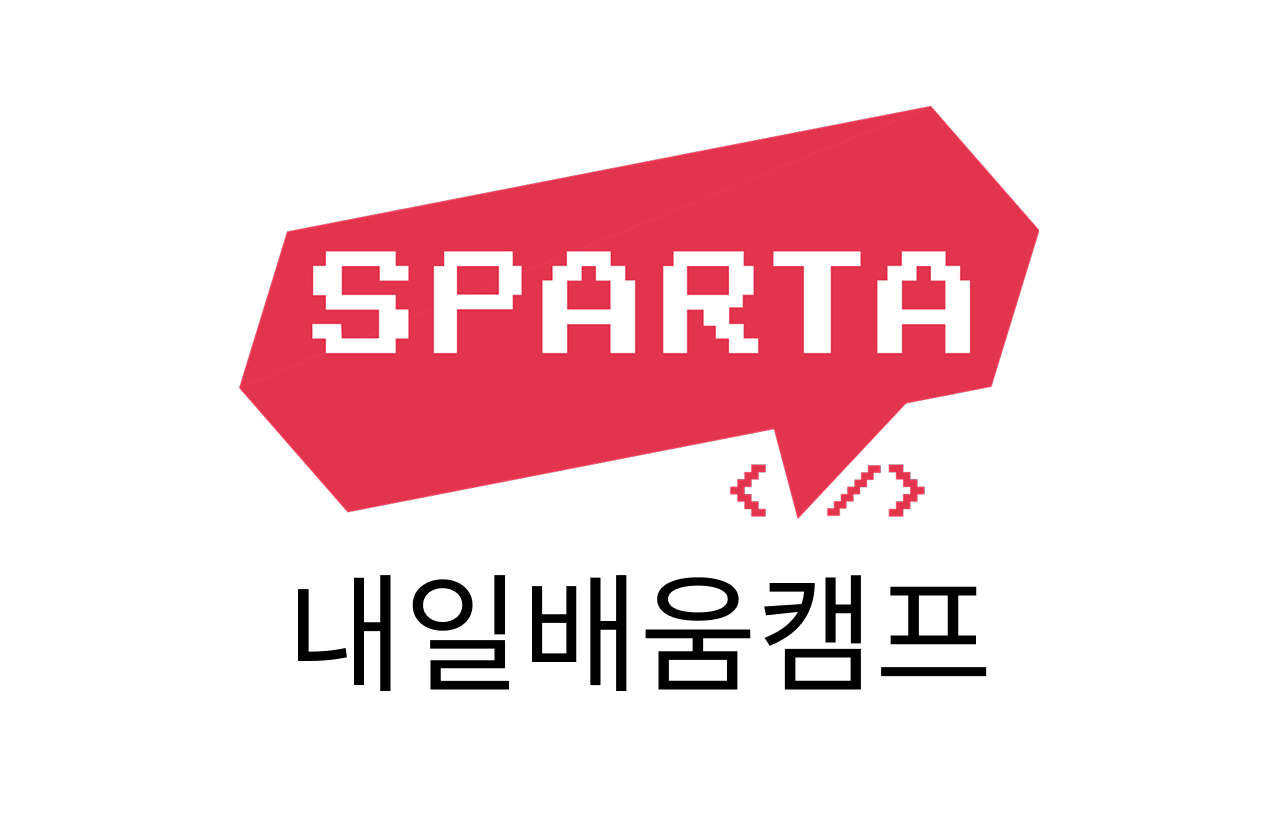
UILabel
- 코드
import UIKit

class ViewController: UIViewController {

    let label = UILabel()

    override func viewDidLoad() {
        super.viewDidLoad()
        configureUI()
    }

    private func configureUI() {
        view.backgroundColor = .white

         label.text = "안녕하세요"
         label.textColor = .black

         view.addSubview(label)

        // Snapkit을 사용하면 label.translatesAutoresizingMaskIntoConstraints = false 사용 안해도 됨

		label.snp.makeConstraints {
        	$0.width.equalTo(80)
        	$0.height.equalTo(40)
            $0.center.equalToSuperview()
        }
    }

}- 결과
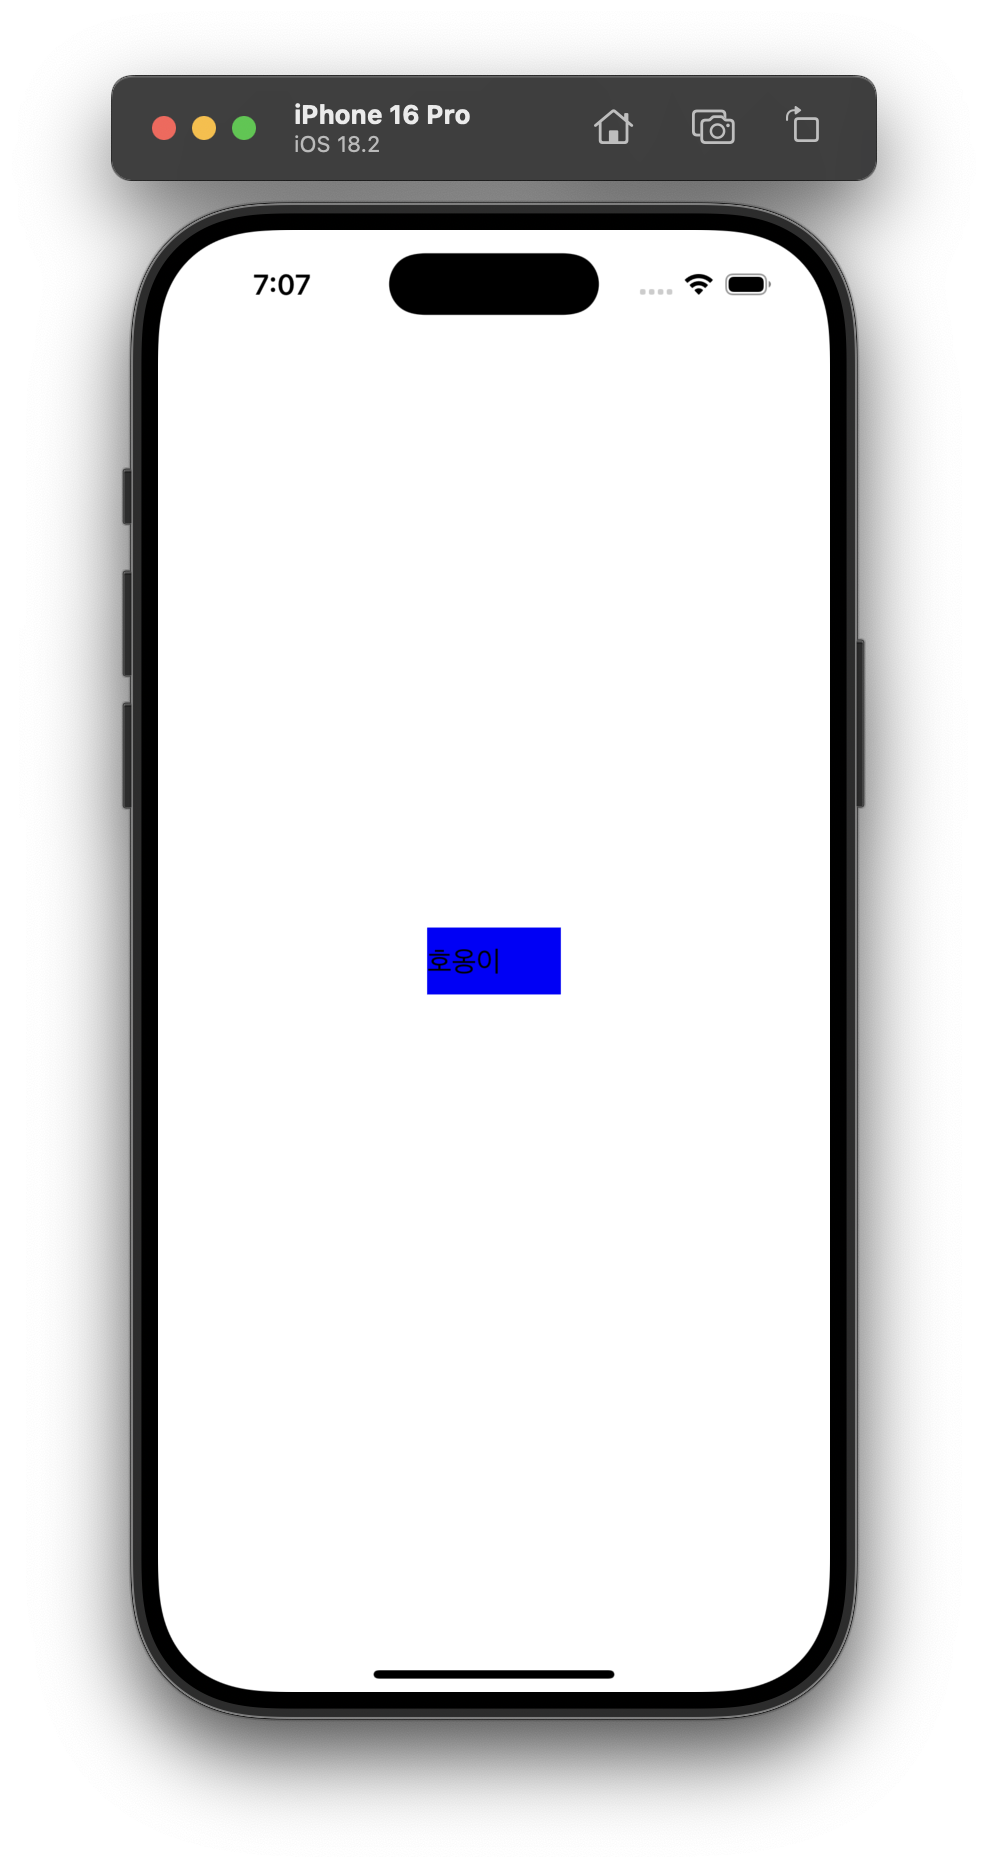
UIButton
- 코드
import UIKit

class ViewController: UIViewController {

    let label = UILabel()

    override func viewDidLoad() {
        super.viewDidLoad()
        configureUI()
    }

    private func configureUI() {
		view.backgroundColor = .white

        button.setTitle("Click", for: .normal)
        button.setTitleColor(.white, for: .normal)
        button.backgroundColor = .red
        button.layer.cornerRadius = 10

        view.addSubview(button)

        button.snp.makeConstraints {
            $0.width.equalTo(120)
            $0.height.equalTo(60)
            $0.center.equalToSuperview()
        }
    }
}- 결과
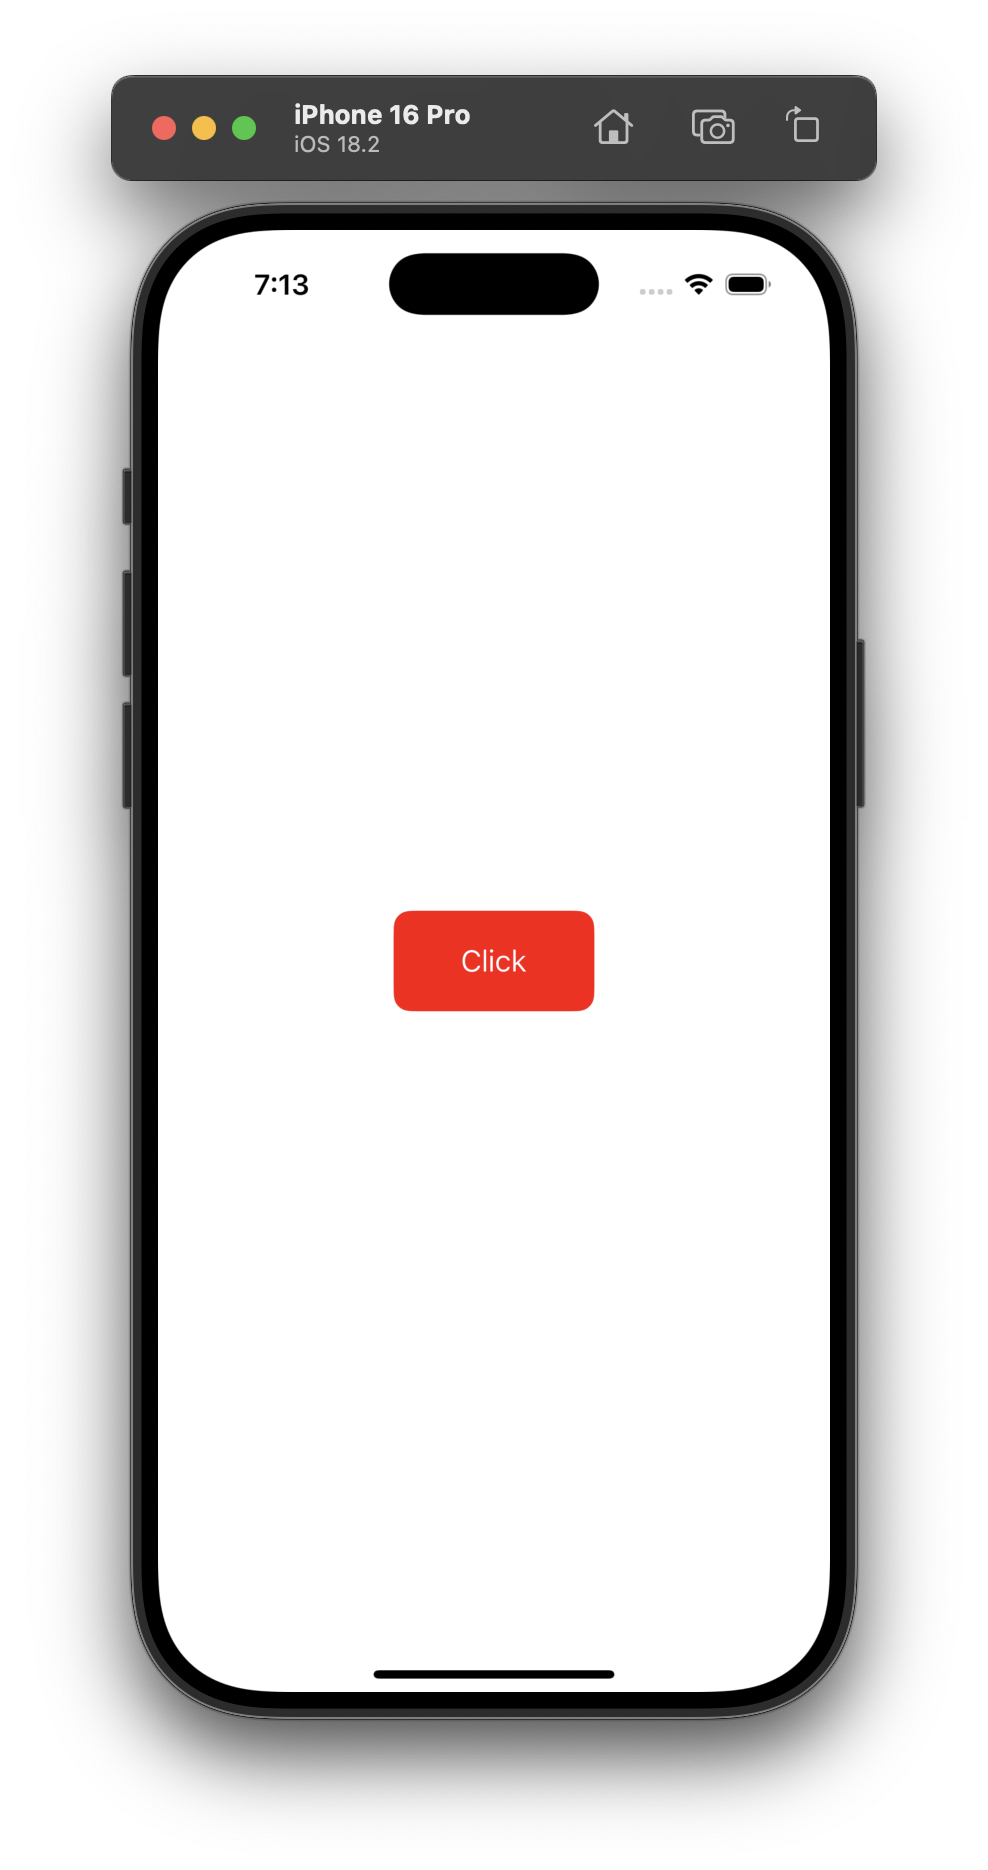
UIImageView
- 코드
import UIKit

class ViewController: UIViewController {

    let label = UILabel()

    override func viewDidLoad() {
        super.viewDidLoad()
        configureUI()
    }

    private func configureUI() {
        view.backgroundColor = .white

        imageView.image = UIImage(named: "cat")
        imageView.backgroundColor = .black
        imageView.contentMode = .scaleAspectFit

        view.addSubview(imageView)

        imageView.snp.makeConstraints {
            $0.width.height.equalTo(300)
            $0.center.equalToSuperview()
        }
    }
}- 결과
📌 SnapKit 주요 메서드
| 메서드 | 설명 |
|---|---|
make.edges.equalToSuperview() | 부모 뷰와 동일한 크기 설정 |
make.center.equalToSuperview() | 부모 뷰의 중앙 정렬 |
make.top.equalTo(view.safeAreaLayoutGuide.snp.top) | Safe Area의 상단에 맞춤 |
make.width.equalTo(100) | 너비를 100으로 설정 |
make.height.equalToSuperview().multipliedBy(0.5) | 부모 뷰의 50% 크기로 설정 |
✍️ 배운점 & 느낀점
- 콜라 문제에서 몫과 나머지를 활용하여 빈 병을 올바르게 계산하는 방법을 배웠다.
SceneDelegate에서window가 하는 역할과 앱의 첫 화면을 설정하는 방법을 익혔다.- SnapKit을 활용하여 오토레이아웃을 더욱 간편하게 적용할 수 있음을 깨달았다.

iOS 개발 블로그