
📱 앱 개발 숙련 강의
🌤️ 날씨 앱 개발 (2/2)
Alamofire라이브러리를 이용하여,URLSession보다 더 간단하게 서버의 데이터를 가져오도록 리팩토링Alamofire를 사용하여 기존 코드보다 더 간결하게 데이터를 요청하는 방법을 배움
URLSession으로 작성된 코드를 Alamofire 라이브러리를 사용하도록 리팩토링
🔹 fetchData 메소드 리팩토링
- API 서버 데이터를 가져오는 메소드
Alamofire 미사용
- 코드의 길이가 상당히 김.
- successRange 변수를 사용해서 응답 성공 여부를 확인함.
- JSON 데이터를 디코딩 하는 코드가 상당히 복잡하고 김
// 서버 데이터를 불러오는 메서드
    private func fetchData<T: Decodable>(url: URL, completion: @escaping (T?) -> Void) {
        let session = URLSession(configuration: .default)
        session.dataTask(with: URLRequest(url: url)) { data, response, error in
            guard let data, error == nil else {
                print("데이터 로드 실패")
                completion(nil)
                return
            }
            let successRange = 200..<300

            if let response = response as? HTTPURLResponse, successRange.contains(response.statusCode) {
                guard let decodedData = try? JSONDecoder().decode(T.self, from: data) else {
                    print(response.statusCode, "JSON 디코딩 실패")
                    completion(nil)
                    return
                }
                completion(decodedData)
            } else {
                print("응답 오류")
                completion(nil)
            }
        }.resume()
    }
Alamofire 사용
Alamofire를 사용해서 서버 데이터를 불러오는 메소드.Alamofire내부에서 응답이 성공했는지 실패했는지 확인함URLResponse타입을HTTPURLResponse타입 캐스팅 후JSONDecoder()를 사용해서 디코딩 하는 과정이responseDecodable안에 들어있음
    private func fetchDayaByAlamofire<T: Decodable>(url: URL, completion: @escaping (Result<T, AFError>) -> Void) {
        AF.request(url).responseDecodable(of: T.self) { response in
            completion(response.result)
        }
    }
🔹 현재 날씨 데이터 가져오는 메서드 리팩토링
Alamofire 미사용
// 서버에서 현재 날씨 데이터를 불러오는 메서드
private func fetchCurrentWeatherData() {
    var urlComponents = URLComponents(string: "https://api.openweathermap.org/data/2.5/weather")
    urlComponents?.queryItems = self.urlQueryItems

    guard let url = urlComponents?.url else {
        print("잘못된 URL")
        return
    }

    // Alamofire 없이 설정 데이터 가져오기
    fetchData(url: url) { [weak self] (result: CurrentWeatherResult?) in
        guard let self, let result else { return }

        // 서버에서 데이터를 가져오는 로직은 OS에서 백그라운드 스레드로 작업함
        // UI를 그리는 작업은 메인 스레드에서 작업해야 됨.
        // 아래의 코드는 이제 UI 그리는 코드니까 백그라운드 스레드에 작업하지 말고 메인 스레드로 작업 하라고 지정하는 코드임
        DispatchQueue.main.async {
            self.tempLabel.text = "\(Int(result.main.temp))℃"
            self.tempMinLabel.text = "최저: \(Int(result.main.tempMin))℃"
            self.tempMaxLabel.text = "최고: \(Int(result.main.tempMax))℃"
        }

        guard let imageUrl = URL(string: "https://openweathermap.org/img/wn/\(result.weather[0].icon)@2x.png") else {
            return
        }

        // image 를 로드하는 작업은 백그라운드 쓰레드 작업
        if let data = try? Data(contentsOf: imageUrl) {
            if let image = UIImage(data: data) {
                DispatchQueue.main.async {
                    self.imageView.image = image
                }
            }
        }
    }
}
Alamofire 사용
Alamofire에서Result타입에Success와Failure를 지원하여 아래와 같이 스위치 문으로 분기가 가능함
// 서버에서 현재 날씨 데이터를 불러오는 메서드
private func fetchCurrentWeatherData() {
    var urlComponents = URLComponents(string: "https://api.openweathermap.org/data/2.5/weather")
    urlComponents?.queryItems = self.urlQueryItems

    guard let url = urlComponents?.url else {
        print("잘못된 URL")
        return
    }

    // Alamofire 사용해서 데이터 가져오기
    fetchDayaByAlamofire(url: url) { [weak self]  (result: Result<CurrentWeatherResult, AFError>) in
        guard let self else { return }

        // Alamofire가 지원하는 Result 타입에 Success 와 Failure 가 있어 아래와 같이 스위치 문으로 분기가 가능함
        switch result {
        case .success(let result):
            DispatchQueue.main.async {
                self.tempLabel.text = "\(Int(result.main.temp))℃"
                self.tempMinLabel.text = "최저: \(Int(result.main.tempMin))℃"
                self.tempMaxLabel.text = "최고: \(Int(result.main.tempMax))℃"
            }

            guard let imageUrl = URL(string: "https://openweathermap.org/img/wn/\(result.weather[0].icon)@2x.png") else {
                return
            }

            AF.request(imageUrl).response { response in
                if let data = response.data, let image = UIImage(data: data) {
                    DispatchQueue.main.async {
                        self.imageView.image = image
                    }
                }
            }

        case .failure(let error):
            print("데이터 로드 실패: \(error)")
        }
    }
}
🔹 5일치 날씨 데이터 가져오는 메서드 리팩토링
- 현재 날씨 가져오는 메소드와 동일하다.
Alamofire 미사용
private func fetchForecastData() {
    var urlComponents = URLComponents(string: "https://api.openweathermap.org/data/2.5/forecast")
    urlComponents?.queryItems = self.urlQueryItems

    guard let url = urlComponents?.url else {
        print("잘못된 URL")
        return
    }

    fetchData(url: url) { [weak self] (result: ForecastWeatherResult?) in
        guard let self, let result else { return }

        for forecastWeather in result.list {
            print("\(forecastWeather.main)\n\(forecastWeather.dtTxt)\n\n")
        }

        DispatchQueue.main.async {
            self.dataSource = result.list
            self.tableView.reloadData()
        }
    }
}
Alamofire 사용
private func fetchForecastData() {
var urlComponents = URLComponents(string: "https://api.openweathermap.org/data/2.5/forecast")
urlComponents?.queryItems = self.urlQueryItems
guard let url = urlComponents?.url else {
print("잘못된 URL")
return
}
fetchDayaByAlamofire(url: url) { [weak self] (result: Result<ForecastWeatherResult, AFError>) in
guard let self else { return }
switch result {
case .success(let result):
DispatchQueue.main.async {
self.dataSource = result.list
self.tableView.reloadData()
}
case .failure(let error):
print("데이터 로드 실패: \(error)")
}
}
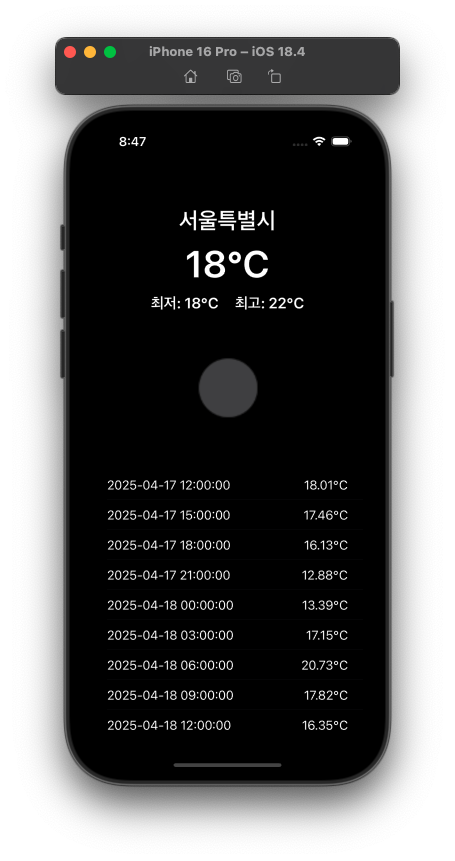
}완성된 앱 화면 😎
✍️ 느낀점 & 배운점
Alamofire라이브러리를 사용하면 서버의 데이터를 가져오는 코드가 간략해지고 편해진다.Alamofire에서 내부적으로 편리한 속성을 지원하여,switch-case문으로 분기처리가 가능해져 사용하기 편했다.
🔹 ColletctionView랑 친해지기!
목표 화면
CollectionView 객체 만들기
private lazy var topCollectionView: UICollectionView = {
    // layout는 생각도 못함...
    let layout = UICollectionViewFlowLayout()
    layout.scrollDirection = .horizontal
    layout.minimumLineSpacing = 0
    layout.minimumInteritemSpacing = 0

    //frame, collectionViewLayout 안넣어서 에러 났었음
    let collectionView = UICollectionView(frame: .zero, collectionViewLayout: layout)

    collectionView.backgroundColor = .gray
    collectionView.delegate = self
    collectionView.dataSource = self

    // 레지스터 빼먹었었음
    collectionView.register(UICollectionViewCell.self, forCellWithReuseIdentifier: "defaultCell")
    collectionView.register(CustomCollectionViewCell.self, forCellWithReuseIdentifier: CustomCollectionViewCell.identifier)
    return collectionView
}()

private lazy var bottomCollectionView: UICollectionView = {
    let layout = UICollectionViewFlowLayout()
    layout.scrollDirection = .vertical
    layout.minimumLineSpacing = 10
    layout.minimumInteritemSpacing = 10
    let collectionView = UICollectionView(frame: .zero, collectionViewLayout:layout)
    collectionView.backgroundColor = .cyan
    collectionView.delegate = self
    collectionView.dataSource = self
    collectionView.register(UICollectionViewCell.self, forCellWithReuseIdentifier: "defaultCell")
    collectionView.register(CustomCollectionViewCell.self, forCellWithReuseIdentifier: CustomCollectionViewCell.identifier)
    return collectionView
}()
오토 레이아웃 설정
multipliedBy(0.5)사용해서 반으로 나누기!
private func configureUI() {
    [topCollectionView, bottomCollectionView]
        .forEach { view.addSubview($0) }

    topCollectionView.snp.makeConstraints {
        $0.top.equalTo(view.safeAreaLayoutGuide)
        $0.horizontalEdges.equalToSuperview()
        $0.height.equalTo(view.safeAreaLayoutGuide.snp.height).multipliedBy(0.5)
    }

    bottomCollectionView.snp.makeConstraints {
        $0.top.equalTo(topCollectionView.snp.bottom)
        $0.horizontalEdges.equalToSuperview()
        $0.height.equalTo(view.safeAreaLayoutGuide.snp.height).multipliedBy(0.5)
    }
}
Delegate 설정
- 셀 크기를 설정
if-else문으로 분기 처리
extension ViewController: UICollectionViewDelegate, UICollectionViewDelegateFlowLayout {
    func collectionView(_ collectionView: UICollectionView, layout collectionViewLayout: UICollectionViewLayout, sizeForItemAt indexPath: IndexPath) -> CGSize {
        if collectionView == topCollectionView {
            return .init(width: collectionView.frame.width / 3, height: collectionView.frame.height / 3)
        } else {
            return .init(width: (collectionView.frame.width - 10) / 2, height: 100)
        }
    }
}
DataSource 설정
cell에 보여질 데이터 설정
extension ViewController: UICollectionViewDataSource {
    func collectionView(_ collectionView: UICollectionView, numberOfItemsInSection section: Int) -> Int {
        return 10

    }

    func collectionView(_ collectionView: UICollectionView, cellForItemAt indexPath: IndexPath) -> UICollectionViewCell {
        guard let cell = collectionView.dequeueReusableCell(withReuseIdentifier: CustomCollectionViewCell.identifier, for: indexPath) as? CustomCollectionViewCell else {
        	return UICollectionViewCell()
        }

        cell.configure()
        cell.label.text="\(indexPath.item)"

        if collectionView == topCollectionView {
            cell.backgroundColor = .green
        } else {
            cell.backgroundColor = .blue
        }
        return cell
    }
}
✍️ 느낀점 & 배운점
CollectionView를 구현해보면서 어려웠던 속성에 대해 조금 익숙해진 것 같다.- 화면을 반으로 나누는 방법도 배웠고,
Delegate와DataSource사용해보면서 익숙 해졌다.

iOS 개발 블로그