
📌 TIL - 2025.04.21
🔍 CoreData 정리
오늘은 iOS에서 쓰이는 데이터 저장 방식인 CoreData를 공부했다.
✅ CoreData
- 복잡한 구조의 데이터 관리에 적합
- 객체를 영속적으로 저장하고, 필요할 때 조회, 수정, 삭제 가능
- 관계형 데이터 및 CRUD 작업에 강함
- 내부적으로는 SQLite 기반으로 동작하지만 SQL을 직접 다룰 필요는 없다
- 예시: 연락처, 게시물 목록, 포켓몬 리스트 등
🔹 사용 예시:
// 예시 코드 (실제 구현 시 Entity 설정 및 Context 관리 필요)
let newItem = NSEntityDescription.insertNewObject(forEntityName: "Person", into: context)
newItem.setValue("Ash", forKey: "name")
try? context.save()
실습에서 사용한 코드
import UIKit
import CoreData
class ViewController: UIViewController {
var container: NSPersistentContainer!
override func viewDidLoad() {
super.viewDidLoad()
// Do any additional setup after loading the view.
view.backgroundColor = .red
let appDelegate = UIApplication.shared.delegate as! AppDelegate
self.container = appDelegate.persistentContainer
createData(name: "Adam1", phoneNumber: "010-1111-2222")
readAllData()
}
func createData(name: String, phoneNumber: String) {
guard let entity = NSEntityDescription.entity(forEntityName: "PhoneBook1", in: self.container.viewContext) else { return }
let newPhoneBook = NSManagedObject(entity: entity, insertInto: self.container.viewContext)
newPhoneBook.setValue(name, forKey: "name")
newPhoneBook.setValue(phoneNumber, forKey: "phoneNumber")
do {
try self.container.viewContext.save()
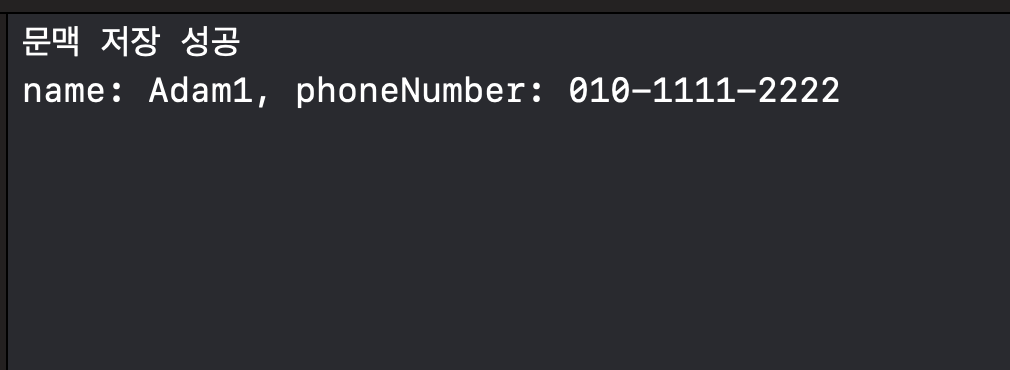
print("문맥 저장 성공")
} catch {
print("문맥 저장 실패")
}
}
func readAllData() {
do {
let phoneBooks = try self.container.viewContext.fetch(PhoneBook1.fetchRequest())
for phoneBook in phoneBooks as [NSManagedObject] {
if let name = phoneBook.value(forKey: "name") as? String,
let phoneNumber = phoneBook.value(forKey: "phoneNumber") {
print("name: \(name), phoneNumber: \(phoneNumber)")
}
}
} catch {
print("데이터 읽기 실패")
}
}
}실행 결과
각 줄 분석
🔷 var container: NSPersistentContainer!
- CoreData를 담당할 컨테이너를 선언.
NSPersistentContainer는 CoreData의 저장소 전체를 관리하는 객체.- 여기에는 Entity 정의, 데이터 저장, 로드 등을 위한 기능들이 들어 있음.
쉽게 표현:
"CoreData 전체를 다루는 커다란 상자(container)를 만들 거야."
🔷 let appDelegate = UIApplication.shared.delegate as! AppDelegate
- 앱의 전체 실행을 담당하는 AppDelegate 인스턴스를 가져오는 코드야.
UIApplication.shared.delegate는 앱 전체에서 공유된 델리게이트 객체를 가져오는 거고,- 그걸 강제로
AppDelegate타입으로 형변환하고 있어.
쉽게 표현:
"앱 전체를 관리하는 AppDelegate를 가져와서 사용할 준비를 해!"
🔷 self.container = appDelegate.persistentContainer
- 이제 AppDelegate 안에 있는
persistentContainer를 가져와서 - 현재 클래스(예: ViewController)에서 사용할 수 있게
self.container에 연결한 거야.
쉽게 표현:
"AppDelegate에서 만들어 둔 CoreData 컨테이너를 내 클래스에서도 쓸 수 있게 저장!"
🔷 AppDelegate 안에 있는 CoreData 관련 코드
CoreData를 활성화 하면 아래의 코드가 생긴다.
lazy var persistentContainer: NSPersistentContainer = {
    let container = NSPersistentContainer(name: "MyModel") // .xcdatamodeld 파일 이름
    container.loadPersistentStores { _, error in
        if let error = error {
            fatalError("CoreData 로딩 실패: \(error)")
        }
    }
    return container
}()
이 코드가 하는 일:
- CoreData를 쓸 준비를 함.
"MyModel"이라는 이름의 데이터 모델을 로드함.- 저장소를 실제로 로드해서 앱이 데이터베이스랑 연결되게 해줌.
지금까지 내용 요약!!
| 코드 | 설명 |
|---|---|
var container | CoreData 저장소 전체를 관리하는 객체 선언 |
UIApplication.shared.delegate | 앱의 공통 관리자(AppDelegate)에 접근 |
appDelegate.persistentContainer | CoreData의 실질적인 저장소(컨테이너)를 가져옴 |
🔷 NSEntityDescription
- CoreData에서는 테이블 하나하나를 Entity(엔티티) 라고 함.
NSEntityDescription은 말 그대로 그 Entity(테이블 구조)에 대한 설명을 담당하는 클래스
쉽게 표현:
"PhoneBook1이라는 테이블의 설계도(틀, 구조)를 알려줘!" 라고 할 때 사용하는 게
NSEntityDescription
🔷 .entity(forEntityName:in:)
NSEntityDescription.entity(forEntityName: "PhoneBook1", in: self.container.viewContext)- 이 코드는 CoreData 모델에서 "PhoneBook1" 이라는 Entity가 있는지 찾고, 그 Entity의 구조를 가져온다.
- 두 번째 인자
in:은 어느 공간(Context) 안에서 찾을지 정해주는 것.
쉽게 표현:
"viewContext 안에 정의된 'PhoneBook1' 테이블 구조 좀 줘!"
🔷 self.container.viewContext
이건 CoreData의 저장소에 접근할 수 있는 통로야. 두 개로 나눠서 설명할게.
1. container
container는NSPersistentContainer라는 타입- 이건 CoreData 전체를 관리하는 커다란 박스
- 내부에는:
- 모델(Entity 정의)
- 저장소(SQLite)
- Context(문맥, 작업 공간) 등을 전부 포함
쉽게 표현:
"container는 데이터베이스 전체 박스야"
2. viewContext
container안에는 데이터를 실제로 읽고 쓰는 작업 공간이 필요함.- 그게 바로
viewContext - 이건 UI가 있는 화면에서 쓰기 적합한 기본
Context. - 만든 객체를 여기에 저장하고,
- 여기에 저장된 데이터를 화면에서 보여줄 수도 있음.
쉽게 표현:
"viewContext는 데이터 넣고 꺼내는 책상 같은 공간"
지금까지 내용 정리
container는 CoreData 데이터베이스 전체고,viewContext는 현재 화면에서 그걸 읽고 쓰기 위한 도구야."
func createData(name:, phoneNumber:) 분석
guard let entity = NSEntityDescription.entity(forEntityName: "PhoneBook1", in: self.container.viewContext) else { return }- 👉 CoreData에서
PhoneBook1이라는 Entity를 가져오는 코드 - 쉽게 말하면 "연락처 테이블 구조를 불러와줘!"라고 하는 것.
self.container.viewContext: 실제 저장/불러오는 공간(문맥, context)
let newPhoneBook = NSManagedObject(entity: entity, insertInto: self.container.viewContext)newPhoneBook이라는 새 객체를 만든다.- 이것은 이제 "비어 있는 연락처 한 줄" 이라고 생각하면 됨
- 아직 이름이나 번호는 들어있지 않음.
newPhoneBook.setValue(name, forKey: "name")
newPhoneBook.setValue(phoneNumber, forKey: "phoneNumber")- 연락처에 실제 데이터를 넣는 부분
setValue()는 데이터를 저장할 때 쓰는 메서드"name"이라는 속성에name값 넣기"phoneNumber"속성에phoneNumber값 넣기
do {
    try self.container.viewContext.save()
    print("문맥 저장 성공")
} catch {
    print("문맥 저장 실패")
}- viewContext.save(): 지금까지 만든 데이터를 진짜로 디스크에 저장
- 저장에 실패할 수도 있으니 에러를 잡기 위해
do-try-catch사용
요약
| 용어 | 의미 |
|---|---|
NSEntityDescription | CoreData의 테이블 구조를 정의한 클래스 |
.entity(forEntityName:in:) | 특정 이름의 테이블 구조를 특정 저장소(context) 안에서 가져오는 메서드 |
container | CoreData 전체를 관리하는 박스 (NSPersistentContainer) |
viewContext | 데이터를 저장하거나 불러올 때 사용하는 CoreData의 실행 공간 |
NSManagedObject | 객체(Object) 형태로 데이터를 저장하고 관리할 수 있게 해주는 프레임워크. |
setValue() | 각 칸에 값 채우기 |
viewContext.save() | 실제로 디스크에 저장 |

iOS 개발 블로그