2020.01.31 next.config(webpack) 설정 / next-bundle-analyzer / compression-webpack-plugin
냉장고 프로젝트 업데이트
next.config
Next의 환경설정 파일로 sass나 기타 모듈, 플러그인들을 연결해주는 옵션을 이곳에서 처리한다. 해당 프로젝트에서는 withSass, withBundleAnalyzer 두 패키지를 연결해보았다.
const withBundleAnalyzer = require("@zeit/next-bundle-analyzer");
const withSass = require('@zeit/next-sass');
module.exports = withBundleAnalyzer(withSass({
   distDir : '.next',
   analyzeServer: ["server", "both"].includes(process.env.BUNDLE_ANALYZE),
   analyzeBrowser: ["browser", "both"].includes(process.env.BUNDLE_ANALYZE),
   bundleAnalyzerConfig: {
     server: {
       analyzerMode: 'static',
       reportFilename: '../../bundles/server.html'
     },
     browser: {
       analyzerMode: 'static',
       reportFilename: '../bundles/client.html'
     }
   },
   cssModules: true,
   webpack(config) {
      console.log('config!!', config)
      return {
         ...config,
         mode : process.env.NODE_ENV === 'production' ? 'production' : 'development',
         devtool : process.env.NODE_ENV === 'production' ? 'hidden-source-map' : 'eval',
      };
   },
}));
한줄 한줄 살펴보자면
1) distDir : next 가 빌드한 파일을 어디에 넣을지 정하는 디렉토리로 기본은 .next 폴더 안에 넣는다.
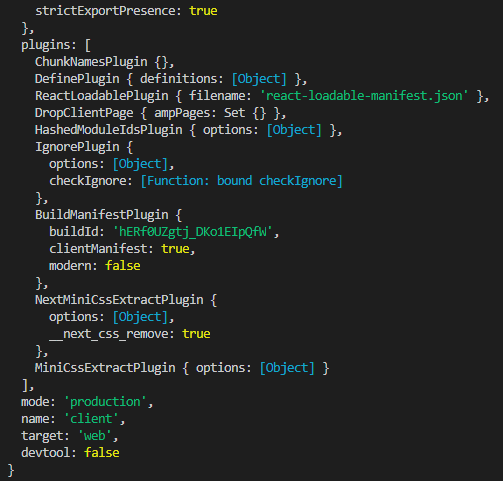
2) webpack : 기본 next의 webpack 설정 위에 덮어 씌우는 용으로 기재한다. webpack의 config를 콘솔로 찍어보면 아래와 같이 어떤 플러그인들이 연결되어있는지 확인 가능하다.
3) @zeit/next-sass 연결
withSass 함수는 module.exports 상위에 감싸주는 하이오더컴포넌트 역할을 하며 next에서 sass가 구동되도록 해준다.
4) @zeit/next-bundle-analyzer 연결
withBundleAnalyzer 함수 역시 마찬가지로 상위컴포넌트로서 감싸주는데 이 패키지의 역할은 package.json의 scripts 명령어 앞에 key=값 이런식으로 'BUNDLE_ANALYZE' 를 환경변수로 넣어줌으로서 이용 가능하다.
  "scripts": {
    "dev": "nodemon",
    "build": "cross-env BUNDLE_ANALYZE=both next build",
    "start": "cross-env NODE_ENV=production next start"
  },
- 그런데 문제는 윈도우에서는 환경변수로 실행이 안 되기 때문에 npm install cross-env도 설치해야 한다.
npm install cross-envnext-bundle-analyzer
설치를 마치고 npm run build를 실행하면 아래와 같은 화면창이 뜬다.
/front/bundles/server.html
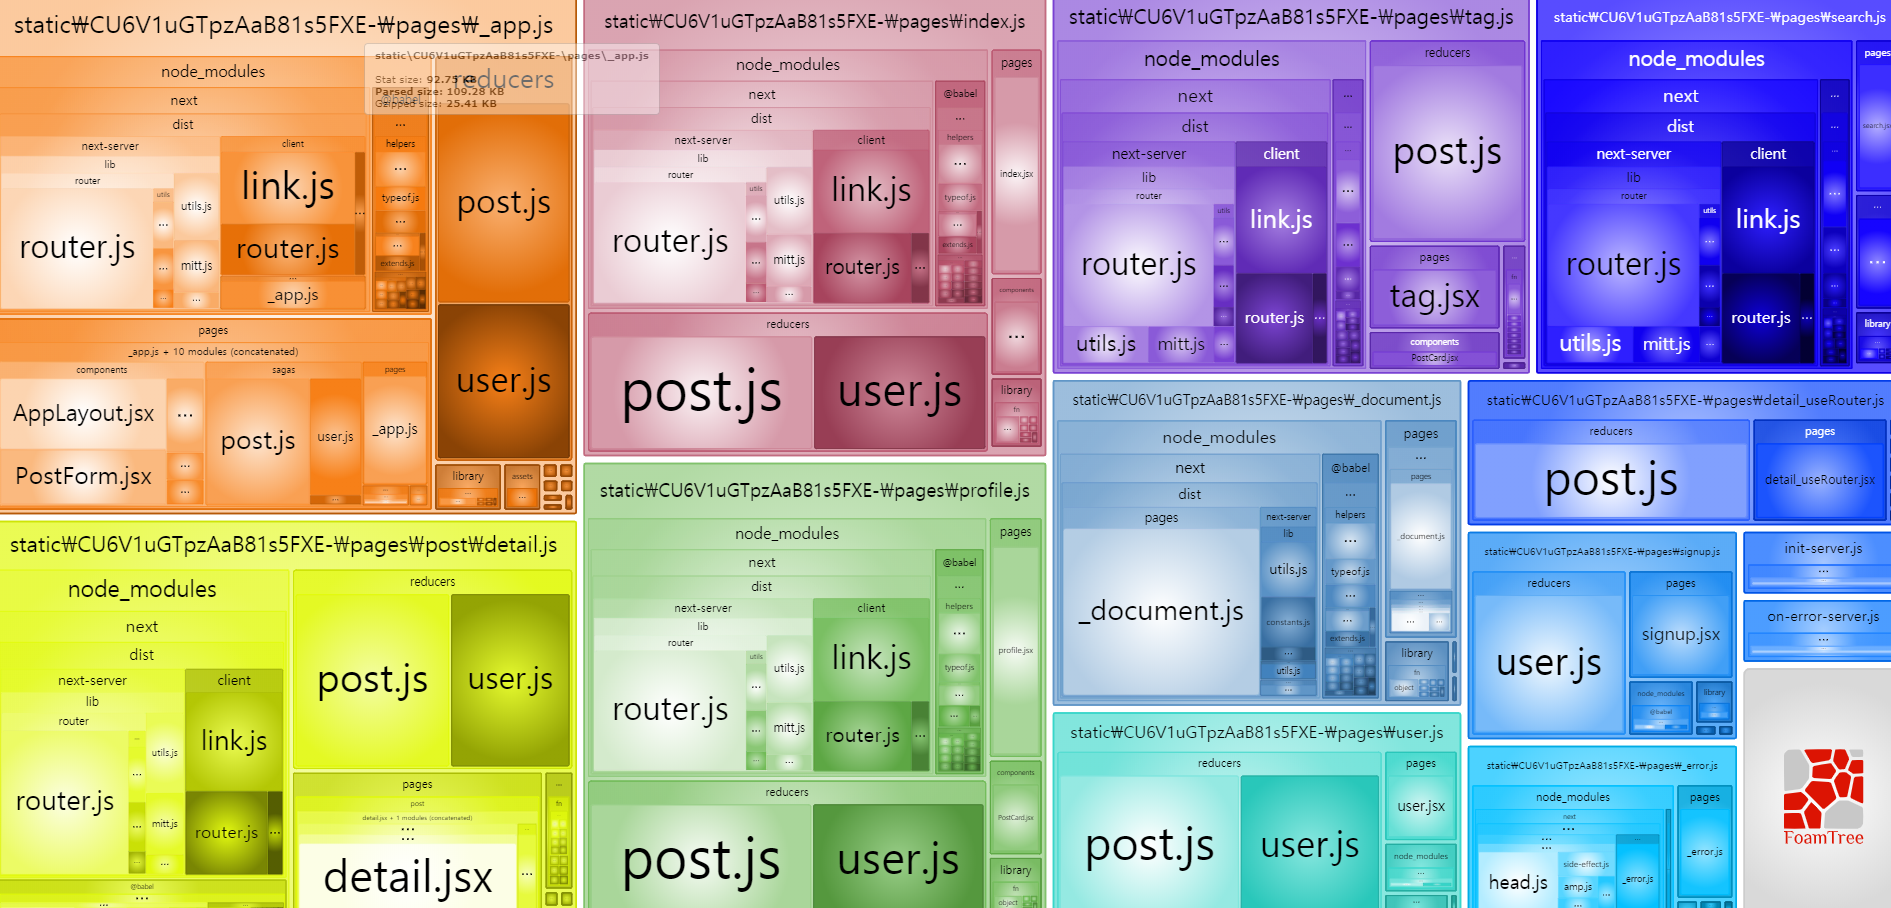
/front/bundles/client.html
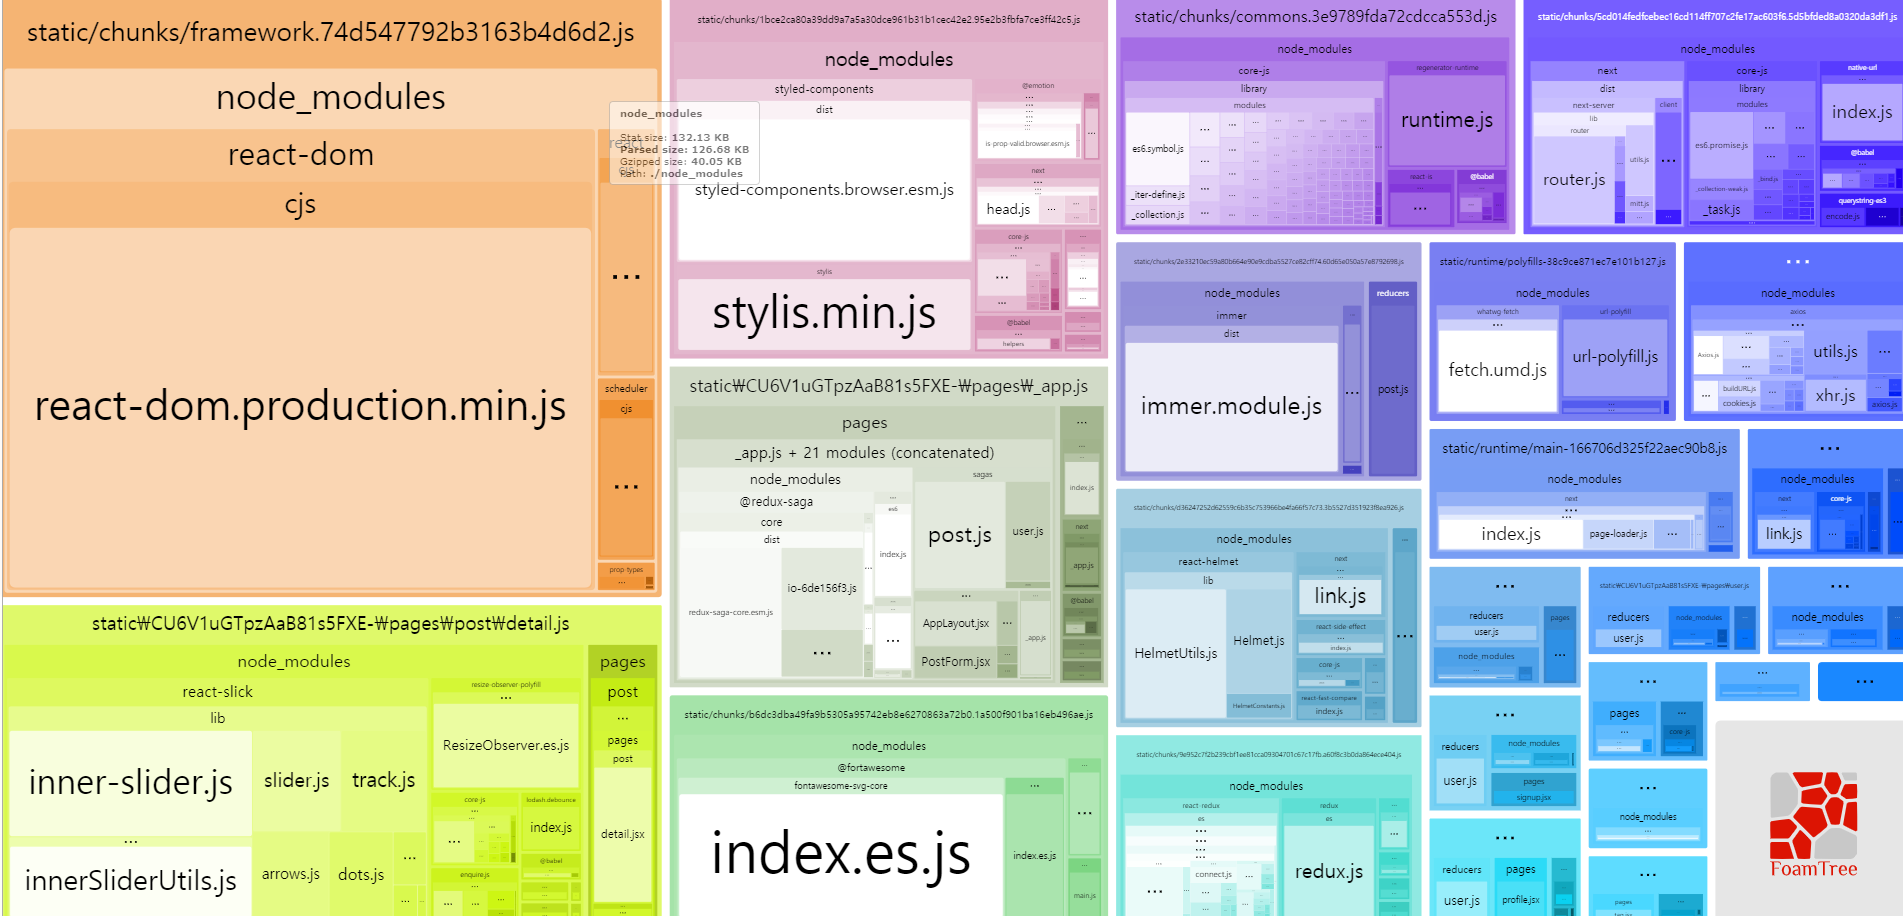
이렇게 육안으로 어떤 파일들이 얼마나 용량을 차지하고 있는지 확인이 가능하다!
compression-webpack-plugin
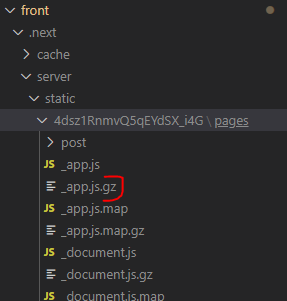
npm i compression-webpack-plugin모듈 패키지 bundle 확장자들을 gz로 바꿔주고 용량을 3분의 1로 줄여준다.
- 브라우저가 서버에게 요청을 보낼 때 서버가 js 파일이 아닌 js.gz를 보내주게되고 브라우저가 압축된 파일을 받아서 다시 해독하여 다시 js 파일로 만든다. => 배포시에는 항상 압축을 해주는 게 좋다!
next.config.js
const CompressionPlugin = require('compression-webpack-plugin');

         plugins : [
            ...config.plugins,
           // 배포용일때만 추가
           process.env.NODE_ENV === 'production' && new CompressionPlugin(),
         ],
package.json 의 prestart 명령어
수정사항이 반영되기 위해선 npm run start 전에 항상 build를 해줘야하는데 매번 build, start 두번씩 하기 번거로우니 prestart 명령어에 npm run build를 넣어서 start 전에 build를 자동으로 해주도록 설정한다.