⭐ SprongBoot InitData 설정방법 (@PostConstruct, CommandLineRunner, ApplicationRunner, schema.sql)
SpringBoot

처음 SpringBoot 어플리메이션을 실행시, DB 데이터를 미리 insert 하는 작업을 할시,
SpringBoot에서 할 수 있는 대표적인 3가지를 소개합니다.
개인적으로, @PostConstruct를 더 추천합니다!
🌟 2) CommandLineRunner 를 주로 사용
그외 JPA에서 EM(EntityManger)을 초기화해주는 @PersistenceContext 어노테이션도 추가해서 보충설명했습니다.
1) @PostConstruct
💥 트랜잭션 보장이 안되서 비추!
@Slf4j
@Component
@Profile("test")
@RequiredArgsConstructor
public class TestDataInit {

    private final CouponRepository couponRepository;

    /**
     * 테스트용 데이터 추가
     */
    @PostConstruct
    public void init() {
        log.info("test data init run...");
        LongStream.rangeClosed(1,3).forEach(i -> {
            couponRepository.save(
                    Coupon.builder()
                            .name("coupon" + i)
                            .code("code" + i)
                            .type(CouponType.DISCOUNT)
                            .status(CouponStatus.PUBLIC)
                            .startDate(LocalDate.now())
                            .endDate(LocalDate.now().plusDays(7))
                            .build()
            );
        });
    }

}
2) CommandLineRunner
@Slf4j
@Configuration
//@Profile({"test", "dev"})    // test, dev 환경에서만 실행
@RequiredArgsConstructor
public class InitData {

    private final PostRepository postRepository;

    @Bean
    CommandLineRunner init() {
        return (args) -> {
            log.info("test data init run...");
            // Post 데이터 초기화
            // 만약 DB 조회시 데이터가 없으면 초기화
            if(postRepository.count() > 0) {
                return;
            }
            List<Post> posts = List.of(
                    new Post("제목1", "내용1"),
                    new Post("제목2", "내용2"),
                    new Post("제목3", "내용3"),
                    new Post("제목4", "내용4"),
                    new Post("제목5", "내용5")
            );
            // Post 데이터 저장
            postRepository.saveAll(posts);
        };
    }
}
3) Schema.sql
설정
build.gradle
    // h2
    runtimeOnly 'com.h2database:h2'
application-test.yml
spring:
  sql:
    init:
      schema-locations: classpath:h2/schema.sql  # 테이블 생성 파일 경로 application.yml 파일이 있는 resources/h2/schema.sql 위치
			data-locations: classpath:h2/data.sql
☑️ 해당 경로 classpath를 상대경로 or 절대경로를 잘 인지하고 해주어야 한다!
- schema.sql
DROP TABLE IF EXISTS coupon;

CREATE TABLE coupon
(
    id          bigint auto_increment primary key,
    code        VARCHAR(255) not null,
    end_date    DATE         null,
    name        VARCHAR(255) not null,
    start_date  DATE         null,
    status      VARCHAR(255) not null,
    type        VARCHAR(255) not null,
    created_at  TIMESTAMP    null,
    modified_at TIMESTAMP    null
);- data.sql
INSERT INTO coupon (code, end_date, name, start_date, status, type, created_at, modified_at)
VALUES ('SAVE10', '2024-12-31', '10% Off', '2024-01-01', 'active', 'discount', '2024-01-01 00:00:00', '2024-01-01 00:00:00');

INSERT INTO coupon (code, end_date, name, start_date, status, type, created_at, modified_at)
VALUES ('FREESHIP', null, 'Free Shipping', '2024-01-01', 'active', 'shipping', '2024-01-01 00:00:00', null);

INSERT INTO coupon (code, end_date, name, start_date, status, type, created_at, modified_at)
VALUES ('WELCOME', '2024-06-30', 'Welcome Discount', '2024-01-01', 'expired', 'welcome', '2024-01-01 00:00:00', '2024-06-30 00:00:00');

INSERT INTO coupon (code, end_date, name, start_date, status, type, created_at, modified_at)
VALUES ('HOLIDAY20', '2024-12-25', 'Holiday Sale', '2024-11-01', 'active', 'seasonal', '2024-11-01 00:00:00', '2024-11-01 00:00:00');

INSERT INTO coupon (code, end_date, name, start_date, status, type, created_at, modified_at)
VALUES ('SUMMER', '2024-08-31', 'Summer Sale', '2024-06-01', 'expired', 'seasonal', '2024-06-01 00:00:00', '2024-08-31 00:00:00');
4) 🌟 data.sql
☑️ data.sql 만으로 진행할 수 있습니다. schema.sql 로, 또는 JPA ddl-auto로 이미 MySQL schema 는 만들어진 상태
😊 개인적으로 이 방법을 더 애용합니다!
data.sql
-- 기존 데이터 삭제
SET FOREIGN_KEY_CHECKS = 0;  -- 외래키 체크 비활성화

TRUNCATE TABLE `member`;
TRUNCATE TABLE `member_role_list`;
TRUNCATE TABLE `category`;
TRUNCATE TABLE `product`;
TRUNCATE TABLE `product_image_list`;
TRUNCATE TABLE `tag`;
TRUNCATE TABLE `product_tag`;


SET FOREIGN_KEY_CHECKS = 1;  -- 외래키 체크 다시 활성화


-- 데이터 입력
-- ...
❗ 주의사항
schema.sql 없이 data.sql만 넣는 방식! ddl-auto: create-drop 설정을 하고 sql init 을 실행하여야 한다.
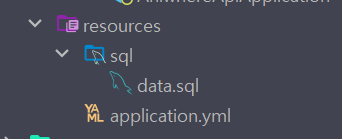
sql 위치
application.yml 파일 두 설정을 해주어야 합니다
defer-datasource-initialization: true # DataSource 초기화 지연

sql:
    init:
      platform: mysql # SQL 초기화 플랫폼 (mysql, h2, postgresql, oracle, sqlserver)
      data-locations: classpath:sql/data.sql # ddl-auto가 create, create-drop, update일 때 데이터 초기화, 초기화 완료후 validate/none로 변경
      mode: always # SQL 초기화 모드 (always, never, embedded, embedded-always)
application.yml
server:
  port: 8090

spring:

  datasource:
    driver-class-name: com.mysql.cj.jdbc.Driver
    url: jdbc:mysql://localhost:3306/shop
    username: root
    password: 1234
#    hikari:
#      maximum-pool-size: 25 # 최대 connection 수
#      max-lifetime: 25000 # 25초, 커넥션이 풀에서 제거되기 전까지의 최대 수명(밀리초), DB wait_timeout(28.3초) 보다 짧게 설정

  jpa:
    hibernate:
      ddl-auto: create-drop # 테이블 생성 및 업데이트 전략 (create, create-drop, update, validate, none)
    defer-datasource-initialization: true # DataSource 초기화 지연
    properties:
      hibernate:
        dialect: org.hibernate.dialect.MySQL8Dialect # Hibernate Dialect 설정
        format_sql: true # SQL 포맷팅
        highlight_sql: true # SQL 하이라이트 출력
        use_sql_comments: true # JPQL SQL 주석 사용
        default_batch_fetch_size: 100 # 기본 배치 크기 설정

  sql:
    init:
      platform: mysql # SQL 초기화 플랫폼 (mysql, h2, postgresql, oracle, sqlserver)
      data-locations: classpath:sql/data.sql # ddl-auto가 create, create-drop, update일 때 데이터 초기화, 초기화 완료후 validate/none로 변경
      mode: always # SQL 초기화 모드 (always, never, embedded, embedded-always)


logging:
  level:
    #    org.springframework.security.web: trace
    org.hibernate: info # Hibernate의 로그 레벨을 info로 설정
    org.hibernate.orm.jdbc.bind: trace # Hibernate의 SQL 바인딩을 출력
스키마 및 data가 입력되었다면
init sql mode -> never 설정해주고
JPA ddl-auto도 update or validate 로 바꿔줍니다!
정리
좋아요, 이번엔 @PostConstruct, @PersistenceContext, ApplicationRunner, CommandLineRunner를 모두 고려해서 스프링 부트에서 초기 데이터를 넣을 때 어떤 기술 조합이 가장 안정적이고 실용적인지 정리해볼게요.
🧠 핵심 비교: 초기 데이터 넣는 방식들
| 방식 | 실행 시점 | 트랜잭션 보장 | 장점 | 단점 |
|---|---|---|---|---|
@PostConstruct | 빈 초기화 직후 | ❌ (트랜잭션 보장 어려움) | 간단함 | 트랜잭션 문제, 순서 제어 어려움 |
CommandLineRunner | 애플리케이션 시작 직후 | ⭕ (직접 @Transactional 가능) | 직관적, 순서 제어 가능 | 파라미터 단순 |
ApplicationRunner | 애플리케이션 시작 직후 | ⭕ | ApplicationArguments로 유연함 | 약간 복잡함 |
@PersistenceContext | JPA EntityManager 주입 | ⭕ (단, 트랜잭션 필요) | 세밀한 JPA 제어 가능 | 코드가 복잡해질 수 있음 |
✅ 추천 기술 조합
초기 데이터를 넣을 때 가장 안정적인 방식은 다음과 같습니다:
🔹 ApplicationRunner + @Transactional + @PersistenceContext 또는 Repository
@Component
public class InitDataRunner implements ApplicationRunner {

    @PersistenceContext
    private EntityManager em;

    @Override
    @Transactional
    public void run(ApplicationArguments args) {
        em.persist(new User("seonggon", "용인시"));
        em.persist(new Product("Copilot AI", 10000));
    }
}
또는 Repository 방식:
@Component
public class InitDataRunner implements CommandLineRunner {

    private final UserRepository userRepository;

    public InitDataRunner(UserRepository userRepository) {
        this.userRepository = userRepository;
    }

    @Override
    @Transactional
    public void run(String... args) {
        userRepository.save(new User("seonggon", "용인시"));
    }
}
⚠️ 왜 @PostConstruct는 피하는 게 좋을까?
@PostConstruct는 빈 초기화 시점에 실행되므로 트랜잭션이 제대로 적용되지 않을 수 있음EntityManager가 아직 완전히 준비되지 않았거나, 영속성 컨텍스트가 제대로 작동하지 않을 수 있음- 특히 복잡한 초기화 로직이나 여러 엔티티 간 관계 설정이 필요할 경우 문제가 발생할 수 있음
🎯 결론
- 간단한 초기화:
CommandLineRunner+ Repository - 유연한 초기화:
ApplicationRunner+EntityManageror Repository - 트랜잭션 보장 필수: 반드시
@Transactional사용 @PostConstruct는 피하는 게 좋음, 특히 JPA 초기화에는
필요하다면 @Profile("local")을 붙여서 운영 환경에서는 실행되지 않게 설정하는 것도 추천해요.