이번 WWDC25에서 App Store Connect의 웹훅이 공개가 되었습니다.
마침 사이드 프로젝트에서 CI/CD를 구현중이었는데 같이 연동하면 좋을거 같아 바로 사용해보았습니다!
WWDC 영상 중 한국인 분이 나오는 것은 처음이라 좀 신기하긴 했습니다. 부럽기도 하구요 ㅜㅜ
0. 이게 무엇인가요?
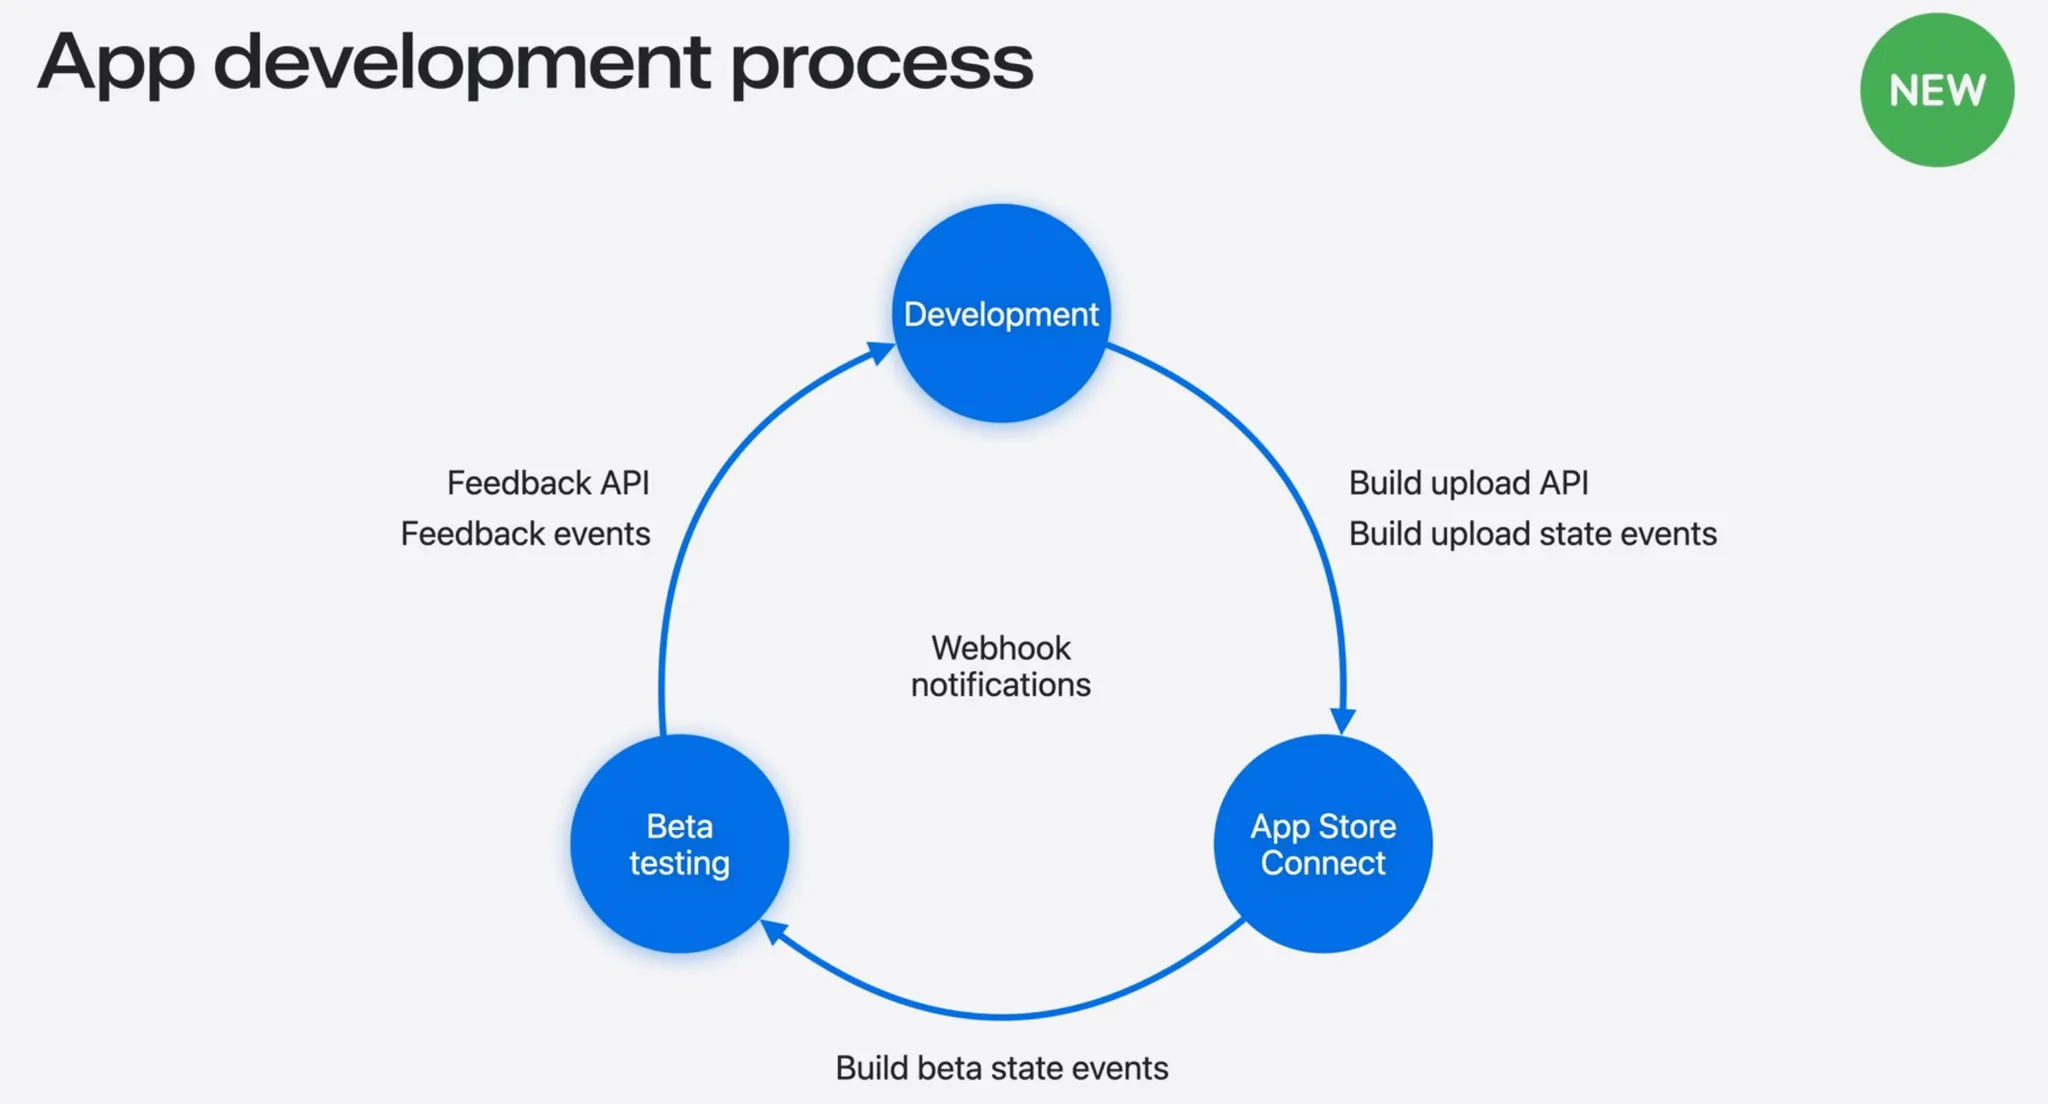
- Build upload state events(앱 심사 과정)
- Build beta state events(베타 앱 심사 과정 → 개인 프로젝트라서 사용할 일 잘 없음)
- Feedback events(테스트 플라이트 앱 피드백)
이 3가지 정보에 대한 것을 Webhook Notifications를 사용해 제공해 준다고 합니다.
일반적으로 저희가 사용할 이벤트는 앱 심사 과정, 테스트 플라이트 앱 피드백 정도가 있겠네요.
변경사항이 업데이트 되었는지 주기적으로 요청하는 기존 API에서 특정 업데이트가 발생했을때 알려주는 Webhook Notifications로 이번에 개편이 되었다고 합니다.
저는 사용을 안해봐서 모르지만 이전에는 주기적으로 App Store Connect에 요청을 보내 앱 상태 변경 사항이 있는지를 파악했다는 것을 알 수 있었습니다.
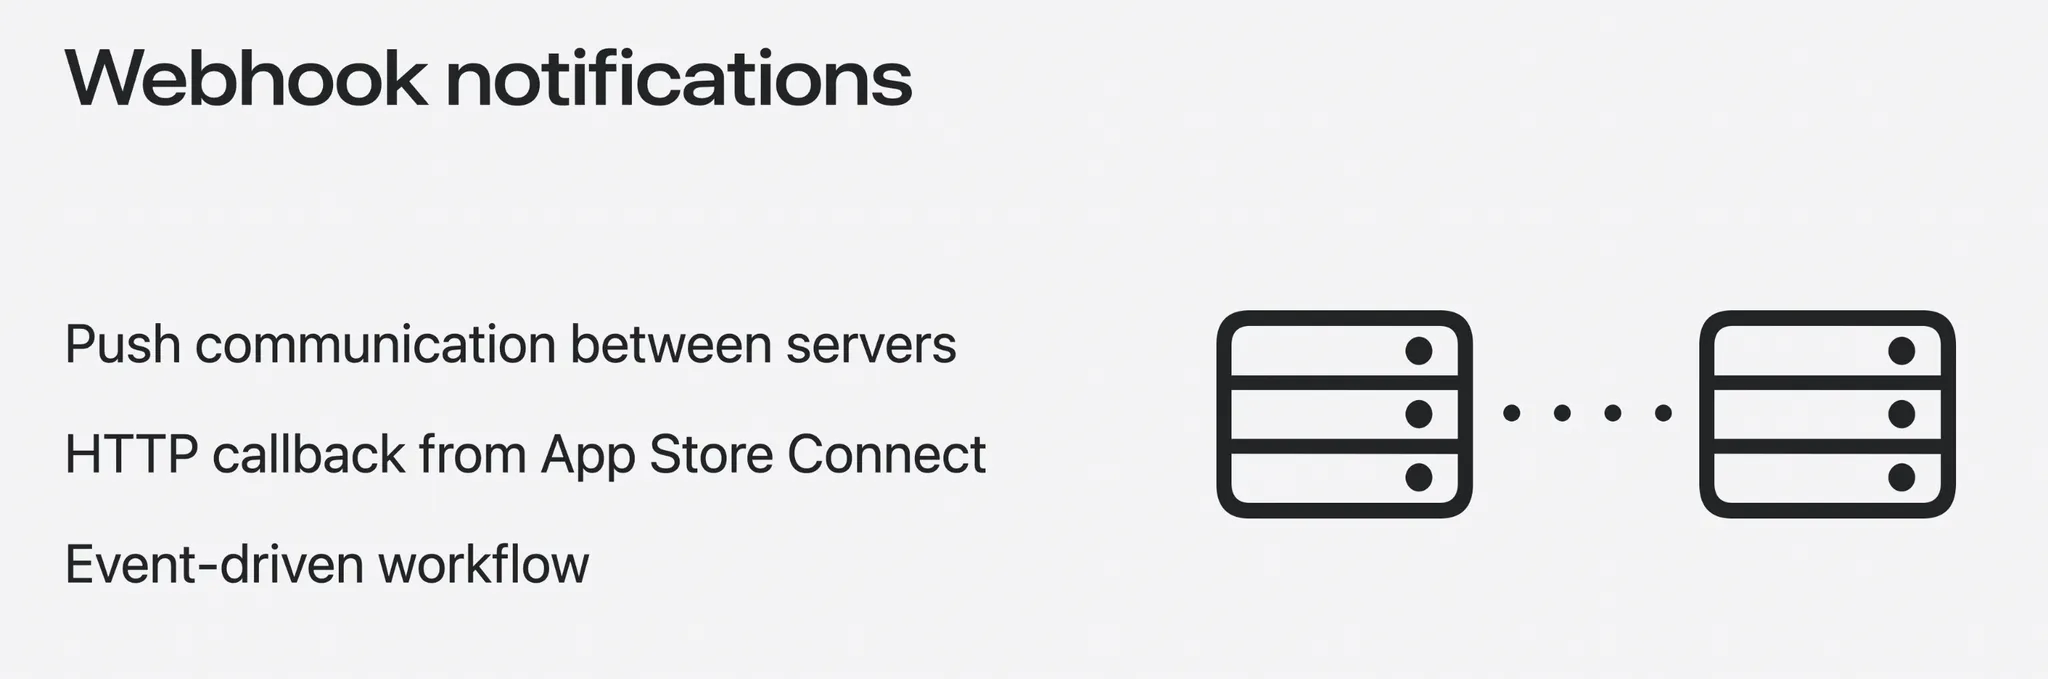
서버간 Push Communication을 통해 전보다 더욱 효율적인 작업 흐름을 가져갈 수 있습니다.
1. Discord Webhook 만들기
우선적으로 웹훅을 받을 URL이 필요합니다. 저는 혼자 사용하기 편한 Discord로 만들었습니다.
디스코드에서 사용할 서버와 채널을 생성해 준 다음 채팅 설정에 들어갑니다.
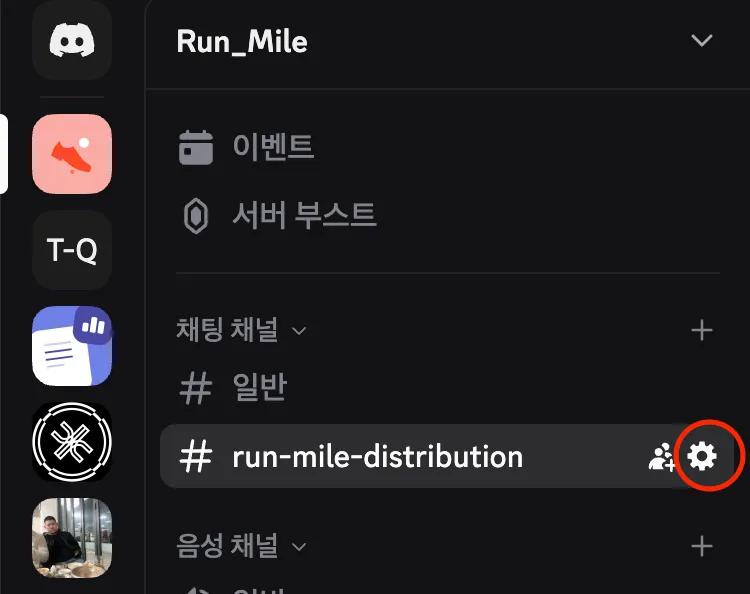
연동 → 웹후크로 이동한 다음 새로운 웹 후크를 생성하면 됩니다.
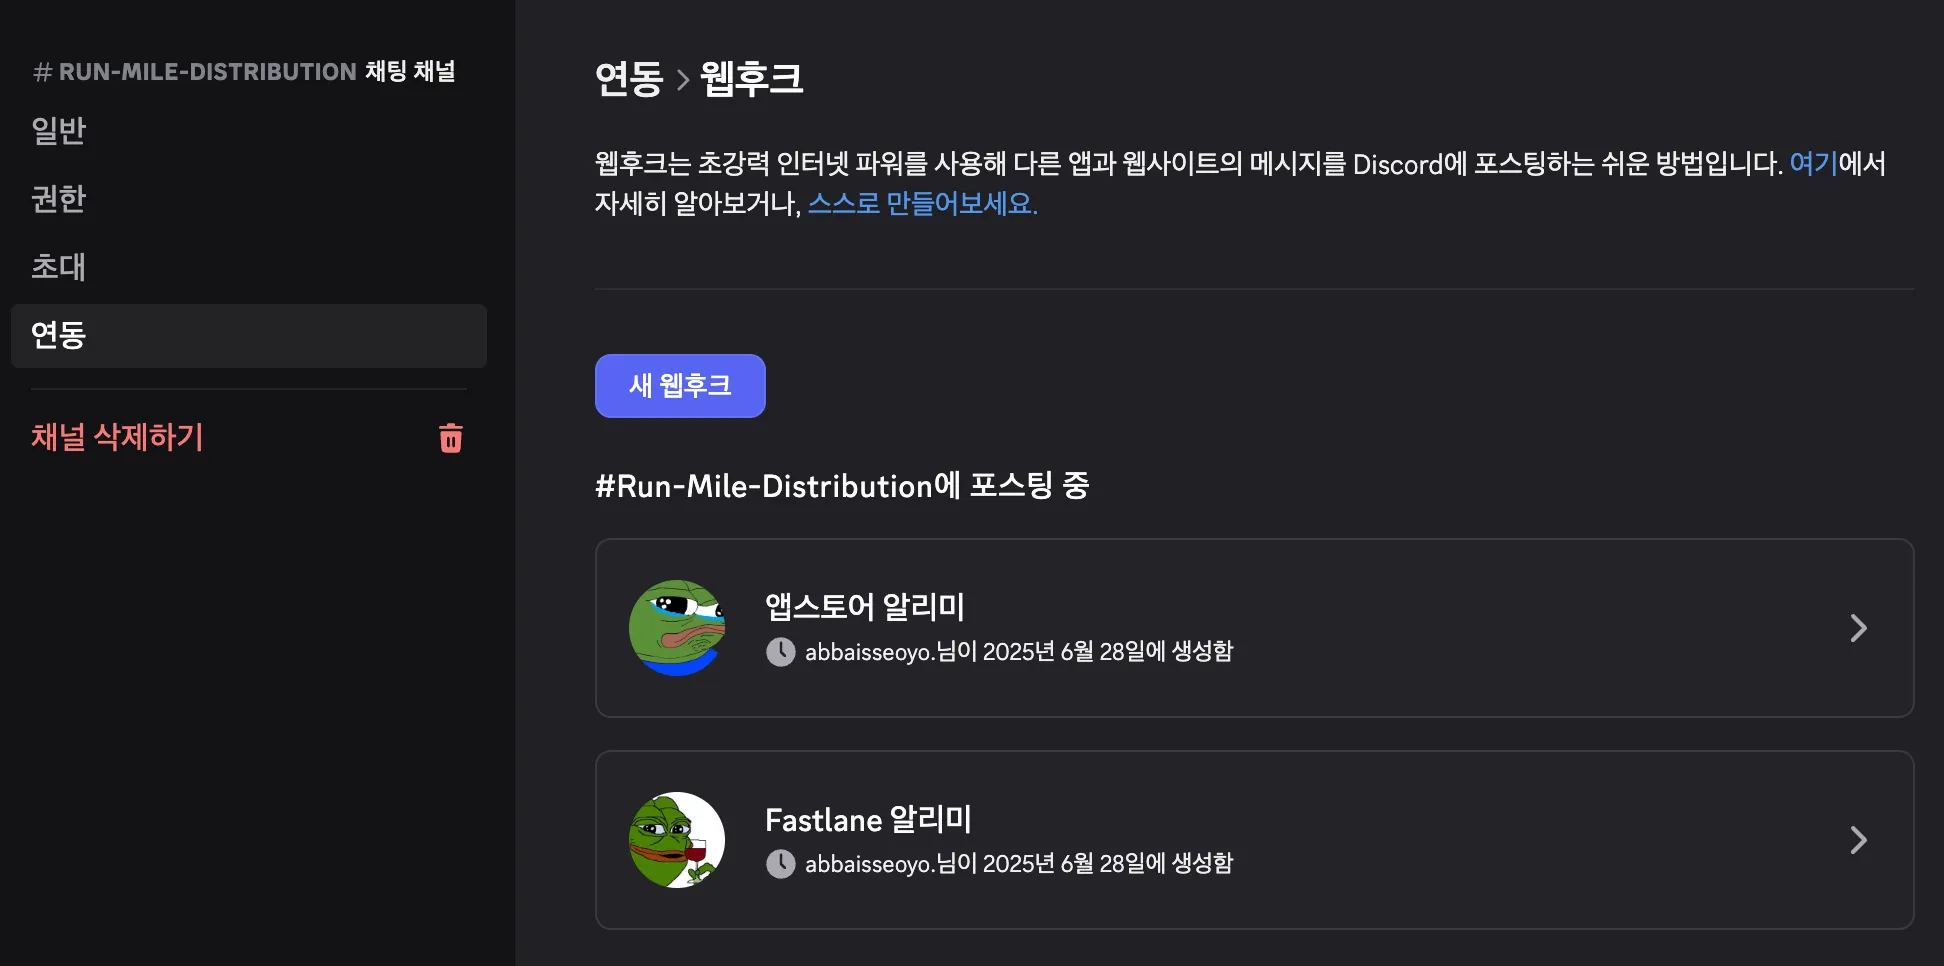
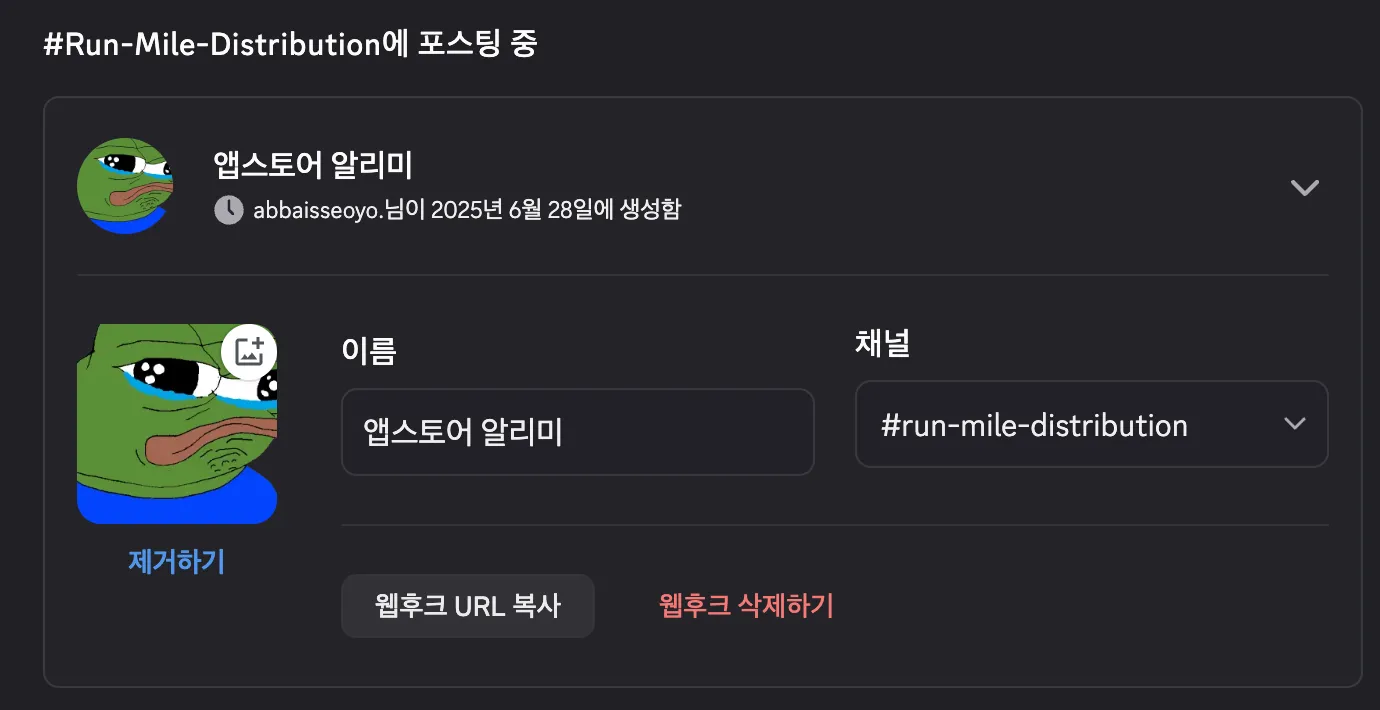
그 후 웹후크 URL 복사를 클릭하시면 웹훅 URL를 받아올 수 있습니다.
기호에 맞게 각자 이름이랑 채널을 설정해주시면 됩니다 ㅎㅎ
2. Webhook 사용 설정
우선 웹훅을 사용하기 위해서는 사용 설정이 필요합니다.
App Store Connect → 사용자 및 액세스 → 웹훅 으로 이동합니다.
App Store Connect
전 이번에 사용하면서 이미 하나 만들어져 있는 상태입니다!
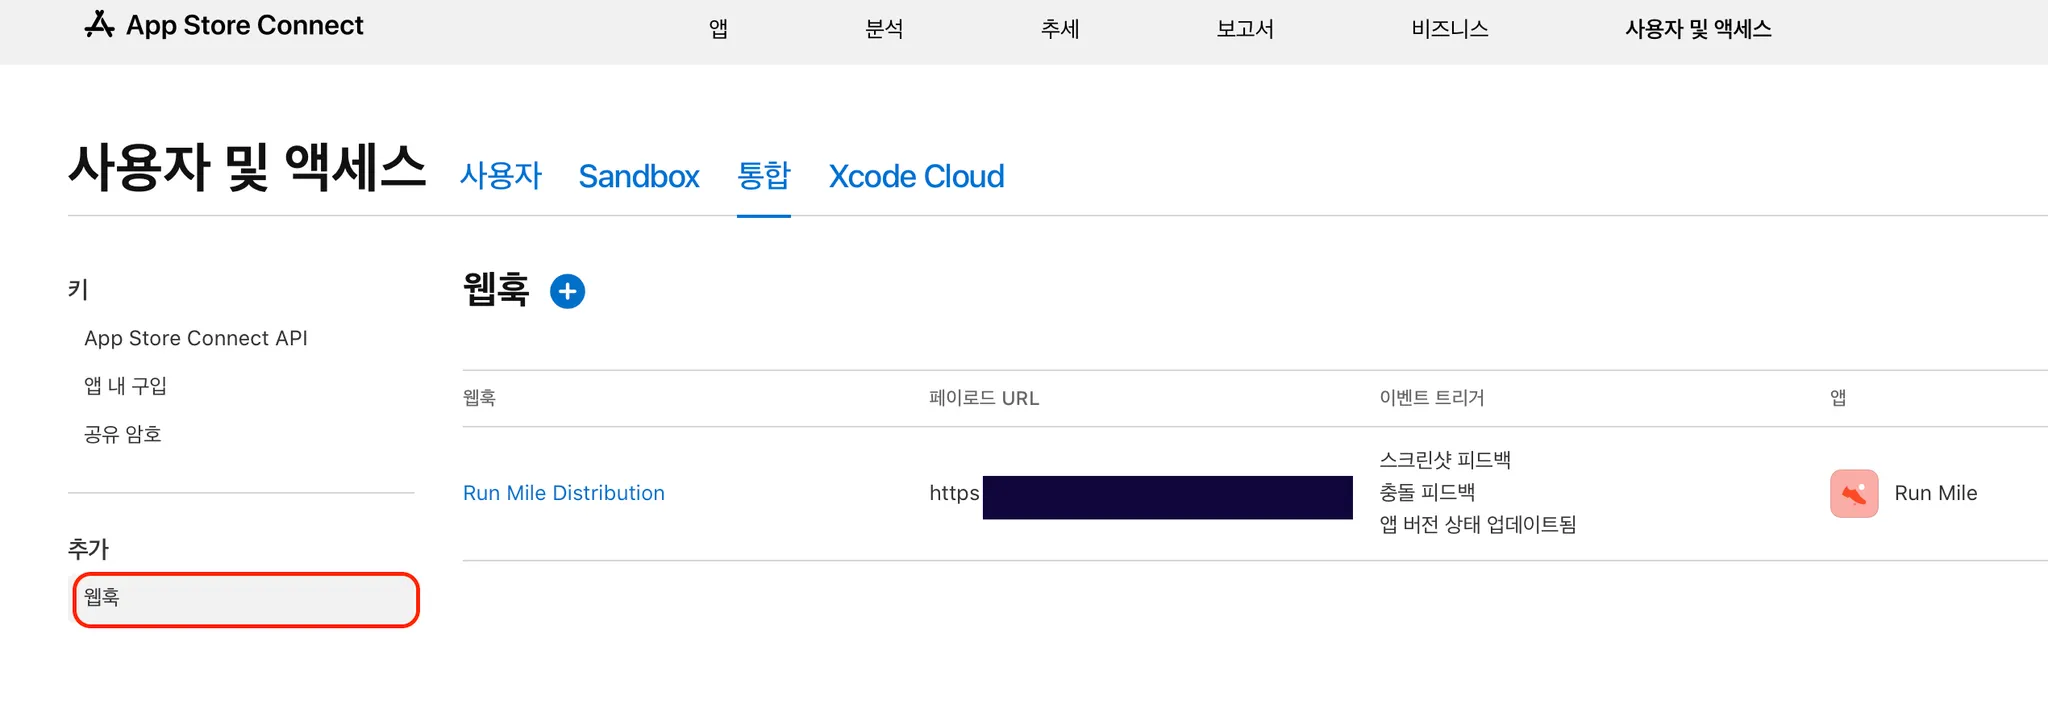
여기서 새 웹훅을 추가를 하면 됩니다.
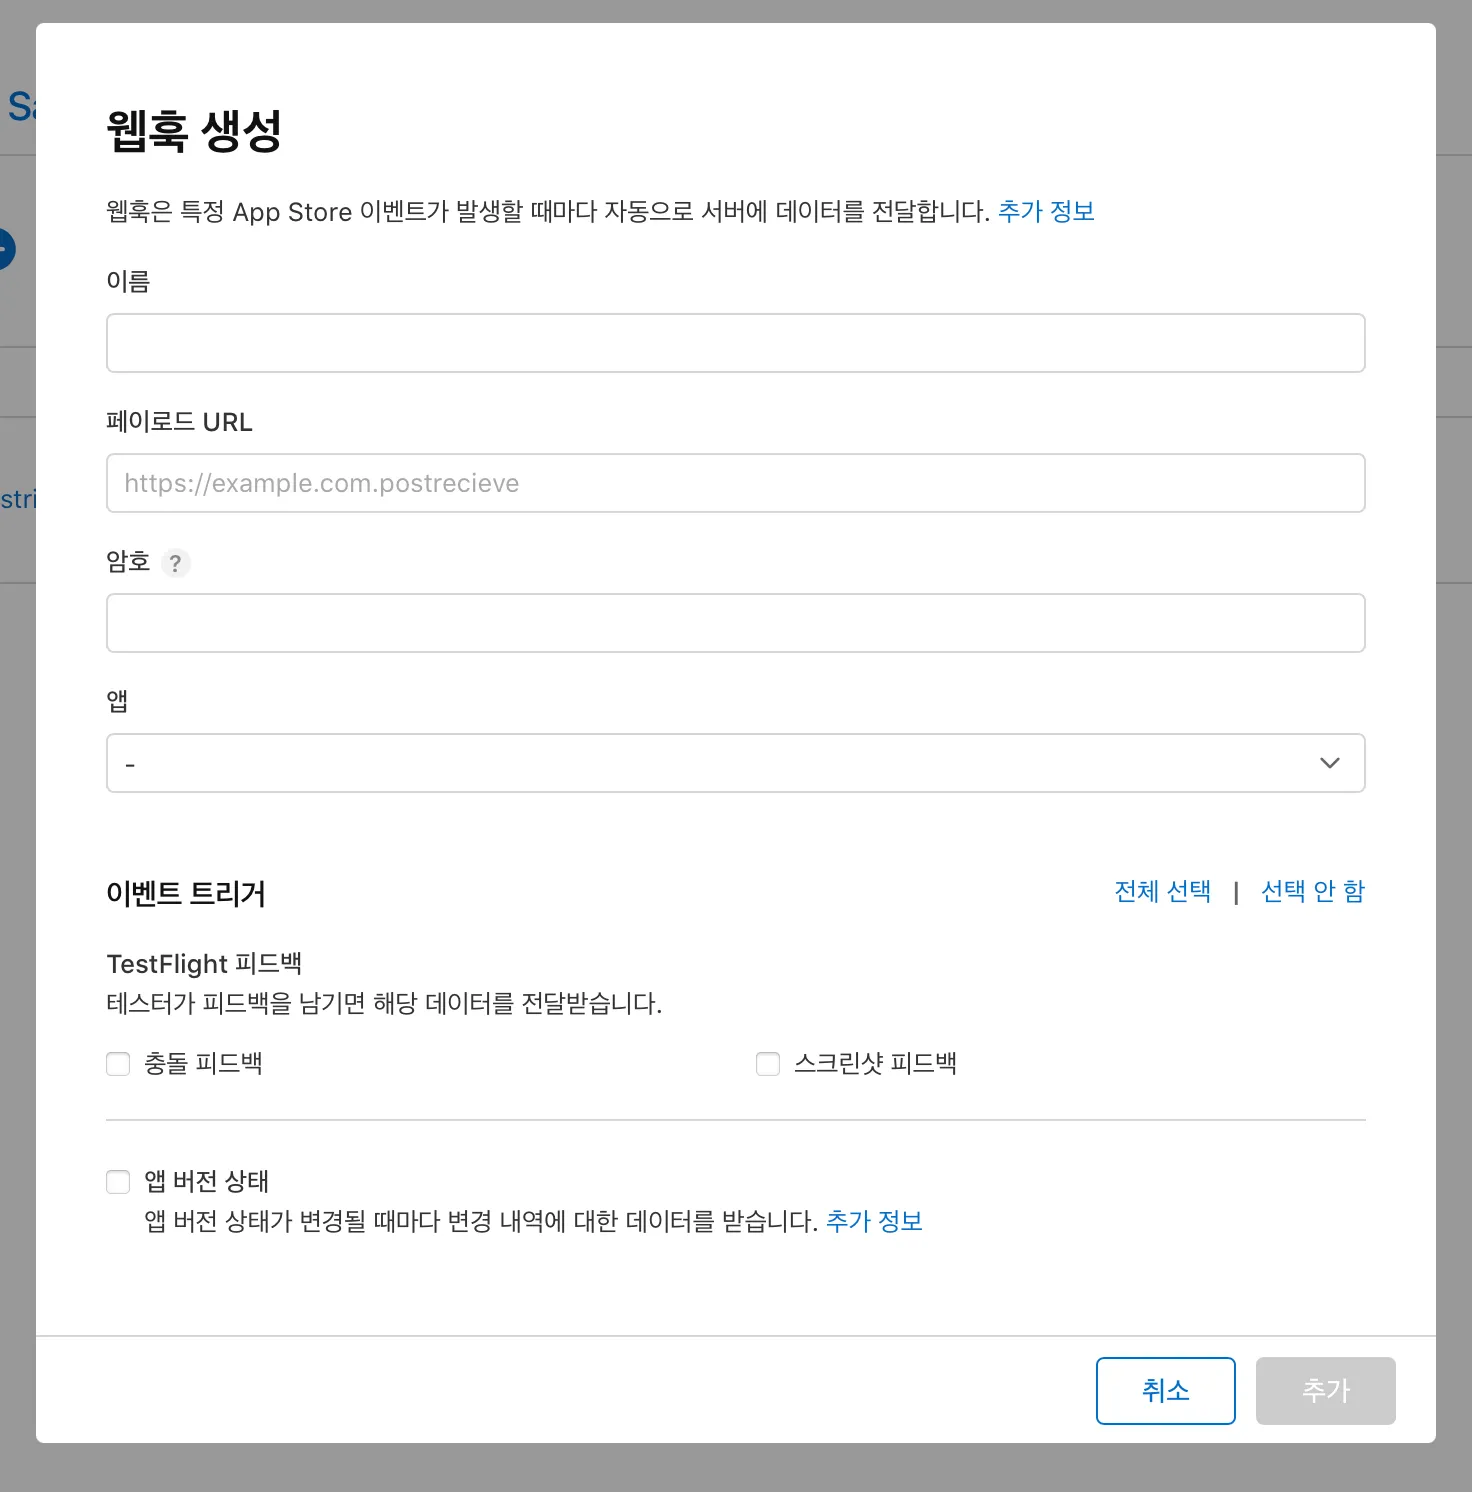
- 이름 : 웹훅의 이름
- 페이로드 URL : 해당 데이터를 받을 웹훅 URL(Slack이나 Discord 같은 협업 툴에서 받아올 수 있습니다.)
- 암호 : App Store Connect가 발행한 웹훅인지 판별을 위한 암호입니다.
- 앱 : 이벤트를 받을 앱을 선택합니다.
- 이벤트 트리거: 받을 이벤트를 선택합니다. (저는 Testflight, 앱 버전 상태 다 선택했습니다.)
이렇게 웹훅을 연결완료 했고 심사과정이 업데이트 되면 자동으로 업데이트 된 정보가 디스코드로 날라올겁니다!!
라고 하면 너무 쉽겠죠 ㅋㅋ;;
분명히 에러가 날겁니다.
아직 해야 할 단계가 하나 남아있습니다.
3. Cloud Run 으로 페이로드 변환
제가 웹훅 사용을 위해서 좀 찾아보니 각각의 툴 마다 사용하는 페이로드(JSON) 포맷이 다 정해져 있더군요.
App Store Connect 웹 훅에서 제공하는 포맷과 Discord에서 지원하는 포맷이 달라 중간에 변환 과정이 필요합니다.
// Discord 페이로드 예시
{
    "embeds": [
        {
            "title": "타이틀입니다.",
            "fields": [
                {
                    "name": "테스트",
                    "value": "Hello World",
                    "inline": true
                },
                {
                    "name": "테스트",
                    "value": "Hello World",
                    "inline": true
                }
            ],
            "color": 65535,
            "timestamp": "2025-04-16T05:00:52.745Z"
        }
    ]
}

// App Store Connect 페이로드 예시
{
  "data": {
    "type": "webhookPingCreated",
    "id": "",
    "version": 1,
    "attributes": {
      "timestamp": "2025-06-27T06:09:36.852689347Z"
    }
  }
}
개인 프로젝트라 이벤트 변경사항이 자주 일어나지 않아 굳이 포맷 변환을 위한 서버는 과하다 생각해서 Serverless 플랫폼인 Google Cloud Run을 사용해 JSON 변환을 진행했습니다.
Cloud Run의 기본 세팅 방법은 구글링하면 잘 나와있어서 저는 소스코드만 올려 놓겠습니다 ㅎㅎ;;
import functions_framework
import requests

@functions_framework.http
def handle_connect_webhook(request):
    payload = request.get_json()

    data = payload['data']
    type = data['type']
    attributes = data['attributes']

    if type == 'appStoreVersionAppVersionStateUpdated':
        current_status = attributes['newValue']
        timestamp = attributes['timestamp']
        result = {
            'embeds': [
                {
                    'title': '심사 상태가 업데이트 되었습니다.',
                    'fields': [
                        {
                            'name': '현재 상태',
                            'value': attributes['newValue']
                        }
                    ],
                    'color': 255,
                    'timestamp': attributes['timestamp']
                }
            ]
        }
    elif type == 'betaFeedbackScreenshotSubmissionCreated':
        result = {
            'embeds': [
                {
                    'title': '테스트플라이트 스크린샷 피드백',
                    'description': '테스트플라이트에 스크린샷 피드백이 왔습니다',
                    'color': 65535,
                    'timestamp': attributes['timestamp']
                }
            ]
        }
    elif type == 'betaFeedbackCrashSubmissionCreated':
        result = {'content': 'betaFeedbackCrashSubmissionCreated'}
    else:
        result = {
            'embeds': [
                {
                    'title': type,
                    'description': '테스트 노티입니다.',
                    'color': 16776960,
                    'timestamp': attributes['timestamp']
                }
            ]
        }

    discord_url = 'https://discord.com/api/webhooks/...'

    response = requests.post(discord_url, json= result)

return (response.text, response.status_code)- App Store Connect 페이로드에서 json get
- 이벤트 타입에 따라 분기 설정
- appStoreVersionAppVersionStateUpdated : 앱스토어 심사 과정
- betaFeedbackScreenshotSubmissionCreated : 베타 피드백(with screenshot)
- betaFeedbackCrashSubmissionCreated : 베타 앱 충돌 피드백
- 그 외 나머지(테스트 핑)
- 각 분기에서 Discord 페이로드 포맷에 맞게 JSON 생성
- 아까전에 받은 Discord Webhook URL로 post
- status code와 메시지 반환

그 후 위에서 만든 App Store Connect 웹 훅의 페이로드 URL을 Cloud Run URL로 수정합니다.
App Store Connect와 Discord 포맷 예시
https://developer.apple.com/documentation/appstoreconnectapi/webhook-events
App Store Versions App Version State Updated
{
  "data": {
    "type": "appStoreVersionAppVersionStateUpdated",
    "id": "7c813492-9516-4c79-903e-224effdd57ac",
    "version": 1,
    "attributes": {
      "newValue": "READY_FOR_REVIEW",
      "oldValue": "PREPARE_FOR_SUBMISSION",
      "timestamp": "2025-04-16T05:00:52.745Z"
    },
    "relationships": {
      "instance": {
        "data": {
          "type": "appStoreVersions",
          "id": "ad7e6298-2570-4ca6-b3cc-f81788e40bdc"
        }
      }
    }
  }
}
Beta Feedback Screenshot Submission Created
{
  "data": {
    "type": "betaFeedbackScreenshotSubmissionCreated",
    "id": "4a9eacca-e53f-4006-85db-aa18c515663a",
    "version": 1,
    "attributes": {
      "timestamp": "2025-05-08T01:29:36.16Z"
    },
    "relationships": {
      "instance": {
        "data": {
          "type": "betaFeedbackScreenshotSubmissions",
          "id": "AD8JvKbr0BK0Cj9OnM6WO6I"
        },
        "links": {
          "self": "https://api.appstoreconnect.apple.com/v1/betaFeedbackScreenshotSubmissions/AD8JvKbr0BK0Cj9OnM6WO6I"
        }
      }
    }
  }
}
Beta Feedback Crash Submission Created
{
  "data": {
    "type": "betaFeedbackCrashSubmissionCreated",
    "id": "a4319bc8-ed16-460b-8de6-ba9734b55631",
    "version": 1,
    "attributes": {
      "timestamp": "2025-05-16T20:53:20.729Z"
    },
    "relationships": {
      "instance": {
        "data": {
          "type": "betaFeedbackCrashSubmissions",
          "id": "AK7UjG-qL5QxXf3gIOGjbpQ"
        },
        "links": {
          "self": "https://api.appstoreconnect.apple.com/v1/betaFeedbackCrashSubmissions/AK7UjG-qL5QxXf3gIOGjbpQ"
        }
      }
    }
  }
}
Discord
https://birdie0.github.io/discord-webhooks-guide/structure/embeds.html
4. 완성~ 결과 확인

오른쪽 상단 테스트 버튼을 눌러 테스트 이벤트를 발생할 수 있습니다.
잘 연결이 되었는지 확인해 볼 수 있어요~~
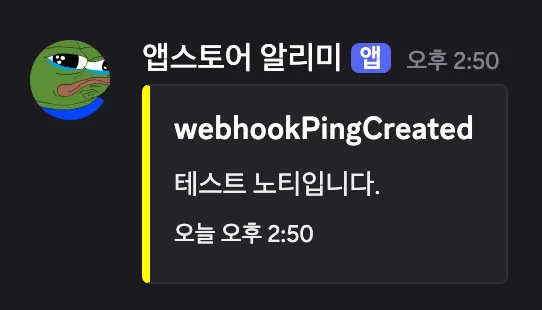
이렇게!!!!
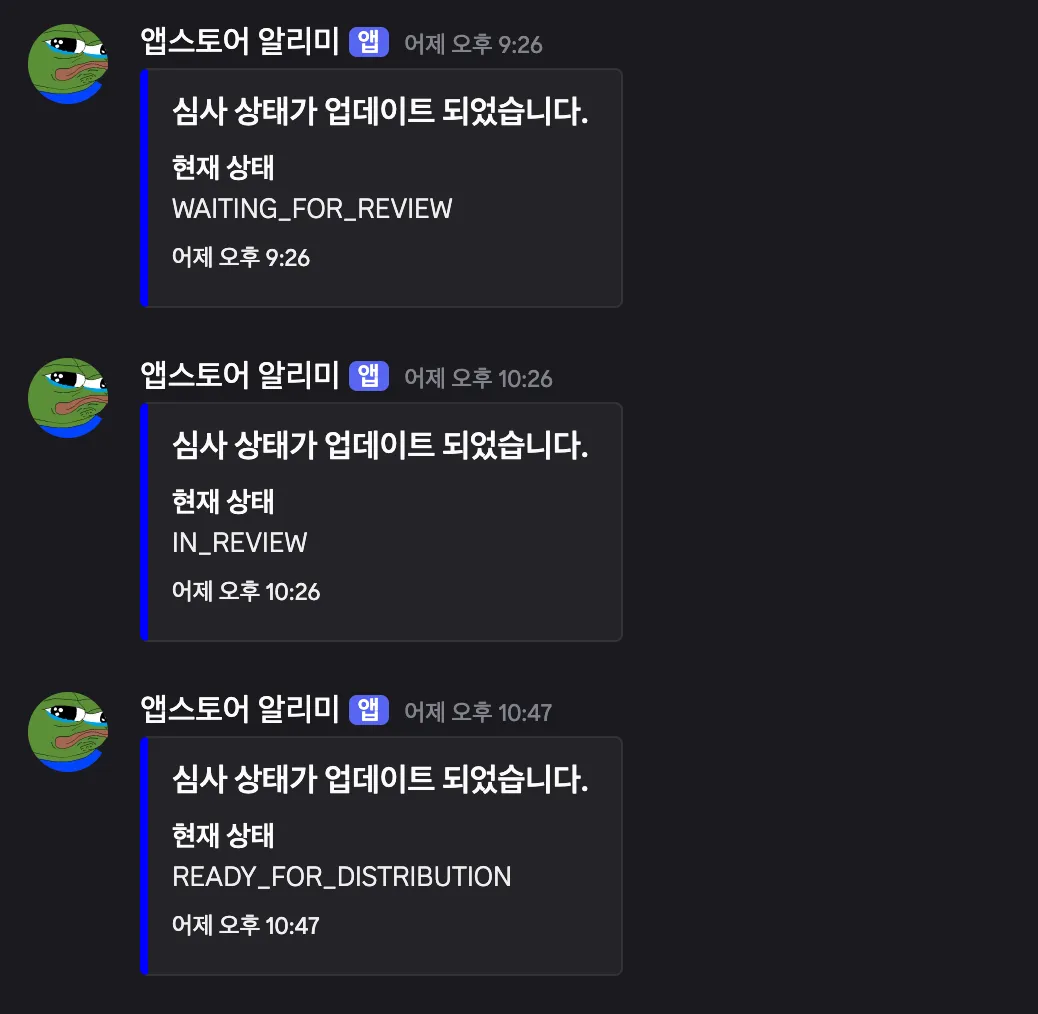
추가적으로 웹훅을 연결한 후 앱 업데이트도 진행했는데 해당 알림도 깔끔하게 왔습니다!
아직 취준생 이지만 이제야 뭔가 일하는 개발자가 된 기분이 드네요 ㅎㅎ
궁금하신 부분 있으시면 편하게 댓글이나 연락주세요!!!

Hey, nice article! I am implementing webhooks for my application and have a small question. Can you please reach me (i did not find any of your contacts)
my email is: gacob32@gmail.com
or discord: plaggezy