
Greedy
예제 입력 1
5 21
5 6 7 8 9
예제 출력 1
21
예제 입력 2
10 500
93 181 245 214 315 36 185 138 216 295
예제 출력 2
497코드
import java.io.BufferedReader;
import java.io.IOException;
import java.io.InputStreamReader;
import java.util.StringTokenizer;

// https://www.acmicpc.net/problem/2798
public class two2798 {
    public int solution() throws IOException {
        BufferedReader reader = new BufferedReader(new InputStreamReader(System.in));

        // 카드 개수, 목표 숫자
        StringTokenizer infoToken = new StringTokenizer(reader.readLine());
        int cardCount = Integer.parseInt(infoToken.nextToken());
        int target = Integer.parseInt(infoToken.nextToken());

        StringTokenizer cardTokens = new StringTokenizer(reader.readLine());
        int[] cards = new int[cardCount];
        for (int i = 0; i < cardCount; i++) {
            cards[i] = Integer.parseInt(cardTokens.nextToken());
        }

        int max = 0;
        // 3장의 카드를 뽑는다
        // 첫 번째 카드 -> n장의 카드가 있다면 첫 번째는 n-2 까지
        for (int i = 0; i < cardCount - 2; i++) {
            // 두 번째 카드 -> 두 번째는 n - 1 까지
            for (int j = i + 1; j < cardCount - 1; j++) {
                // 세 번째 카드 -> 세 번째 카드는 n까지
                for (int k = j + 1; k < cardCount; k++) {
                    int sum = cards[i] + cards[j] + cards[k];
                    // 이번 카드 3장의 합이 여태까지 구한 것 중 제일 크면
                    if (sum <= target && sum > max) max = sum;
                }
            }
        }
        return max;
    }

    public static void main(String[] args) throws IOException {
        System.out.println(new two2798().solution());
    }
}
Greedy Algorithm
Greedy
답을 도출하기 위해 선택을 해야 할 때, 현재 가장 최선인 답안을 고르는 알고리즘이다. 탐욕적 알고리즘이라고도 한다. 탐욕 알고리즘의 치명적인 단점은 탐욕 알고리즘이 항상 정답을 돌려주지는 않는다는 점이다.
탐욕적 알고리즘이 가진 속성이 있다. 여태까지 선택한 결과가 현재의 선택에 영향을 미치지만, 미래의 선택은 현재의 선택에 영향을 미치지 않는다. 이것을 탐욕적 선택 속성 Greedy Property Choice라고 한다. 또한 매번 선택한 결과인 부분 문제의 해답이 최적 해의 일부분이 된다.
Coin
문제
준규가 가지고 있는 동전은 총 N종류이고, 각각의 동전을 매우 많이 가지고 있다.
동전을 적절히 사용해서 그 가치의 합을 K로 만들려고 한다. 이때 필요한 동전 개수의 최솟값을 구하는 프로그램을 작성하시오.
입력
첫째 줄에 N과 K가 주어진다. (1 ≤ N ≤ 10, 1 ≤ K ≤ 100,000,000)
둘째 줄부터 N개의 줄에 동전의 가치 Ai가 오름차순으로 주어진다. (1 ≤ Ai ≤ 1,000,000, A1 = 1, i ≥ 2인 경우에 Ai는 Ai-1의 배수)
출력
첫째 줄에 K원을 만드는데 필요한 동전 개수의 최솟값을 출력한다.
예제 입력 1
10 4200
1
5
10
50
100
500
1000
5000
10000
50000
예제 출력 1
6
예제 입력 2
10 4790
1
5
10
50
100
500
1000
5000
10000
50000
예제 출력 2
12코드
import java.io.BufferedReader;
import java.io.IOException;
import java.io.InputStreamReader;
import java.util.StringTokenizer;

// https://www.acmicpc.net/problem/11047
public class four11047 {
    public int solution() throws IOException {
        BufferedReader reader = new BufferedReader(new InputStreamReader(System.in));
        StringTokenizer info = new StringTokenizer(reader.readLine());
        // 동전의 종류
        int coinKinds = Integer.parseInt(info.nextToken());
        // 만들고자 하는 금액
        int targetAmount = Integer.parseInt(info.nextToken());
        // 개별 동전 가치 저장
        int[] coinAmounts = new int[coinKinds];

        for (int i = 0; i < coinKinds; i++) {
            int coinAmount = Integer.parseInt(reader.readLine());
            // 큰 동전을 0에 두기 위해 역손으로 저장
            coinAmounts[coinKinds - i - 1] = coinAmount;
        }

        // 실제로 사용한 동전의 개수
        int coinUsed = 0;
        /*
        // 1. 사전적으로 풀이
        int currentCoin = 0;
        while (targetAmount > 0) {
            // 현재 선택한 동전을 사용할 수 있을 때
            if(targetAmount >= coinAmounts[currentCoin]) {
                // 사용
                targetAmount -= coinAmounts[currentCoin];
                coinUsed++;
            }
            // 아니라면 다음 동전 사용
            else currentCoin++;
        }

         */

        // 2. 수학적으로 계산
        // 큰 동전부터 순서대로 확인
        for (int i = 0; i < coinKinds; i++) {
            // 남은 금액에서 현재 동전으로 지불할 수 있는 최대 갯수
            coinUsed += targetAmount / coinAmounts[i];
            // 지불하고 남은 금액 갱신
            targetAmount %= coinAmounts[i];
        }

        return coinUsed;
    }

    public static void main(String[] args) throws IOException {
        System.out.println(new four11047().solution());
    }
}
HTTP Client
HTTP
HTTP는 Cilent-Server Protocol이다. Client와 Server가 무엇인지부터 살펴보자. 우리가 현재 Spring boot를 이용해 요청을 처리하는 server를 만들고 있다. 그러나 예를 들어 날씨에 관한 요청을 보내고 그 요청을 가져와서 새로운 기능을 만들고 싶다면 외부 API(Application Programming Interface)를 사용해서 가져올 수 있다. 그렇다면 서버에서 다른 서버로 요청을 어떻게 보낼 수 있을까?
외부 api 사용을 위해 연습해 보자.
Rest Template
원래의 Spring에서 HTTP 요청을 보내기 위해 제공한 HTTP Client이다. Spring 5 버전 이후로 유지 보수 단계이지만 오래 사용한 만큼 여전히 사용처가 많다.
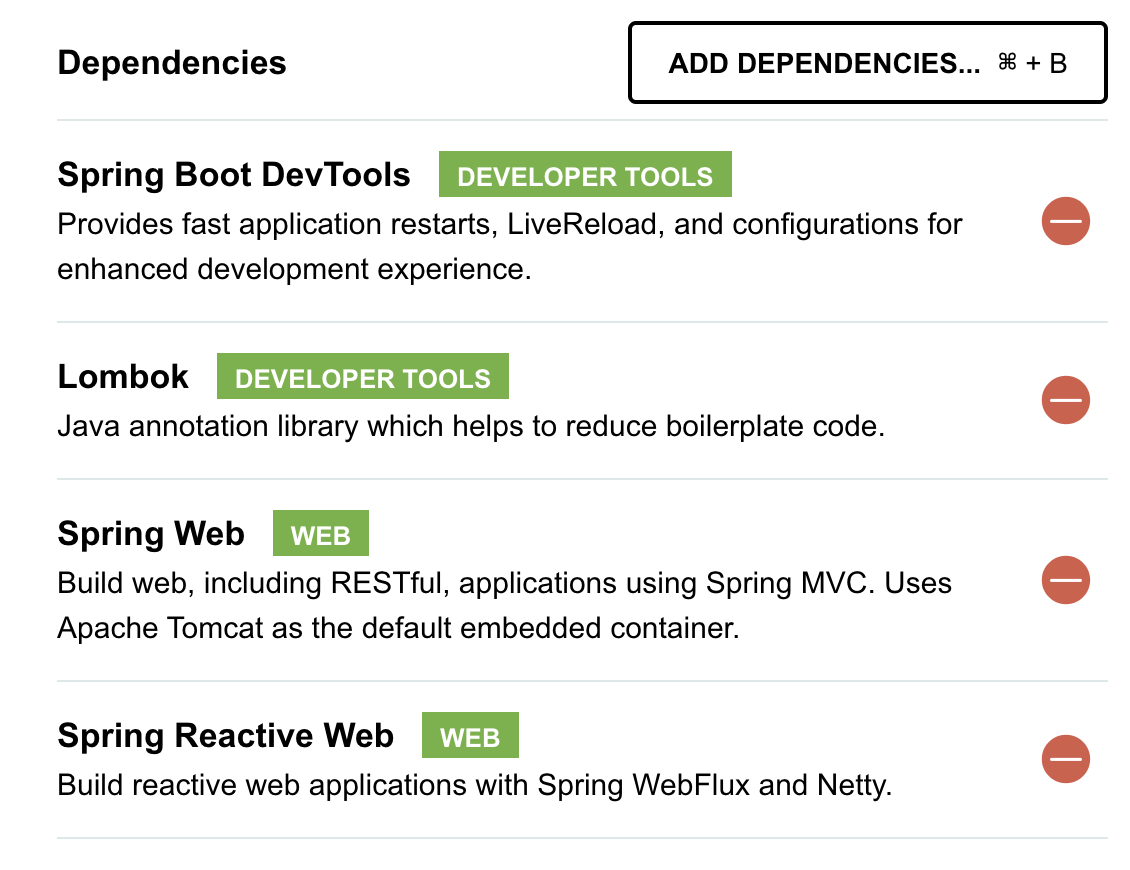
Spring에서 HTTP Client 기능을 사용하기 위해 Spring Reactive Web을 추가해 준다.
RestTemplate을 사용하기 위해 객체를 정의해 준다.
import lombok.extern.slf4j.Slf4j;
import org.springframework.stereotype.Service;
import org.springframework.web.client.RestTemplate;

@Service
@Slf4j
public class BearRestService {
    public void getBearObject() {
        // RestTemplate:
        RestTemplate restTemplate = new RestTemplate();
    }
}
이후 어디로 HTTP 요청을 보낼 것인지를 정한다.
@Service
@Slf4j
public class BearRestService {
    public void getBearObject() {
        // RestTemplate:
        RestTemplate restTemplate = new RestTemplate();
        String url = "https://random-data-api.com/api/v2/beers";
    }
}
이후 Rest Template으로 GET 요청을 보내 본다. getForObject는 데이터를 자바 객체로 바꿔 주는 역직렬화 과정을 진행해 준다.
@Service
@Slf4j
public class BearRestService {
    public void getBearObject() {
        // RestTemplate:
        RestTemplate restTemplate = new RestTemplate();
        String url = "https://random-data-api.com/api/v2/beers";

        // RestTemplate으로 GET 요청
        String responseBody = restTemplate.getForObject(url, String.class);
        log.info(responseBody);
    }
}
테스트 코드를 작성해서 확인해 보자.
import org.junit.jupiter.api.Test;
import org.springframework.beans.factory.annotation.Autowired;
import org.springframework.boot.test.context.SpringBootTest;

@SpringBootTest
public class BearRestServiceTest {
    @Autowired
    private BearRestService service;

    @Test
    public void testGetBearObject() {
        service.getBearObject();
    }
}
무언가 돌아오고 있는 모습을 확인할 수 있다.

이때 이 데이터를 Dto 형태로 자바에서 관리하기 편하게 저장해 주는 것이 좋기 때문에, Response Body에 맞춰 DTO를 만들 수 있다.
@Data
public class BeerGetDto {
    private Long id;
    private String uid;
    private String brand;
    private String name;
    private String style;
    private String hop;
    private String yeast;
    private String malts;
    private String ibu;
    private String alcohol;
    private String blg;
}
@Service
@Slf4j
public class BeerRestService {
public void getBearObject() {
// RestTemplate:
RestTemplate restTemplate = new RestTemplate();
String url = "https://random-data-api.com/api/v2/beers";
// @RequestBody -> JSON -> DTO
BeerGetDto responseBody
= restTemplate.getForObject(url, BeerGetDto.class);
log.info(responseBody.toString());
}
}이랬을 때 요청에 맞춰 Dto로 잘 변환되는 것을 알 수 있다.

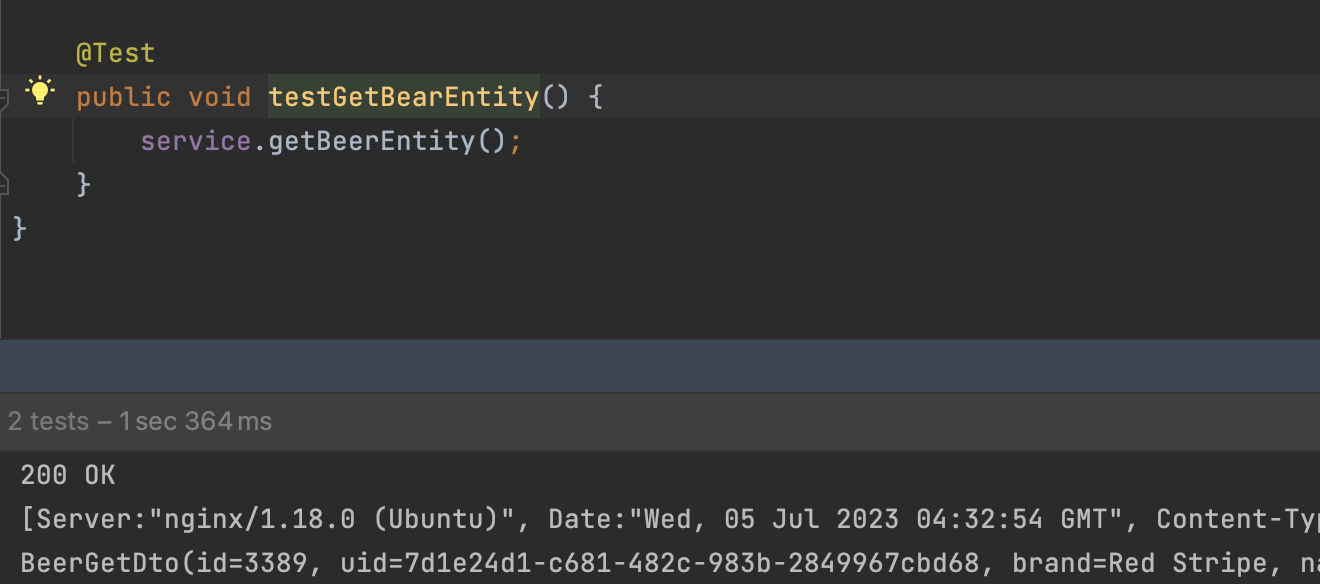
HTTP 요청에 의해 반환되는 값 중 Body 뿐만 아니라 응답 전체를 받아 올 수도 있다.
public void getBeerEntity() {
        // RestTemplate: Spring에서 제공하는 기본 HTTP Client
        RestTemplate restTemplate = new RestTemplate();
        String url = "https://random-data-api.com/api/v2/beers";

        // RestController
        ResponseEntity<BeerGetDto> response =
                restTemplate.getForEntity(url, BeerGetDto.class);
        log.info(response.getStatusCode().toString());
        log.info(response.getHeaders().toString());
        log.info(response.getBody().toString());
    }
테스트 코드를 작성해 확인해 보면 잘 나오는 것을 확인할 수 있다.
서버끼리 통신을 하기 위해 beer이라는 서버를 클론받아 따로 실행해 준다. 포트는 8081번을 사용한다.
Beer 서버에 Post 요청을 보내기 위해 Beer 서버에서 받을 수 있는 BeerPostDto를 생성한다.
@Data
public class BeerPostDto {
    private String name;
    private Long cc;
    private Double alcohol;
}
이후 서비스에서 Beer 서버에서 POST 요청을 보내는 함수를 작성한다.
public void postBeerObject() {
        // RestTemplate: Spring에서 제공하는 기본 HTTP Client
        RestTemplate restTemplate = new RestTemplate();
        String url = "https://random-data-api.com/api/v2/beers";

        BeerPostDto beerPostDto = new BeerPostDto();

        // post 요청을 보낼 때 responseBody를 같이 전달해야 함
        String responseBody = restTemplate.postForObject(
                url, // 요청 url
                beerPostDto, // requestBody
                String.class); // 응답 해석 타입
    }
이를 응답받는 ResponseBody에 따라 Dto로 만들어 관리할 수도 있다.
public void postBeerObject() {
// RestTemplate: Spring에서 제공하는 기본 HTTP Client
RestTemplate restTemplate = new RestTemplate();
String url = "http://localhost:8081/give-me-beer";
BeerPostDto beerPostDto = new BeerPostDto();
// post 요청을 보낼 때 responseBody를 같이 전달해야 함
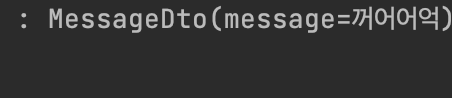
MessageDto responseBody = restTemplate.postForObject(
url, // 요청 url
beerPostDto, // requestBody
MessageDto.class); // 응답 해석 타입
log.info(responseBody.toString());
// 응답 Body 없이 응답하는 URL
url = "http://localhost:8081/give-me-beer-204";
ResponseEntity<Void> response = restTemplate.postForEntity(
url,
beerPostDto,
Void.class); // null의 객체화된 클래스
log.info(response.getStatusCode().toString());
}응답이 잘 뜨는 것을 확인할 수 있다.

Web Client
Web Client는 반응형(Reactive) 웹 개발의 수요에 맞춰서 등장한 HTTP 클라이언트이다. 반응형 웹 개발이란 어떤 함수의 결과에 따라 동작하지 않고, 어떤 엔티티의 변화에 반응해서 동작하는 프로그래밍 이다. 또한 Builder 패턴처럼 사용하는 HTTP Client 객체이며 이를 익혀 보기 위해 새로운 서비스 안에 Web Client를 정의한다.
@Service
@Slf4j
public class BeerClientService {
    public void getBeer() {
        WebClient webClient = WebClient.builder().build();

        String url = "https://random-data-api.com/api/v2/beers";
        // 어떤 HTTP Method로 요청을 보낼지를 get() post() 메소드 순으로 결정
        // 만일 다른 메소드를 쓰고 싶다면 method() 사용

    }
}
이후 GET 요청을 처리하는 메소드를 만들어 보자.
public void getBeer() {
        WebClient webClient = WebClient.builder().build();

        String url = "https://random-data-api.com/api/v2/beers";
        // 어떤 HTTP Method로 요청을 보낼지를 get() post() 메소드 순으로 결정
        // 만일 다른 메소드를 쓰고 싶다면 method() 사
        String response = webClient.get() // webClient.method(HttpMethod.GET)\
                .uri(url) // 요청 경로 설정
                .header("x-test", "header") // 요청 헤더 추가
                // GET 요청이라 Body 없이
                .retrieve() // 여기 전까지는 요청을 정의한 부분
                // 이제부터 정의하는 건 응답을 어떻게 처리할 것인지
                .bodyToMono(String.class) // 응답이 한 번 돌아올 것이며 String으로 받을 거임
                .block(); // 동기식으로 처리하겠다
    }
이후 테스트 코드를 작성한 뒤 테스트하면 잘 뜨는 것을 확인할 수 있다.

BeerDto로 바꾸는 것 역시 가능하다.
public void getBeer() {
        WebClient webClient = WebClient.builder().build();

        String url = "https://random-data-api.com/api/v2/beers";
        // 어떤 HTTP Method로 요청을 보낼지를 get() post() 메소드 순으로 결정
        // 만일 다른 메소드를 쓰고 싶다면 method() 사
        BeerGetDto response = webClient.get() // webClient.method(HttpMethod.GET)\
                .uri(url) // 요청 경로 설정
                .header("x-test", "header") // 요청 헤더 추가
                // GET 요청이라 Body 없이
                .retrieve() // 여기 전까지는 요청을 정의한 부분
                // 이제부터 정의하는 건 응답을 어떻게 처리할 것인지
                .bodyToMono(BeerGetDto.class) // 응답이 한 번 돌아올 것이며 String으로 받을 거임
                .block(); // 동기식으로 처리하겠다
        log.info(response.toString());
    }
POST도 똑같이 진행할 수 있다.
public void postBear() {
        WebClient webClient = WebClient.builder().build();
        String url = "http://localhost:8081/give-me-beer";

        BeerPostDto dto = new BeerPostDto();
        MessageDto responseBody = webClient.post()
                .uri(url)
                .bodyValue(dto)
                .retrieve()
                .bodyToMono(MessageDto.class)
                .block();
        log.info(responseBody.toString());
    }
테스트 코드 작성 후 확인해 보면 잘 작동하는 것을 확인할 수 있다.
요청이 수락은 됐지만 데이터에 대한 변동이 없거나 서버가 돌려줄 데이터가 없을 경우 처리했다는 사실만 말해 주는 204 요청을 따로 처리할 수도 있다.
Interface DI
만약 날씨 API를 차용한다고 생각해 보면, 네이버, 다음, 구글 등에서 사용할 수 있다. 내가 필요로 하는 건 날씨 정보이지, 날씨 정보를 가져오는 방법이 아니다. 즉 HTTP Client는 굳이 따지자면 Service 같아 보이지만 HTTP 요청이 핵심적인 비즈니스 로직인지 아닌지에 따라 그 영역이 달라진다. 단순한 데이터를 받아 오는 역할만 하는 경우에는 @Component로 사용할 수도 있다.
비즈니스 로직 입장에서는 Web Client인지 Rest Template인지 상관하지 않고 데이터를 받아오기만 하면 된다. 따라서 행동만 정의된 추상적인 타입인 interface를 활용한다.
이를 코드로 연습해 보기 위해 BeerService에 맥주를 마시는 메소드를 구현한다고 생각해 보자.
@Slf4j
@Service
public class BeerService {
    public void drickBeer() {
        log.info("order beer");
        // TODO API를 이용해 맥주 정보 받아오기
        log.info("맛있다");
    }
}
이때 내가 가진 관심은 맥주 정보이지 맥주 정보를 받아오는 방법이 아니다. 따라서 나의 비즈니스 로직은 맥주 정보이다.
따라서 Bean 객체로 맥주 정보를 받아 오는 클래스를 만들어 준다.
@Component
// 그냥 평범한 빈 객체
public class BeerRestClient {
    public BeerGetDto getBeer() {
        // BearRestService에 있는 코드
        RestTemplate restTemplate = new RestTemplate();
        String url = "https://random-data-api.com/api/v2/beers";

        // @RequestBody -> JSON -> DTO
        return restTemplate.getForObject(url, BeerGetDto.class);
    }
}
이 객체를 BeerService에서 사용하고 싶다. 의존성 주입을 어떤 식으로 하면 될까? Spring 방식의 Dependency Injection을 다음과 같이 진행해 주면 된다.
@Slf4j
@Service
public class BeerService {

    **public BeerService(BeerRestClient client) {
        this.client = client;
    }

    private final BeerRestClient client;**
    public void drickBeer() {
        log.info("order beer");
        // TODO API를 이용해 맥주 정보 받아오기
        BeerGetDto result = client.getBeer();
        log.info("{}는 맛있다", result.getName());
    }
}
테스트 코드를 보면 잘 나타나는 것을 확인할 수 있다.

그러다 위 코드의 경우 Beer를 유지 보수만 하고 있는 RestTemplate을 쓰고 있기 때문에 업데이트가 어려울 수 있다. 따라서 다른 Client인 Web Client로 교체해야 할 수도 있다. 이때도 지금처럼 BeerWebClient를 만들어서 Component로 등록할 수 있다.
@Component
public class BeerWebClient {
    public BeerGetDto getBeer() {
        WebClient webClient = WebClient.builder().build();
        String url = "https://random-data-api.com/api/v2/beers?size=10";
        return webClient.get()
                .uri(url)
                .retrieve()
                .bodyToMono(BeerGetDto.class)
                .block();
    }
}
이후 서비스에서는 어떻게 WebClient로 바꿀 수 있을까?
@Slf4j
@Service
public class BeerService {

    public BeerService(BeerWebClient client) {
        this.client = client;
    }

    private final BeerWebClient client;
    public void drickBeer() {
        log.info("order beer");
        // TODO API를 이용해 맥주 정보 받아오기
        BeerGetDto result = client.getBeer();
        log.info("{}는 맛있다", result.getName());
    }
}
위처럼 모든 Rest를 Web으로 하나하나 바꿔서 변경해야 한다. 코드가 길어질 경우 이렇게 구현된 클래스를 바탕으로 의존성을 주입받기 시작하면 결합성이 매우 증가하여 수정이나 보수가 매우 귀찮은 방법이다. 이 문제를 해소하기 위해 인터페이스 기반의 의존성 주입을 한다.
먼저 BeerClient라는 Interface를 정의한다.
public interface BeerClient {
    BeerGetDto getBeer();
}
이후 RestClient 에 implements BeerClient를 넣어 구현체로 만든다. 후에 Service에서 의존성을 인터페이스로 받는다.
@Slf4j
@Service
public class BeerService {

    **private final BeerClient client;

    public BeerService(BeerClient client) {
        this.client = client;
    }**

    public void drickBeer() {
        log.info("order beer");
        // TODO API를 이용해 맥주 정보 받아오기
        BeerGetDto result = client.getBeer();
        log.info("{}는 맛있다", result.getName());
    }
}
이렇게 본인이 어떻게 작동할 것인지 나중에 받아서 작동하는 방식을 Stategy Pattern이라고 한다.
이후 WebClient도 인터페이스 구현체로 만들면 다시 의존성 주입에 오류가 뜬다. 의존성 주입을 할 수 있는 클래스의 종류가 두 개라서, 어떤 애를 우선적으로 적용할지 말해 줘야 한다. 이때 WebClient를 우선적으로 주입하기 위해 @Primary Annotation을 추가하면 된다.
**@Primary**
@Component
public class BeerWebClient implements BeerClient {
    public BeerGetDto getBeer() {
        WebClient webClient = WebClient.builder().build();
        String url = "https://random-data-api.com/api/v2/beers?size=10";
        return webClient.get()
                .uri(url)
                .retrieve()
                .bodyToMono(BeerGetDto.class)
                .block();
    }
}
이럴 경우 Client가 달라져도 서비스 코드는 무엇도 건드리지 않은 채 수정이 가능하다.