저번 글에서는 다른 앱의 데이터를 전달받는 방법을 소개했었다.
이제 그 전달받은 데이터(YouTube url)를 가지고 YouTube Data API 를 이용해서 더 많은 데이터들을 가져와 화면에 뿌려보는 작업을 수행해보도록 하겠다.
우선 YouTube Data API에 관한 상세한 설명은 링크를 첨부하여 대체하도록 하겠다.
https://developers.google.com/youtube/v3/docs?hl=ko
사용한 리소스 videos 이다
https://developers.google.com/youtube/v3/docs/videos?hl=ko
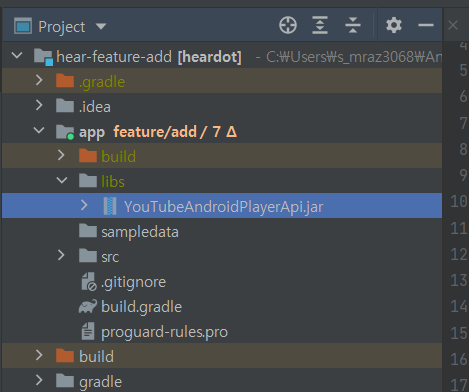
유튜브 영상 정보를 얻어오기 위해선 추가적으로 프로젝트에 다운 받아야 하는 파일이 존재한다.
https://developers.google.com/youtube/android/player/downloads
해당 링크에 들어가 압축파일을 다운받고 압축을 푼 뒤에
프로젝트 내부에 app 폴더 내부에 libs 폴더를 새로 추가하고 jar 파일을 넣어주면 된다.
이제 기본적인 세팅은 완료되었다.
이제 저번 글에서 받아왔던 유튜브 링크를 확인해보도록 하자.
sharedText: https://youtu.be/q-YzHC6m7Po
이 링크에서 해당 동영상의 key 값, 즉 고유 id 는 / 뒤에 gnbfLrY2ya8 라는 값이다. 실제로 다른 영상들의 링크도 앞 부분의 base url은 모두 같고 뒤에 id만 다르다.
따라서 뒤에 id를 따로 추출하기 위해 간단한 문자열 파싱 작업을 수행해주자.
if(Intent.ACTION_SEND == action && type != null) {
	if("text/plain" == type) {
    		sharedText = intent.getStringExtra(Intent.EXTRA_TEXT).toString()

		Log.d("sharedText", sharedText)

		val arr = sharedText.split("be/")
    	videoId = arr[1]

		Log.d("sharedText", videoId)

		fetchData(videoId)
    	}
        else if (type.startsWith("image/")) {
                val imageUri = intent.getParcelableExtra<Uri>(Intent.EXTRA_STREAM)
                Log.d("imageUri", "$imageUri")
            }
        }
sharedText: q-YzHC6m7Po
이제 key값을 가져왔으니 api 문서를 참고해서 형식에 맞춰 내가 필요한 정보들을 request 해주면 된다.
https://developers.google.com/youtube/v3/getting-started?hl=ko
내가 필요로 했던 정보는 영상의 제목과 채널 명, 그리고 썸네일이었다.
따라서 요청 request 는 다음과 같다.
interface YouTubeService {
    //video resource endpoint
    @GET("youtube/v3/videos")
    suspend fun fetchYoutubeSearchResultInfo(
        @Query("id") videoId: String,
        @Query("key") apiKey: String = BuildConfig.GOOGLE_API_KEY,
        @Query("fields") fields: String = "items(id,snippet(title,thumbnails,channelTitle))",
        @Query("part") part: String = "snippet"
    ): Response<YouTubeResponse>?
}
해당 메소드를 통해 retrofit 통신을 수행해보도록 하자.
class YouTubeRepository {
    suspend fun fetchYoutubeVideoInfo(
        accessToken: String,
        videoId: String,
    ): YouTubeState<YouTubeResponse> {
        ServiceGenerator.setBuilderOptions(
            targetUrl = BuildConfig.YOUTUBE_BASE_URL,
            authToken = accessToken
        )
            .create(YouTubeService::class.java)
            .fetchYoutubeSearchResultInfo(
                videoId = videoId
            )?.run {
                return YouTubeState.Success(
                    this.body() ?: YouTubeResponse()
                )
            } ?: return YouTubeState.Error(Exception("Fetch Exception"))
    }
}
백엔드 서버가 존재할 경우 로그인할때 사용한 accessToken을 담아보내지만 그렇지 않다면 google api키를 담아 보내주면 된다.
suspend fun fetchYoutubeVideoInfo(
        accessToken: String,
        videoId: String,
        context: CoroutineContext = Dispatchers.IO,
        start: CoroutineStart = CoroutineStart.DEFAULT,
    ): YouTubeState<YouTubeResponse> = viewModelScope.async(
        context = context,
        start = start
    ) {
        youTubeRepository.fetchYoutubeVideoInfo(
            accessToken = accessToken,
            videoId = videoId
        )
    }.await()
view 에서
private fun fetchData(videoId: String) {
mainScope {
viewModel.fetchYoutubeVideoInfo(accessToken = accessToken, videoId = videoId).let{
when(it) {
is YouTubeState.Success -> {
Log.d( "fetch Success", "${it.data}")
initViews(it.data)
}
is YouTubeState.Error -> {
Log.d("fetch error", "${it.exception}")
}
}
}
}
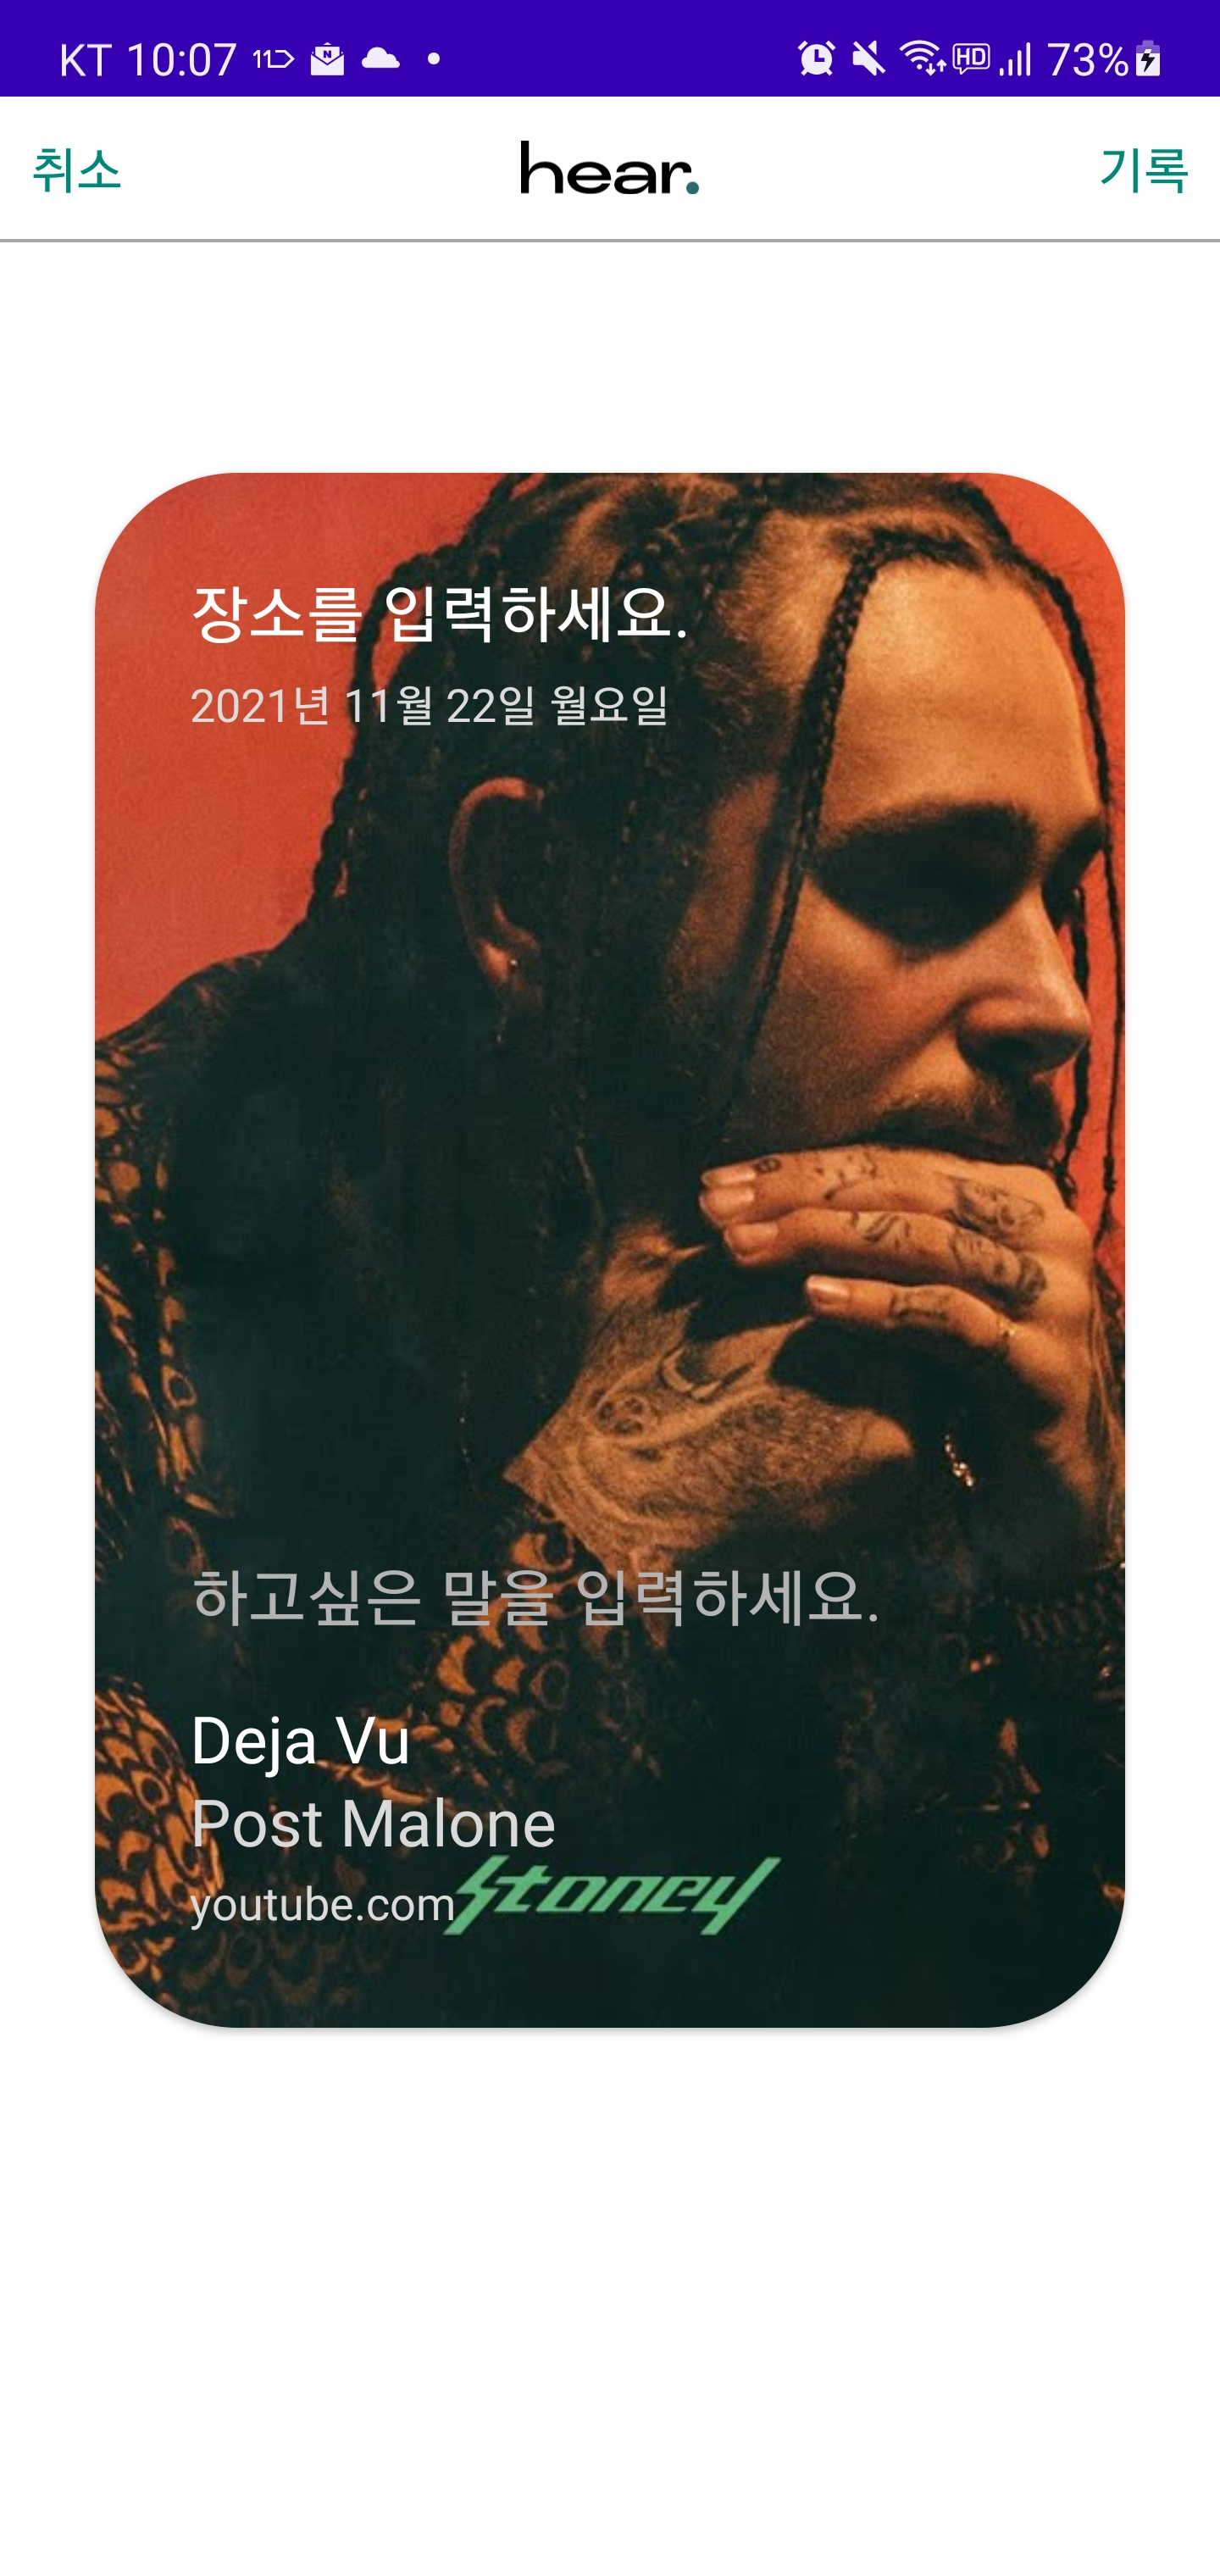
}로그로 찍어 본 결과는 다음과 같다.
I/okhttp.OkHttpClient: {
"items": [
{
"id": "q-YzHC6m7Po",
"snippet": {
"title": "Deja Vu",
"thumbnails": {
"default": {
"url": "https://i.ytimg.com/vi/q-YzHC6m7Po/default.jpg",
"width": 120,
"height": 90
},
"medium": {
"url": "https://i.ytimg.com/vi/q-YzHC6m7Po/mqdefault.jpg",
"width": 320,
"height": 180
},
"high": {
"url": "https://i.ytimg.com/vi/q-YzHC6m7Po/hqdefault.jpg",
"width": 480,
"height": 360
},
"standard": {
"url": "https://i.ytimg.com/vi/q-YzHC6m7Po/sddefault.jpg",
"width": 640,
"height": 480
},
"maxres": {
"url": "https://i.ytimg.com/vi/q-YzHC6m7Po/maxresdefault.jpg",
"width": 1280,
"height": 720
}
},
"channelTitle": "Post Malone - Topic"
}
}
]
}
<-- END HTTP (988-byte body)
D/fetch Success: YouTubeResponse(items=[Item(id=q-YzHC6m7Po, snippet=Snippet(thumbnails=Thumbnails(default=Default(height=90, url=https://i.ytimg.com/vi/q-YzHC6m7Po/default.jpg, width=120), high=High(height=360, url=https://i.ytimg.com/vi/q-YzHC6m7Po/hqdefault.jpg, width=480), maxres=Maxres(height=720, url=https://i.ytimg.com/vi/q-YzHC6m7Po/maxresdefault.jpg, width=1280), medium=Medium(height=180, url=https://i.ytimg.com/vi/q-YzHC6m7Po/mqdefault.jpg, width=320), standard=Standard(height=480, url=https://i.ytimg.com/vi/q-YzHC6m7Po/sddefault.jpg, width=640)), title=Deja Vu, channelTitle=Post Malone - Topic))])
간단하게 화면에 뿌려보면 이런식으로 출력할 수 있다.
유튜브의 경우 open API가 존재하여 영상의 링크만 있으면 썸네일과 음악의 제목, 가수등을 알 수 있지만, 멜론과 같은 스트리밍 사이트의 경우엔 따로 open API를 제공해주지 않기에 웹파싱을 통한 방법으로 음악의 제목과 가수, 앨범표지(썸네일)를 가져와야 한다.