
서두
Kotlin을 사용할 때 멀티 스레드 환경에서 Race Condition 문제를 해결할 수 있는 4가지 3가지 방법들을 소개하고 이들의 각각의 특징과 차이점에 대해 알아보려고 한다.
본론에 나오는 코드들은 Kotlin Playground에서 실제로 동작 결과를 확인해볼 수 있습니다.
본론
문제 상황
여러 스레드에서 공유 자원에 동시에 접근하면 race condition이 발생할 수 있다.
예시
import kotlin.concurrent.thread

fun main() {
    var count = 0

	val threads = mutableListOf<Thread>()

    // 10000개 스레드, 각각 100번 증가
    repeat(10000) {
        threads.add(thread {
            repeat(100) {
                count++
            }
        })
    }

    threads.forEach { it.join() }  // 모든 스레드 종료 대기

	println("Result: $count") // 999800, 999812 등 1000000이 아닌 다른 값이 출력될 수 있음
	println("Expected: ${10000 * 100}") // 1000000
}
이러한 문제를 해결하기 위해 Kotlin은 4가지의 해결 방법을 제공한다.
Synchronized
synchronized는 모니터 락(Monitor Lock) 을 사용해 한 번에 하나의 스레드만 임계 영역(critical section)에 접근하도록 보장한다.
Monitor와 Lock의 대한 개념은 아래 블로그 내용을 참고하면 도움이 될 듯하다.
[Java] 자바 객체의 Lock 과 Monitor 이해하기
@Synchronized vs synchronized 블록
Synchronized 방식엔 메소드 전체에 어노테이션을 붙히는 방식과 메소드내에 필요한 부분만을 락 하는 synchronized 블록 방식이 존재한다.
@Synchronized 어노테이션
import kotlin.concurrent.thread
import kotlin.system.measureTimeMillis

class SynchronizedCounter {
    @Volatile  // CPU 캐시가 아닌 메모리에서 직접 읽기/쓰기
    private var count = 0

    @Synchronized
    fun increment() {
        count++
    }

    // @Synchronized
    fun getCount() = count
}
synchronized 블록
class BlockCounter {
    @Volatile  // CPU 캐시가 아닌 메모리에서 직접 읽기/쓰기
    private var count = 0
    private val lock = Any()

    fun increment() {
        // 필요한 부분만 락
        synchronized(lock) {
            count++
        }
    }

    // fun getCount() = synchronized(lock) { count }
    fun getCount() = count
}
@Volatile 은 변수의 가시성(메모리 동기화)을 보장하기 위한 어노테이션으로,
getCount()함수가 항상 최신 값을 읽도록 하려면@Volatile을 추가하거나getCount()도synchronized로 감싸줘야 한다.
더 자세한 내용은 아래 블로그 글 참고
코틀린/자바의 volatile에 대해서
실행 결과 확인
import kotlin.concurrent.thread

fun main() {
    // 1. @Synchronized
    val syncCounter = SynchronizedCounter()

    val threads1 = List(1000) {
        thread {
            repeat(100) {
                syncCounter.increment()
            }
        }
    }
    threads1.forEach { it.join() }

    println("@Synchronized: ${syncCounter.getCount()}")


    // 2. synchronized 블록
    val blockCounter = BlockCounter()

    val threads2 = List(1000) {
        thread {
            repeat(100) {
                blockCounter.increment()
            }
        }
    }
    threads2.forEach { it.join() }

    println("synchronized {}: ${blockCounter.getCount()}")
}
출력:
@Synchronized: 100000
synchronized {}: 100000
성능 차이 확인
import kotlin.concurrent.thread
import kotlin.system.measureTimeMillis

fun main() {
    // @Synchronized - 메서드 전체 락
    class SynchronizedCounter {
        private var count = 0

        @Synchronized
        fun increment() {
            Thread.sleep(1)  // 작업 시뮬레이션
            count++
        }
    }

    // synchronized 블록 - 필요한 부분만 락
    class BlockCounter {
        private var count = 0
        private val lock = Any()

        fun increment() {
            Thread.sleep(1)  // 락 밖에서 실행
            synchronized(lock) {
                count++  // 최소한만 락
            }
        }
    }

    // 성능 비교
    val time1 = measureTimeMillis {
        val counter = SynchronizedCounter()
        List(100) {
            thread { counter.increment() }
        }.forEach { it.join() }
    }

    val time2 = measureTimeMillis {
        val counter = BlockCounter()
        List(100) {
            thread { counter.increment() }
        }.forEach { it.join() }
    }

    println("@Synchronized: ${time1}ms")
    println("synchronized {}: ${time2}ms")
    println("차이: ${time1 - time2}ms")
}
출력
@Synchronized: 128ms
synchronized {}: 26ms
차이: 102ms
두 방식의 차이점 정리
| @Synchronized | synchronized 블록 | |
|---|---|---|
| 락 범위 | 메서드 전체 | 필요한 부분만 |
| 락 객체 | this (고정) | 선택 가능 (lock 객체) |
| 유연성 | 낮음 | 높음 |
| 성능 | 상대적으로 느림 | 최적화 가능 |
| 적합한 경우 | 단순 로직 | 복잡한 로직, 여러 자원 |
둘다 OS 레벨의 락 방식이라 이후 소개할 다른 방식들에 비해 무거운 편이다.
데드락이 발생할 수도 있는데, 이는 AtomicInteger를 제외한 모든 방식에서 개발자의 부주의로 발생할 수 있기에 간단하게 짚고 넘어가도록 하겠다.
AtomicInteger
AtomicInteger는 락 없이 CAS(Compare-And-Swap) 연산으로 원자성을 보장한다.
import java.util.concurrent.atomic.AtomicInteger

class Counter {
    private val count = AtomicInteger(0)

    fun increment() {
        count.incrementAndGet() // 원자적 증가
    }

    fun get() = count.get()
}
실행 결과 확인
import java.util.concurrent.atomic.AtomicInteger
import kotlin.concurrent.thread

fun main() {
    val counter = AtomicCounter()

    List(1000) {
        thread {
            repeat(100) {
                counter.increment()
            }
        }
    }.forEach { it.join() }

    println("Result: ${counter.get()}")
    println("Expected: 100000")
}
출력:
Result: 100000
Expected: 100000
synchronized와 성능 비교
import java.util.concurrent.atomic.AtomicInteger
import kotlin.concurrent.thread
import kotlin.system.measureTimeMillis

fun main() {
    // synchronized
    class SyncCounter {
        @Volatile private var count = 0
        @Synchronized fun increment() { count++ }
        fun get() = count
    }

    // AtomicInteger
    class AtomicCounter {
        private val count = AtomicInteger(0)
        fun increment() { count.incrementAndGet() }
        fun get() = count.get()
    }

    val iterations = 1_000_000

    // synchronized 벤치마크
    val syncTime = measureTimeMillis {
        val counter = SyncCounter()
        repeat(iterations) {
            counter.increment()
        }
    }

    // AtomicInteger 벤치마크
    val atomicTime = measureTimeMillis {
        val counter = AtomicCounter()
        repeat(iterations) {
            counter.increment()
        }
    }

    println("synchronized: ${syncTime}ms")
    println("AtomicInteger: ${atomicTime}ms")
    println("AtomicInteger가 ${syncTime / atomicTime}배 빠름")
}
출력:
synchronized: 38ms
AtomicInteger: 10ms
AtomicInteger가 3배 빠름
synchronized 는 OS 레벨의 락이고(커널 모드 전환) AtomicInteger는 각 CPU 아키텍처의 원자 명령어를 직접 사용하기에 더 빠른 편이다.
다만 내부적으로 증감 연산, 값 설정등 간단현 연산 API들만 지원하기에, 단일 변수를 핸들링하는 상황에서 성능상 이점을 챙기고 싶을때 사용하면 될 듯하다.
내용 추가
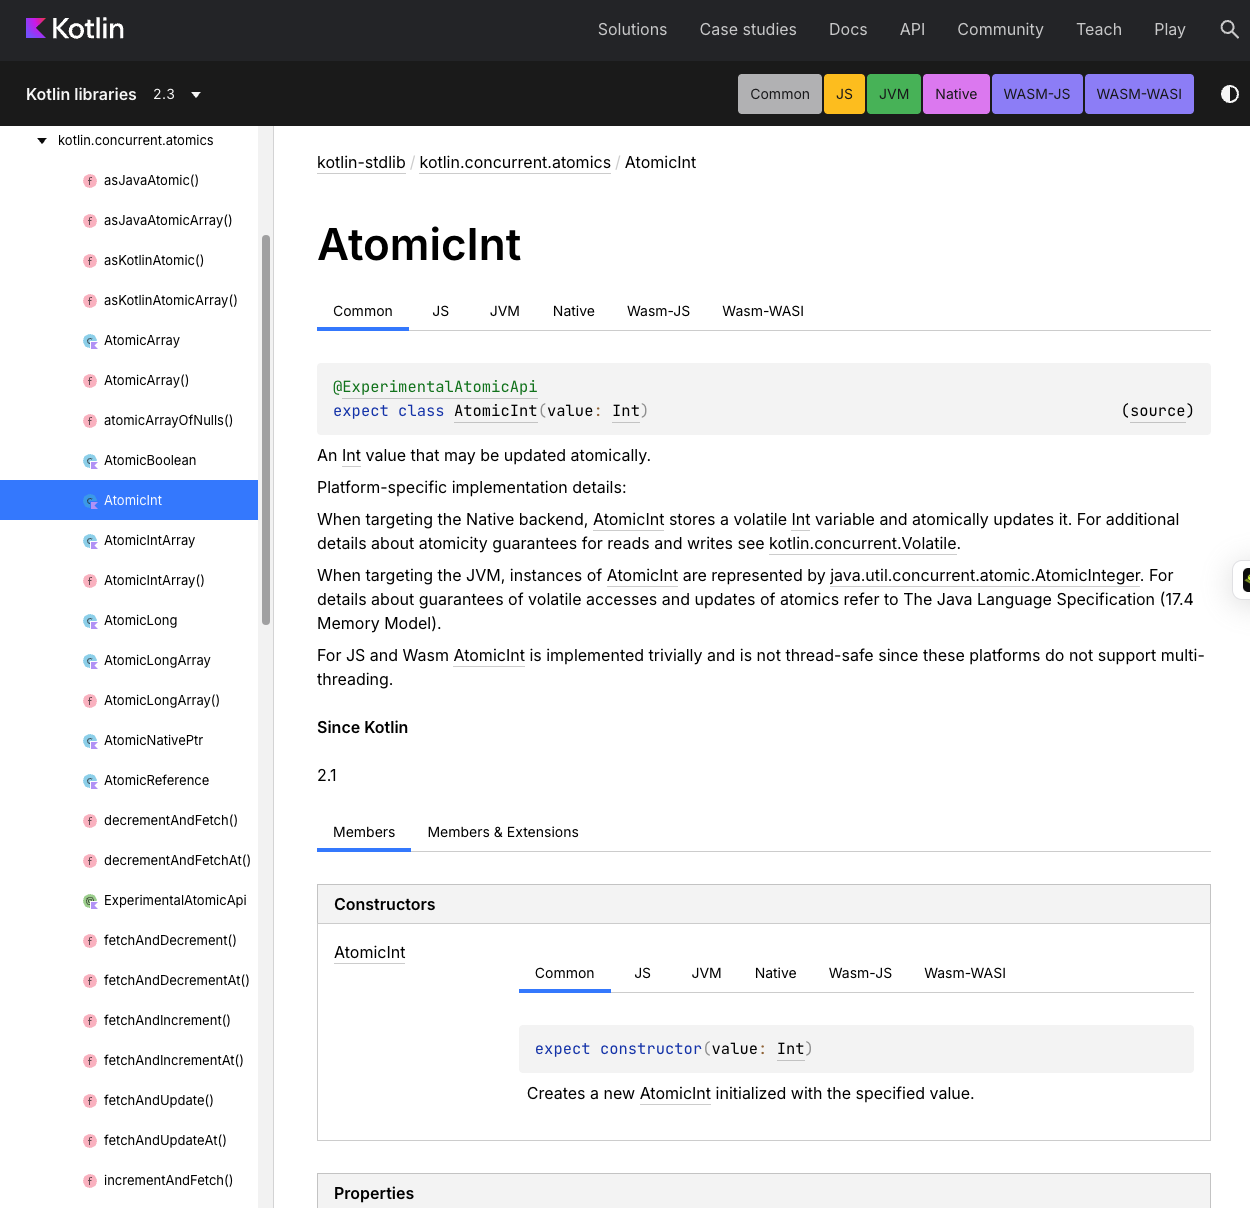
Kotlin 2.1버전 부터 Kotlin 전용 AtomicInt, IntArray, Long 과 같은 API도 지원된다.
Kotlin Multiplatform 환경에서 AtomicInteger를 사용해야할 경우 사용하면 될 것으로 보인다.
Mutex
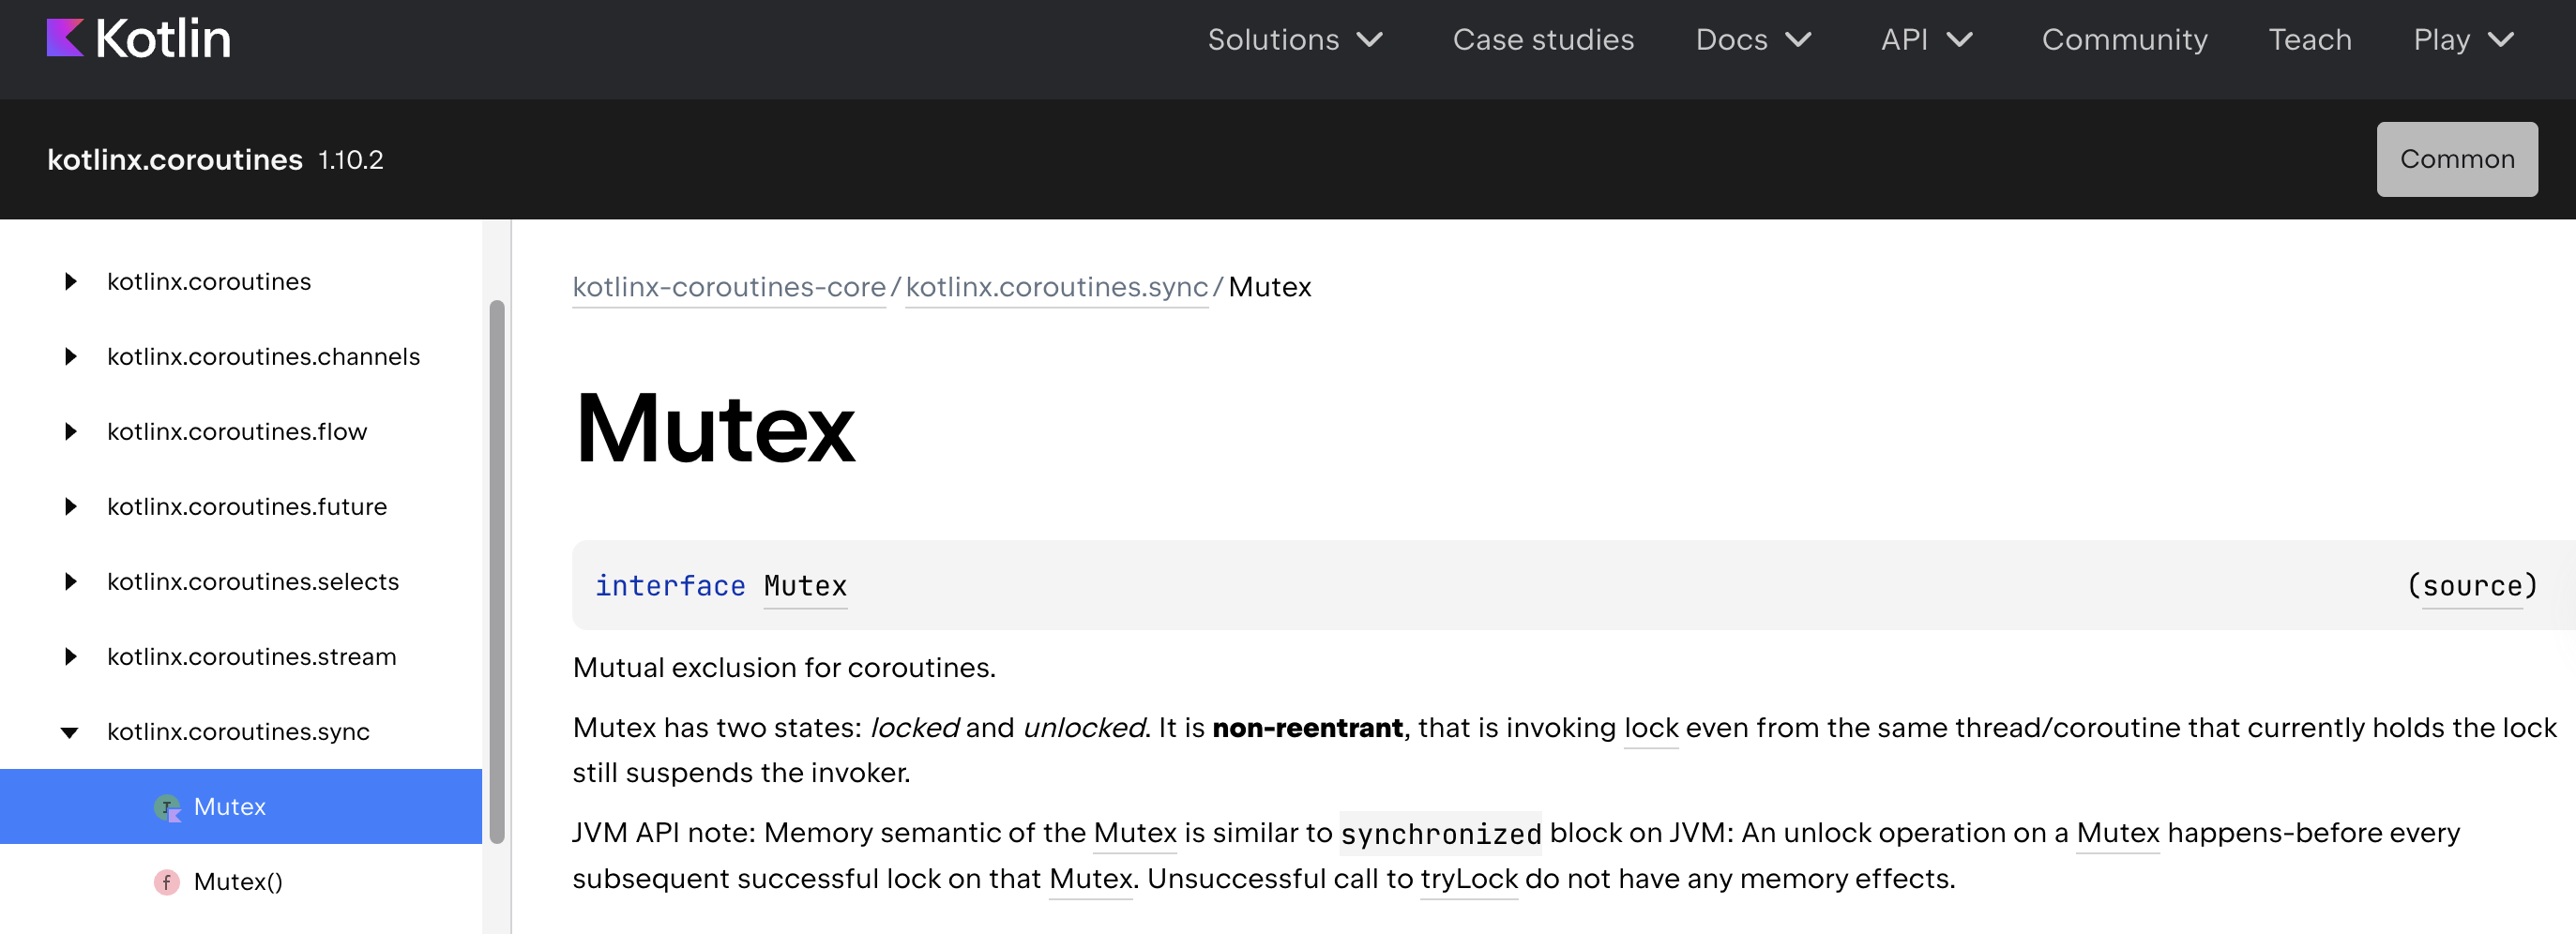
Mutex는 코루틴 전용 락으로, suspend 함수에서 사용할 수 있다.
import kotlinx.coroutines.*
import kotlinx.coroutines.sync.Mutex
import kotlinx.coroutines.sync.withLock

class MutexCounter {
	@Volatile  // 가시성 보장
    private var count = 0
    private val mutex = Mutex()

    suspend fun increment() {
        mutex.withLock {
            count++
        }
    }

    fun get() = count  // @Volatile이므로 withLock 불필요
    // suspend fun get() = mutex.withLock { count }
}
실행 결과 확인
fun main() = runBlocking {
    val counter = MutexCounter()

    // 1000개 코루틴이 각각 100번 증가
    List(1000) {
        launch(Dispatchers.Default) {
            repeat(100) {
                counter.increment()
            }
        }
    }.forEach { it.join() }

    println("Result: ${counter.get()}")
    println("Expected: 100000")
}
출력
Result: 100000
Expected: 100000
아래의 Semaphore 내용은 Race Condition을 해결하는 방법이 아닌 리소스 과부하 방지를 위한 해결법이라고 보는게 더 적절합니다. 지적해주신 jaeryo2357님 감사합니다 ㅎ
Semaphore
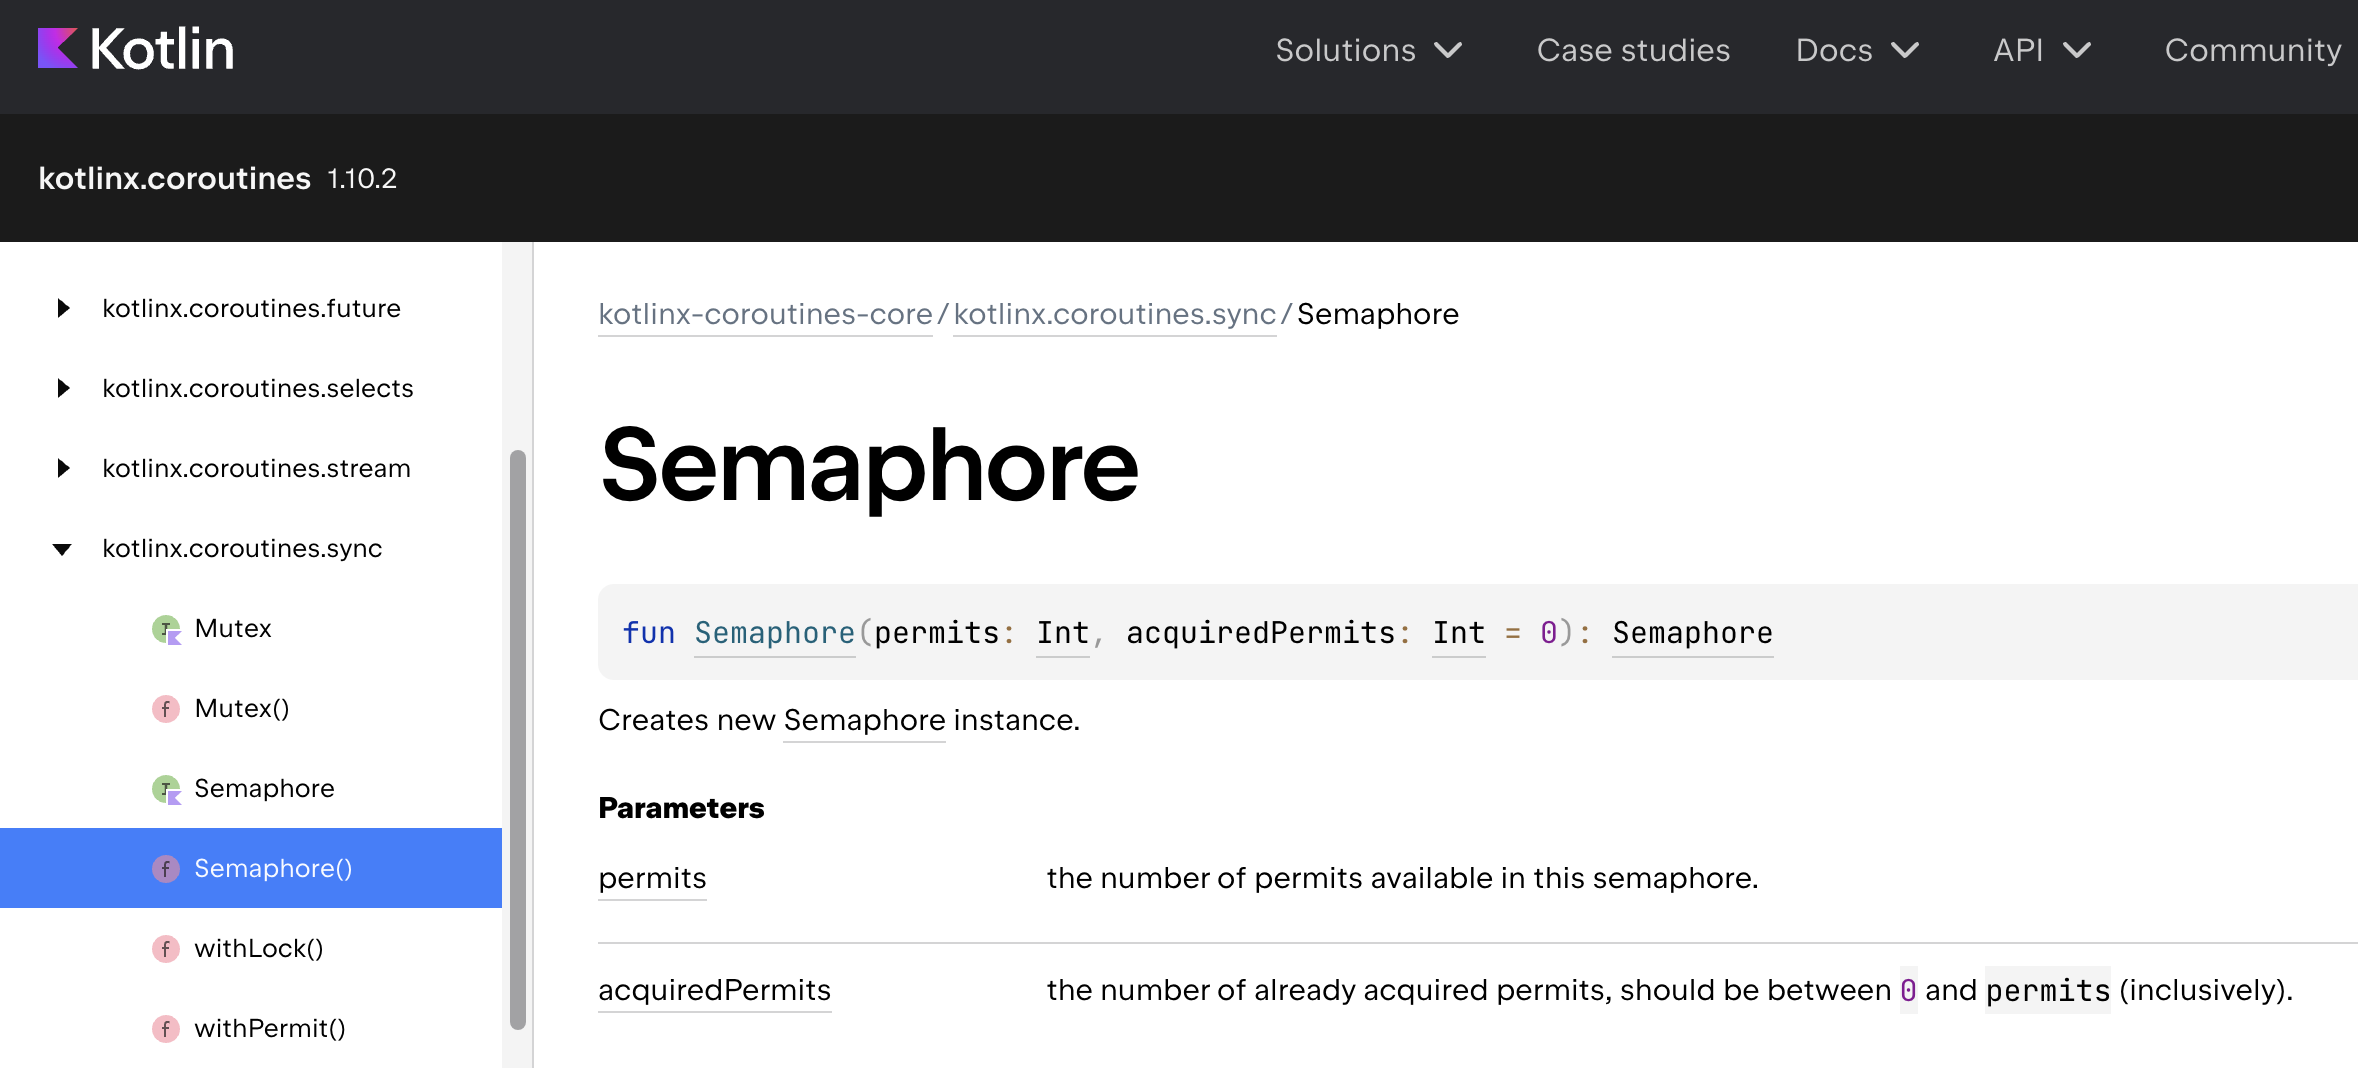
Semaphore도 Mutex와 마찬가지로 코루틴 전용으로, N개의 허가증(permit)을 관리해 동시 실행되는 코루틴 개수를 제한하는 도구다.
import kotlinx.coroutines.*
import kotlinx.coroutines.sync.Semaphore
import kotlinx.coroutines.sync.withPermit

class SemaphoreCounter {
	@Volatile
    private var count = 0
    private val semaphore = Semaphore(5)  // Mutex와 차이 - 5개까지 코루틴이 동시에 작업할 수 있음

    suspend fun increment() {
        semaphore.withPermit {
            count++
        }
    }

    fun getCount() = count
    // suspend fun get() = semaphore.withPermit { count }
}
실행 결과 확인
fun main() = runBlocking {
    val counter = SemaphoreCounter()

    List(1000) {
        launch(Dispatchers.Default) {
            repeat(100) {
                counter.increment()
            }
        }
    }.forEach { it.join() }

    println("Result: ${counter.getCount()}")
    println("Expected: 100000")
}
출력 (틀림)
Result: 100000
Expected: 100000
내용 정정
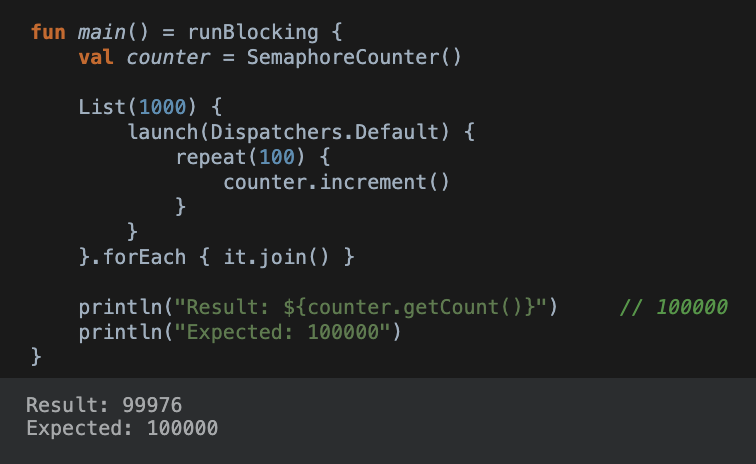
위 예제 Race Condition 발생함!
코루틴 전용? 그러면 일반 함수에서는?
Java 에서 제공하는 API 들을 사용하면 된다.
Mutex -> Java는 Mutex 클래스가 없으므로 synchronized 나 ReentrantLock 클래스를 이용해 Mutex를 구현
Semaphore -> java.util.concurrent.Semaphore 를 사용하여 구현
왜 굳이 따로 만든거임? 이미 Java꺼가 있잖아
Java에서 제공하는 API는 스레드를 블로킹하는 방식이기 때문에 코루틴을 사용할때의 장점을 상실하게 된다. 따라서 Kotlin Coroutine의 suspend 를 사용하는 방식으로 재설계하여 코루틴의 장점을 유지하도록 하였다.
Java Semaphore
javaSem.acquire()  // 스레드가 멈춤
work()
javaSem.release()
// → 대기 중 스레드는 아무것도 못함
Kotlin Semaphore
kotlinSem.withPermit {  // 코루틴만 suspend
    work()
}
// → 스레드는 다른 코루틴 실행
추가 궁금증 with limitedParallelism
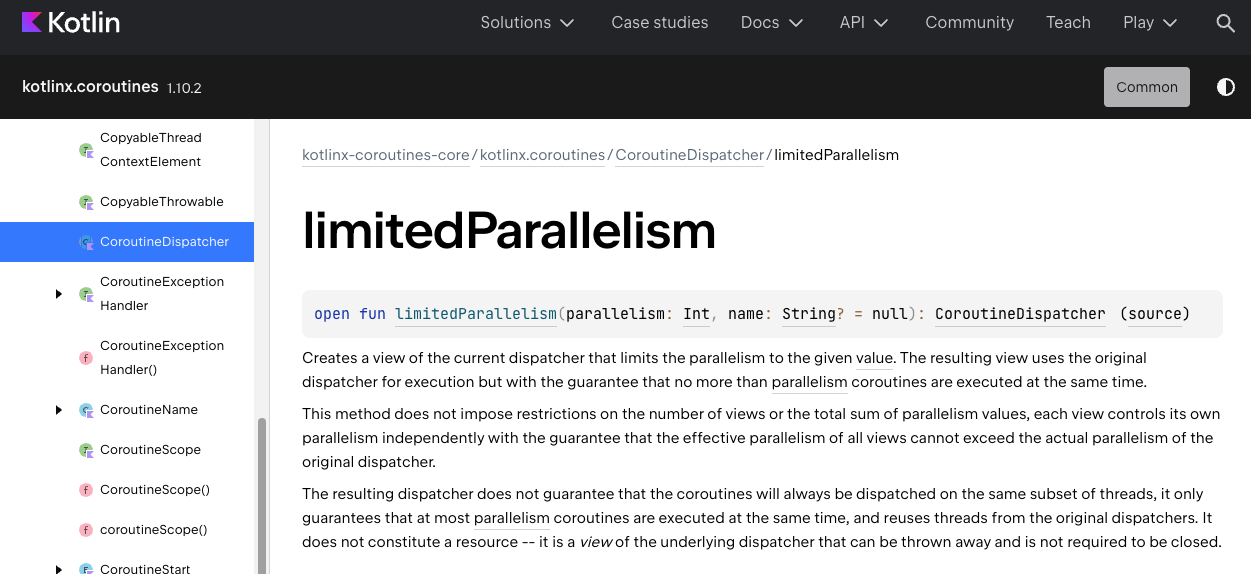
언뜻 봤을땐 Semaphore 랑 limitedParallelism 이 유사해보여 어떤 차이가 있는지 알아보았다.
Semaphore 는 블록 내에 동시 진입 가능한 코루틴의 개수를 제한하고,
limitedParallelism 는 Dispatcher가 사용하는 스레드 풀의 크기 제한한다.
// Semaphore - withPermit 블록내에 진입 제한
val semaphore = Semaphore(4)
semaphore.withPermit {
    work()  // 코루틴 4개까지 동시 실행
}

// limitedParallelism - 스레드 풀 크기 제한
val dispatcher = Dispatchers.IO.limitedParallelism(4)
launch(dispatcher) {
    work()  // 4개 스레드로만 실행
}
결론
Kotlin에서 Race Condition을 해결하는 4가지 3가지 방식의 사용 방법과, 각각의 방식의 차이점을 확인해볼 수 있었다.
정리
Race Condition 해결 방법
| synchronized | AtomicInteger | Mutex | |
|---|---|---|---|
| 패키지 | Kotlin 내장 | java.util.concurrent.atomic | kotlinx.coroutines.sync |
| 함수 타입 | 일반 함수 | 일반 함수 | suspend 함수 |
| 플랫폼 | JVM | JVM | Multiplatform |
| 블로킹 방식 | 스레드 블로킹 | 논블로킹 (CAS) | 코루틴 suspend |
| 레벨 | OS (커널 모드) | CPU (하드웨어) | 코루틴 스케줄러 |
| 속도 | 느림 | 빠름 | 중간 |
| 동시 접근 | 1개 (배타적) | 1개 (원자적) | 1개 (배타적) |
| 적합한 사용 사례 | 일반 함수, 여러 변수 보호, 간단한 로직 | 단일 변수 증감, 카운터, 플래그, 최고 성능 필요 | suspend 함수, 코루틴 기반 앱 |
번외) 리소스 과부하 방지
| Semaphore | |
|---|---|
| 패키지 | kotlinx.coroutines.sync |
| 함수 타입 | suspend 함수 |
| 플랫폼 | Multiplatform |
| 블로킹 방식 | 코루틴 suspend |
| 목적 | 동시 실행 개수 제한 (N개) |
| 적합한 사용 사례 | API rate limiting, 이미지 동시 디코딩, DB 커넥션 풀 |
⚠️ Semaphore는 상호 배제가 아닌 동시성 제한 도구로, Race Condition 해결에는 적합하지 않음
reference)
[Java] 자바 객체의 Lock 과 Monitor 이해하기
Is there an advantage to use a Synchronized Method instead of a Synchronized Block?
코틀린/자바의 volatile에 대해서
자바 AtomicInteger 완벽 가이드 — 락 없이 빠른 동시성 카운터
https://kotlinlang.org/api/core/kotlin-stdlib/kotlin.concurrent.atomics/-atomic-int/
[JAVA] ReentrantLock 이란?
https://kotlinlang.org/api/kotlinx.coroutines/kotlinx-coroutines-core/kotlinx.coroutines/-coroutine-dispatcher/limited-parallelism.html
https://kotlinlang.org/api/kotlinx.coroutines/kotlinx-coroutines-core/kotlinx.coroutines.sync/-mutex/
https://kotlinlang.org/api/kotlinx.coroutines/kotlinx-coroutines-core/kotlinx.coroutines.sync/-semaphore/
[Java] 뮤텍스 Mutex & 세마포어 Semaphore

안녕하세요! 글 너무 잘 읽었습니다!
그런데 글을 읽으면서 의문이 든 점이 있습니다. 설명해 주신 Semaphore은 동시에 여러 코루틴이 실행되는 문법이라고 하셨는데요. 그렇다면 Race Condition을 해결하는 방법으로 보는 것은 살짝 애매하지 않나요?
실제로 withPermit 함수 내부에 delay 등 코드를 넣으면 race condition 상태가 발생하는 것처럼 보입니다!
좋은 글 감사합니다