antd
2장에서는 ant design 을 이용한 기본적인 틀을 구성한다.
공식문서를 보고 형식변환만 해서 사용하면 되기 때문에 크게 어려움은 없었던 것 같다.
우선 antd와 styled-components를 사용하기 위해서 npm을 이용한다.
>npm i antd @ant-design/icons styled-components(사용법은 많이 나와있으니 생략)
주의깊게 본 부분은 _app.js 이다. 조금 생소한 부분이었는데, _app.js 란 페이지의 기본 레이아웃을 유지할 때 굉장히 편리하게 사용할 수 있다.
[app.js]
import "antd/dist/antd.css";

const App = ({Component}) => {
	return (
		<Component/>
    )
}
_app.js를 사용한 이유는 antd를 사용하기 위해 맨위의 구문을 import 해줘야 하는데 공통 코드가 모든 페이지에 들어가기에 저 부분을 공통적으로 넣기 위해 _app.js에 넣어주었다.
그 다음은 모든 페이지들의 공통 레이아웃으로 넣어줄 AppLayout.js component이다.
import React, { useState } from "react";
import PropTypes from "prop-types";
import Link from "next/link";
import { Menu, Input, Row, Col } from "antd";
import styled from "styled-components";
import twitImage from "../img/twit1.jpeg";
import UserProfile from "./UserProfile";
import LoginForm from "./LoginForm";

const TwitBox = styled.div`
    display: flex;
    justify-content: center;
    align-items: center;
`;
const SearchInput = styled(Input.Search)`
    vertical-align: middle;
`;
function AppLayout({ children }) {
    const [isLoggedIn, setIsLoggedIn] = useState(false);
    return (
        <>
            <TwitBox>
                <img src={twitImage} alt="twitImage" width={120} height={100} />
            </TwitBox>
            <Menu mode="horizontal">
                <Menu.Item>
                    <Link href="/">
                        <a>홈</a>
                    </Link>
                </Menu.Item>
                <Menu.Item>
                    <Link href="/profile">
                        <a>프로필</a>
                    </Link>
                </Menu.Item>
                <Menu.Item>
                    <Link href="/signup">
                        <a>회원가입</a>
                    </Link>
                </Menu.Item>
                <Menu.Item>
                    <Input.Search
                        enterButton
                        style={{ verticalAlign: "middle" }}
                    />
                </Menu.Item>
            </Menu>
            <Row gutter={8}>
                <Col xs={24} md={6}>
                    {isLoggedIn ? (
                        <UserProfile setIsLoggedIn={setIsLoggedIn} />
                    ) : (
                        <LoginForm setIsLoggedIn={setIsLoggedIn} />
                    )}
                </Col>
                <Col xs={24} md={12}>
                    {children}
                </Col>
                <Col xs={24} md={6}>
                    right
                </Col>
            </Row>
        </>
    );
}

AppLayout.propTypes = {
    children: PropTypes.node.isRequired,
};
export default AppLayout;
코드는 정말 심플하다. 아직 redux와 같은 전역상태관리를 사용하지 않기 때문에 useState로 로그인이 되었다면 UserProfile 을 좌측 부분에 사용하고
그렇지 않다면 로그인을 할 수 있는 LoginForm을 보여주게 된다.
두 컴포넌트에 setIsLoggedIn이라는 props를 주었는데,
이 props는 코드 위쪽에 있는 useState로 관리한다.
디자인은 보는 것과 같이 antd의 Menu를 사용했고 메뉴 아래 부분은 화면을 깔끔하게 분할하여 나타내기 위해서 antd의 Row, Col을 사용했다.
만약 로그인이 되어있지 않다면 아래와 같이 LoginForm.js 컴포넌트를 좌측에서 보여주게 될 것이다.
import React, { useCallback, useState } from "react";
import { Form, Button, Input } from "antd";
import styled from "styled-components";
import Link from "next/link";

const DivBox = styled.div`
    margin-top: 10px;
`;
function LoginForm({ setIsLoggedIn }) {
    const [email, setEmail] = useState("");
    const [password, setPassword] = useState("");

    const onChangeEmail = useCallback((e) => {
        setEmail(e.target.value);
    }, []);
    const onChangePassword = useCallback((e) => {
        setPassword(e.target.value);
    }, []);
    const onSubmitForm = useCallback(
        (e) => {
            //onFinish = e.preventDefault() 가 이미 적용되어있음~!
            if (email && password) {
                setIsLoggedIn(true);
            }
        },
        [email, password]
    );
    return (
        <Form onFinish={onSubmitForm}>
            <div>
                <label htmlFor="email">이메일</label>
                <br />
                <Input
                    name="email"
                    value={email}
                    onChange={onChangeEmail}
                    required
                />
            </div>
            <div>
                <label htmlFor="password">비밀번호</label>
                <br />
                <Input
                    type="password"
                    name="password"
                    value={password}
                    onChange={onChangePassword}
                    required
                />
            </div>
            <DivBox>
                <Button type="primary" htmlType="submit">
                    로그인
                </Button>
                <Link href="/signup">
                    <a>
                        <Button>회원가입</Button>
                    </a>
                </Link>
            </DivBox>
        </Form>
    );
}

export default LoginForm;
antd 의 Form과 styled-components를 이용해서 간단하게 사용하였다.
만약? 로그인이 되어있다면
import React, { useCallback } from "react";
import { Card, Avatar, Button } from "antd";

function UserProfile({ setIsLoggedIn }) {
    const onClick = useCallback(() => {
        setIsLoggedIn(false);
    }, []);
    return (
        <Card
            actions={[
                <div key="twit">
                    짹짹
                    <br />8
                </div>,
                <div key="following">
                    팔로잉
                    <br />0
                </div>,
                <div key="follower">
                    팔로워
                    <br />0
                </div>,
            ]}
        >
            <Card.Meta avatar={<Avatar>Vc</Avatar>} title="Vanc" />
            <Button onClick={onClick}>로그아웃</Button>
        </Card>
    );
}

export default UserProfile;
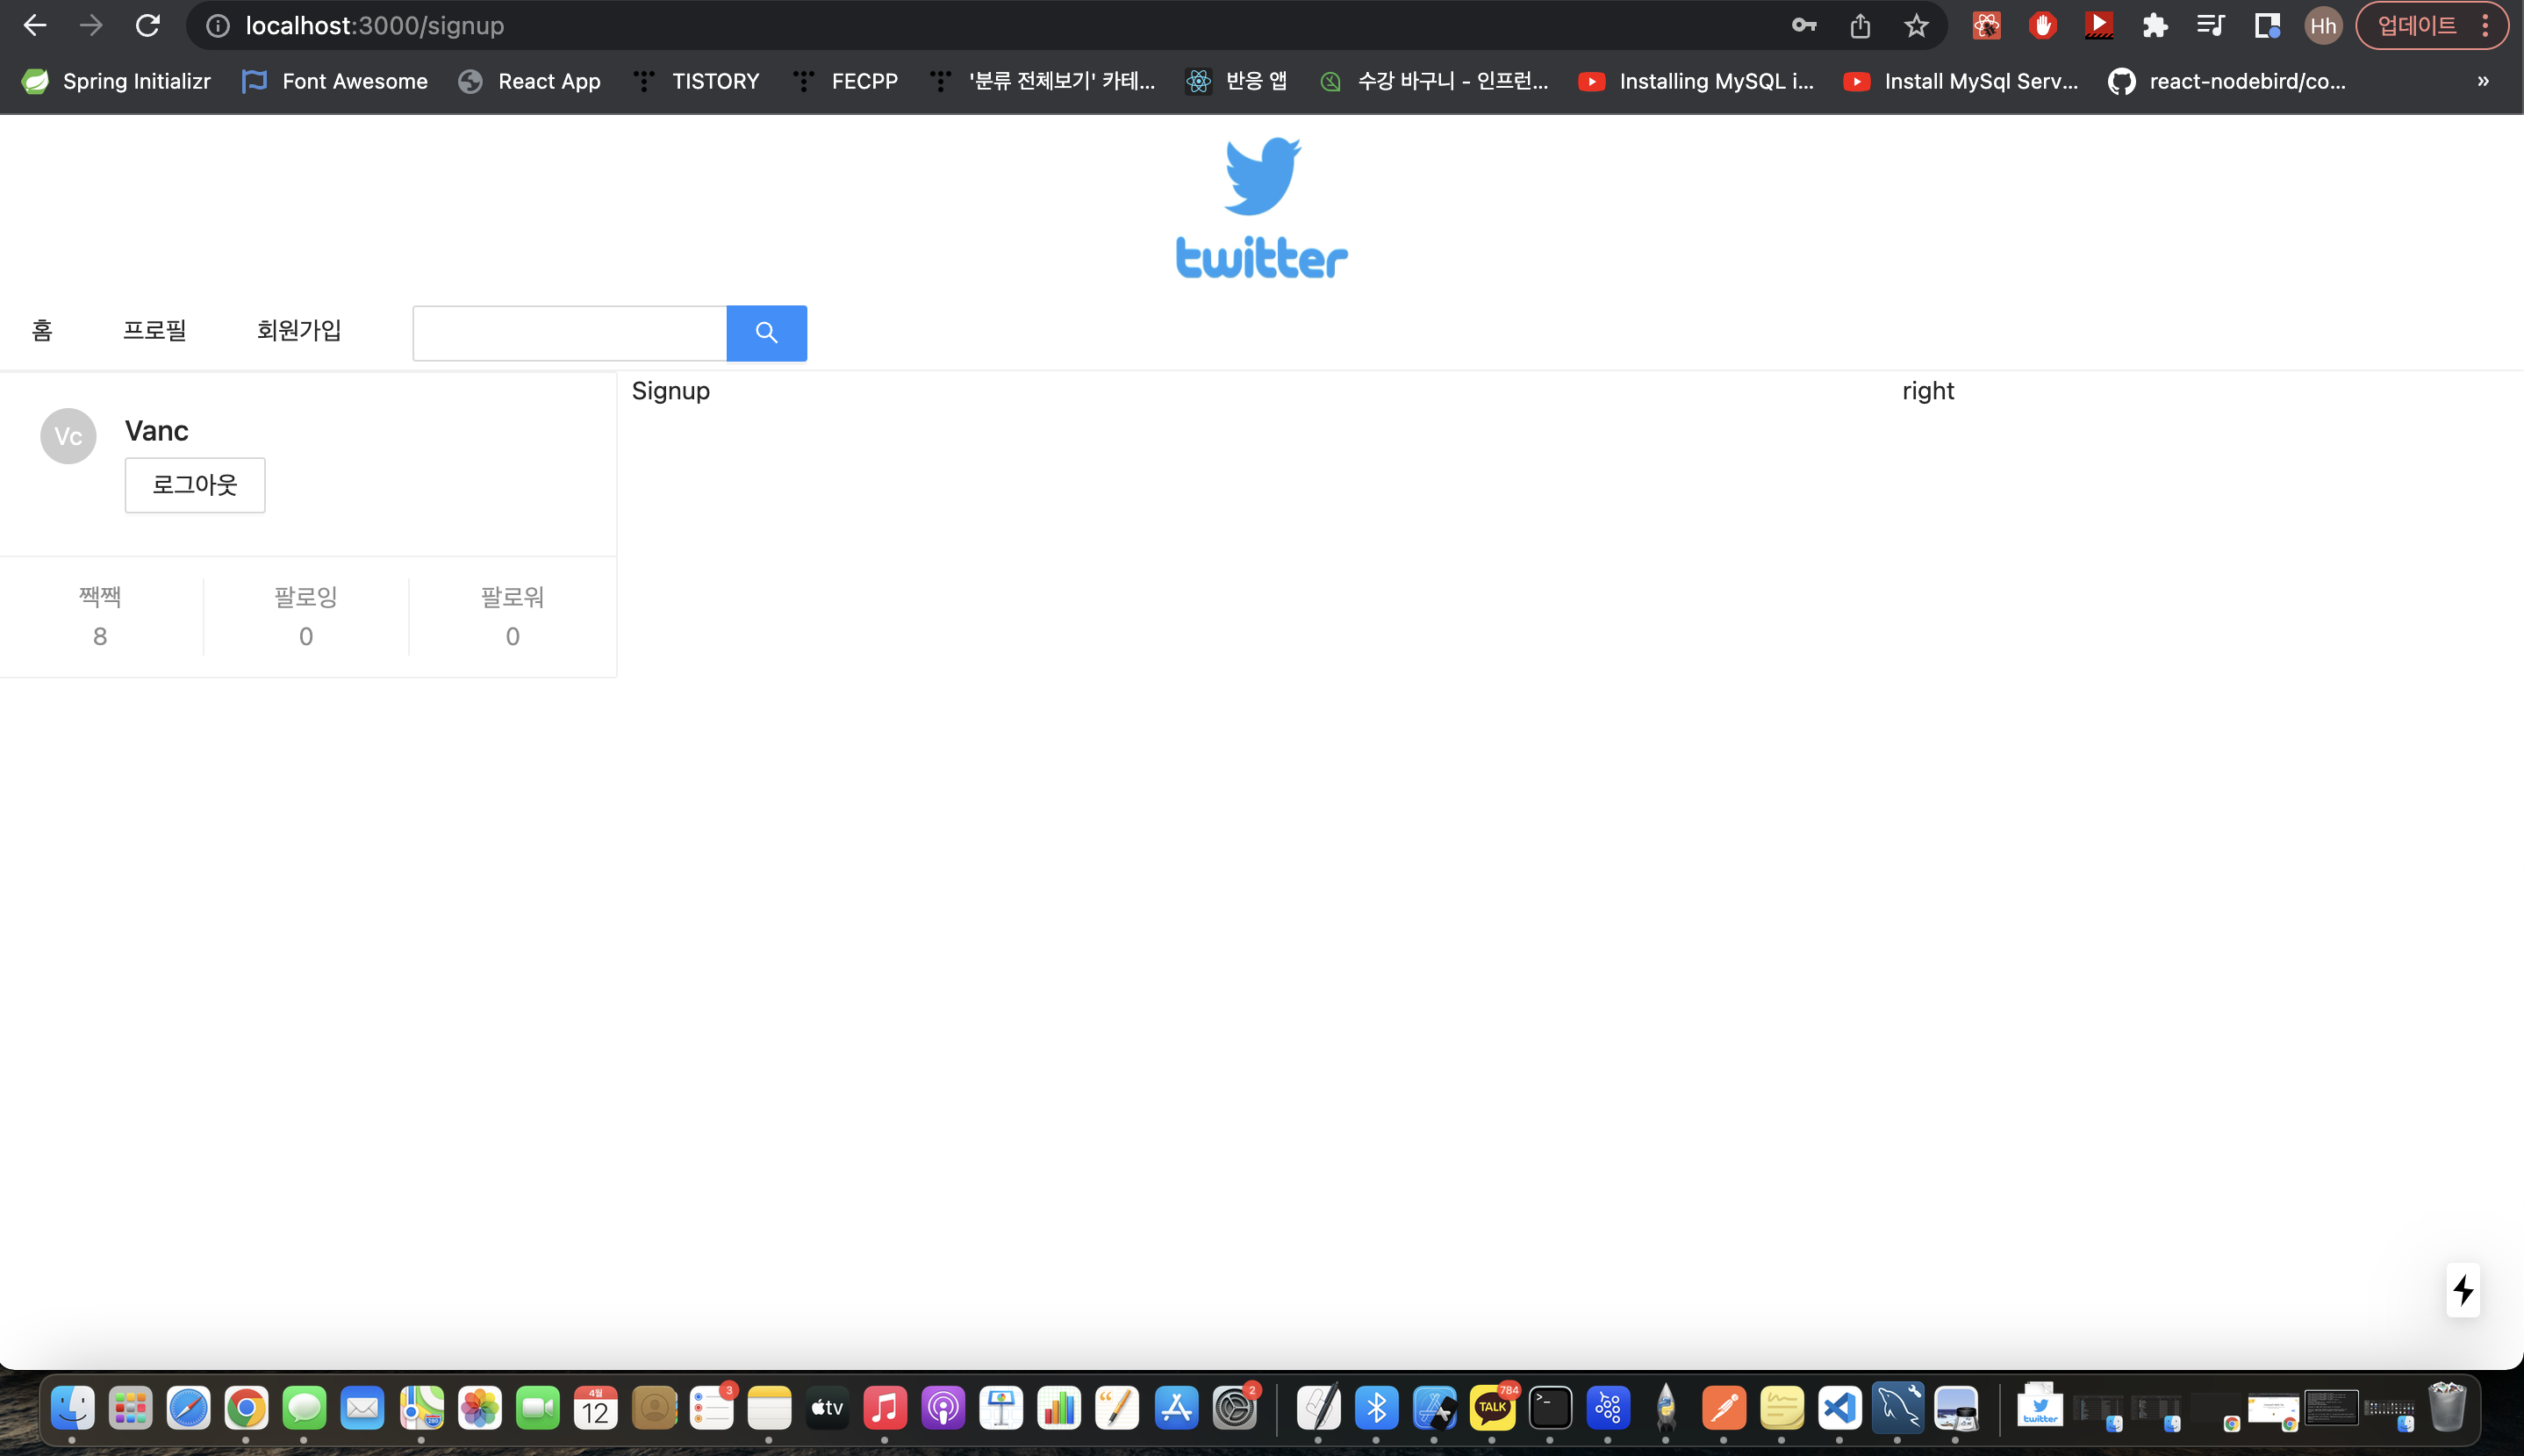
이와 같이 자신의 팔로워,팔로잉,자신의 게시글수와 자신의 아이디 등을 확인 할 수 있는 component를 보여줄 것이다.
이는 antd의 Card를 이용했는데 이런 sns 시스템을 구현하려 한다면 유용하게 앞으로도 사용할 수 있을 것 같다.
아직 server가 없기 때문에 간단하게 props로 받은 setIsLoggedIn을 이용해서 antd의 Form이 onFinish가 된다면 setIsLoggedIn을 true로 변경하고 AppLayout에서 변경된 isLoggedIn값으로 로그인되어있는지 되어있지 않은지만 확인 가능한 상태까지만 진행했다.
진행현황 + 위 titleIcon같은 것이 있으면 깔끔한 사이트처럼 보일 것 같아서 하나 추가했다.