이번에는 입력을 시도해 보겠습니다.
1. CREATE
1-1. constants.js는 3편에서 이미 모두 작성했습니다.
1-2. actions.js
export const categoryInsert = (year, semester) => ({
    type: CATE_INSERT,
    request: {
        url: '/category/store',
        method: 'POST',
        body: JSON.stringify({year: year, semester: semester}),
    }
});
year 및 semester라는 데이터를 stringify해서 /category/store이라는 URL을 기본 URL 추가하여 방향을 잡고 데이터를 보냅니다.
이 부분이 CREATE의 action 부분입니다.
1-3. reducers.js
case success(CATE_INSERT): {
            return {
                ...state,
                lists: [
                    action.data,
                    ...state.lists
                ],
            };
        }
action을 통해 서버로 보내진 데이터가 저장처리가 된다면, 그 저장된 year 및 semester라는 데이터는 다시 돌아오게 처리합니다.
그러하면 기존 state에 있는 lists의 데이터를 두고 action.data 즉, 돌아온 데이터 값을 추가합니다.
1-4. Category.js
추가한 코드만 작성하겠습니다.
// import 부분 추가
import {categoryRead, categoryInsert} from "../store/category/actions";

// render 부분 추가
render() {
        return (
            <div>
                <table border={'1'} width={'200'} cellSpacing={'0'}>
                    <thead>
                    <tr>
                        <th>학년</th>
                        <th>학기</th>
                    </tr>
                    </thead>
                    <tbody>
                    {/* javascript의 프로토타입 map으로 반복문으로 생각하면 편함. */}
                    {this.props.lists.map(item => (
                        <tr key={item.id}>
                            <td>{item.year}</td>
                            <td>{item.semester}</td>
                        </tr>
                    ))}
                    </tbody>
                </table>
                <hr/>
                <div>
                    <input type="text" id={'year'} placeholder={'학년'} onChange={function (e) {
                        this.setState({year: e.target.value});
                    }.bind(this)}/>
                    <br/>
                    <br/>
                    <input type="text" id={'semester'} placeholder={'학기'} onChange={function (e) {
                        this.setState({semester: e.target.value});
                    }.bind(this)}/>
                </div>
                <hr/>
                <div>
                    <button onClick={function () {
                        this.props.categoryInsert(this.state.year, this.state.semester);
                    }.bind(this)}>CREATE
                    </button>
                </div>
            </div>
        );
    }
}

// action 부분
const mapDispatchToProps = dispatch => ({
    categoryRead: () => dispatch(categoryRead()),
    categoryInsert: (year, semester) => dispatch(categoryInsert(year, semester)),
});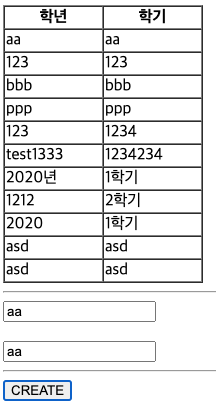
위와 같은 사진처럼 추가가 잘 되겠습니다.

다양하지만 공부할 것이 많은 개발자입니다.