가상키보드 만들기
개발공부
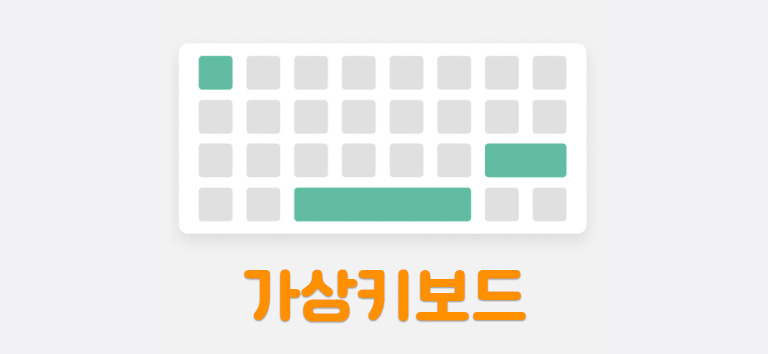
가상키보드

개발환경 설정
최상의 성능을 위해 어플리케이션을 최적화하는 개발도구
Webpack 사용
$ npm i -D webpack webpack-cli webpack-dev-server
$ npm i -D terser-webpack-plugin
//webpack.config.js
const path = require("path");
const TerserWebpackPlugin = require("terser-webpack-plugin");
module.exports = {
entry: "./src/js/index.js",
output: {
filename: "bundle.js",
path: path.resolve(__dirname, "./dist"),
clean: true,
},
devtool: "source-map",
mode: "development",
optimization: {
minimizer: [new TerserWebpackPlugin()],
},
};- 추가적인 압축 플러그인까지 설치 후
TerserWebpackPlugin을 생성하여
minimizer에 입력 후$ npx webpack을 실행한다. dist경로에bundle.js,bundle.js.map파일이 생성된다.
HTML과 CSS파일을 설정해줄 모듈을 설치한다.
$ npm i -D html-webpack-plugin
$ npm i -D mini-css-extract-plugin css-loader css-minimizer-webpack-plugin
Lodash, 객체, 배열 등의 데이터 구조를 쉽게 변환해 사용하게 도와주는
자바스크립트 라이브러리
$ npm i -g npm
$ npm i --save lodash- 추가적인 Webapck 설정 사항을 입력한다.
//webpack.config.js

const path = require("path");
const TerserPlugin = require("terser-webpack-plugin");
const CssMinimizerPlugin = require("css-minimizer-webpack-plugin"); /
const HtmlWebpackPlugin = require("html-webpack-plugin");
const MiniCssExtractPlugin = require("mini-css-extract-plugin");
module.exports = {
  entry: "./src/js/index.js",
  output: {
    filename: "bundle.js",
    path: path.resolve(__dirname, "./dist"),
    clean: true,
  },
  devtool: 'source-map',
  mode: "development",
  devServer: {
    host: "localhost",
    port: 4200,
    open: true,
    watchFiles: 'index.html',
  },
  plugins: [
    new HtmlWebpackPlugin({
      title: "keyboard",
      template: "./index.html",
      inject: "body",
      favicon: "./favicon.ico"
    }),
    new MiniCssExtractPlugin({ filename: "style.css" }),
  ],
  module: {
    rules: [
      {
        test: /\.css$/,
        use: [MiniCssExtractPlugin.loader, "css-loader"],
      },
    ],
  },
  optimization: {
    minimizer: [
      new TerserPlugin(),
      new CssMinimizerPlugin()
    ]
  },
};build를production모드에서 하기
//package.json

"scripts": {
    "build": "webpack --mode=production", //npm run build
    "dev": "webpack-dev-server" //npm run dev
},- Webpack Dev Server를 이용해서 개발할 때 Dev server 띄우기
$ npx webpack-dev-server입력해서 잘 동작하는지 확인
//webpack.config.js

devServer: {
    host: "localhost",
    port: 4200,
    open: true,
    watchFiles: 'index.html',
  },
Webpack Dev Server로 인해 개발환경이 설정이 제대로 되었다면
브라우저를 새로고침하지 않아도 자동으로 새로고침되어 개발하기 편한 환경 탄생!
$ npm run dev를 통해 브라우저를 열 수 있다.
개발환경 설정2
ESLint, 코드 퀄리티를 보장하도록 도와준다.
Prettier, 코드 스타일을 깔끔하게 도와준다.
$ npm i -D eslint
$ npm install --save-dev --save-exact prettier
$ npm i -D eslint-config-prettier eslint-plugin-prettier
$ npx eslint --init
//.eslintrc.json
{
"env": {
"browser": true,
"es2021": true
},
"extends": ["eslint:recommended", "plugin:prettier/recommended"],
"parserOptions": {
"ecmaVersion": 13,
"sourceType": "module"
},
"rules": {
"prettier/prettier": "error"
}
}//.prettierrc.json
{
"arrowParens": "always",
"bracketSameLine": false,
"bracketSpacing": true,
"embeddedLanguageFormatting": "auto",
"htmlWhitespaceSensitivity": "css",
"insertPragma": false,
"jsxSingleQuote": false,
"printWidth": 80,
"proseWrap": "preserve",
"quoteProps": "as-needed",
"requirePragma": false,
"semi": true,
"singleQuote": false,
"tabWidth": 2,
"trailingComma": "es5",
"useTabs": false,
"vueIndentScriptAndStyle": false
}//settings.json
{
//저장할 때 prettier가 포맷한다.(js.css.html 모두)
"editor.formatOnSave": true,
"editor.codeActionsOnSave": {
//저장될 때 eslint 룰대로 fix 한다.
"source.fixAll.eslint": true
}다크테마 적용하기
다크테마 기능을 사용하기 위한 css 설정
- filter: invert(100%) 색상 반전 효과 [무채색을 반전]
- filter: hue-rotate 컬러 휠을 기준으로 몇 도를 움직이는지 설정 [색상이 있는 색상을 반전]
/* style.css */

html[theme="dark-mode"] {
  filter: invert(100%) hue-rotate(180deg);
}
<!-- index.html -->
<!DOCTYPE html>
<html theme=""></html>class Keyboar 안에서 DOM을 가져와서 DOM에 이벤트를 붙이는 형식으로 구성
-
#를 붙이면 private변수가 되서 class 외부에서 값을 오해하거나 덮어씌울 수 없다.
[ES2019부터 javascript에서 지원되는 속성] -
인스턴스가 생성되었기 때문에 keyboard.js 안의 consteuctor()가 실행되고
#assignElement(), #addEvent()가 실행되면서 console에 true / false 값이 찍힌다.
true 일 때 다크테마모드 적용, false면 해제.
//keyboard.js

export class Keyboard {
  #swichEl;
  constructor() {
    this.#assignElement();
    this.#addEvent();
  }
  //엘리먼트 가져오기
  #assignElement() {
    this.#swichEl = document.getElementById("switch");
  }

  //이벤트를 가져오는 메소드
  #addEvent() {
    this.#swichEl.addEventListener("change", (event) => {
      document.documentElement.setAttribute(
        "theme",
        event.target.checked ? "dark-mode" : ""
      );
      console.log(event.target.checked);
    });
  }
}
Font 변경 기능
<div class="select-box"> 에 <select id="font"> 를 줘서
변경될 때 마다 변화를 감지하고 옵션태그 안의 값을 이용해서 폰트를 변경하는 것을 구현
//keyboard.js

export class Keyboard {
  #swichEl; //다크모드 스위치 엘레멘트
  #fontSelectEl; //폰트 변경 엘레멘트
  constructor() {
    this.#assignElement();
    this.#addEvent();
  }

  #assignElement() {
    this.#swichEl = document.getElementById("switch");
    this.#fontSelectEl = document.getElementById("font");
  }

  #addEvent() {
    this.#swichEl.addEventListener("change", (event) => {
      document.documentElement.setAttribute(
        "theme",
        event.target.checked ? "dark-mode" : ""
      );
      console.log(event.target.checked);
    });
    this.#fontSelectEl.addEventListener("change", (event) => {
      //가져온 폰트값 body에 적용하기
      //body에 있는 모든 폰트들이 선택한 폰트로 바뀌게 된다.
      document.body.style.fontFamily = event.target.value;
      //select-box이기때문에 value를 가져올 수 있다.
    });
  }
}
Keyboard event 적용하기
코드 리팩토링 [비용절감 / 이벤트핸들러 분리]
- document 에서 switch, font를 찾고 탐색하고 있는데 해당 부분 개선하기
- 현재는 메뉴, 인풋그룹, 키보드가 컨테이너에 둘러 쌓여 있는데 해당 부분 개선하기
→ 컨테이너를 먼저 찾은 다음에 컨테이너 메뉴, 인풋그룹, 키보드 클래스를 탐색하는 방법
//keyboard.js
export class Keyboard {
  #swichEl; //다크모드 스위치 엘레멘트
  #fontSelectEl; //폰트 변경 엘레멘트
  #containerEl;
  constructor() {
    this.#assignElement();
    this.#addEvent();
  }

  #assignElement() {
    this.#containerEl = document.getElementById("container");
    this.#swichEl = this.#containerEl.querySelector("#switch");
    this.#fontSelectEl = this.#containerEl.querySelector("#font");
  }

  #addEvent() {
    this.#swichEl.addEventListener("change", this.#onChangeTheme);
    this.#fontSelectEl.addEventListener("change", this.#onChangeFont);
  }

	//다크테마모드 변경
  #onChangeTheme(event) {
    document.documentElement.setAttribute(
      "theme",
      event.target.checked ? "dark-mode" : ""
    );
    console.log(event.target.checked);
  }
	//폰트 변경
  #onChangeFont(event) {
    document.body.style.fontFamily = event.target.value;
  }
}
키보드 이벤트 추가하기
KeyboardEvent { isTrusted: true, key: ‘a’, code: ’KeyA’, …}
//keyboard.js

#addEvent() {
    this.#swichEl.addEventListener("change", this.#onChangeTheme);
    this.#fontSelectEl.addEventListener("change", this.#onChangeFont);

    document.addEventListener("keydown", (event) => {
      console.log(event.code);
      if (this.#keyboardEl.querySelector(`[data-code=${event.code}]`)) {
        this.#keyboardEl
          .querySelector(`[data-code=${event.code}]`)
          .classList.add("active");
      }
    });
    document.addEventListener("keyup", (event) => {
      if (this.#keyboardEl.querySelector(`[data-code=${event.code}]`)) {
        this.#keyboardEl
          .querySelector(`[data-code=${event.code}]`)
          .classList.remove("active");
      }
    });
}- [ 옵셔널체이닝(optional chaining) ]
if문 보다 간단하게 ?. 사용하여 코드 리팩토링
//keyboard.js

#addEvent() {
    this.#swichEl.addEventListener("change", this.#onChangeTheme);
    this.#fontSelectEl.addEventListener("change", this.#onChangeFont);

    document.addEventListener("keydown", (event) => {
      console.log(event.code);
      this.#keyboardEl
        .querySelector(`[data-code=${event.code}]`)
        ?.classList.add("active");
    });

    document.addEventListener("keyup", (event) => {
      this.#keyboardEl
        .querySelector(`[data-code=${event.code}]`)
        ?.classList.remove("active");
    });
  }
한글 입력 불가 메세지 표시 및 한글 입력 막기
keydown즉, 입력된 키가 한글인지 캐치해서 인풋그룹에 에러 클래스를 추가해
한글 입력 불가 경고 메세지를 띄우는 것input value중에 한글을 찾아내서 한글을 공백으로 치환해준다.
replace()의 첫번째 파라미터에는 정규식을 넣어주고 두번째는""으로 바꿔준다.
이렇게 한글을""으로 바꾼 값을 다시inputEl.value에 넣어준다.
export class Keyboard {
  #swichEl;
  #fontSelectEl;
  #containerEl;
  #keyboardEl;
  #inputGroupEl;
  #inputEl;
  constructor() {
    this.#assignElement();
    this.#addEvent();
  }

.
.
.


  #addEvent() {
    this.#swichEl.addEventListener("change", this.#onChangeTheme);
    this.#fontSelectEl.addEventListener("change", this.#onChangeFont);
    document.addEventListener("keydown", this.#onKeyDown.bind(this));
    document.addEventListener("keyup", this.#onKeyUp.bind(this));
    this.#inputEl.addEventListener("input", this.#onInput);
  }

  #onInput(event) {
    event.target.value = event.target.value.replace(/[ㄱ-ㅎ|ㅏ-ㅣ|가-힣]/, "");
  }

  #onKeyDown(event) {
    this.#inputGroupEl.classList.toggle(
      "error",
      /[ㄱ-ㅎ|ㅏ-ㅣ|가-힣]/.test(event.key)
    );

    this.#keyboardEl
      .querySelector(`[data-code=${event.code}]`)
      ?.classList.add("active");
  }

  #onKeyUp(event) {
    this.#keyboardEl
      .querySelector(`[data-code=${event.code}]`)
      ?.classList.remove("active");
  }

  #onChangeTheme(event) {
    document.documentElement.setAttribute(
      "theme",
      event.target.checked ? "dark-mode" : ""
    );
    console.log(event.target.checked);
  }

  #onChangeFont(event) {
    document.body.style.fontFamily = event.target.value;
  }
}
마우스 이벤트 추가하기
- 키보드 레이아웃에서 마우스로 키보드를 눌렀을 때 input에 입력되게 구현
- 마우스를 클릭할 때는 키보드가 안눌리게 예외처리
- 키보드를 입력할 때는 마우스 클릭이 안되게 예외처리
export class Keyboard {
  #swichEl;
  #fontSelectEl;
  #containerEl;
  #keyboardEl;
  #inputGroupEl;
  #inputEl;
  //예외처리
  #keyPress = false;
  #MouseDown = false;
  constructor() {
    this.#assignElement();
    this.#addEvent();
  }

  .
  .
  .


  #onMouseUp(event) {
    //키보드를 누를 때 마우스가 동작하지 않도록 해주고
    //mouseUp상태니까 this.#MouseDown = false;로 .
    if (this.#keyPress) return;
    this.#MouseDown = false;
    const KeyEl = event.target.closest("div.key");

    const isActive = !!KeyEl?.classList.contains("active");

    const val = KeyEl?.dataset.val;

    if (isActive && !!val && val !== "Space" && val !== "Backspace") {
      this.#inputEl.value += val;
    }

    if (isActive && val === "Space") {
      this.#inputEl.value += " ";
    }

    if (isActive && val === "Backspace") {
      this.#inputEl.value = this.#inputEl.value.slice(0, -1);
    }

    this.#keyboardEl.querySelector(".active")?.classList.remove("active");
  }

  #onMouseDown(event) {
    //키보드를 입력하고 있을 때 마우스핸들러는 작동하지 않게하기
    //메소드 자체가 실행이 안되고 밑에 있는 코드들에 접근하지 못하게 막기
    if (this.#keyPress) return;
    this.#MouseDown = true;
    event.target.closest("div.key")?.classList.add("active");
  }

  #onInput(event) {
    event.target.value = event.target.value.replace(/[ㄱ-ㅎ|ㅏ-ㅣ|가-힣]/, "");
  }

  #onKeyDown(event) {
    //#MouseDown 상태면 키보드 이벤트핸들러는 동작할 수 없게하기
    if (this.#MouseDown) return;
    //onKeyDown한 상태니까 keyPress가 true인 상태.
    this.#keyPress = true;

    this.#inputGroupEl.classList.toggle(
      "error",
      /[ㄱ-ㅎ|ㅏ-ㅣ|가-힣]/.test(event.key)
    );

    this.#keyboardEl
      .querySelector(`[data-code=${event.code}]`)
      ?.classList.add("active");
  }

  #onKeyUp(event) {
    //#MouseDown 상태면 키보드 이벤트핸들러는 동작할 수 없게하기
    if (this.#MouseDown) return;
    //onKeyUp을 하면 키보드가 눌려진 상태가 아니니까 false.
    this.#keyPress = false;

    this.#keyboardEl
      .querySelector(`[data-code=${event.code}]`)
      ?.classList.remove("active");
  }
.
.
.

}