AutoConfiguration?
db접속 정보를 설정 파일에 옮겨 적었을 뿐인데, 어떻게 bean이 생성되고 활용되는 것일까? 또한 어떻게 의존성 추가 만으로 간단하게 라이브러리를 가져다 사용할 수 있게된 것일까 문득 의문이 들었다. 당연하듯 편리하게 사용해왔던 이러한 강력한 기능은 springboot가 가진 auto-configure에 의해서 동작하고 있었다.
Spring Boot auto-configuration attempts to automatically configure your Spring application based on the jar dependencies that you have added.
동작 과정

@SpringBootApplication을 들어가 보면
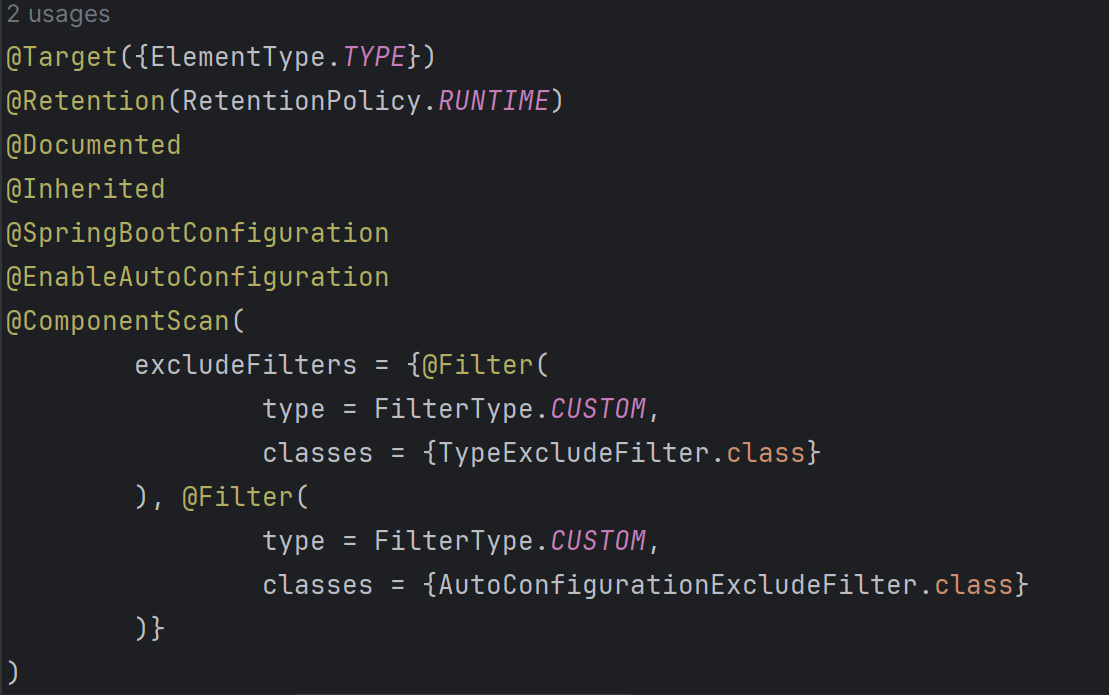
위와 같이 @EnableAutoConfiguration annotation이 작성되어 있다.

@EnableAutoConfiguration은 AutoConfigurationImportSelector class를 import하고 있다.
public String[] selectImports(AnnotationMetadata annotationMetadata) {
        if (!this.isEnabled(annotationMetadata)) {
            return NO_IMPORTS;
        } else {
            AutoConfigurationEntry autoConfigurationEntry = this.getAutoConfigurationEntry(annotationMetadata);
            return StringUtils.toStringArray(autoConfigurationEntry.getConfigurations());
        }
    }
AutoConfigurationImportSelector class에는 위와 같이 selectImports라는 메소드를 가지고 있고, getAutoConfigurationEntry 메소드를 통해 autoconfiguration의 대상이 되는 객체들을 반환하고 있는 것을 볼 수 있다.
 protected AutoConfigurationEntry getAutoConfigurationEntry(AnnotationMetadata annotationMetadata) {
        if (!this.isEnabled(annotationMetadata)) {
            return EMPTY_ENTRY;
        } else {
            AnnotationAttributes attributes = this.getAttributes(annotationMetadata);
            List<String> configurations = this.getCandidateConfigurations(annotationMetadata, attributes);
            configurations = this.removeDuplicates(configurations);
            Set<String> exclusions = this.getExclusions(annotationMetadata, attributes);
            this.checkExcludedClasses(configurations, exclusions);
            configurations.removeAll(exclusions);
            configurations = this.getConfigurationClassFilter().filter(configurations);
            this.fireAutoConfigurationImportEvents(configurations, exclusions);
            return new AutoConfigurationEntry(configurations, exclusions);
        }
    }
getAutoConfigurationEntry메소드에서 수행되는 동작들을 간단히 살펴보면 다음과 같다.
getCandidateConfigurations: 후보를 가져오고removeDuplicates: 중복을 제거한다.getExclusions: 자동 설정에서 제외되는 객체들을 가져오고removeAl: 제외되는 객체들을 제거한다.getConfigurationClassFilter().filter: 필터를 거친다.
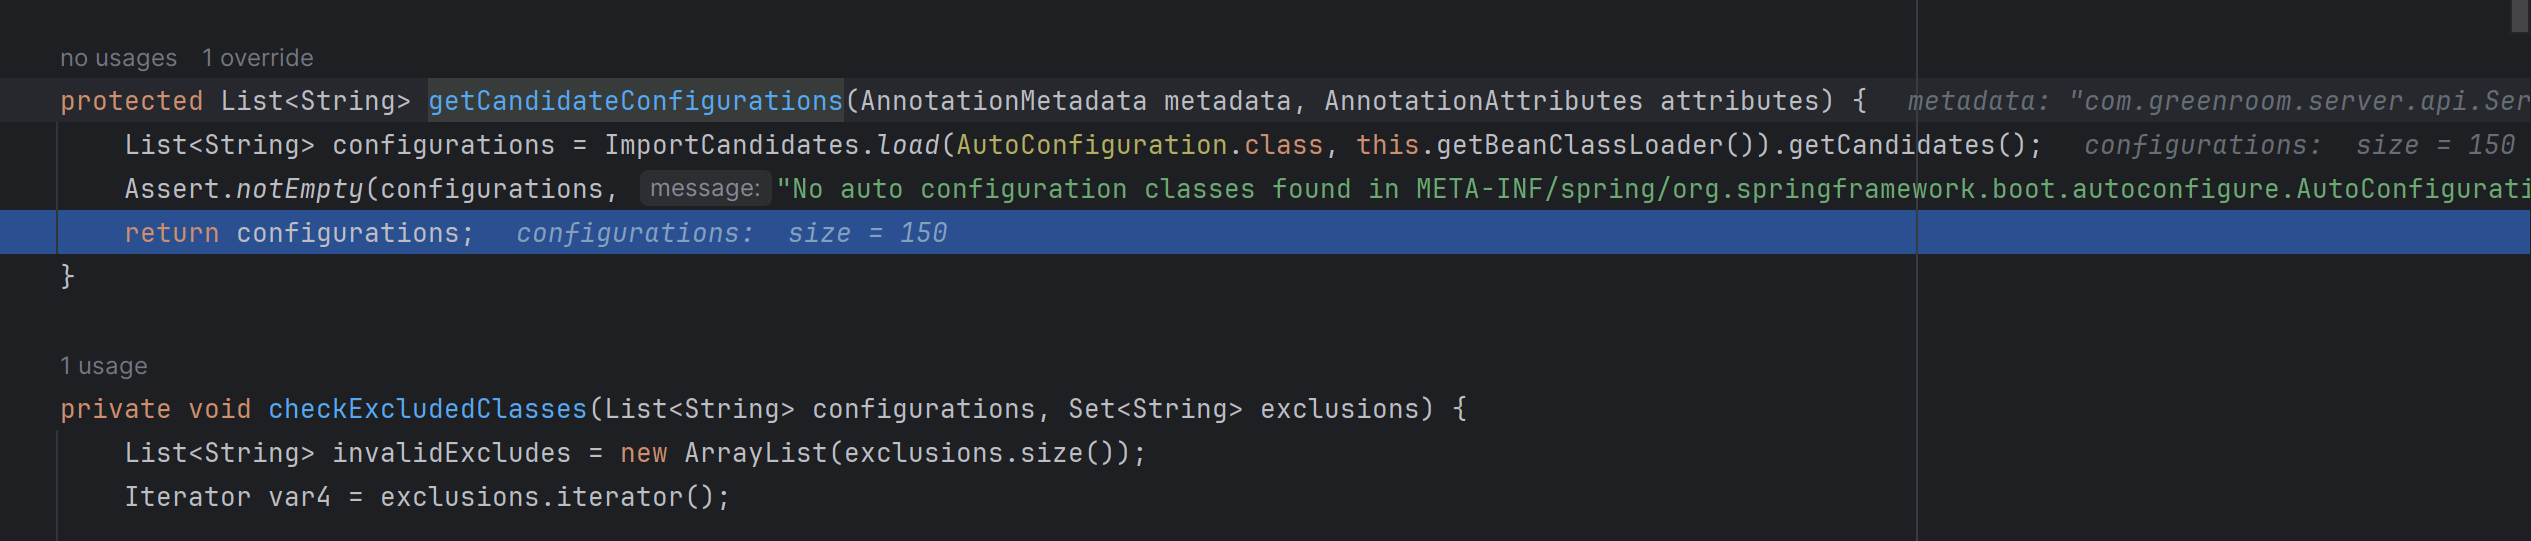
getCandidateConfigurations 메소드를 살펴보면 ImportCandidates.load를 통해서 autoconfigure의 대상이 되는 entry 후보들을 가져온다. 디버깅을 해보았을 때 150개의 후보가 나왔다.
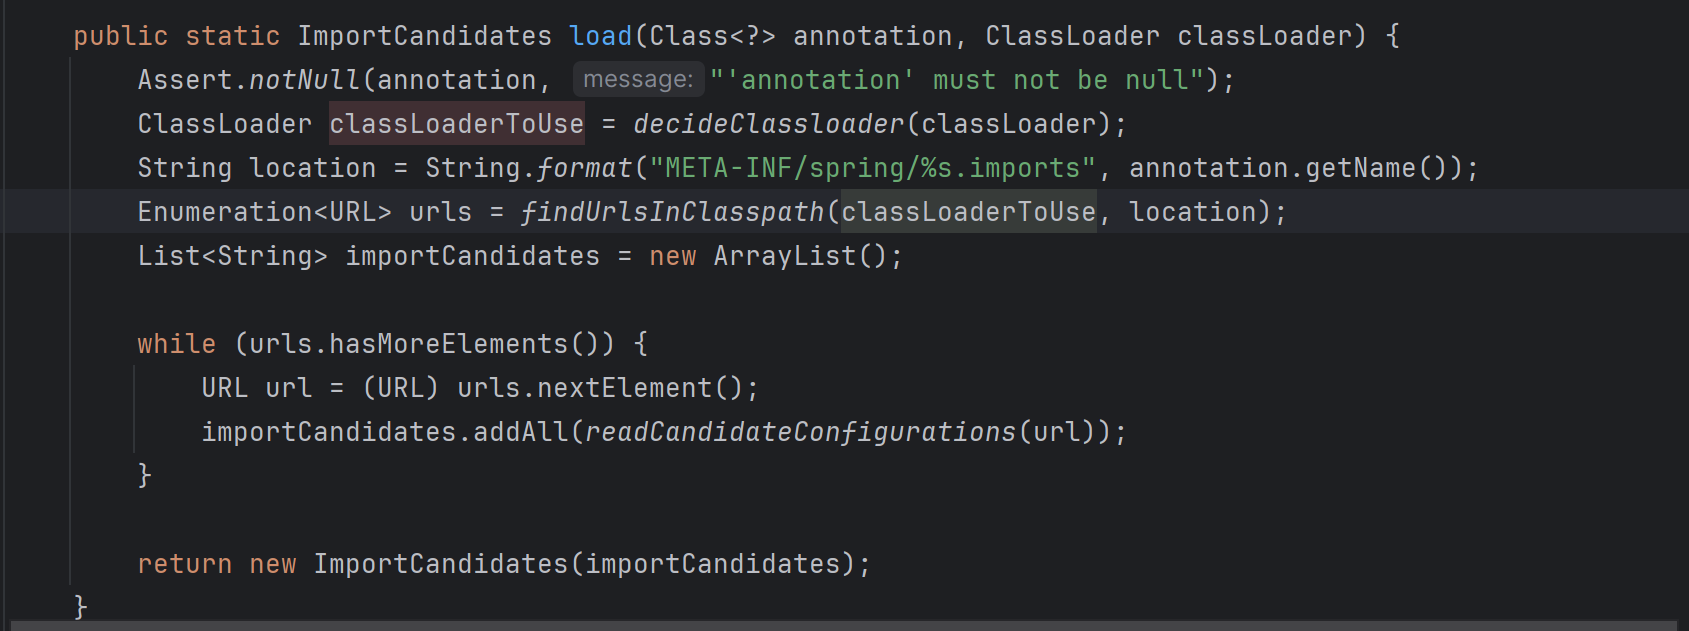
ImportCandidates.load() 메소드를 자세히 살펴보면, META-INF/spring/org.springframework.boot.autoconfigure.AutoConfiguration.imports.의 classpath를 가지고 있는 class들을 모두 읽어오도록 되어 있다.
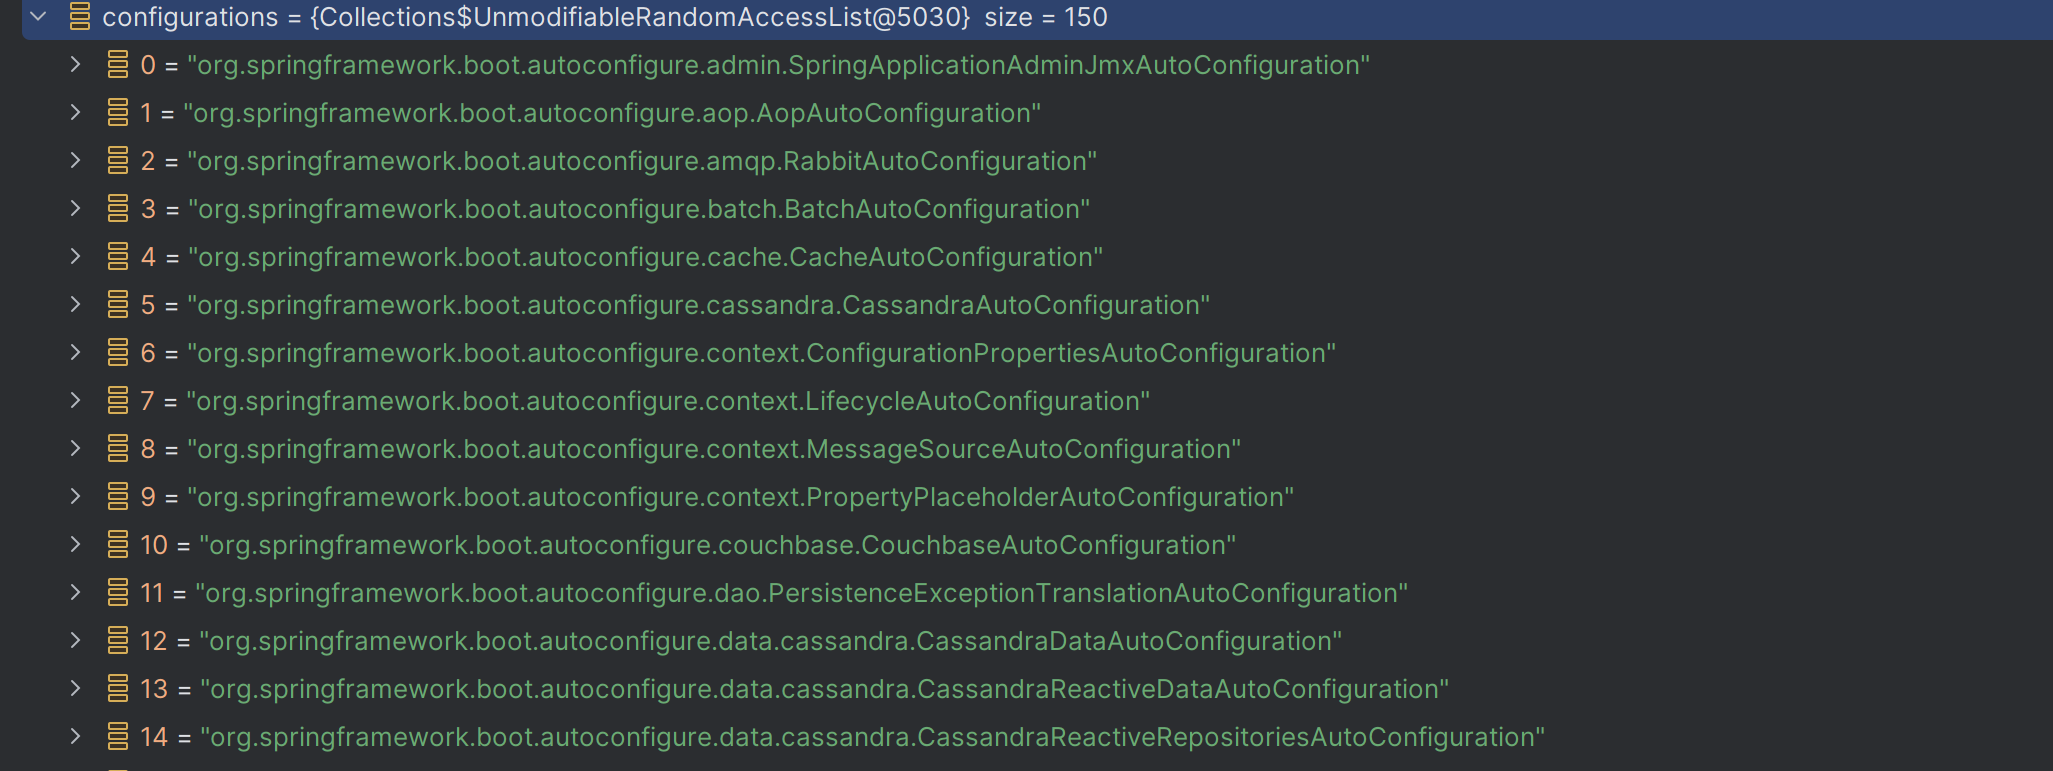
디버깅 결과 위와 같이 autoconfigure의 대상이 되는 class들의 full name을 읽어오는 것을 확인할 수 있었다.
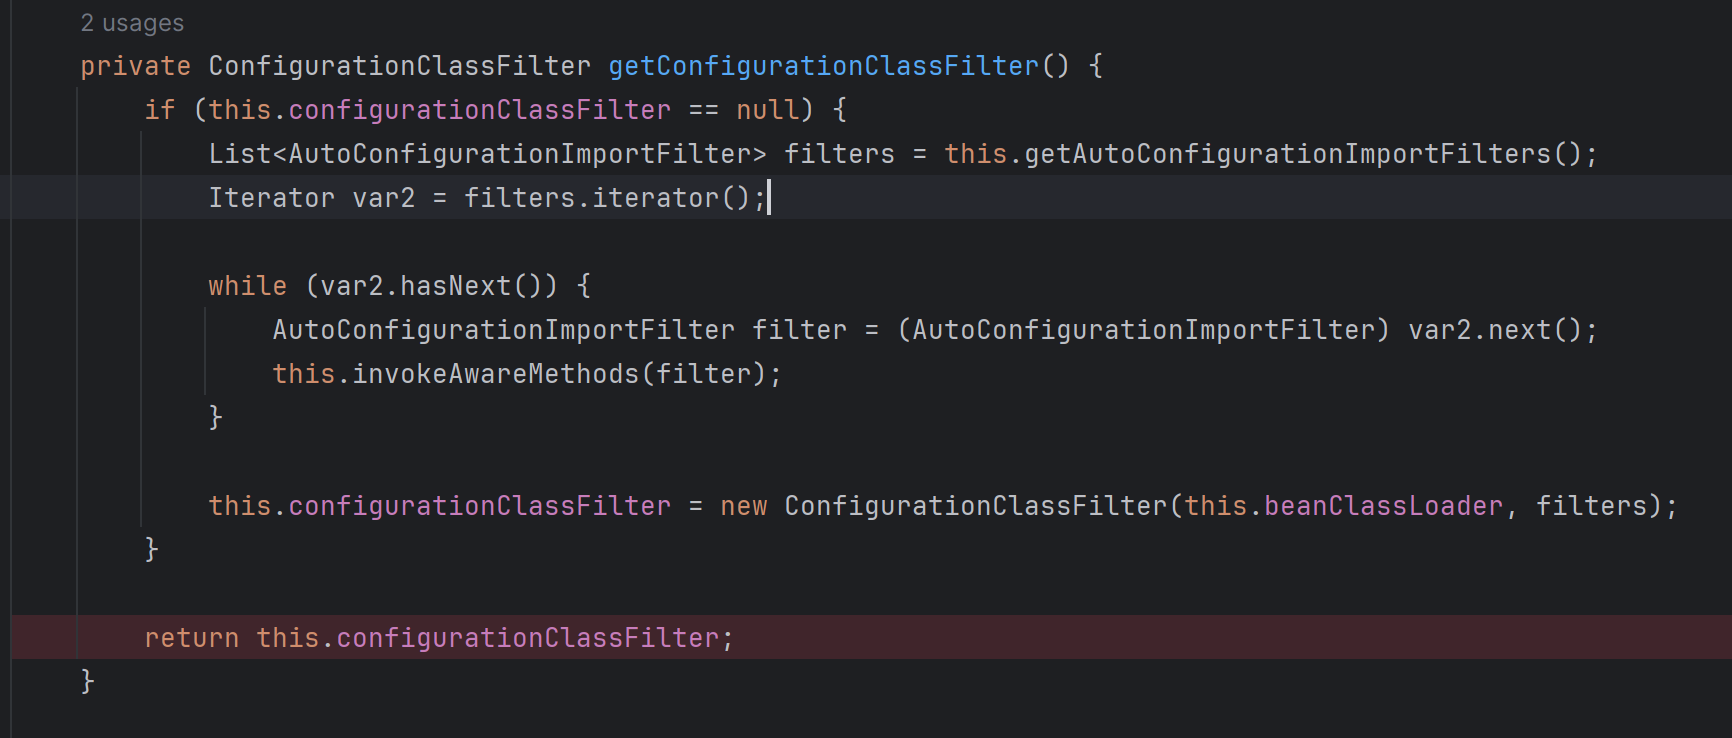
this.getConfigurationClassFilter().filter()메소드에서 getConfigurationClassFilter()를 살펴보면 autoConfiguration의 대상이 되는 entry들을 filtering 하는 filter들을 가져온다.
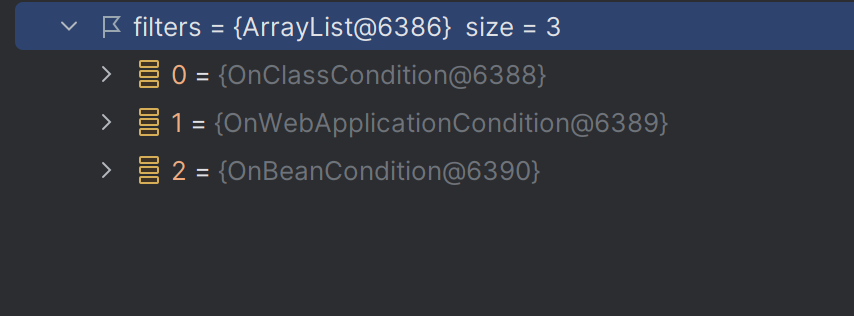
디버깅 결과 다음과 같이 3개의 필터를 가져온다.
OnClassCondition
: @ConditionalOnBean, @ConditionalOnMissingBean 등 검사OnWebApplicationCondition
: @ConditionalOnClass, @ConditionalOnMissingClass 검사OnBeanCondition
: @ConditionalOnWebApplication , @ConditionalOnNotWebApplication 검사
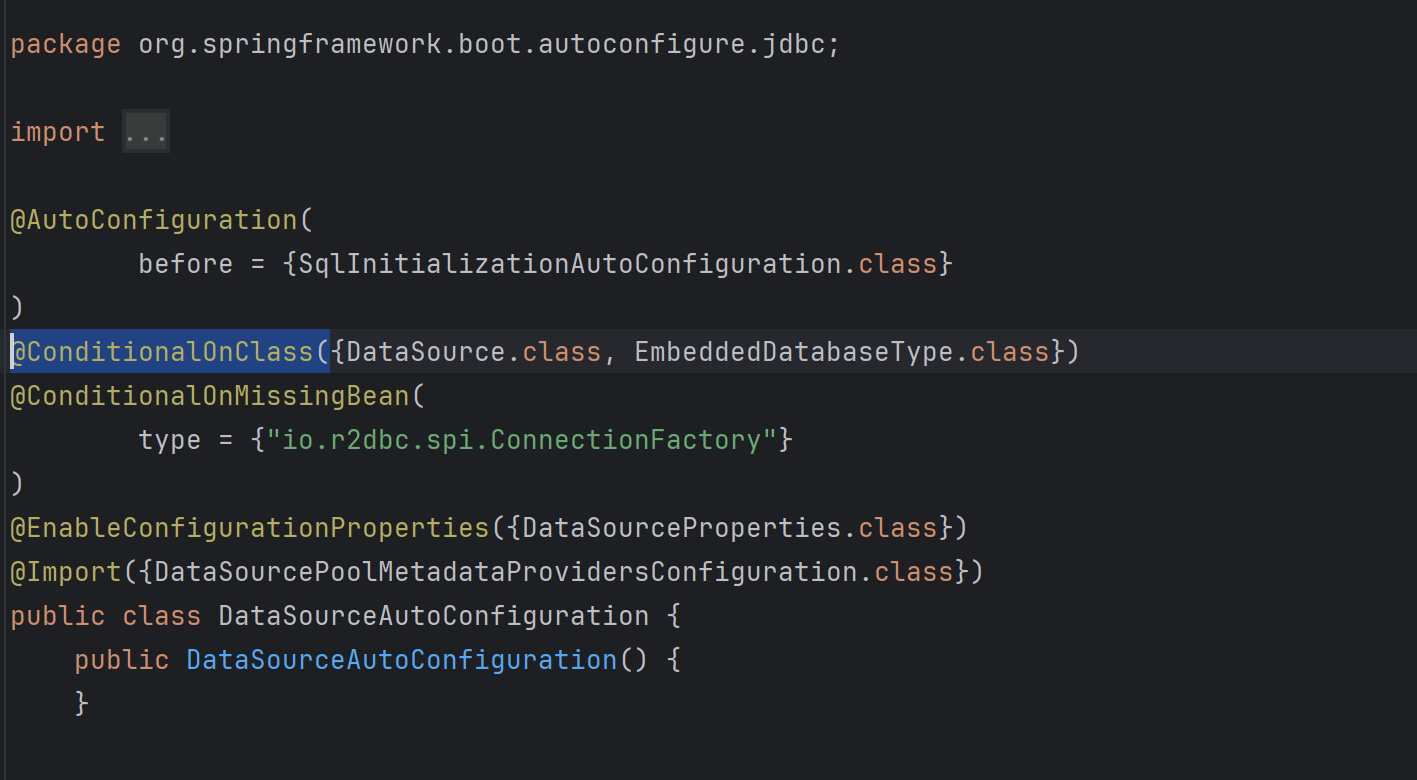
실제로 @AutoConfiguration annotation이 붙어 있는 DataSpurceProperties를 보면 @ConditionalOnClass 와 @ConditionalOnMuassingBean annotation이 붙어있는 것을 볼 수 있다. 이 annotation들에 설정된 조건들을 위 필터들이 각각 검사하여 autoconfiguration에 해당 class를 포함시킬지 말지 결정된다.
@ConditionalOnClass({DataSource.class, EmbeddedDatabaseType.class})예를 들어 설명하자면, DataSource.class, EmbeddedDatabaseType.class 가 존재할 때만 bean으로 해당 class를 등록하고 그렇지 않으면 무효화 한다는 조건의 내용이다.
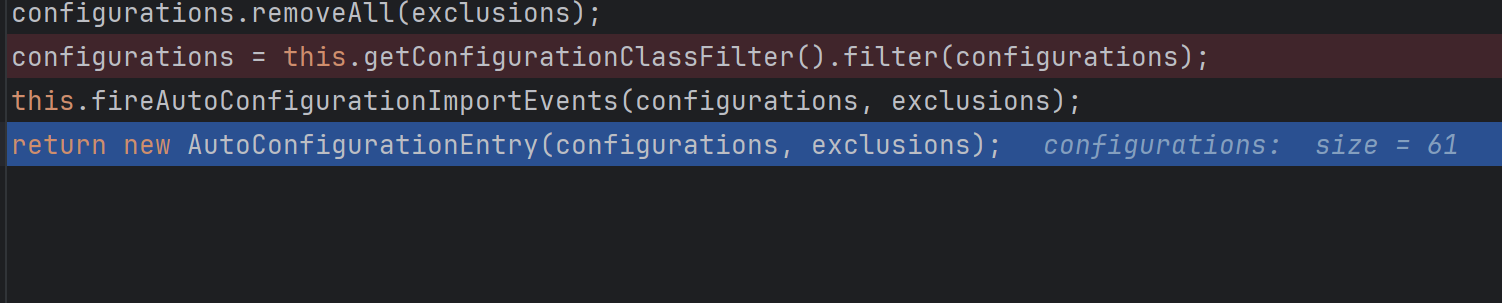
디버깅 했을 때 150개였던 configuration 후보가 filter를 거친 뒤 61개로 줄어든 것을 확인할 수 있었다.
참고로 개발자가 정의한 Component들이 먼저 scan되어 bean으로 등록되고, 이후 autoconfiguration bean들이 이후에 등록된다.
예시로 한번 더 살펴보기
build.gradle에 org.springframework.boot:spring-boot-starter-data-jpa 의존성을 추가해주면, org.springframework.boot.autoconfigure.jdbc 패키지를 포함하게 된다.
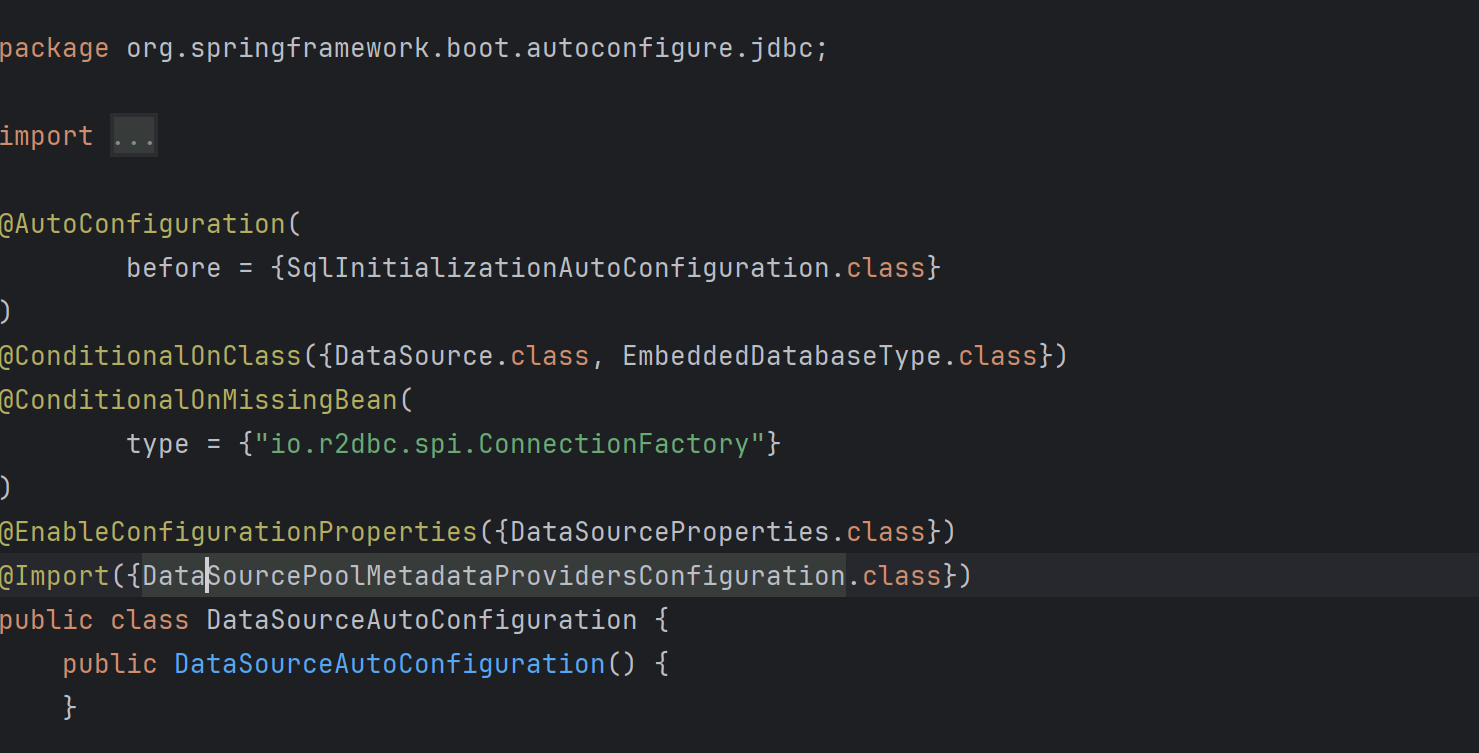
해당 패키지에는 DataSourceAutoConfiguration class가 포함되어 있고, @AutoConfiguration annotation이 작성되어 있다. 따라서 앞에서 설명한 동작 과정대로 해당 class가 bean으로 등록되게 된다.
이전 글에서 설명했던 DataSourceProperties class를 bean으로 등록하고, yml 파일의 환경 설정 속성값들을 객체에 바인딩할 수 있는 이유는, DataSourceAutoConfiguration class에 @EnableConfigureationProperties이 작성되어 있기 때문이다.
해당 annotation에 DataSourceProperties.class를 작성함으로써 DataSourceProperties class가 ConfigurationProperties로 scan되어 bean으로 등록되도록 한다. 이후 설정 정보가 필요한 곳에서 객체를 주입받아 사용할 수 있다.
> 즉, yml 파일의 db 접속 정보를 적는 것만으로 db에 접속할 수 있었던 것은 autoconfiguration 기능에 의해 DataSourceAutoConfiguration가 bean으로 생성되었고, DataSourceAutoConfiguration class를 통해 DataSourceProperties class를 ConfigurationProperties로 인식되게 할 수 있었고, 이 객체를 bean으로 생성하여 yml 파일의 속성값들과 바인딩하여 사용할 수 있었기 때문이라고 정리할 수 있을 것 같다.