
🏷️OpenDaylight
- 이번에는 mininet을 이용하여 가상 네트워크를 구성해보도록 하겠다.
- 🖇️cf. 나의 가상머신 IP는 192.168.111.146이다.
📌실습
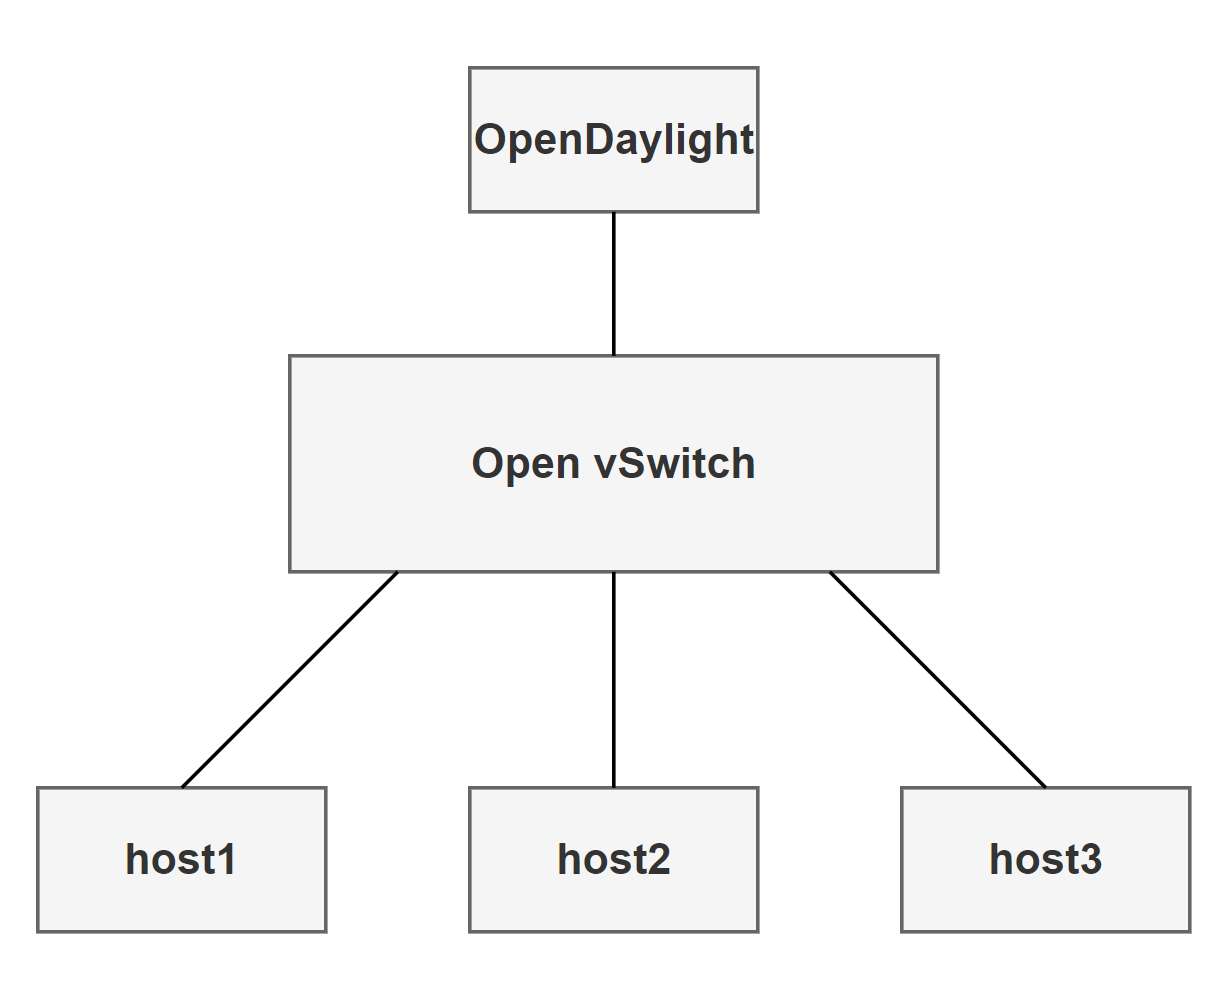
가상 네트워크 구성
- mininet과 Open vSwitch로 가상 네트워크를 구성해본다.
- 다음과 같은 topology를 만들 것이다.
sudo apt install mininet openvswitch-switch && service openvswitch-switch start- 스위치 1개에 3개의 host가 연결된 가상 네트워크 환경을 만들어 보자.
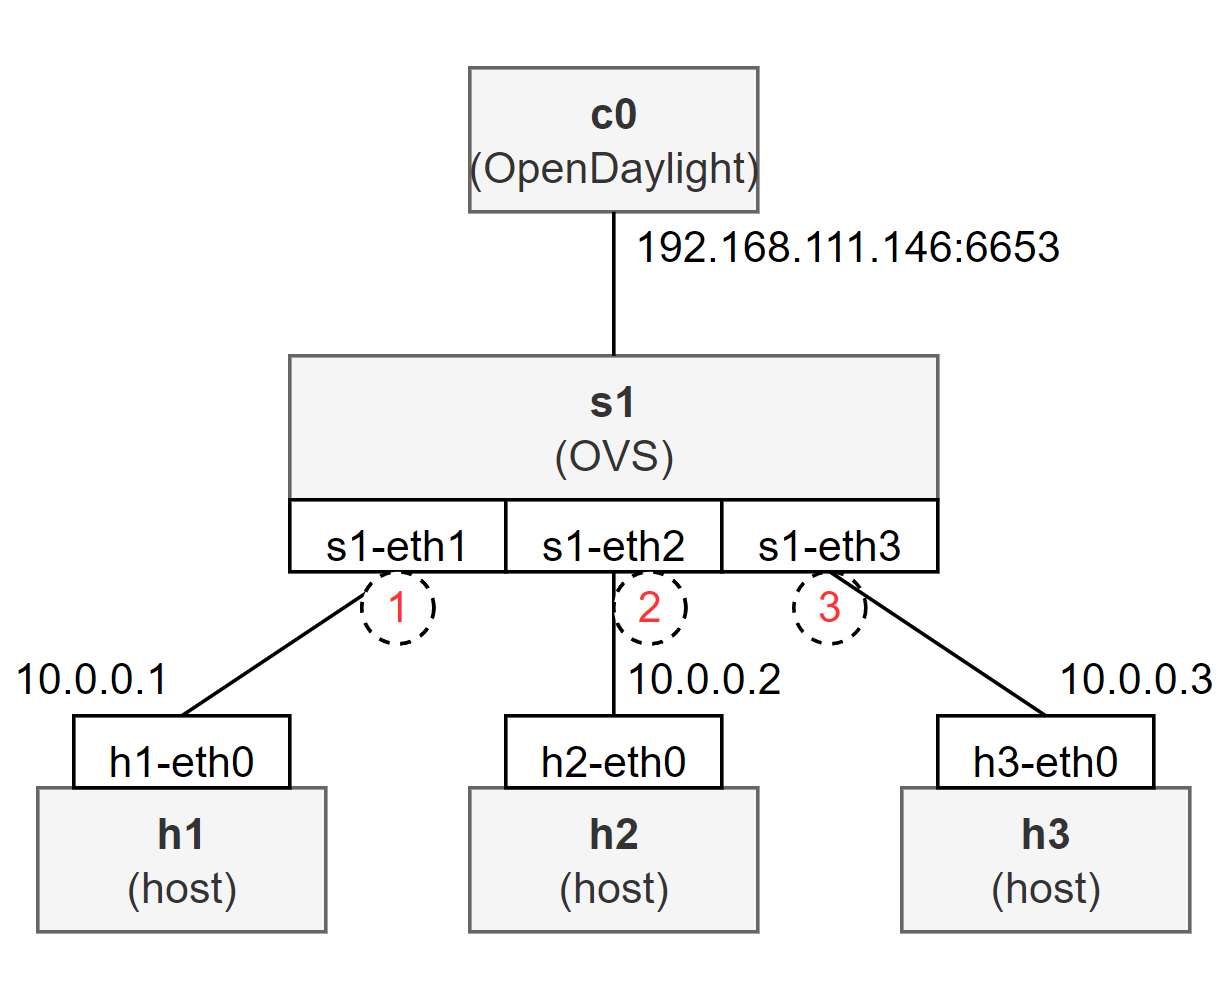
sudo mn --controller=remote,ip=192.168.111.146,port=6653 --topo=single,3 --switch=ovs,protocols=OpenFlow13- mininet CLI에서 OVS와 연결된 노드 정보를 출력해보자.
mininet> nodes
available nodes are:
c0 h1 h2 h3 s1

mininet> net
h1 h1-eth0:s1-eth1
h2 h2-eth0:s1-eth2
h3 h3-eth0:s1-eth3
s1 lo:  s1-eth1:h1-eth0 s1-eth2:h2-eth0 s1-eth3:h3-eth0
c0

mininet> dump
<Host h1: h1-eth0:10.0.0.1 pid=16830>
<Host h2: h2-eth0:10.0.0.2 pid=16832>
<Host h3: h3-eth0:10.0.0.3 pid=16834>
<OVSSwitch{'protocols': 'OpenFlow13'} s1: lo:127.0.0.1,s1-eth1:None,s1-eth2:None,s1-eth3:None pid=16839>
<RemoteController{'ip': '192.168.111.146', 'port': 6653} c0: 192.168.111.146:6653 pid=16822>- OVS의 Openflow 관리도구인
ovs-ofctl로 OVS의 상태를 조회해보자.
sudo ovs-ofctl show s1 -O OpenFlow13
OFPT_FEATURES_REPLY (OF1.3) (xid=0x2): dpid:0000000000000001
n_tables:254, n_buffers:0
capabilities: FLOW_STATS TABLE_STATS PORT_STATS GROUP_STATS QUEUE_STATS
OFPST_PORT_DESC reply (OF1.3) (xid=0x3):
 1(s1-eth1): addr:ba:ac:ae:84:69:b4
     config:     0
     state:      LIVE
     current:    10GB-FD COPPER
     speed: 10000 Mbps now, 0 Mbps max
 2(s1-eth2): addr:1e:32:e7:a1:f7:c2
     config:     0
     state:      LIVE
     current:    10GB-FD COPPER
     speed: 10000 Mbps now, 0 Mbps max
 3(s1-eth3): addr:ba:64:51:1b:6e:b7
     config:     0
     state:      LIVE
     current:    10GB-FD COPPER
     speed: 10000 Mbps now, 0 Mbps max
 LOCAL(s1): addr:fe:cb:fc:4b:da:4c
     config:     PORT_DOWN
     state:      LINK_DOWN
     speed: 0 Mbps now, 0 Mbps max
OFPT_GET_CONFIG_REPLY (OF1.3) (xid=0x9): frags=normal miss_send_len=0- DPID는 OpenDaylight(odl)이 하위에 연결된 SDN 스위치를 구분하는 식별자다.
1(s1-eth1)같이 인터페이스명 앞에 붙어진 번호가 OVS스위치가 연결된 인터페이스를 구분하는 번호다.- 추후에 flow rule을 설정할 때 사용된다.
- 얻은 정보를 토대로 얻은 topology는 다음과 같다.

2Co 4:7