
완성코드
server.js
// node.js 에서 기본 제공되는 패키지로 세팅
const http = require('http')
const url = require('url')

// localhost -> 127.0.0.1 -> loop back -> 서버를 실행한 컴퓨터
const host = 'localhost'
const port = 3000;


// req -> request -> 요청
// res -> response -> 응답

// 엔드포인드별 상황까지 추가
const server = http.createServer((req,res)=>{
    const path = url.parse(req.url).pathname;

    if(path=='/') {
        res.writeHead(200,{'Content-type' : 'text/html'});
        res.end('<h1> Home page </h1>')

    }else if(path == '/post'){
        res.writeHead(200,{'Content-type' : 'text/html'});
        res.end('<h1> Post page </h1>')

    }else if(path == '/user'){
        res.writeHead(200,{'Content-type' : 'text/html'});
        res.end('<h1> User page </h1>')

    }else{
        res.writeHead(404,{'Content-type' : 'text/html'});
        res.end('<h1> 404 Not fount!! </h1>')
    }

    // res.writeHead(200,{'Content-type' : 'text/html'});
    // res.end('<h1> Hello world </h1>')
});

server.listen(port,host,()=>{
    console.log('서버가 시작되었습니다. http://localhost:3000')
});
순서1
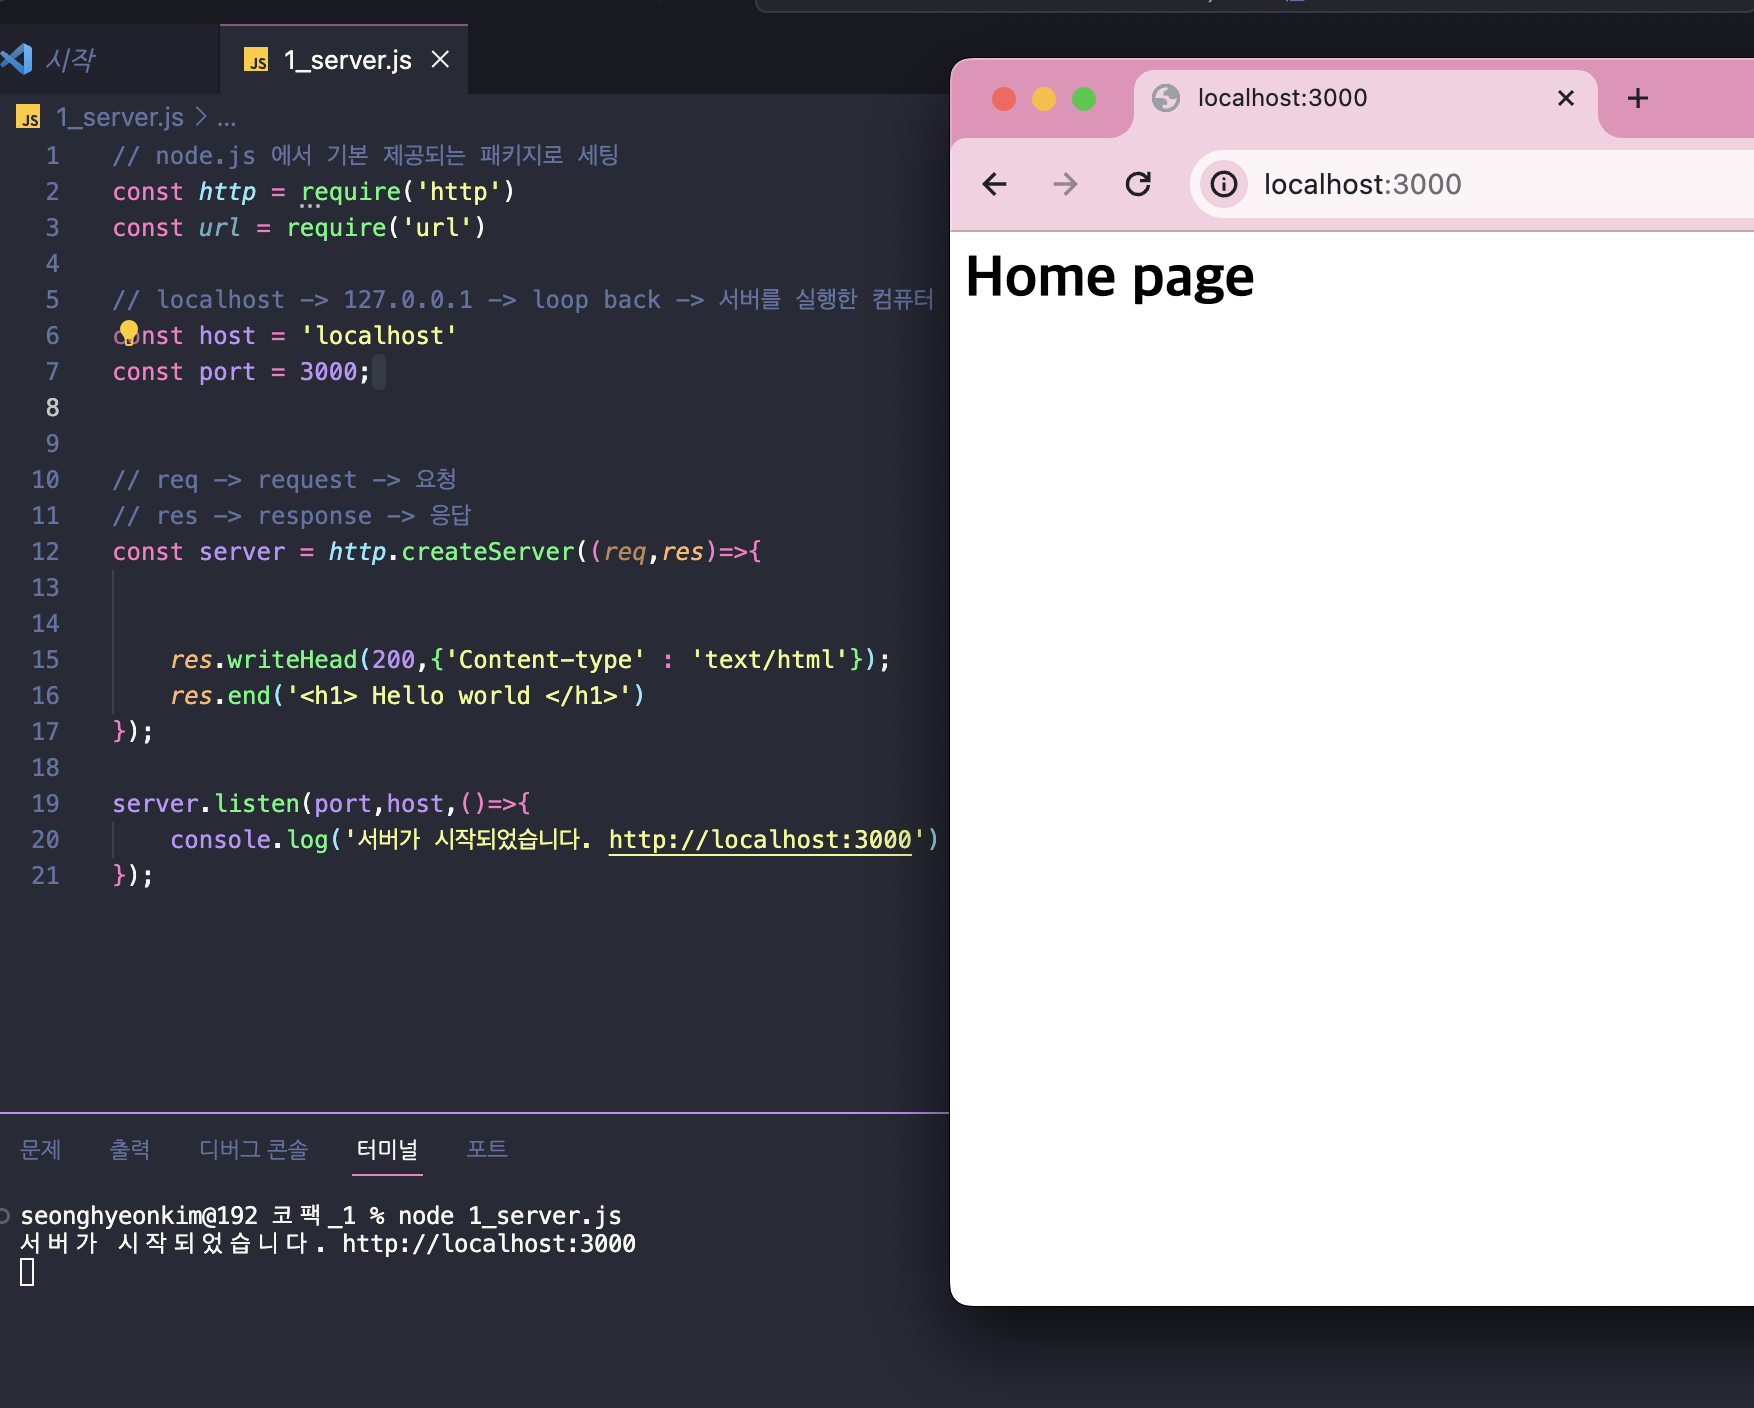
VS코드로 node.js 가 설치되어 있다면 간단하게 서버를 구현할수 있습니다.
먼저 node.js 에서 기본으로 제공되는 패키지들인 http 와 url 을 불러온 후 서버가 실행될 포트와 호스트까지 입력해줍니다.
그리고 http 를 사용해서 서버를 만들어준 후 간단하게 실행되었을때 보여줄 값들을 작성,
그리고 서버가 실행되었을때에 잘 실행됬는지를 확인해줄 listen 까지 작성해주면 코드 몇줄만에 서버는 만들어집니다.
// node.js 에서 기본 제공되는 패키지로 세팅
const http = require('http')
const url = require('url')

// localhost -> 127.0.0.1 -> loop back -> 서버를 실행한 컴퓨터
const host = 'localhost'
const port = 3000;


// req -> request -> 요청
// res -> response -> 응답
const server = http.createServer((req,res)=>{

    res.writeHead(200,{'Content-type' : 'text/html'});
    res.end('<h1> Hello world </h1>')
});

server.listen(port,host,()=>{
    console.log('서버가 시작되었습니다. http://localhost:3000')
});
이제 작성한 파일을 터미널창에서 node server.js(파일이름) 를 입력후 실행한다음 http://localhost:3000 링크로 들어가면 내가 실행한 서버가 잘 실행되는것을 확인할 수 있습니다.
순서2
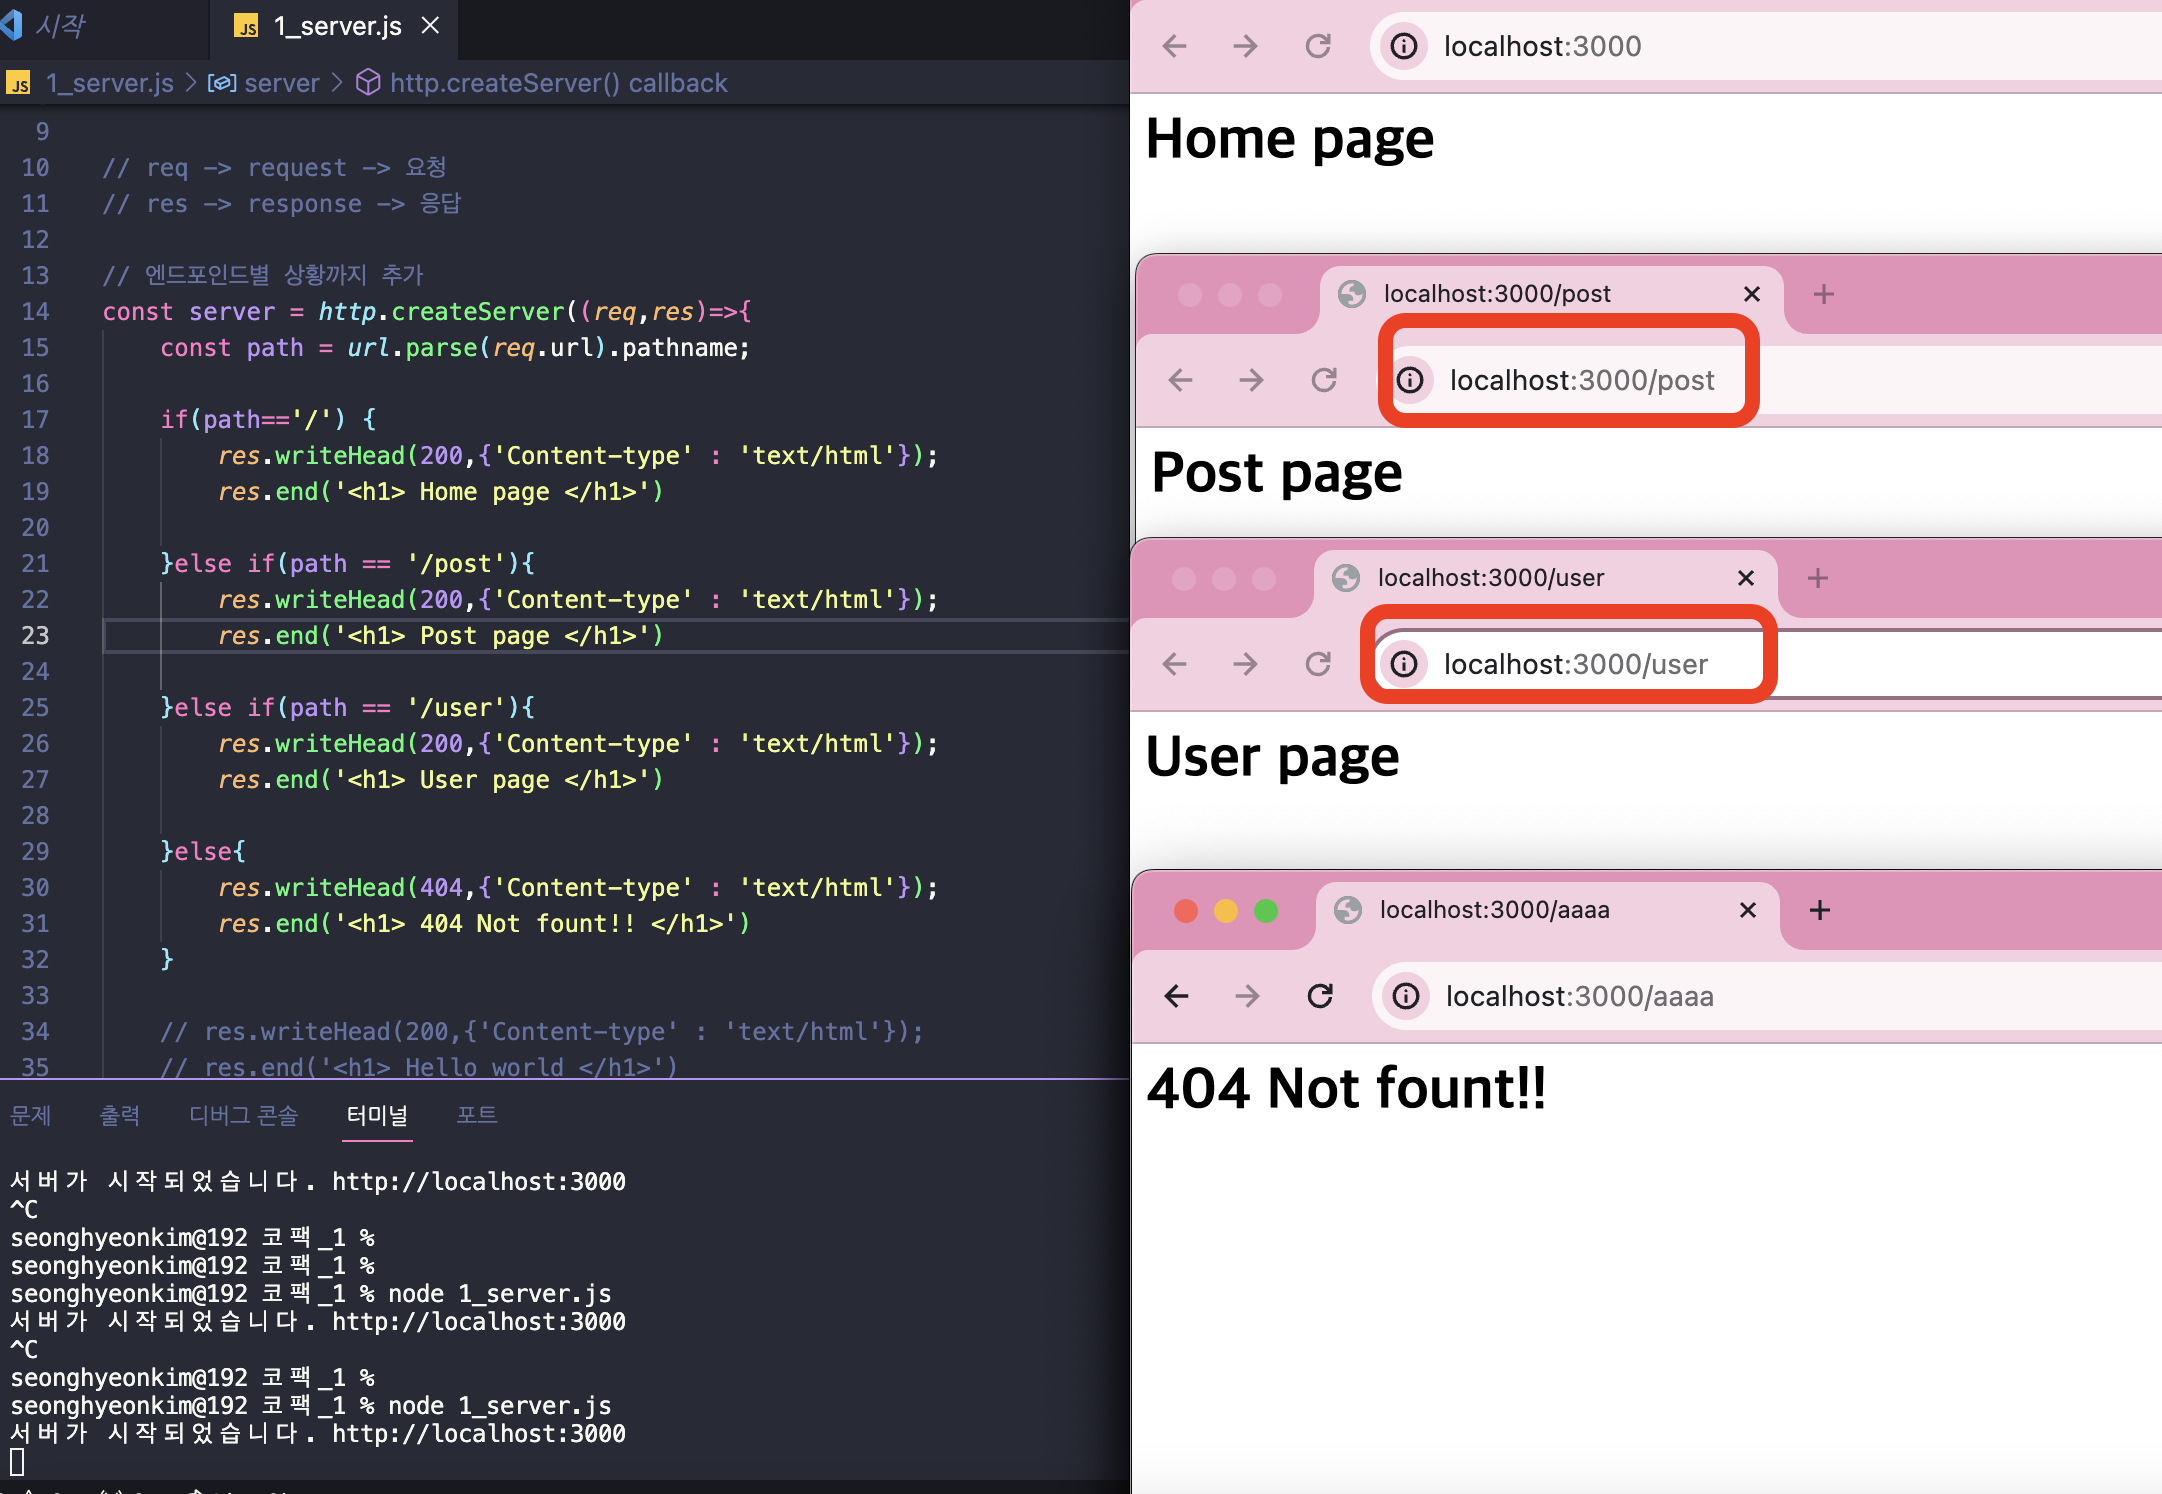
서버를 만들었으니 이제 각 엔드포인트 별로 각각 다른 페이지가 나올 수 있도록 추가로 작성해보겠습니다.
// node.js 에서 기본 제공되는 패키지로 세팅
const http = require('http')
const url = require('url')

// localhost -> 127.0.0.1 -> loop back -> 서버를 실행한 컴퓨터
const host = 'localhost'
const port = 3000;


// req -> request -> 요청
// res -> response -> 응답

// 엔드포인드별 상황까지 추가
const server = http.createServer((req,res)=>{
    const path = url.parse(req.url).pathname;

    if(path=='/') {
        res.writeHead(200,{'Content-type' : 'text/html'});
        res.end('<h1> Home page </h1>')

    }else if(path == '/post'){
        res.writeHead(200,{'Content-type' : 'text/html'});
        res.end('<h1> Post page </h1>')

    }else if(path == '/user'){
        res.writeHead(200,{'Content-type' : 'text/html'});
        res.end('<h1> User page </h1>')

    }else{
        res.writeHead(404,{'Content-type' : 'text/html'});
        res.end('<h1> 404 Not fount!! </h1>')
    }

    // res.writeHead(200,{'Content-type' : 'text/html'});
    // res.end('<h1> Hello world </h1>')
});

server.listen(port,host,()=>{
    console.log('서버가 시작되었습니다. http://localhost:3000')
});
기존코드에서 아까는 사용하지 않았던 url 을 사용해서 const path = url.parse(req.url).pathname; 라는 코드를 한줄 추가해준 후 이제 각 url 에 각 경로별로 들어왓을때에 다른 페이지 내용을 보여줄 수 있도록 만들어줍니다.
마찬가지로 완성이 되고 실행을 해보면 url 별로 각각 다른 페이지가 나오는 것을 확인할 수 있습니다.
순서3 express 사용해서 만들어보기
- 동일한 내용의 서버를 이번에는 express 를 사용해서 만들어보겠습니다.
- 먼저 새로운 파일을 한개 생성해줍니다.
- 그리고 아래와 같이 코드를 작성해줍니다
const express = require('express')

const app = express()

app.get('/', (req,res)=>{
    res.send('<h1> Home page </h1>')
})

app.get('/user', (req,res)=>{
    res.send('<h1> User page </h1>')
})

app.get('/post', (req,res)=>{
    res.send('<h1> Post page </h1>')
})

app.use((req,res)=>{
    res.status(404).send('<h1> 404 Not Found page </h1>')
})


app.listen(3000, ()=>{
    console.log('server running on http://localhost:3000')
})
- 그리고 express 를 사용하기 위해서 설치까지 해줘야 하는데요, 터미널 창에서
npm install express혹은yarn init express을 입력해주면 파일목록에 package.json 이라는 파일이 생성이 되는것을 볼수 있습니다.
- 이제 이전과 동일하게
node 2_server.js(파일이름)을 입력해주면 동일하게 서버가 실행되고 작동되는것을 볼 수 있습니다.
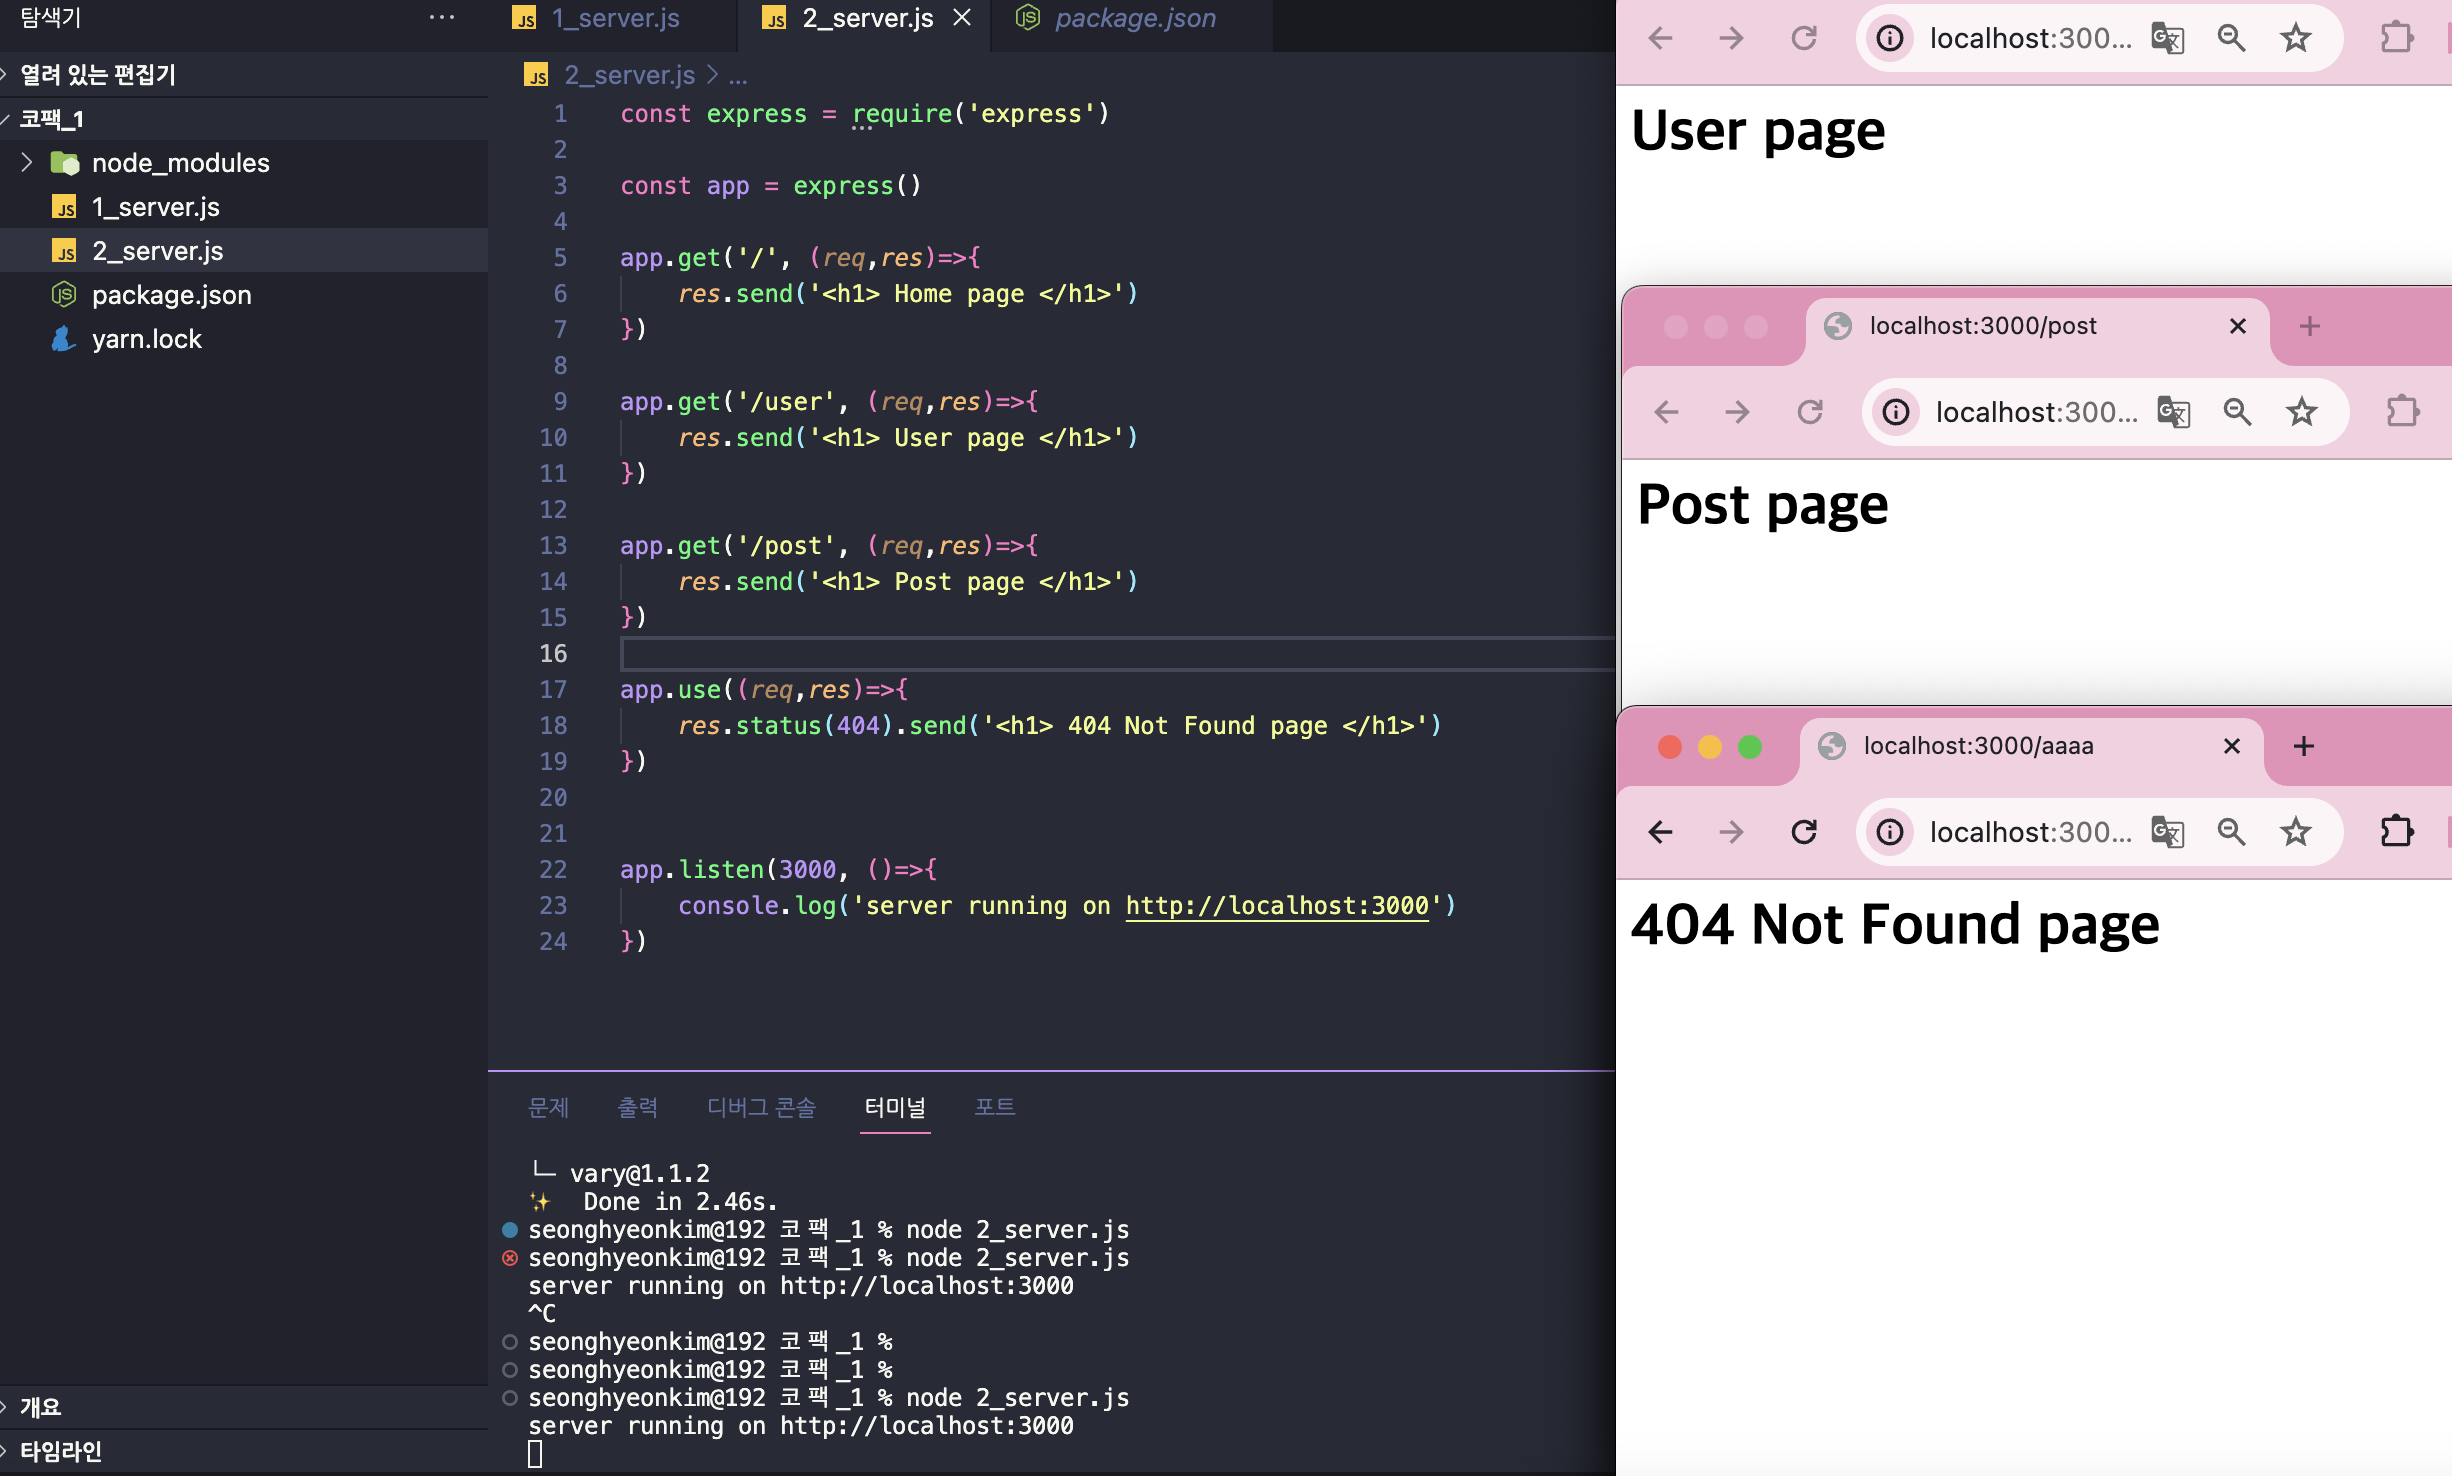
같은 서버의 내용일지라도 코드 가독성으로나 메모리적으로나 훨씬 효율적인것을 볼 수 있습니다.
마무리
node.js 를 사용해서 만들수 있지만 실제로 이렇게 서버를 만들면 굉장히 힘들고 또 내부적으로 다뤄야 될 내용들이 많기때문에 어려움이 있습니다.
마치 요리할때 비빔밥을 만든다고 node.js 라는 좋은 고추장을 사용해놓고 그걸 숟가락으료 퍼서 양념을 넣는게 아닌 젓가락으로 한콕씩 찝어서 바르는것과 수준의 비효율적이고 불필요하게 난이도를 높이는 하드코딩이라고 할 수 있습니다.
그래서 node.js 환경에서 더욱 편하게 서버를 구축할 수 있는 다른 패키지들인 exprss 나 nest.js 를 사용하는것이 이러한 이유중 하나입니다.