
0. Linux Kernel Build
리눅스 커널 빌드 방법은 이전에 올린 글을 참고하면 되는데 여기에서 config 몇 가지를 더 수정해야 한다:
make O=../build/<ARCH>/ menuconfig
# Processor type and features --->
# [ ]    Randomize the address where the kernel is loaded
#
# Kernel hacking --->
#     Compile-time checks and compiler options --->
#         Debug information (Rely on the toolchain's implict default DWARF version)
# [ ]     Reduce debugging information
# [*]     Provide GDB scripts for kernel debugging
make O=../build/<ARCH>/ -j$(nproc)
make O=../build/<ARCH>/ scripts_gdb
Reference: https://docs.kernel.org/dev-tools/gdb-kernel-debugging.html
1. Buildroot 다운로드
buildroot 의 최신 버전은 다음을 통해 확인하길 바란다: https://buildroot.org/download.html
wget https://buildroot.org/downloads/buildroot-2024.02.4.tar.gz
tar -xvzf buildroot-2024.02.4.tar.gz
rm buildroot-2024.02.4.tar.gz
mv buildroot-2024.02.4.tar.gz buildroot/
2. rootfs 생성
cd buildroot/
make qemu_x86_64_defconfig
make menuconfig
# C library (glib)
# Toolchain
# [*] Build cross gdb for the host
# [*]     TUI support
# [*]     Simulator support
# Kernel
# [ ] Linux Kernel

make
buildroot 는 top-level parallel build 를 지원하므로 굳이 -jN 을 쓸 필요가 없다. 또한 커널도 커스텀 커널을 사용할 예정이므로 굳이 커널까지 빌드하지 않는다.
3. QEMU 로 디버깅하기
#/bin/bash
BASEDIR=$(dirname "$0")/..
BUILDDIR=$BASEDIR/build/x86_64
ROOTFS=$BASEDIR/buildroot/output/images/rootfs.ext2
VMLINUX=$BUILDDIR/vmlinux
IMAGE=$BUILDDIR/arch/x86_64/boot/bzImage
if [[ $1 == "debug" ]]; then
qemu-system-x86_64 \
-M pc \
-kernel $IMAGE \
-drive file=$ROOTFS,if=virtio,format=raw \
-append "console=ttyS0 root=/dev/vda nokaslr" \
-net nic \
-net user \
-nographic \
-s -S > ./output.log &
QEMU_PID=$!
gdb $VMLINUX \
-ex "add-auto-load-safe-path $BUILDDIR" \
-ex "target remote :1234"
kill $QEMU_PID
else
qemu-system-x86_64 \
-M pc \
-kernel $IMAGE \
-drive file=$ROOTFS,if=virtio,format=raw \
-append "console=ttyS0 root=/dev/vda" \
-net nic \
-net user \
-nographic
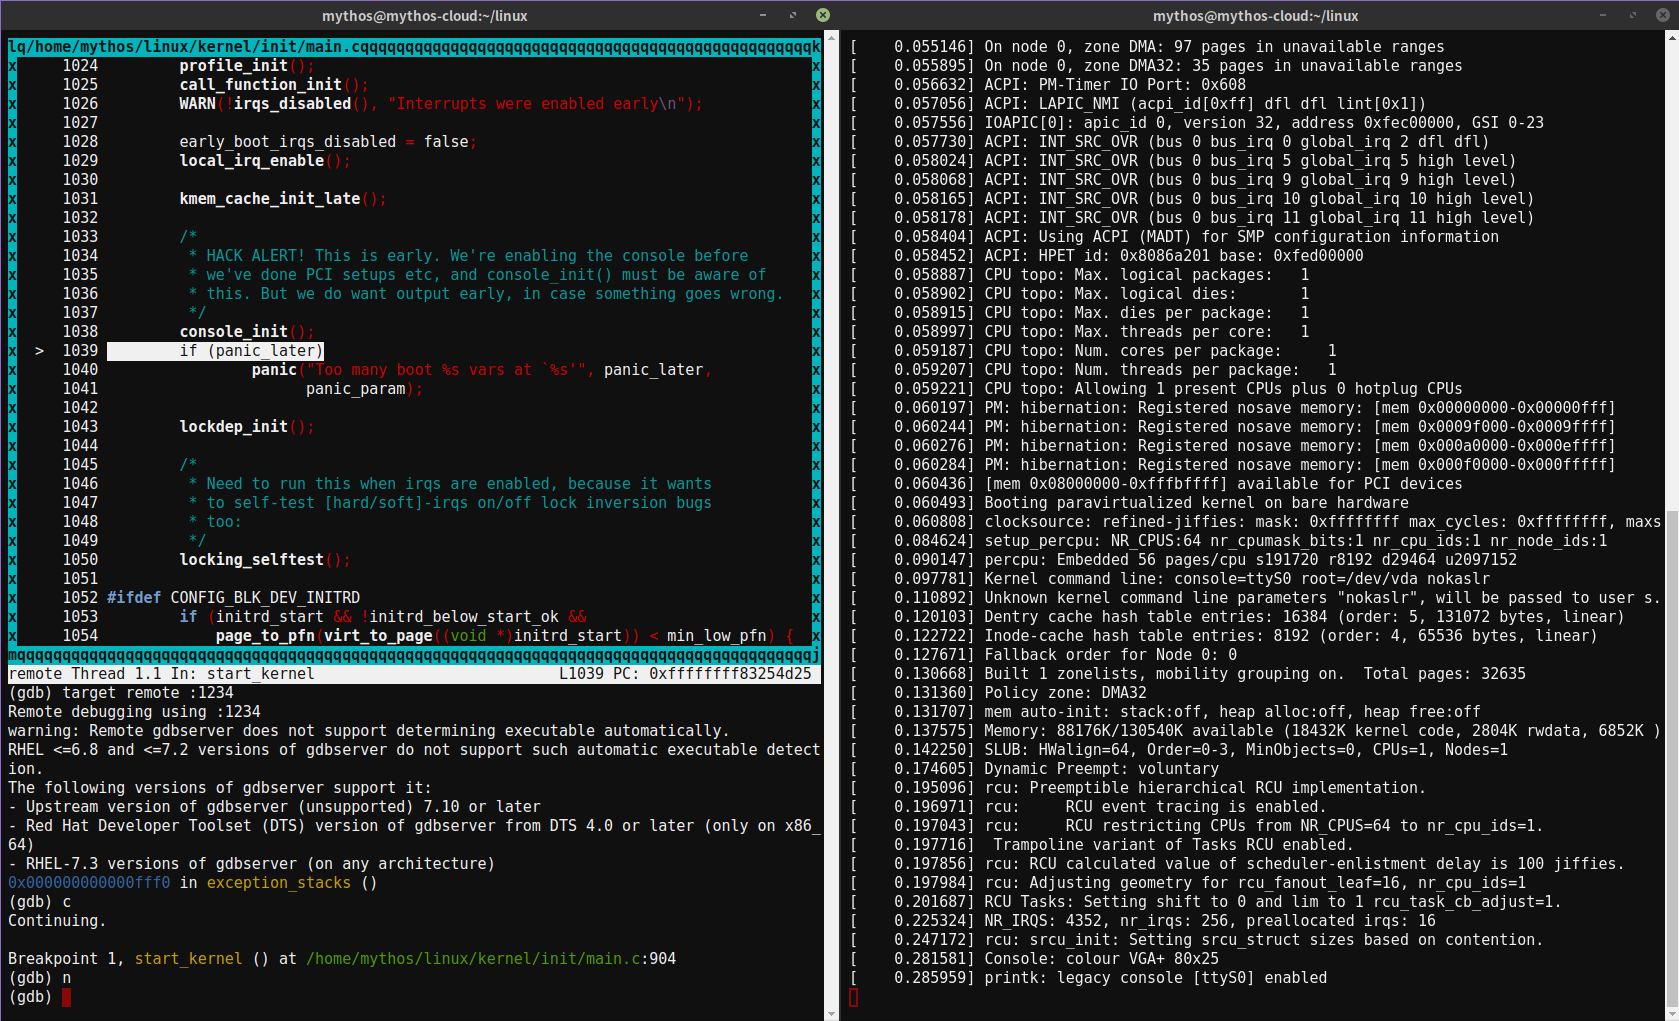
fi필자가 만든 스크립트인데 ./run_qemu.sh debug 실행하면 된다. 디렉토리 구조는 이하와 같다:
linux/
├-- build/
|	├-- x86_64/
|   |  	├-- vmlinux
|   |   ├-- arch/x86/boot/
|   └   └   └-- bzImage
├-- buildroot/
|	├-- output/
|   | 	├-- images/
|   └   └   └-- rootfs.ext2
├-- kernel/
├-- patch/
├-- script/
└	└-- run-qemu.sh
- network backend 'user' is not compiled into this binary
만일 network backend 'user' is not compiled into this binary 경고가 발생한다면 QEMU 에서 slirp 를 지원하지 않아서 그런 것이다.
Reference: https://wiki.qemu.org/Documentation/Networking
이 때에는 QEMU 를 직접 빌드해야 한다:
sudo dnf install libslirp-devel

# https://www.qemu.org/download/
wget https://download.qemu.org/qemu-9.0.2.tar.xz
tar xvJf qemu-9.0.2.tar.xz
cd qemu-9.0.2
./configure --enable-slirp
make
sudo make install
Reference: https://stackoverflow.com/questions/75641274/network-backend-user-is-not-compiled-into-this-binary

2000.11.30