2025.04.01
MSA
이전에는 라우팅 기능만 살펴봤다.
이번에는 인증(Authentication), 권한 부여(Authorization), 로깅(Logging) 등 공통 기능을 어떻게 처리하는지 살펴볼 것이다.
Service Instance 간의 통신
서비스 인스턴스 간의 통신은 크게 3가지 방식으로 나눌 수 있다.
실제로 사용할 방법은 1가지로 추려질 것이다.
스프링 Discovery Client로 서비스 인스턴스 검색
스프링 Discovery Client
- 서비스 디스커버리를 위한 가장 기본적인 인터페이스
- 로드 밸런서(Spring Cloud Load Balancer)와 통합되어, 서비스 레지스트리에 등록된 인스턴스를 조회
- Discovery Client를 사용하면 등록된 모든 서비스 이름과 해당 서비스의 인스턴스 정보(URL, 포트 등)를 쿼리할 수 있다
예제 코드
@Component
public class OrderDiscoveryClient {

   @Autowired
   private DiscoveryClient discoveryClient;

   public Order getOrder(String orderId) {
     RestTemplate restTemplate = new RestTemplate();

     <!-- Discovery Client를 사용하여 order-service의 모든 인스턴스 정보를 가져온다. -->
     List<ServiceInstance> instances =
         discoveryClient.getInstances("order-service");

     if (instances.size() == 0) return null;

     <!-- 인스턴스의 URI를 사용하여 요청을 보낼 URL을 직접 구성한다.
     	  스케일 아웃해서 인스턴스가 여러 개인 경우, 항상 첫 번째 인스턴스만 호출한다.
          로드 밸런서 이용이 안됨 -->
     String serviceUri = String.format(
         "%s/v1/order/%s",
         instances.get(0).getUri().toString(),
         orderId
     );

     <!-- RestTemplate을 사용하여 해당 서비스 인스턴스의 API를 호출한다. -->
     ResponseEntity<Order> restExchange =
         restTemplate.exchange(serviceUri, HttpMethod.GET, null, Order.class, orderId);

     return restExchange.getBody();
   }
}
DiscoveryClient
- 스프링 클라우드 로드 밸런서와 상호 작용
- 유레카에 등록된 서비스의 모든 인스턴스를 검색하려면 getInstances() 메서드를 사용
- getInstances() 호출 시,
서비스 이름(serviceId)를 인자로 전달하면 해당 서비스의 모든 ServiceInstance 객체 리스트를 반환 - ServiceInstance 클래스 : 호스트 이름, 포트, URI 같은 서비스의 인스턴스 정보를 보관
- 단순히 인스턴스를 조회하는 역할, 실제 로드밸런싱은 로드 밸런서가 담당
RestTemplate
스프링 프레임워크에서 제공하는 HTTP 클라이언트 라이브러리
- RESTful 웹 서비스를 호출하는 데 사용되는 동기식 클라이언트
- HTTP 메서드(GET, POST, PUT, DELETE 등)를 쉽게 사용할 수 있는 메서드를 제공
- URI 템플릿 변수와 매개변수를 지원하여 동적 URL을 쉽게 구성
- 요청/응답에 대한 객체 변환을 자동으로 처리
- 커스텀 헤더 관리, 에러 핸들링 등 다양한 기능을 제공
Discovery Client + RestTemplate 사용 시 단점
코드가 많다는 단점
- Discovery Client를 직접 호출하면 서비스 리스트를 얻게 되지만,
어떤 인스턴스를 선택해 호출할지 결정하는 책임은 사용자(개발자)에게 있다.
스케일 아웃된 환경에서는 인스턴스가 여러 개일 때 Load Balancing을 직접 구현(api 주소를 직접)
-> 스프링 클라우드 클라이언트 측 로드 밸런서를 이용하지 못한다 - 코드에서 서비스를 호출하는 데 사용될 URL을 직접 생성
->서비스 메소드 내에서 너무 많은 일(인스턴스 선택 + URL 구성 + 호출)을 한다 - RestTemplate는 인스턴스를 찾아가는 구문을 수동으로 작성해야하는 단점 때문에 로드 밸런서를 통한 부하 분산을 자동으로 처리할 수 없다
-> 잘 사용하지 않는다.
로드 밸런서를 지원하는 스프링 REST 템플릿으로 서비스 호출
예제 코드
- 로드 밸런서를 지원하는 RestTemplate 클래스를 사용하려면 스프링 클라우드의 @LoadBalanced 애너테이션으로 RestTemplate 빈(bean)을 정의해야 한다.
@SpringBootApplication
public class UserApplication {

    public static void main(String[] args) {
        SpringApplication.run(UserApplication.class, args);
    }

    <!-- RestTemplate 빈을 등록하고, @LoadBalanced를 붙여서 로드 밸런싱 기능을 활성화 -->
    @LoadBalanced
    @Bean
    public RestTemplate getRestTemplate() {
        return new RestTemplate();
    }
}
@Component
public class OrganizationRestTemplateClient {

    @Autowired
    private RestTemplate restTemplate;

	<!-- RestTemplate를 주입받을 때 get(0)코드가 없어진 것을 확인 할 수 있다. -->
    public Order getOrder(String orderId) {
        ResponseEntity<Order> restExchange =
            restTemplate.exchange(
            	<!-- 서비스 이름은 URL에 사용 -->
                "http://order-service/v1/order/{orderId}",
                HttpMethod.GET,
                null,
                Order.class,
                orderId
            );
        return restExchange.getBody();
    }
}
- 스프링 클라우드 Discovery Client를 직접 사용하지 않는다
- restTemplate.exchange() 호출에 사용된 URL에서 서버 이름은 유레카에 Order 서비스를 등록할 때 사용된 Order 서비스 키의 애플리케이션 ID와 일치
로드 밸런서를 지원하는 RestTemplate 클래스 동작 방식
- 전달된 URL을 파싱하고 서버 이름으로 전달된 것을 키로 사용하여 서비스의 인스턴스를 로드 밸런서에 쿼리
- 실제 서비스의 호스트, 포트 정보는 개발자에게 추상화되어 보이지 않는다
- Spring Cloud Load Balancer가 서비스 인스턴스 목록을 가져오고,
라운드 로빈 방식으로 트래픽을 분산
넷플릭스 Feign 클라이언트로 서비스 호출
Feign 클라이언트
- 다른 서비스 인스턴스의 REST API를 호출하기 위한 HTTP 클라이언트
- REST 서비스를 호출하는 데 RestTemplate 클래스와 다른 접근 방식
- 개발자는 먼저 자바 인터페이스를 정의한 후
스프링 클라우드 애너테이션들을 추가하여
스프링 클라우드 로드 밸런서를 통해 호출할 유레카 기반 서비스를 매핑할 수 있다. - 인터페이스만 정의하면, 구현 클래스나 HTTP 호출 로직 등을 따로 작성할 필요 없다
- 인터페이스로 작성해서 언제나 의존성 주입이 가능하다.
-> 가장 많이 사용한다.
예제 코드
<!-- 하나의 인터페이스를 만든다 -->
<!-- 디스커버리에 등록해 놓은 외부의 서비스의 이름을 작성 -->
@FeignClient(name = "order-service")
public interface OrganizationFeignClient {

	<!-- 외부 서비스의 API를 get으로 가지고 온다. -->
    @RequestMapping(method = RequestMethod.GET, value = "/v1/order/{orderId}")
    Order getOrder(@PathVariable("orderId") String orderId);

}
getOrder() 메서드를 정의하는 방법
- 스프링 Controller 클래스에서 엔드포인트를 노출하는 방식과 같다.
- 주문 서비스를 호출할 때 HTTP 동사와 엔드포인트를 노출하도록 매핑하는
@RequestMapping 애너테이션을 getOrder() 메서드에 정의 - URL에 전달된 order ID를 @PathVariable 애너테이션을 사용하여
getOrder() 메서드의 orderId 매개변수에 매핑 - 주문 서비스의 호출 반환값은 getOrder() 메서드의 반환값으로 정의된 Order 클래스에 자동으로 매핑
에러 핸들링
표준 스프링 RestTemplate 클래스를 사용할 때 모든 서비스 호출 결과에 대한 HTTP상태 코드(status code)를 ResponseEntity 클래스의 getStatus() 메서드로 반환
-> 하지만 Feign 클라이언트를 사용하면 호출된 서비스에서 반환한 모든 HTTP 4xx – 5xx 상태 코드가 FeignException에 매핑
- FeignException 객체에는 에러 메시지뿐만 아니라,
JSON 형식의 응답 내용도 함께 포함되어 있어 파싱이 가능하다 - Feign은 사용자 정의 Exception으로 매핑할 수 있도록 커스텀 에러 디코더(ErrorDecoder)를 작성할 수 있는 기능을 제공
- 커스텀 디코더 작성 방법은 Feign 공식 깃허브 문서 참고:(https://github.com/Netflix/feign/wiki/Customerror-handling)
JWT 토큰 검증과 Authentication 객체 저장 시점
API Gateway에서 JWT 검증 및 인증 객체 설정
Spring Cloud Gateway 에서 JWT 토큰을 검증하고, 해당 토큰이 유효하면 Authentication 객체를 생성하여 각 서비스로 전달하는 방식
- Gateway 필터에서 JWT 검증을 수행하고, 각 마이크로서비스로 전달되는 HTTP 요청에 Authentication 정보를 추가
- 토큰을 직접 서비스로 전달하는 것이 아니라, 검증된 사용자 정보를 각 서비스에 전파할 수 있다.
장점
- 중앙화된 인증 처리 : 모든 서비스가 Gateway에서 인증되므로 서비스 단에서는 별도로 JWT 검증을 수행할 필요가 없다
-> 각 서비스에서는 이미 인증된 사용자 정보에 접근할 수 있다 - 보안성 향상 : 인증 처리가 중앙에서 이루어지기 때문에, 보안 관련 로직이 통합적으로 관리
- 재사용성 : 동일한 JWT 검증 로직을 각 서비스에서 중복해서 작성할 필요가 없다
-> 한 번의 검증으로 모든 요청에 대해 적용
단점
- 단일 장애 지점(SPOF) : Gateway가 장애가 발생하면 모든 요청이 처리되지 않으므로, 단일 장애 지점
-> 고가용성 구성(게이트웨이를 여러 개 설정)이 필요 - 성능 문제 : 인증 로직이 Gateway에 집중되면 과부하가 걸릴 가능성
-> 스케일링이 중요한 부분 - 복잡성 증가 : 사용자 정보를 각 마이크로서비스로 전달하는 방식(예: HTTP 헤더로 추가)을 잘 설계해야 한다.
-> 각 서비스는 JWT가 아닌, 미리 검증된 Authentication 객체에만 의존할 수 있도록 해야 한다

각 서비스에서 JWT 검증
모든 마이크로서비스에서 JWT 검증 로직을 직접 구현
- 각 서비스는 요청 시 헤더에 있는 JWT를 파싱하여 인증 검증을 수행하고 SecurityContextHolder 에 저장
장점
- 독립성: 각 서비스가 JWT 검증을 독립적으로 수행하므로, API Gateway가 필요 없거나 가벼운 역할만 하게 된다
-> 서비스가 독립적으로 운영 - 확장성: 서비스마다 독립적으로 확장
-> Gateway의 과부하 문제를 피할 수 있다 - 유연성: 각 서비스는 인증 로직에 필요한 변경 사항을 빠르게 반영
단점
- 코드 중복: 모든 서비스에서 JWT 검증 로직을 구현해야 하기 때문에 코드 중복이 발생할 수 있다.
-> 새로운 서비스가 생길 때마다 인증 로직을 추가 해야함 - 유지 보수: JWT 검증 로직에 변경이 생기면 각 서비스에서 해당 버전을 업데이트하고 배포해야 한다
-> 일관성 유지가 어려울 수 있다 - 성능 저하: 각 서비스가 독립적으로 JWT 검증을 수행
-> 각 서비스가 동일한 작업을 반복적으로 수행하게 되어 성능 이슈가 있을 수 있다
OAuth2 인증 서버를 통한 토큰 검증
OAuth2 인증
인증(Authentication)과 권한 부여(Authorization)를 위한 표준 프로토콜
- 사용자가 다른 서비스에 자신의 자원(예: 사용자 데이터, 프로필 정보 등)에 접근할 수 있도록 허용하는 안전한 방법을 제공
- 사용자는 자신의 비밀번호를 공유하지 않고도, 제3자(서드파티) 애플리케이션이 자원에 접근할 수 있도록 권한을 부여
- 직접 구현한다기보다 Google, Kakao 등의 인증 서버를 활용하는 방법이 가장 간편
OAuth2 인증 서버를 통한 토큰 검증
- 각 서비스는 JWT를 직접 검증하지 않고, OAuth2 인증 서버에 유효성 검증을 요청하는 방식
- 각 마이크로서비스는 JWT를 받은 후 인증 서버로 검증 요청을 보내고, 그 응답을 바탕으로 인증 처리를 수행
장점
- 토큰 관리의 유연성: JWT뿐만 아니라 다른 인증 방식을 지원하는 토큰도 검증할 수 있어 다양한 요구사항에 유연하게 대응
- 중앙화된 검증: 모든 검증 로직이 OAuth2 인증 서버에서 이루어지므로, 각 마이크로서비스가 자체적으로 검증 로직을 구현할 필요가 없다
- 보안성: 토큰 상태(유효성, 만료)를 중앙에서 관리하므로 보안 측면에서 이점(만료된 토큰을 빠르게 인지하고 처리)
단점
- 추가적인 네트워크 요청: 각 서비스가 인증할 때마다 중앙 서버로 요청을 보내기 때문에 지연 시간이 증가할 수 있다.
- 복잡성 증가: OAuth2 서버를 추가적으로 구성해야 하며, 토큰 검증 로직을 별도로 운영해야 하므로 시스템 복잡성이 증가
- 고가용성 필요: Authorization Server가 중단되면 모든 마이크로서비스가 인증을 처리하지 못하게 되므로(단일 장애 지점), 서버의 고가용성 구성이 필수적
정리
- API Gateway 방식 : 중앙화된 인증 처리를 제공하여 관리 및 유지보수에 유리하지만, 성능 문제나 단일 장애 지점 문제가 발생
- 각 서비스마다 검증하는 방식 : 서비스 간 독립성을 보장하지만, 인증 로직의 변경 시 관리 비용이 커질 수 있다.
- OAuth2 인증 서버를 통해 중앙에서 인증 처리를 수행 : 보안성과 유연성을 높일 수 있지만, 네트워크 오버헤드와 서버의 고가용성 요구가 따른다
Config Server, Actuator 활용
MSA 환경에서의 구성 관리
MSA 환경에서는 변경되지 않는(불변, immutable) 애플리케이션 이미지를 빌드하고 배포한다
- 애플리케이션 코드와 구성 정보(환경 설정)를 완전히 분리하여 관리
- 구성 정보(config)는 Config Server에 따로 저장
- 민감한 정보(token, secret, api-key 등)도 Config Server에만 저장- 다른 서버(마이크로서비스)는 Config Server의 위치만 알고 있으면,
필요한 환경 설정을 중앙 저장소에서 가져올 수 있다
- 다른 서버(마이크로서비스)는 Config Server의 위치만 알고 있으면,
- 각 마이크로서비스는 시작 시점에 Config Server에서 필요한 구성 정보를 읽어와서 주입받는다
- Config Server는 dotenv 파일을 중앙 집중화한 형태
-> 각 서비스에 민감 정보를 안전하게 제공하는 역할
Spring Cloud Config Server
Config Server는 여러 마이크로서비스의 환경 설정 파일(.env 등)을 중앙 집중화한 형태
-> 각 서비스에 민감 정보를 안전하게 제공하는 역할
- 중앙 집중식 구성 관리: 여러 환경과 애플리케이션에 대한 구성을 한 곳에서 관리
- 동적 구성 업데이트: 런타임 중에 구성을 변경하고 클라이언트에 즉시 반영할 수 있다
- 버전 관리: Git 등의 버전 관리 시스템과 통합하여 구성 변경 이력을 추적할 수 있다
- 보안: 중요한 구성 정보를 암호화하여 저장하고 전송할 수 있다
설정 방법
Spring Cloud Config Server측 설정
Spring Colud Config Server dependency를 추가
implementation 'org.springframework.cloud:spring-cloud-config-server'@EnableConfigServer
- Spring Cloud Config Server를 활성화하는 애노테이션
- Spring Boot 애플리케이션이 구성 서버로 동작
@SpringBootApplication
<!-- Config Server 기능을 활성화하는 애너테이션 -->
@EnableConfigServer
public class ConfigServerApplication {

    public static void main(String[] args) {
        SpringApplication.run(ConfigServerApplication.class, args);
    }
}
application.yml 파일에 설정에 읽어올 설정파일의 경로를 지정
- Local Repository인 경우 : Local Repository의 경로가 기입
- Github Remote Repository인 경우 : Github Repository의 주소가 기입
- public한 경우 : 주소만 기입해도 된다- private한 경우 : username, password가 같이 기입
- username, password 노출을 피하고 싶을 경우 : SSH key 생성 후 github에 공개키, config server에 개인키를 추가하여 설정하는 것도 가능
- private한 경우 : username, password가 같이 기입
- Config Server 경로에 들어가면 환경 설정 파일(.yml, .properties)이 있고, 그 안에 token, secret, api-key 같은 민감 정보가 포함될 수 있다.
server:
  port: 8888  # Config Server 기본 포트

spring:
  application:
  	# Config Server 이름
    name: config-server

  cloud:
    config:
      server:
        git:
          uri: [설정파일이 담긴 Git 레포지토리 경로]
          # local repository path or remote repository path
          # Git 저장소로 인식되려면 해당 경로에 .git 폴더가 존재해야 한다
          # optional: 브랜치 설정
          # default-label: main
Spring Cloud Config Service Instance측 설정
bootstrap.yml 사용을 위한 dependency를 추가
implementation 'org.springframework.cloud:spring-cloud-starter-config'
implementation 'org.springframework.cloud:spring-cloud-starter-bootstrap' <!-- Spring Boot 3.x 기준은 필요 없음, application.yml만 사용 -->
- bootstrap.properties or bootstrap.yml은 스프링 클라우드의 특정 파일 타입
- application.properties or application.yml 파일을 사용하는 컴포넌트보다 ApplicationContext로 먼저 로드 - 스프링 애플리케이션 이름, 스프링 클라우드 구성 서버 위치, 암호화/복호화 정보 등을 지정
- config server에 기입을 해놓으면 서비스 인스턴스가 런을 하는 순간 config server에 대한 정보를 먼저 읽어오고 그 뒤에 application.yml이 동작하게 된다.
bootstrap.yml 작성
spring:
  cloud:
    config:
      uri: [Config Server 주소]
      # 해당 Config Server에서 읽어올 설정 파일 이름을 작성한다.
      name: [읽어올 파일 이름]   # 예: msaconfig.yml
application.yml 작성
- 설정파일이 분리 된 내용을 제거하고 bootstrap.yml 파일을 읽어올 수 있도록 import
spring:
  config:
    import:
 	- classpath:/bootstrap.yml
Spring Cloud Gateway + Eureka + JWT
.yml 설정
server:
  <!-- Gateway 서버 포트 설정 (모든 요청의 진입점) -->
  port: 8000

spring:
  application:
  	<!-- 애플리케이션 이름 (Eureka에 등록될 이름) -->
    name: gateway-server

  cloud:
    gateway:
      <!-- Gateway 라우팅 설정 (MSA의 각 서비스로 트래픽 전달) -->
      routes:
      	<!-- 라우트 식별자 (사용자 서비스) -->
        - id: user-service
          <!-- Eureka에서 사용자 서비스 이름 (Load Balancer 사용) -->
          uri: lb://USER-SERVICE
          <!-- 어떤 요청을 이 서비스로 보낼지 판단 -->
          predicates:
          	<!-- /user-service/** 경로로 오는 요청을 이 서비스로 라우팅 -->
            - Path=/user-service/**
          <!-- 요청/응답 가로채기 (전/후 처리) -->
          filters:
          	<!-- 경로 재작성 (Prefix 제거) -->
            - RewritePath=/user-service/(?<segment>.*), /${segment}

		<!-- 라우트 식별자 (주문 서비스) -->
        - id: order-service
          <!-- Eureka에서 주문 서비스 이름 (Load Balancer 사용) -->
          uri: lb://ORDER-SERVICE
          <!-- /order-service/** 경로로 오는 요청을 주문 서비스로 라우팅 -->
          predicates:
            - Path=/order-service/**
          filters:
            <!-- 경로 재작성 -->
            - RewritePath=/order-service/(?<segment>.*), /${segment}
            <!-- JWT 토큰 인증 필터 적용 (커스텀 필터) -->
            - AuthorizationHeaderFilter

eureka:
  client:
    <!-- Eureka에 자신을 등록 -->
    register-with-eureka: true
    <!-- Eureka에서 서비스 목록을 가져옴 -->
    fetch-registry: true
    service-url:
      <!-- Eureka 서버 주소 -->
      defaultZone: http://localhost:8761/eureka

<!-- JWT 관련 설정 (다른 서비스와 공유) -->
token:
  <!-- JWT 만료 시간 (밀리초 단위) -->
  expiration_time: 43200000
  <!-- JWT 서명을 위한 비밀 키 (Config Server로 관리할 수도 있음) -->
  secret: asdkfe;woifjcdslkcjfa;weofkl
전체 흐름 정리
1. Config Server
각 서비스의 환경 설정파일(.yml, .properties)을 중앙에서 관리하는 서버
- 민감한 정보(token, secret, api-key)도 들어갈 수 있다.
-> 모든 서비스의 설정을 한 곳에서 관리
2. 서비스가 Config Server에 접근해야 하는 이유
서비스는 실행 시점에 Config Server에 접근해서 자신에게 필요한 설정 파일을 가져와야 한다.
- user-service → user-service.yml
- order-service → order-service.yml
-> 이렇게 하면 각 서비스가 자신의 환경 설정 + 민감 정보를 가져올 수 있다.
3. bootstrap.yml 역할
서비스가 실행될 때
- bootstrap.yml을 먼저 읽는다
- Config Server 주소 + 어떤 설정 파일을 가져올지 (application.name) 설정
- Config Server에 요청해서 설정을 가져온다.
- 가져온 설정을 바탕으로 서비스가 환경 구성을 완성
- 그 뒤 application.yml을 읽는다.
Spring Actuator

Eureka server에서 서비스 인스턴스를 클릭하면 해당 애플리케이션의 기본 주소가 localhost:5000/actuator/info와 같은 형태로 열린다
이 Actuator 엔드포인트를 통해, MSA 환경에서 각 마이크로서비스의 상태를 모니터링하고 관리할 수 있다.
Spring Boot 애플리케이션의 운영 환경에서 모니터링 및 관리를 위한 기능을 제공하는 라이브러리
- 애플리케이션 상태(등록여부), 메트릭(주기), 환경 설정 등의 정보를 실시간으로 확인할 수 있다
- HTTP 엔드포인트나 JMX를 통해 애플리케이션의 내부 상태를 모니터링하고 관리할 수 있다.
- 애플리케이션의 건강 상태 체크, 로그 레벨 변경, 스레드 덤프 확인 등 다양한 운영 기능을 제공
- 필요에 따라 사용자 정의 엔드포인트를 추가하여 기능을 확장할 수 있다
actuator 사용을 위한 dependency를 추가
implementation 'org.springframework.boot:spring-boot-starter-actuator'.yml 파일 설정
### 기본 경로 수정
management:
  endpoints:
	web:
base-path: /management- actuator의 모든 엔드포인트의 경로에는 /actuator가 앞에 붙는다
- actuator의 엔드포인트는 민감한 정보를 제공하므로 보안 처리가 되어야 한다.
- 스프링 시큐리티를 사용해서 액추에이터를 보안 처리할 수 있다- 액추에이터 자체로는 보안 처리가 되어 있지 않으므로 대부분의 엔드포인트가 기본적으로 비활성화
management:
  endpoints:
    web:
      exposure:
      	# 노출할 엔드포인트 목록 지정
        include: health, info, beans, conditions
        # 노출 제외할 엔드포인트 목록 지정
        exclude: threaddump, heapdump
        # 우선 순위가 exclude가 include보다 우선이다
Actuator Endpoint 종류
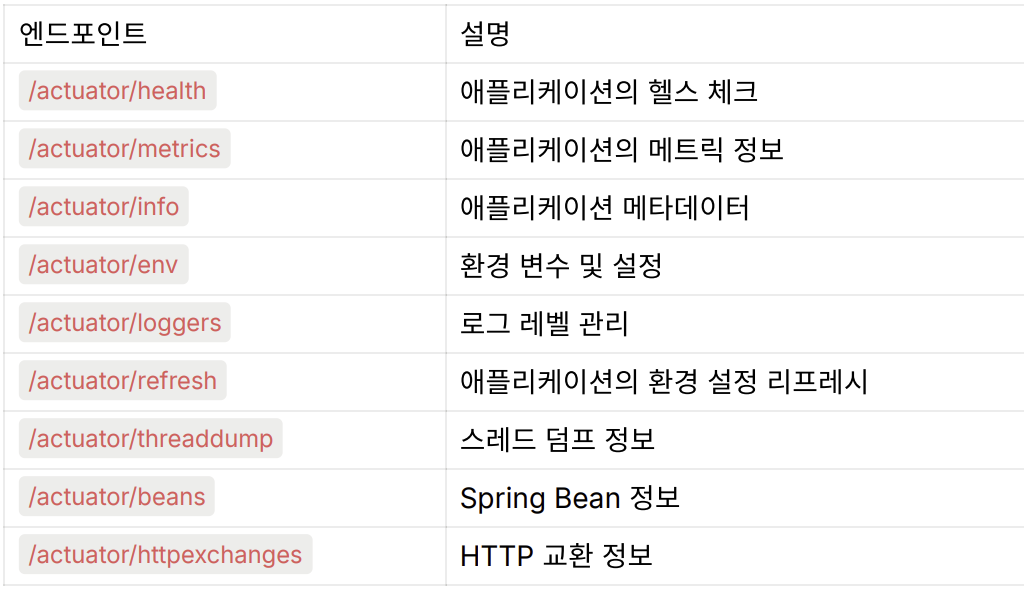
- GET /actuator/health (기본 설정) : 애플리케이션의 상태(UP/DOWN)
{
  "status": "UP"
}- GET /actuator/metrics : JVM 메트릭, 시스템 지표 목록을 조회
{
  "names": ["jvm.memory.used", "jvm.gc.pause", ...]
}
- GET /actuator/info : 애플리케이션의 버전, 이름 등의 정보를 확인
{
  "app": {
    "name": "MyApp",
    "version": "1.0.0"
  }
}
- GET /actuator/env : 현재 환경 변수, 프로퍼티 소스를 확인
{
  "activeProfiles": [],
  "propertySources": [...]
}
- GET /actuator/loggers : 로그 레벨 상태를 확인하고 동적으로 변경
{
  "levels": {
    "ROOT": "INFO",
    "com.example": "DEBUG"
  }
}
- GET /actuator/threaddump : 현재 JVM 스레드 상태를 확인
{
  "threads": [
    {
      "name": "main",
      "state": "RUNNABLE",
      ...
    }
  ]
}
- GET /actuator/beans : 등록된 Bean 목록 및 의존성 정보를 확인
{
  "contexts": {
    "application": {
      "beanDefinitionCount": 50,
      ...
    }
  }
}
- GET /actuator/httpexchanges : 최근의 HTTP 요청-응답 내역을 확인
{
  "exchanges": [
    {
      "timestamp": "2024-09-26T12:00:00Z",
      "method": "GET",
      "uri": "/api/example",
      ...
    }
  ]
}
좋은 MSA 구조를 개발하기 위한 방법
- Rest API 설계 표준화
- 서비스 간 통신을 일관성 있게 유지하기 위해 API 설계 규칙을 명확히 정하고 표준화
- 역할 분리와 인스턴스 다양화
- Gateway API, Config Server, Eureka Server, Eureka Client 등 서로 다른 인스턴스가 명확한 역할을 수행하도록 구성
- 서비스 간 의존성을 최소화하여 시스템의 유연성과 확장성을 높인다
- Gateway를 통한 내부 서비스 보호
- 모든 외부 요청은 Gateway를 통해 들어오게 하고,
내부 인스턴스(마이크로서비스)는 직접 외부에 노출되지 않도록 보호
- 모든 외부 요청은 Gateway를 통해 들어오게 하고,
- 모니터링 시스템 구축
- Actuator + 프로메테우스 + 그라파나
- Spring Actuator를 이용해 서비스 상태를 수집
- Prometheus + Grafana를 통해 모니터링 및 시각화 대시보드를 구축
- CI/CD 파이프라인 구축
- 지속적 통합(Continuous Integration)과 지속적 배포(Continuous Deployment)
- 분산 로깅 및 추적 시스템 구축
- MSA 환경에서는 오류나 장애가 발생했을 때 어느 서비스에서 문제가 발생했는지 추적이 어려울 수 있다
- 분산 트레이싱(Distributed Tracing)과 통합 로깅 시스템을 구축 -> 서비스 간 호출 흐름과 에러를 명확히 추적할 수 있도록 한다
참고
시큐리티가 적용된 프로젝트는 PostMan 검증 시 발급 된 토큰을 반드시 Authorization 탭에 입력해야한다.
- 토큰 넣을 때 주의점
-> Bearer [토큰] 형식, Bearer와 토큰 사이에 반드시 띄어쓰기 존재
-> 띄어쓰기, 공백, 오탈자 반드시 고려해야 한다.
모놀로식 아키텍쳐가 Domain 별로 코드가 명확히 분리되어 있다면 Controller 단위로 분리하여 MSA화하는 것도 문제가 없다.
Domain 분리가 잘 안 되어 있을 때 Controller 단위 분리하게 되면 겉으로는 MSA 구조이지만 실제로는 하나로 뭉친 모놀로식과 다를 바 없는 구조가 된다.
모놀로식 아키텍처는 하나의 애플리케이션 안에 모든 비즈니스 로직과 데이터 처리가 이루어진다.
-> 트랜젝션 어노테이션을 사용하면 여러 도메인/DB 작업이 하나의 트랜잭션으로 묶여 데이터 일관성과 안전성을 쉽게 보장할 수 있다.
하지만 마이크로서비스 아키텍처(MSA)는 각각의 서비스가 자신만의 DB를 독립적으로 가지기 때문에, 서비스 간 호출 과정에서 트랜잭션을 묶기가 어렵다.
-> 어디서 오류가 발생했는지 추적이 어렵고, 일부 서비스는 성공하고 일부는 실패하는 분산 트랜잭션 문제가 발생할 수 있다.