📌학습 내용
실무 팁
(1) position에 대한 감이 생길 때까지는 큰 공간(div)을 작업할 때 일단position: relative;로 설정해두고 배치 작업을 진행해도 괜찮음
(2) 배치가 완료된 상태에서 레이아웃 수정을 해야 할 때는topleftrightbottom사용하면 구조가 틀어지지 않음
(3) 한 프로젝트에서id와class이름은 일관성 있게 지어져야 함 (대소문자, 숫자, 특수기호 사용법 등)
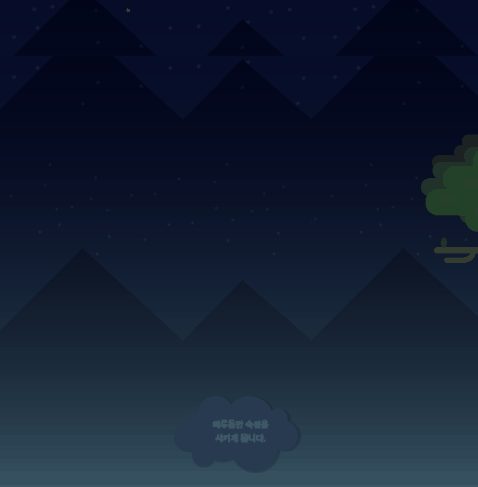
📖NIGHT2
💡 설계:style.css
📎html
<div id="night2">
<div class="moon"></div>
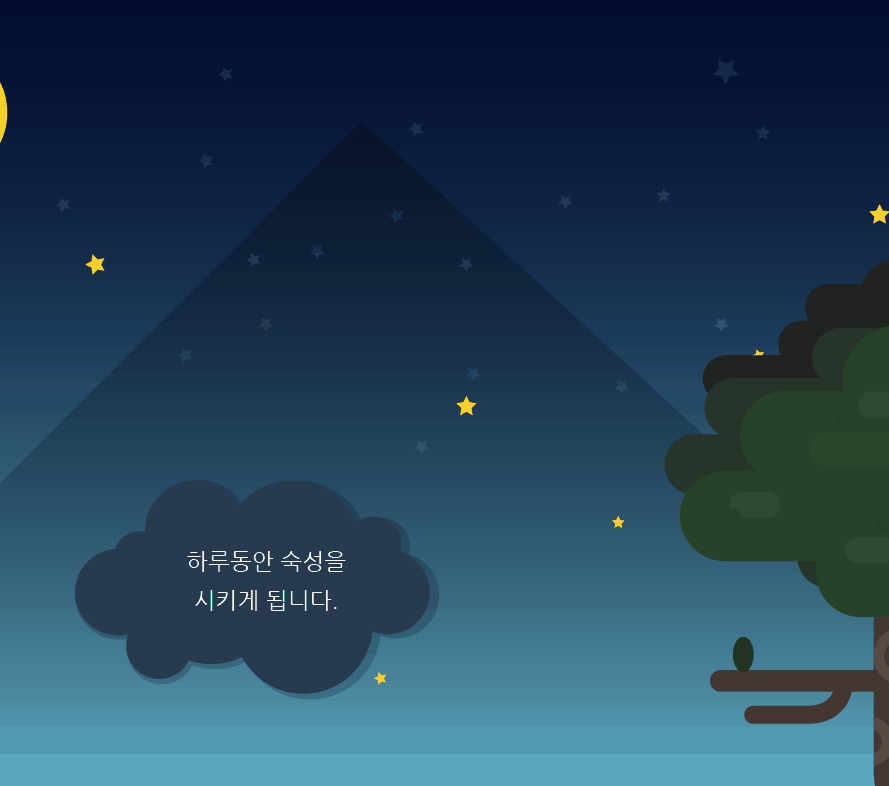
<img class="night2Bubble" src="img/oneday/night2/night2bubble.png" alt="하루동안 숙성을 시키게 됩니다.">
<div class="rightMoonTree"></div>
</div>📎CSS
        #night2 {
            position: relative;

            width: 100%;
            height: 800px;
            background-image: url(../img/oneday/night2/night2_bg.png);
        }

        #night2 .moon {
            width: 135px;
            height: 135px;
            background-image: url(../img/oneday/night2/moon.png);
        }

        #night2 .night2Bubble {
            position: absolute;

            margin: 300px 0 0 80px;
        }

        #night2 .rightMoonTree {
            position: absolute;

            width: 243px;
            height: 588px;
            background-image: url(../img/oneday/night2/moontree.png);

            right: 0;
            bottom: 0;
        }
💡 NIGHT2 애니메이션: animation.css
        #night2 .moon {
            animation: moveMoon linear 10s infinite;
        }

        @keyframes moveMoon {
            from {
                margin-left: -135px /* static 포지션이라 left 쓸 수 없음 */
            }

            to {
                margin-left: 110%;
            }
        }
💡 NIGHT2 모바일 버전: mobile.css
        #night2 {
            height: 620px;
            background-image: url(../img/mobile/oneday/night2/mobile_night2_bg.png);
        }

        #night2 .moon {
            width: 40px;
            height: 40px;
            background-image: url(../img/mobile/oneday/night2/mobile_moon.png);
        }

        #night2 .night2Bubble {
            width: 127px;

            left: 50%;
            margin: 300px 0 0 -67px;
        }

        #night2 .rightMoonTree {
            width: 70px;
            height: 173px;
            background-image: url(../img/mobile/oneday/night2/mobile_moontree.png);

            top: 70px;
            bottom: initial; /* bottom값을 초기화 */
        }
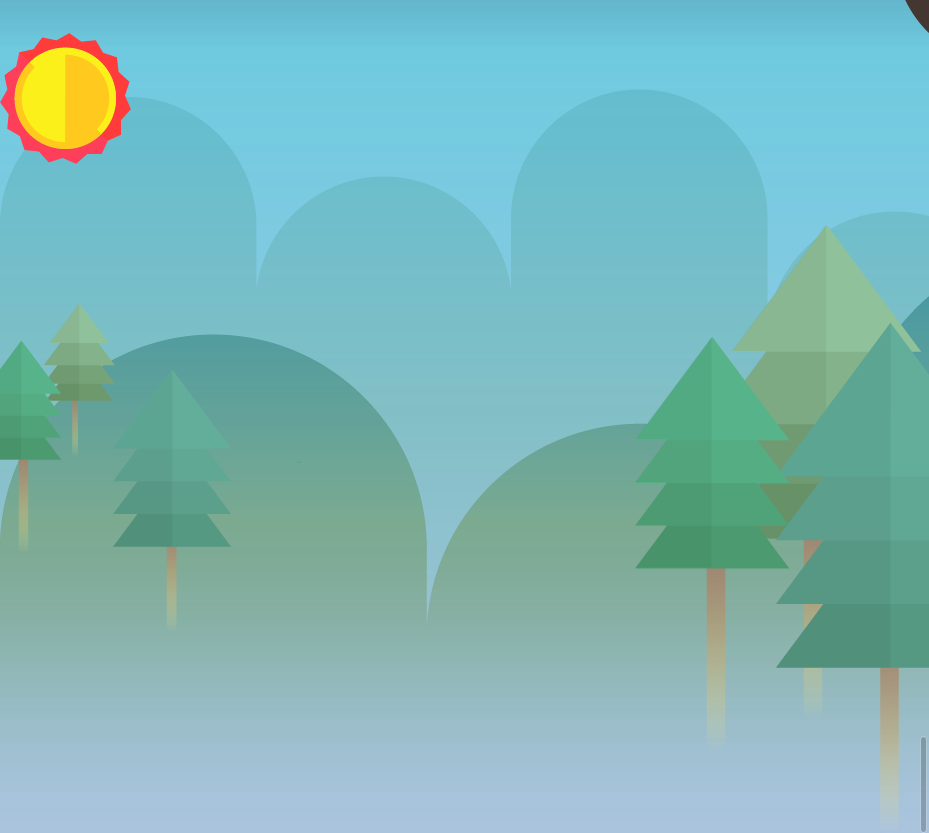
📖MORNING
💡 설계:style.css
📎html
          <div id="morning">
              <div class="sun"></div>
              <div class="leftPine"></div>
              <div class="rightPine"></div>
          </div>
📎CSS
        #morning {
            position: relative;

            width: 100%;
            height: 800px;
            background-image: url(../img/oneday/morning/morning_bg.png);
        }

        #morning .sun {
            width: 131px;
            height: 131px;
            background-image: url(../img/oneday/morning/sun.png);
        }

        #morning .leftPine {
            position: absolute;

            width: 231px;
            height: 329px;
            background-image: url(../img/oneday/morning/leftpine.png);

            top: 270px;
        }

        #morning .rightPine {
            position: absolute;

            width: 294px;
            height: 609px;
            background-image: url(../img/oneday/morning/rightpine.png);

            right: 0;
            bottom: 0;
        }
💡 MORNING 애니메이션: animation.css
        #morning .sun {
            animation: moveSun linear 10s 1500ms infinite;
        }

        @keyframes moveSun {
            from {
                margin-left: -131px
            }

            to {
                margin-left: 110%;
            }
        }
💡 MORNING 모바일 버전: mobile.css
        #morning {
            height: 720px;
            background-image: url(../img/mobile/oneday/morning/mobile_morning_bg.png);
        }

        #morning .sun {
            width: 33px;
            height: 32px;
            background-image: url(../img/mobile/oneday/morning/mobile_sun.png);
        }

        #morning .leftPine {
            width: 48px;
            height: 81px;
            background-image: url(../img/mobile/oneday/morning/mobile_leftpine.png);
        }

        #morning .rightPine {
            width: 77px;
            height: 149px;
            background-image: url(../img/mobile/oneday/morning/mobile_rightpine.png);

            top: 220px;
        }
📖KITCHEN
💡 설계:style.css
📎html
            <div id="kitchen">
                <div class="leftPan"></div>
                <div class="rightPot"></div>

                <div class="steamWrap">
                    <div class="steam"></div>
                    <div class="bubble1"></div>
                </div>

                <img class="kitchenBubble" src="img/kitchen/kitchenbubble.png" alt="숙성을 시킨 반죽을 잘 익혀주면">
            </div>
📎CSS
        #kitchen {
            position: relative;

            width: 100%;
            height: 800px;
            background-image: url(../img/kitchen/kitchen_bg.png);
        }

        #kitchen .leftPan {
            float: left;

            width: 253px;
            height: 384px;
            background-image: url(../img/kitchen/pan.png);
        }

        #kitchen .rightPot {
            float: right;

            width: 243px;
            height: 132px;
            background-image: url(../img/kitchen/pot.png);
        }

        #kitchen .steamWrap {
            position: relative;

            width: 483px;
            height: 457px;
            /*background-color: yellow;*/ /* 영역 시각화 */

            left: 50%;
            margin-left: -275px;
            top: 100px;

            clear: both;
        }

        #kitchen .steamWrap .steam {
            position: absolute;

            width: 479px;
            height: 457px;
            background-image: url(../img/kitchen/steam.png);

            z-index: 100;
        }

        #kitchen .steamWrap .bubble1 {
            position: absolute;

            width: 55px;
            height: 56px;
            background-image: url(../img/kitchen/bubble.png);

            margin-top: 230px;
        }

        #kitchen .kitchenBubble {
            position: absolute;

            top: 400px;
            right: 0;
} 
💡 KITCHEN 애니메이션: animation.css
포물선 움직임 따오기
https://jeremyckahn.github.io/stylie/
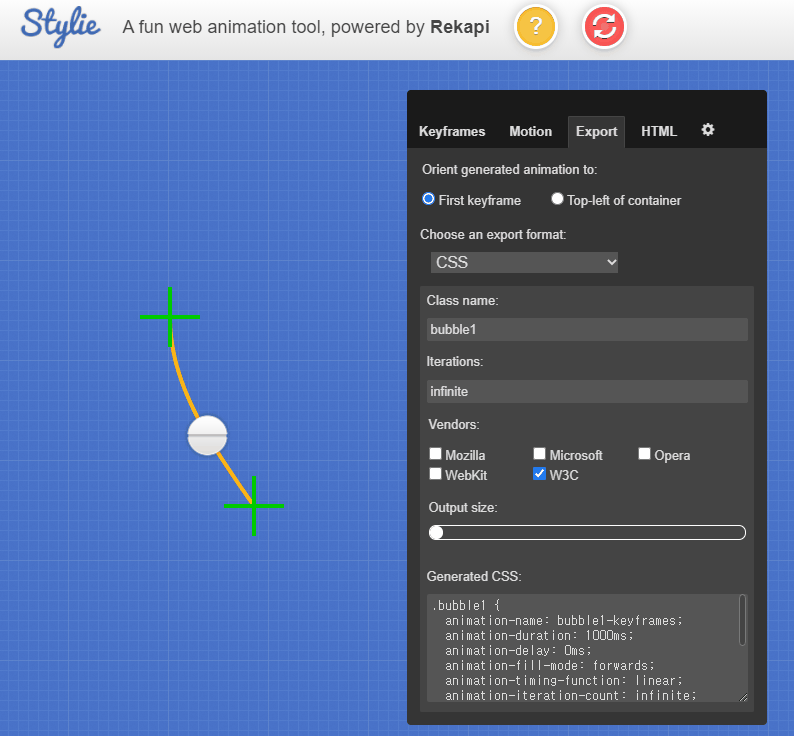
        #kitchen .steamWrap .bubble1 {
          animation-name: bubble;
          animation-duration: 1000ms;
          animation-delay: 0ms;
          animation-fill-mode: forwards;
          animation-timing-function: linear;
          animation-iteration-count: infinite;
          transform-origin: 0 0;
        }

        @keyframes bubble {
          0% {
            transform:translate(0px, 0px) scale(1) rotateX(0deg) rotateY(0deg) rotateZ(0deg) translate(-50%, -50%);
          }
          100% {
            transform:translate(-84px, -189px) scale(1) rotateX(0deg) rotateY(0deg) rotateZ(0deg) translate(-50%, -50%);
          }
        }
💡 KITCHEN 모바일 버전: mobile.css
        #kitchen {
            height: 400px;
            background-image: url(../img/mobile/kitchen/mobile_kitchen_bg.png);
        }

        #kitchen .leftPan {
            width: 52px;
            height: 78px;
            background-image: url(../img/mobile/kitchen/mobile_pan.png);
        }

        #kitchen .rightPot {
            width: 73px;
            height: 38px;
            background-image: url(../img/mobile/kitchen/mobile_pot.png);
        }

        #kitchen .steamWrap {
            width: 300px;
            height: 300px;
            margin-left: -150px;

            top: 0;
        }

        #kitchen .steamWrap .steam {
            width: 222px;
            height: 184px;
            background-image: url(../img/mobile/kitchen/mobile_steam.png);

            left: 50%;
            top: 100px;
            margin: 0 0 0 -140px;
        }

        #kitchen .steamWrap .bubble1 {
            display: none;
        }

        #kitchen .kitchenBubble {
            width: 143px;
            left: 50%;

            margin: -320px 0 0 -70px;
        }
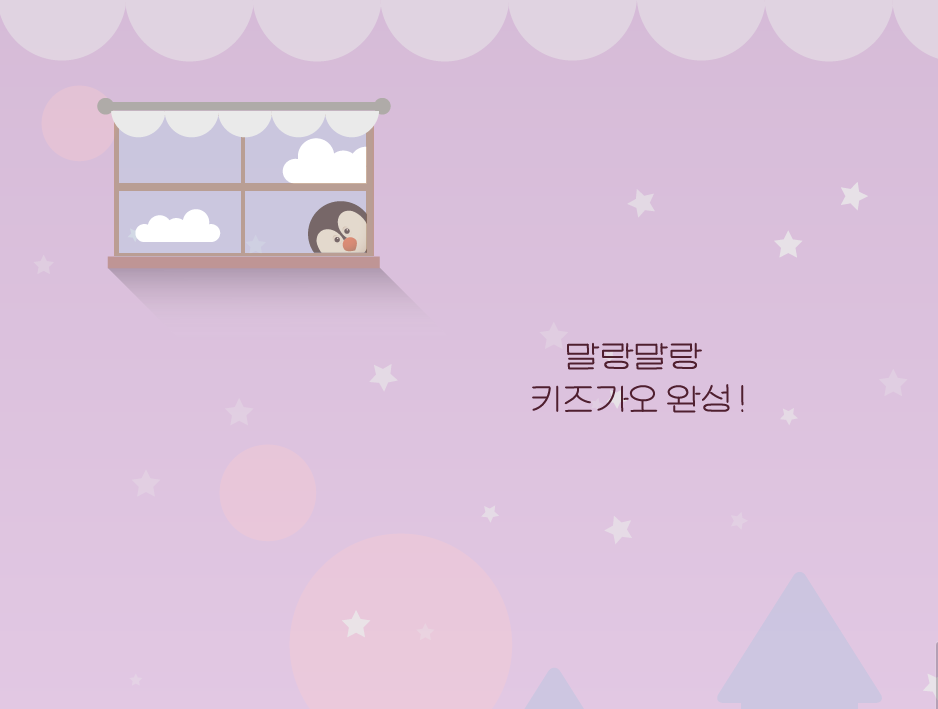
📖COLOR1
💡 설계:style.css
📎html
          <div id="color1">
              <div class="penguin"></div>
              <img class="color1Bubble" src="img/color/color1/color1Bubble.png" alt="말랑말랑 키즈가오 완성!">
          </div>
📎CSS
        #color1 {
            position: relative;

            width: 100%;
            height: 750px;
            background-image: url(../img/color/color1/color1_bg.png);
        }

        #color1 .penguin {
            position: relative;

            width: 356px;
            height: 244px;
            background-image: url(../img/color/color1/penguin.png);

            top: 100px;
            left: 100px;
        }

        #color1 .color1Bubble {
            float: right;

            margin: 100px 200px 0 0;
        }
💡 COLOR1 모바일 버전: mobile.css
        #color1 {
            height: 500px;
            background-image: url(../img/mobile/color/color1/mobile_color1_bg.png);
        }

        #color1 .penguin {
            display: none;
        }

        #color1 .color1Bubble {
            float: initial; /* float 적용 무효 */
            position: relative;

            width: 162px;
            height: 56px;

            left: 50%;
            margin: 100px 0 0 -83px;
        }
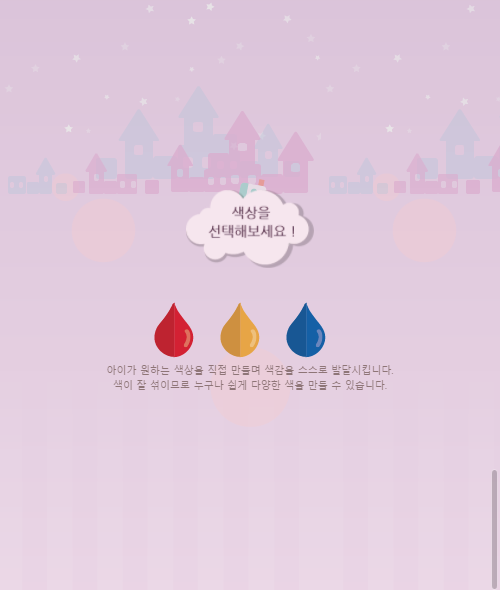
📖COLOR2
💡 설계:style.css
📎html
        <div id="color2">
            <div class="horse"></div>

            <div class="color2wrap">
                <img class="color2Bubble" src="img/color/color2/color2bubble.png" alt="색상을 선택해보세요!">

                <div class="btn-wrap">
                    <button type="button" class="red"></button>
                    <button type="button" class="yellow"></button>
                    <button type="button" class="blue"></button>
                </div>

                <p class="color2Comment">
                    아이가 원하는 색상을 직접 만들며 색감을 스스로 발달시킵니다. <br>
                    색이 잘 섞이므로 누구나 쉽게 다양한 색을 만들 수 있습니다.
                </p>
            </div>
        </div>
📎CSS
        #color2 {
            position: relative;

            width: 100%;
            height: 800px;
            background-image: url(../img/color/color2/color2_bg.png);
        }

        #color2 .horse {
            float: right;

            width: 188px;
            height: 241px;
            background-image: url(../img/color/color2/horse.png);

            margin: 100px 100px 0 0;
        }

        #color2 .color2wrap {
            clear: both;
            position: relative;

            width: 500px;

            top: 100px;
            margin-left: 50px;
        }

        #color2 .color2wrap .color2Bubble {
            margin-bottom: 30px;
        }

        #color2 .color2wrap .btn-wrap {
            margin-bottom: 20px;
        }

        #color2 .color2wrap .btn-wrap .red,
        #color2 .color2wrap .btn-wrap .yellow,
        #color2 .color2wrap .btn-wrap .blue {
            width: 59px;
            height: 82px;
        }

        #color2 .color2wrap .btn-wrap .red {
            background-image: url(../img/color/color2/btn/btn_red.png);
        }

        #color2 .color2wrap .btn-wrap .yellow {
            background-image: url(../img/color/color2/btn/btn_yellow.png);
        }

        #color2 .color2wrap .btn-wrap .blue {
            background-image: url(../img/color/color2/btn/btn_blue.png);
        }

        #color2 .color2wrap .color2Comment {
            color: #8e7577;
        }
💡 COLOR2 모바일 버전: mobile.css
        #color2 {
            height: 400px;
            background-image: url(../img/mobile/color/color2/mobile_color2_bg.png);
        }

        #color2 .horse {
            display: none;
        }

        #color2 .color2wrap {
            width: 320px;

            top: 0;
            left: 50%;
            margin-left: -160px;

            text-align: center;
        }

        #color2 .color2wrap .color2Bubble {
            width: 128px;
        }

        #color2 .color2wrap .btn-wrap {
            width: 300px;
            height: 60px;

            margin-bottom: 0;
        }

        #color2 .color2wrap .btn-wrap .red,
        #color2 .color2wrap .btn-wrap .yellow,
        #color2 .color2wrap .btn-wrap .blue {
            width: 40px;
            height: 56px;
        }

        #color2 .color2wrap .btn-wrap .red {
            background-image: url(../img/mobile/color/color2/btn/mobile_btn_red.png);
        }

        #color2 .color2wrap .btn-wrap .yellow {
            background-image: url(../img/mobile/color/color2/btn/mobile_btn_yellow.png);
            margin-left: 20px;
            margin-right: 20px;
        }

        #color2 .color2wrap .btn-wrap .blue {
            background-image: url(../img/mobile/color/color2/btn/mobile_btn_blue.png);
        }

        #color2 .color2wrap .color2Comment {
            line-height: 15px;
            font-size: 10px;
        }
📖COLOR3
💡 설계:style.css
📎html
          <div id="color3">
              <div class="flag"></div>
              <div class="book"></div>
              <img class="logo" src="img/color/color3/logo.png" alt="키즈가오 회사 로고">
              <div class="dice"></div>
          </div>
📎CSS
        #color3 {
            position: relative;

            width: 100%;
            height: 800px;
            background-image: url(../img/color/color3/color3_bg.png);
        }

        #color3 .flag {
            position: relative;

            width: 1774px;
            height: 178px;
            background-image: url(../img/color/color3/flag.png);

            left: 50%;
            margin-left: -887px;
        }

        #color3 .book {
            float: right;

            width: 417px;
            height: 178px;
            background-image: url(../img/color/color3/book.png);
        }

        #color3 .logo {
            position: absolute;

            left: 50%;
            margin-left: -378.5px;
        }

        #color3 .dice {
            position: absolute;

            width: 239px;
            height: 200px;
            background-image: url(../img/color/color3/dice.png);

            left: 0;
            bottom: 0;
        }
💡 COLOR3 모바일 버전: mobile.css
        #color3 {
            height: 430px;
            background-image: url(../img/mobile/color/color3/mobile_color3_bg.png);
        }

        #color3 .flag {
            width: 320px;
            height: 46px;
            background-image: url(../img/mobile/color/color3/mobile_flag.png);

            margin-left: -160px;
        }

        #color3 .book {
            width: 107px;
            height: 46px;
            background-image: url(../img/mobile/color/color3/mobile_book.png);

            margin-right: 20px;
        }

        #color3 .logo {
            width: 225px;

            margin-top: 100px;
            margin-left: -112.5px;
        }


        #color3 .dice {
            width: 62px;
            height: 52px;
            background-image: url(../img/mobile/color/color3/mobile_dice.png);
        }
⭐최종 결과물: PC ver.


⭐최종 결과물: Mobile ver.

📌어려운 점
position과 float가 여전히 좀 어렵다. 그동안 수업만 따라가고 복습을 소홀히 했던 게 이런 것에서 티가 난다🥺
📌해결 방법
이번 주말에 다시 한 번 개념을 정리하자!
📌느낀 점
소오올직히 처음엔 타인의 작업물을 그대로 따라해보는 게 과연 도움이 될까 의구심도 조금 있었는데 강사님 가이드를 따라 함께 작업하다 보니 많은 부분 도움이 되었다.
특히,
• 대략 어떤 경우에 어떤 태그와 속성들을 사용하게 되는지 파악할 수 있었다.
• 코드 작성할 때 내가 어떤 점에서 실수를 하는지 알 수 있었다. 작업하다가 class앞에 '.'을 누락시키거나 div를 닫아주지 않은 적이 두어 번 있어서 주의하며 실습했다.
• position과 float 사용에 대해 조금 더 감을 잡을 수 있었다.