todo 구현
- 모달 창에서 todo 작업
- vuex를 통한 todo 상태 관리
- todo CRUD
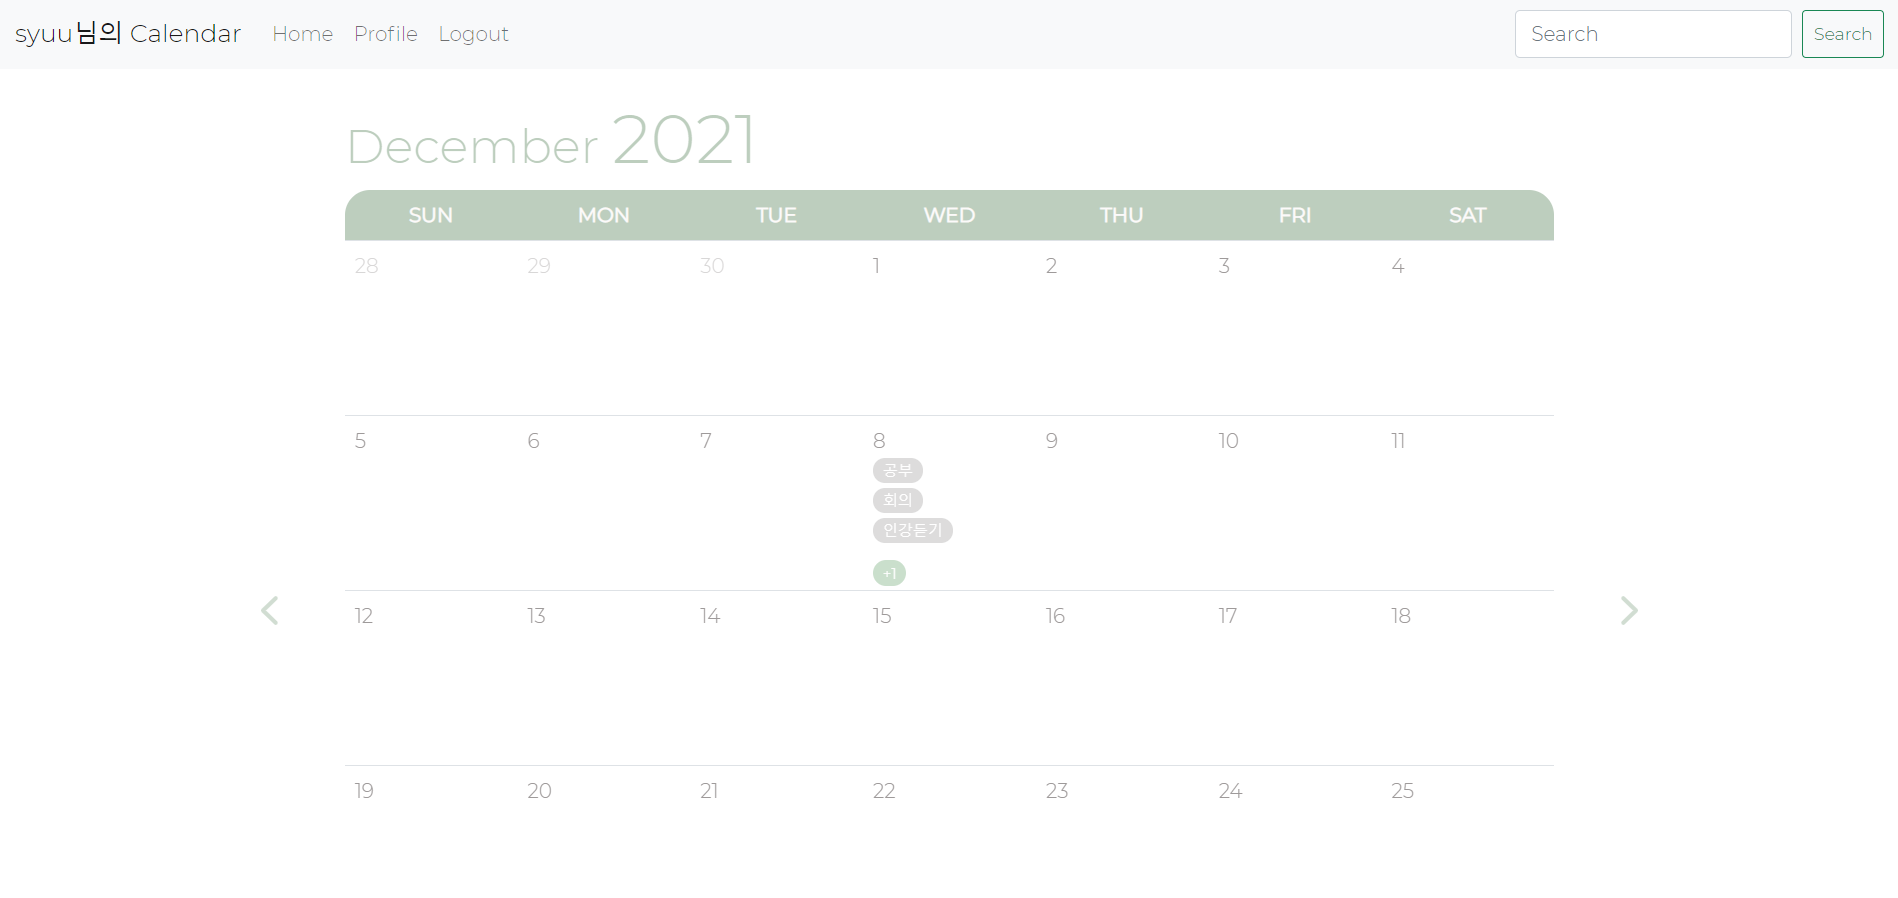
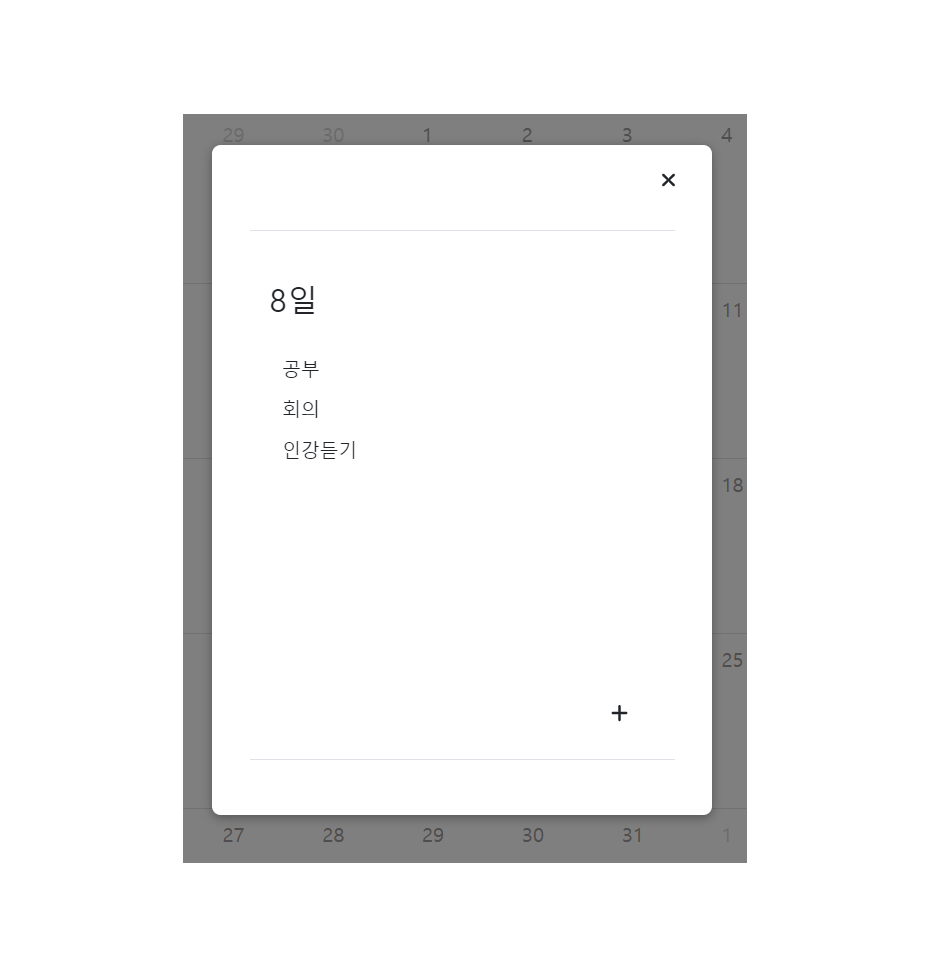
- get : 캘린더에서 date를 클릭해 모달 창을 띄워 todo list를 출력 / 캘린더에 todo title 출력
- post : 추가 버튼을 눌러 todo 추가
- update : 수정하기 버튼을 눌러 todo 수정
- delete : 삭제하기 버튼을 눌러 todo 삭제
todo 모달 창 생성
캘린더 컴포넌트 위에 모달 형태로 띄워지는 todo는 총 3개의 뷰로 구성된다. 기존에 사용한 modal뷰를 재활용 하되, 안에 content는 필요할 때마다 다르게 사용하도록 했다. todo구현에 있어서 content에 해당하는 컴포넌트는 todoList가 된다.(아래에서 자세히 설명)
- modal.vue : 재활용 가능한 뷰(껍데기)
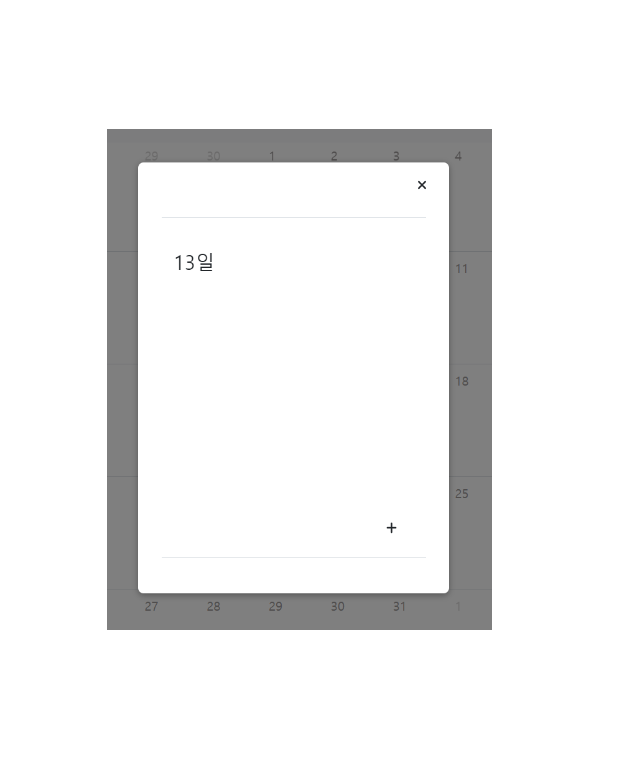
- todoList.vue : 캘린더의 각 날짜를 클릭해 해당 날짜의 todo list를 출력하는 뷰
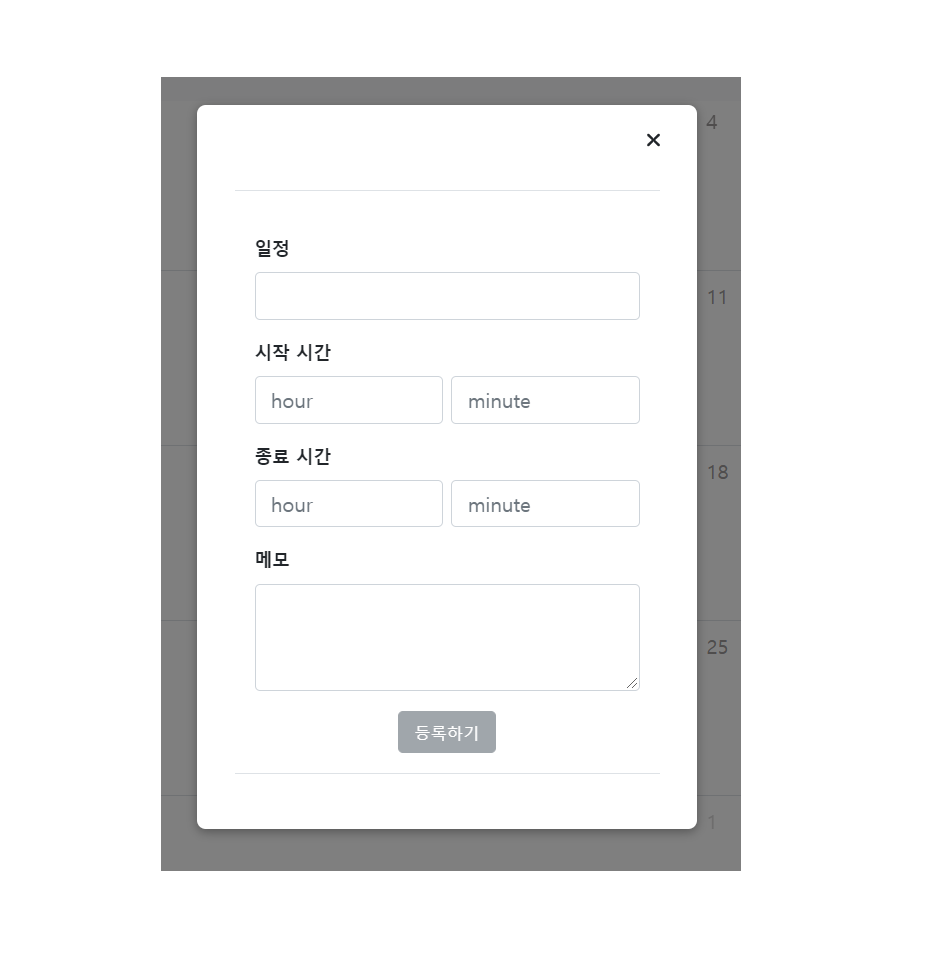
- todoForm.vue : todo add 컴포넌트. todoList 컴포넌트에서 추가 버튼을 클릭하면 나타나는 뷰
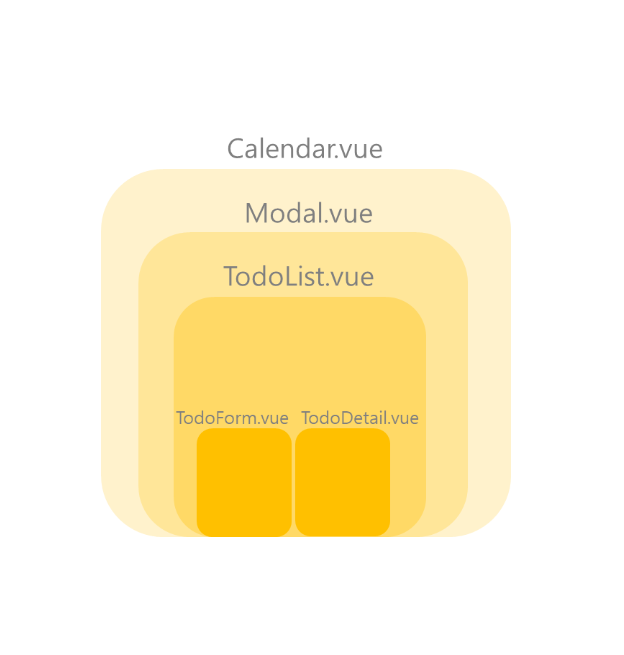
사실 컴포넌트 depth가 이정도로 깊어도 되는지는 잘..😅
calendar 컴포넌트에 modal 컴포넌트 삽입
modal 컴포넌트에 slot을 정의하여 모달 창을 재활용해보자.
modal 컴포넌트에서 header, body, footer라는 이름으로 slot을 정의해주면, 상위 컴포넌트에서는 slot을 불러와 보여주고 싶은 content를 header, body, footer 안에 를 넣을 수 있다.
modal 컴포넌트는 slot 태그를 정의하여 틀을 제공하고, 이 slot을 불러온 상위 컴포넌트에서 보여주고 싶은 content를 제공한다.
modal 하위 컴포넌트를 calendar 상위 컴포넌트에 삽입해 modal 컴포넌트를 재활용할 수 있다.
modal.vue
<template>
  <transition class="modal">
    <div class="modal-mask">
      <div class="modal-wrapper">
        <div class="modal-container">
          <div class="close-btn" @click="closeModal()">
            <font-awesome-icon icon="xmark" type="button"/>
          </div>
          <slot name="container">

            <div class="modal-header">
                <slot name="header">
                </slot>
            </div>

            <div class="modal-body">
              <slot name="body">
              </slot>
            </div>

            <div class="modal-footer">
                <slot name="footer">
                </slot>
            </div>
          </slot>
      </div>
    </div>
   </div>
  </transition>
</template>
modal 컴포넌트를 calendar 컴포넌트에 삽입해보자.
calendar.vue
<ModalView v-if="modalStatus">
      <template v-slot:body>
            <AddToDoContent/>
      </template>
</ModalView>
content는(여기서는 slot으로 body라 지정한 부분) 사용되는 곳마다 다르게 사용할 것이다. 따라서 todo 에서는 AddToDoContent라는 컴포넌트, 즉 todoList 컴포넌트를 삽입해 content를 보여주도록 했다.
클릭된 날짜 데이터 넘겨주기
원하는 캘린더의 날짜를 클릭하면 해당 날짜를 todoList뷰에 띄워줘야 한다. todo에 사용되는 관련 데이터들은 다른 컴포넌트들에서도 여러번 사용될 것이기 때문에 vuex 상태 관리 저장소를 이용하여 데이터를 관리했다.
store/todo.js
export default {
    namespaced: true,
    state: () => {
        return {
            modalStatus: false,
            clickedDate:{},
            todos:[],
        }
    }
 }

 `
 `
 mutations: {
   setClickedDate(state, payload) {
              state.clickedDate = payload;
          },
 }
클릭한 날짜를 매개변수로 넘겨주어 clickedDate 상태에 저장해준다.
calendar.vue
<td scope="row" v-for="(date, SecondIdx) in weeks" :key="SecondIdx"
    class="date" @click="showToDoModal(date)"></td>

`
`
`
showToDoModal(date){
            if(this.$store.state.user.userId){
                this.setClickedDate(date);
                this.toggleModal();
            }
        }
todoList 뷰
todo Add
todoForm 삽입
todo를 추가하는 todoForm 컴포넌트는 todoList뷰에서 추가 버튼을 클릭해 진입하게 된다.
todoList.vue
<template>
`
`
`
  <div class="btn">
              <div class="btn-add" @click="goToForm()">
                    <font-awesome-icon icon="plus" type="button"/>
              </div>
  </div>
</template>
<TodoForm v-if="showFormModal"/>
todoForm 컴포넌트 템플릿 작성
todoForm.vue
<template>
    <form class="todo-form">
        <div class="mb-3">
            <label for="title" class="form-label">일정</label>
            <input type="text" class="form-control" id="title" v-model="title"/>
        </div>
        <div class="mb-3">
            <label for="startTime" class="form-label">시작 시간</label>
            <div class="times">
                <input type="text" class="form-control time" id="startHour" placeholder="hour" v-model="startHour"/>
                <input type="text" class="form-control time" id="startMinute" placeholder="minute" v-model="startMinute"/>
            </div>
        </div>
        <div class="mb-3">
            <label for="endTime" class="form-label">종료 시간</label>
            <div class="times">
                <input type="text" class="form-control time" id="endHour" placeholder="hour" v-model="endHour"/>
                <input type="text" class="form-control time" id="endMinute" placeholder="minute" v-model="endMinute"/>
            </div>
        </div>
        <div class="mb-3">
            <label for="memo" class="form-label">메모</label>
            <textarea class="form-control" id="memo" rows="3" v-model="memo"></textarea>
        </div>
        <button type="submit" class="btn btn-secondary" :class="{'disabled': !title}" @click.prevent="add()">등록하기</button>
    </form>
</template>
todoForm 뷰
todo 추가하기
입력된 사용자 데이터를 비동기로 처리하는 actions를 dispatch함으로써 todo의 add가 이뤄진다.
todoForm.vue
async add() {
            try{
                const id = this.$store.state.user.userId;
                const userData = {
                    title: this.title,
                    year: this.date.year,
                    month: this.date.month,
                    clickedDate: this.clickedDate,
                    startHour: this.convertTime(this.startHour),
                    startMinute: this.convertTime(this.startMinute),
                    endHour: this.convertTime(this.endHour),
                    endMinute: this.convertTime(this.endMinute),
                    memo: this.memo
                }
                await this.$store.dispatch('todo/addSchedule',{
                    id,
                    userData
                })
                console.log('userData:', userData);
                this.toggleModal();
            }catch(err){
                console.log(err);
            }
        }
입력된 사용자 데이터를 매개변수에 담아서 todo를 추가하는 api 통신을 비동기로 처리하기 위해 store의 actions에 정의하였다. api 통신 후 res로 추가된 todo 데이터를 받아 state에 add해주었다.
store/todo.js
mutations: {
	addTodo(state, userData){
            state.todos.push(userData);
        }
}

actions: {
  async addSchedule({commit}, payload){
              try{
                  const { id, userData } = payload;
                  const res = await addTodo(id, userData);
                  if(res.data.resultData){
                      await commit('addTodo', res.data.addData);
                  }
              }catch(err){
                  console.log(err);
              }
          }
}
todo get
추가한 todo 데이터를 받아와 뿌려보자.
먼저 캘린더의 년,월을 기준으로 todo를 요청해 데이터를 받아와 state.todos 배열에 저장해줄 것이다.
월별 todo 리스트 받아오기
현재 보고 있는 캘린더의 년,월 데이터를 기준으로 todo리스트를 받아와야 하기 때문에 current데이터 값을 state에 저장해준다.
calendar.vue
getDates(){
  if(this.$store.state.user.userId){
                  this.setDate({
                          year: this.currentYear,
                          month: this.currentMonth + 1
                  });
                  //todo 요청
                  this.deleteTodosPerMth();
                  this.getSchedule();
 },

 getSchedule(){
            this.$store.dispatch('todo/getSchedule');
        }
마찬가지로 api통신을 비동기로 처리하기 위해 actions에 정의해준다. state에 저장한 date값(year, month)을 api 함수의 인자로 전달하고, res에 받아온 결과 값 배열은 state.todos 배열에 저장한다.
store/todo.js
mutations: {
	setTodos(state, payload){
            payload.forEach(todo => state.todos.push(todo));
        }
},

actions: {
        async getSchedule({state, commit, rootState}){
            try{
                const id = rootState.user.userId;
                const res = await getTodo(id, state.date.year, state.date.month);
                if(res.data.resultData.showSchedule){
                    await commit('setTodos', res.data.array);
                }
            }catch(err){
                console.log(err);
            }
        }
 }
다른 지역 모듈 내에서 다른 지역 모듈 변수 또는 최상위 변수를 사용하고 싶다면 rootState를 사용해야 한다.
받아온 데이터 화면에 출력하기
캘린더 뷰에는 캘린더의 날짜와 동일한 todo객체들이 필요하고, todoList 뷰에는 클릭한 날짜와 동일한 todo객체들이 필요하다.
먼저 캘린더 뷰에 todo 객체들을 출력해보자.
calendar.vue
todos 배열의 각 todo객체의 date와 캘린더의 date가 같은 todo를 filter하여 배열에 담아 뿌려준다.
<div v-for="(todo,idx) in getListOfTodo(date)" :key="idx">
      <span class="badge rounded-pill">
      {{ todo.title }}
      </span>
</div>
<span v-show="getListOfTodo(date).length>3 && !isPrevOrNextMth(dates,FirstIdx,SecondIdx)" class="badge more-todo rounded-pill text-white">
    +{{ getListOfTodo(date).length-3 }}
</span>
`
`
`
getListOfTodo(date) {
            let list =[];
            list = this.todos.filter(todo => todo.date === date);
            return list;
        }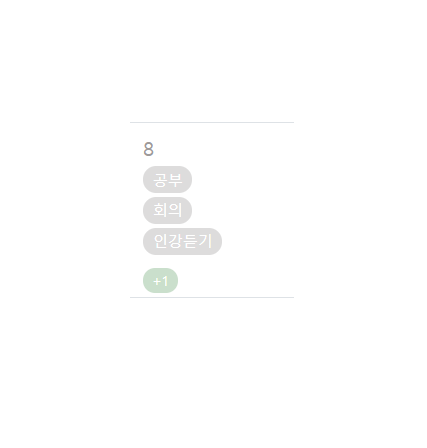
todo가 4개 이상인 경우, 화면에 보여지고 남은 todo의 갯수를 표시해주었다.
이제 todoList 뷰에도 출력해보자.
store/todo.js
todo의 date와 클릭된 날짜의 todo가 같은 경우를 filter하자.
이처럼 state의 상태에 추가적인 계산 로직이 들어가는 경우 해당 getter 속성을 computed에 정의하여 computed의 장점인 캐쉬의 효과를 볼 수 있다.
getters: {
        filterTodos :state => {
            return state.todos.filter(todo => todo.date === state.clickedDate)
        },
    }
todoList.vue
<div class="todoList" v-if="filterTodos">
   <div class="todo" v-for="(todo,idx) in filterTodos" :key="idx">
     {{ todo.title }}
   </div>
</div>


computed: {
	...mapGetters('todo', ['filterTodos'])
}
todo update
하나의 todo 정보를 불러와 해당 todo를 수정해보자.
todoList.vue
하나의 todo title을 클릭하면 detail을 보여주는 TodoDetail 컴포넌트에게 클릭된 todo 정보를 props로 전달해준다.
<div class="todoList" v-if="filterTodos">
    <div class="todo" v-for="(todo,idx) in filterTodos" :key="idx">
        <span @click="showDetail(todo)">{{ todo.title }}</span>
    </div>
</div>
<TodoDetail v-if="showDetailModal" :todoInfo="todoInfo"/>
todoDetail.vue
export default ({
    props: ['todoInfo'],
})
이제 todoDetail 컴포넌트에서 부모 컴포넌트인 todoList에서 전달한 todoInfo데이터를 사용할 수 있다.
await this.$store.dispatch('todo/editSchedule', editData);store/todo.js
데이터를 수정하는 api 통신이 이뤄지면 state를 update한다. todos 배열의 todo 객체들 각각의 id와 수정된 데이터의 id가 같은 todo 객체의 index를 찾고, 해당 인덱스를 todos 배열에서 찾아 제거해준다.
mutations: {
	updateTodo(state, {postId, editData}){
            const idx = state.todos.findIndex((el) => el.post_id === postId);
            state.todos.splice(idx,1,editData);
        },
},

actions: {
	async editSchedule({commit}, payload){
            try {
                const res = await editTodo(payload.post_id, payload);
                if(res.data.resultData.editTodo){
                    await commit('updateTodo', {
                        editData: res.data.editData
                    });
                }
            }catch(err){
                console.log(err);
            }
        }
 }
todo delete
todoList.vue
삭제하고자 하는 todo의 id를 넘겨준다.
async del(){
            try{
                await this.$store.dispatch('todo/deleteSchedule', this.todoInfo.post_id);
                this.toggleModal();
            }catch(err){
                console.log(err);
            }
        }
store/todo.js
async deleteSchedule({commit}, postId){
            try{
                const res = await deleteTodo(postId);
                if(res.data.resultData.deleteTodo){
                    await commit('removeTodo',postId);
                }
            }catch(err){
                console.log(err);
            }
        }
결과