
오늘은 센서로 여러가지 색다른 경험을 하는 날이다.
도착한 라즈베리파이 센서 키트에는 다음 준비물이 들어있다.
- 소켓 점퍼 케이블
- 초음파 센서
- 디지털 적외선 물체 감지 센서
- 아날로그 사운드 센서
- 디지털 접촉식 터치센서
- led 센서
- 브래드 보드
실습내용은 아래 사이트를 참고하여 진행하였다.
전체적인 진행과 잘 안되는 부분을 친절하게 알려준 수빙에게 감사를🙏!
https://projects.raspberrypi.org/en/projects/physical-computing/1
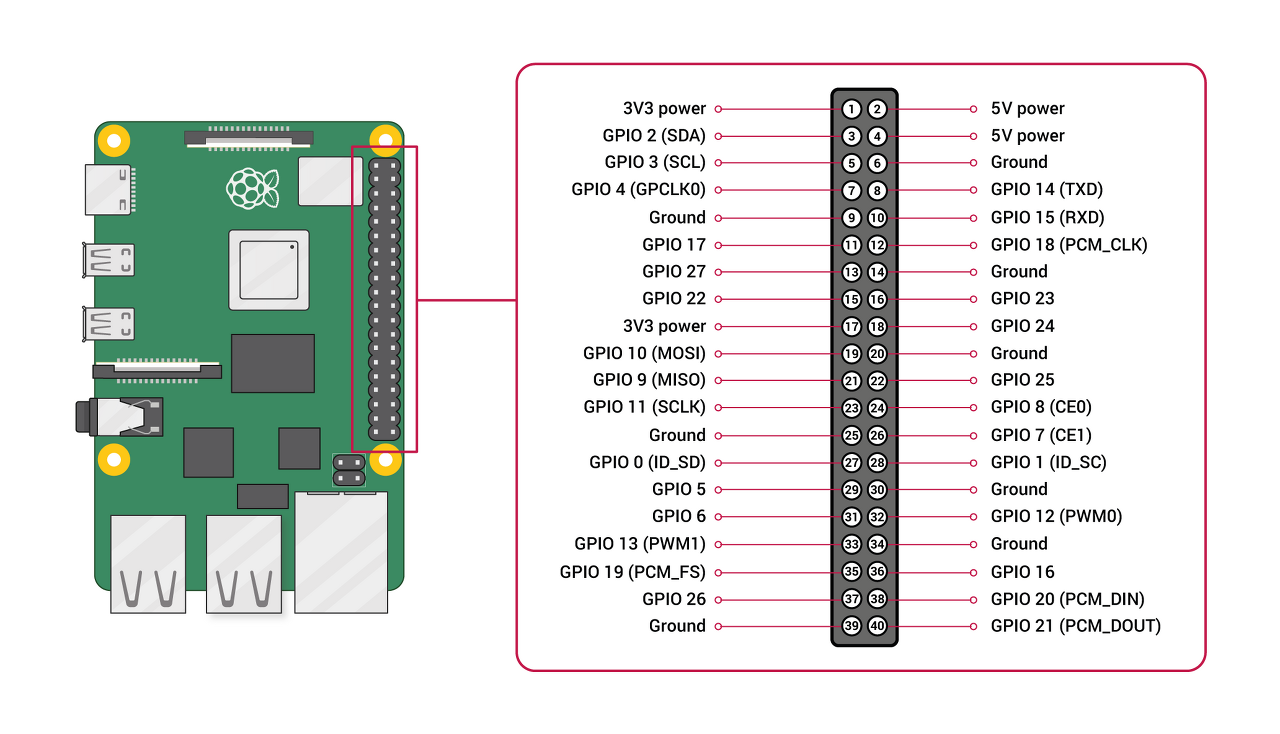
GPIO 핀 번호
https://fishpoint.tistory.com/6181
1. LED 센서 연결
3v 3power에 케이블 핀을 꽂고 브래드 보드 +에 케이블을 연결한 다음 +판에 led의 긴다리부분(+극)을 꽂고 나머지 짧은 건 아래 쪽 일반 단자 부분에 연결한다. 이후 저항(옴)도 -쪽으로 연결해주고 다른 케이블은 ground 쪽으로 연결해주자.
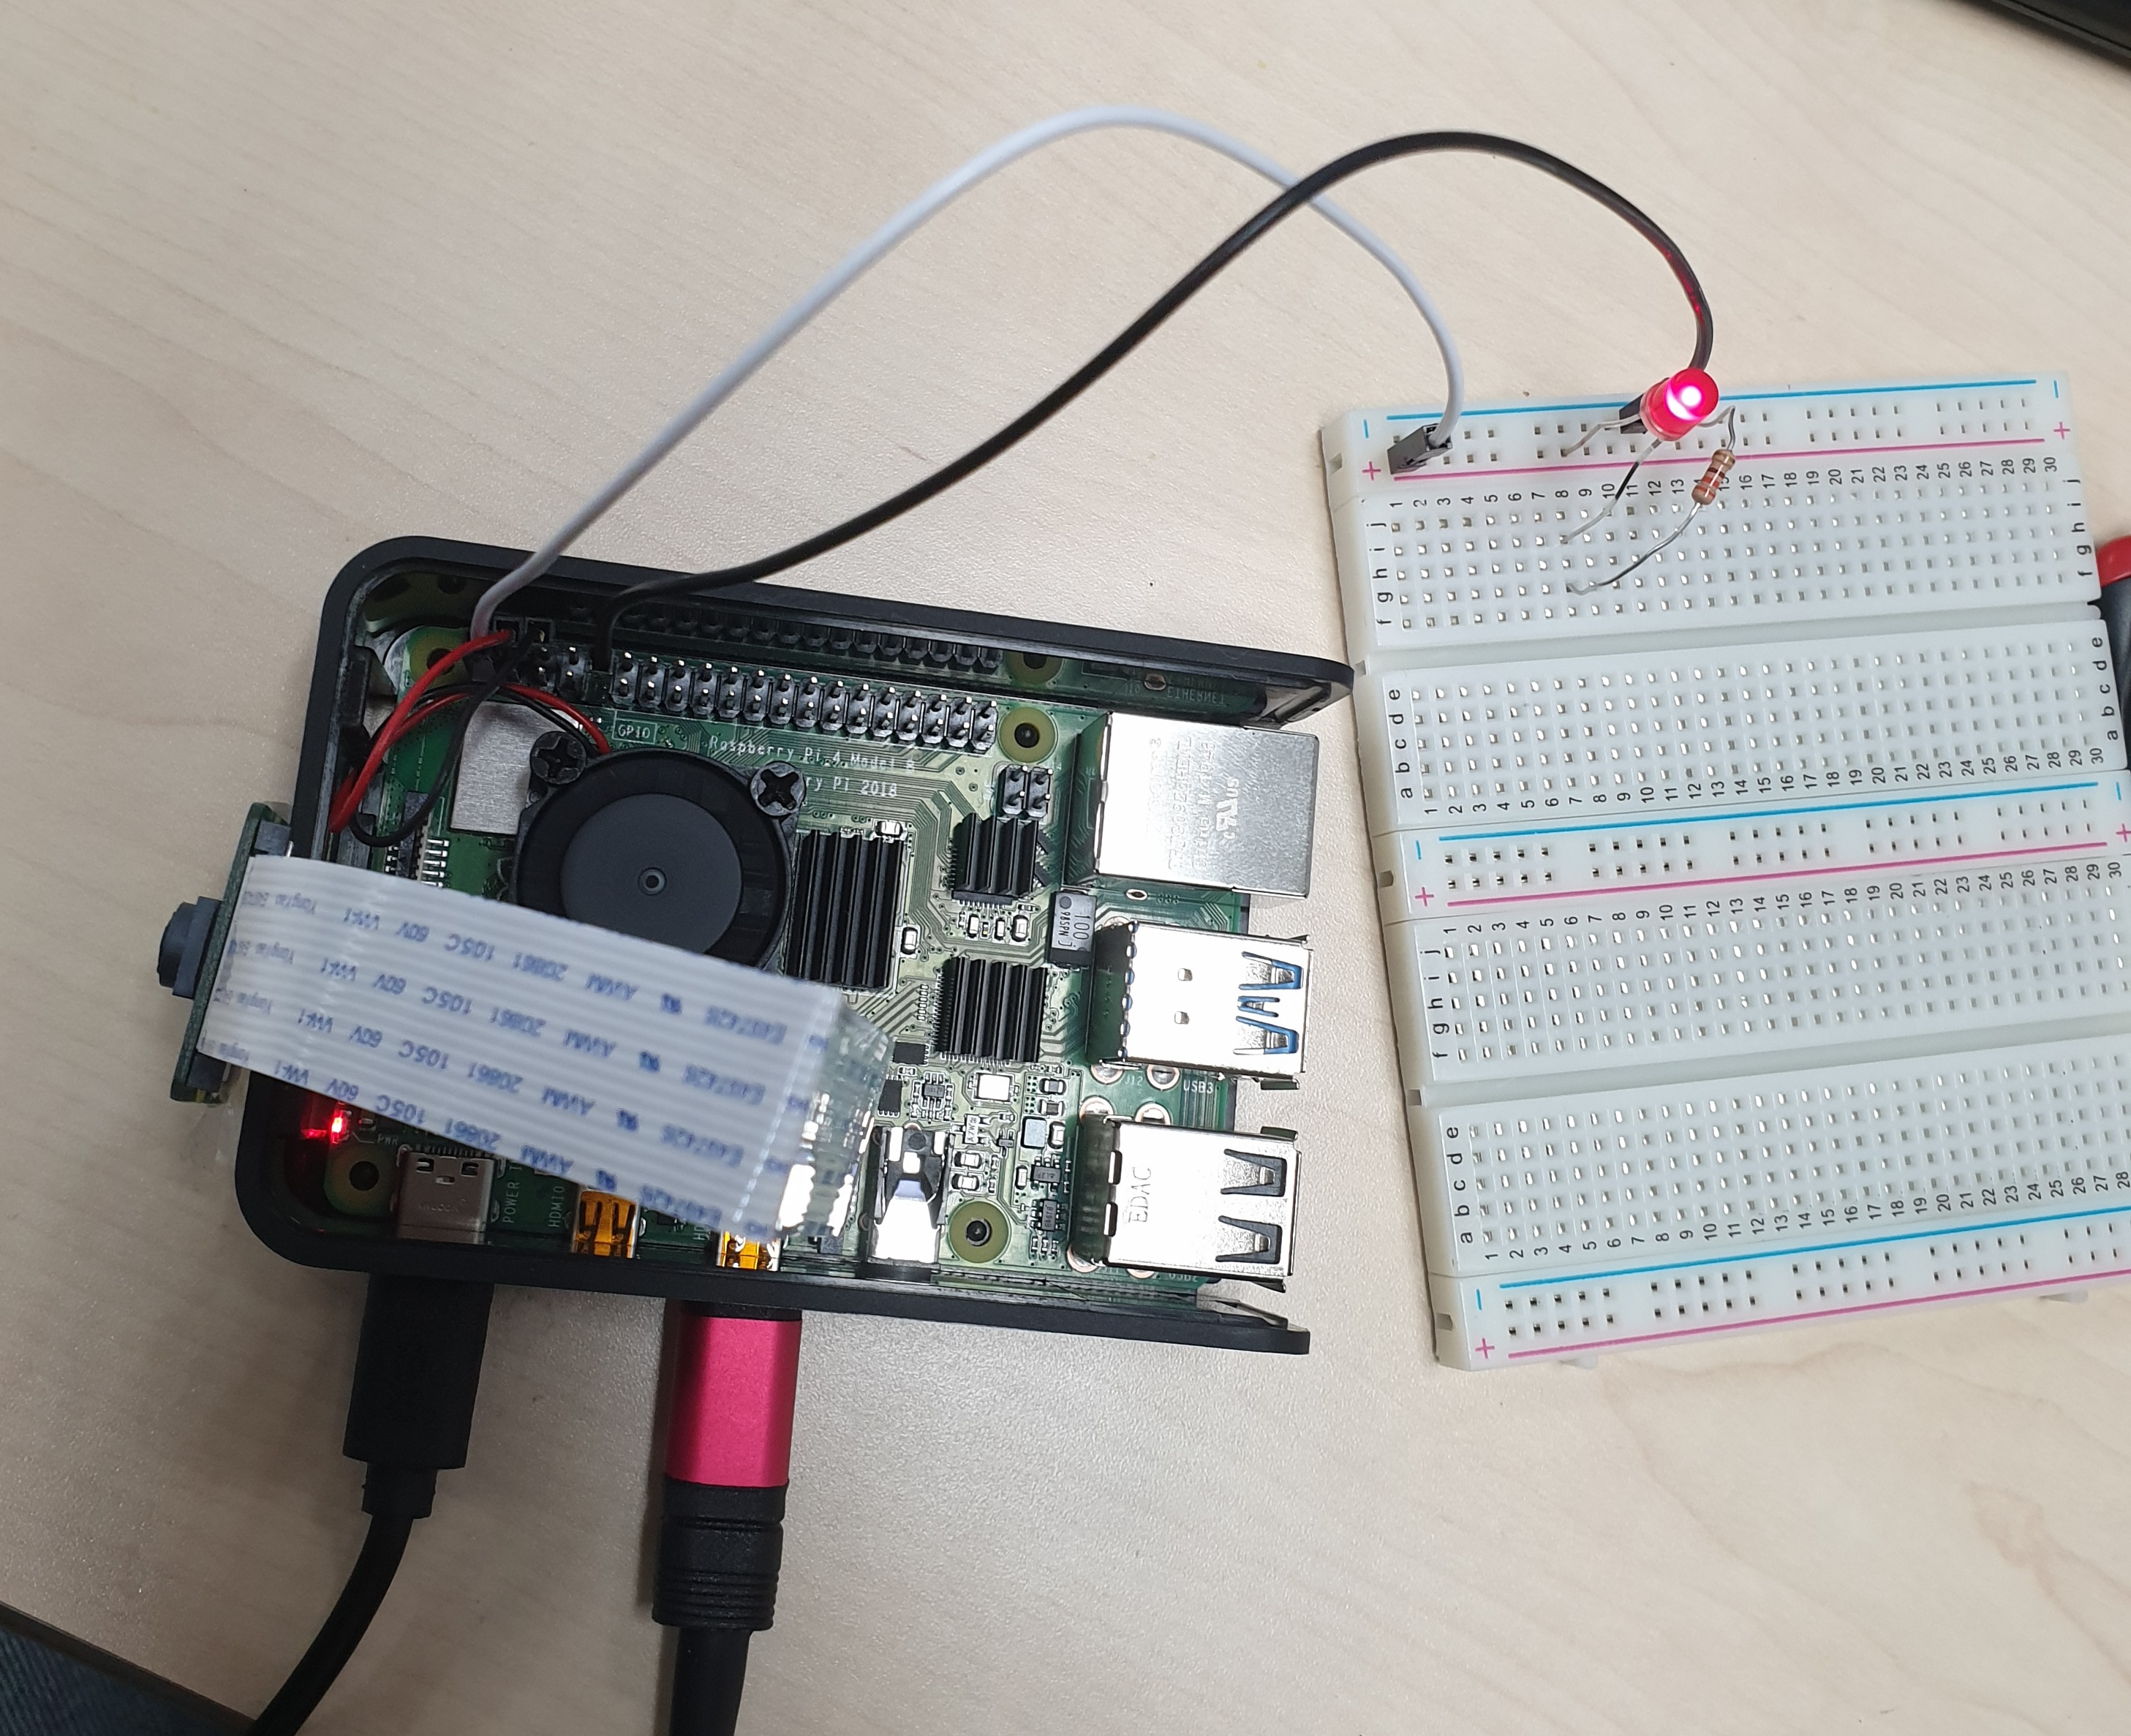
그럼 불이 들어오는 걸 확인할 수 있다.
깜빡이는 거 실습해보기!
3v 3power에 꽂은 케이블 핀을 빼고 아무 GPIO 핀에 연결하자. 나는 GPIO 4번에 연결하였다. 이후 아래 코드를 작성하고 실행해하여 led가 어떻게 깜박이는지 관찰해보자.
code
import RPi.GPIO as GPIO
import time

ledPin= 4
GPIO.setmode(GPIO.BCM)
GPIO.setup(ledPin , GPIO.OUT)
while True:
  GPIO.output(ledPin , GPIO.HIGH)
  time.sleep(1)
  GPIO.output(ledPin , GPIO.LOW)
  time.sleep(1)
결과
깜박이는 led 센서 확인 완료!

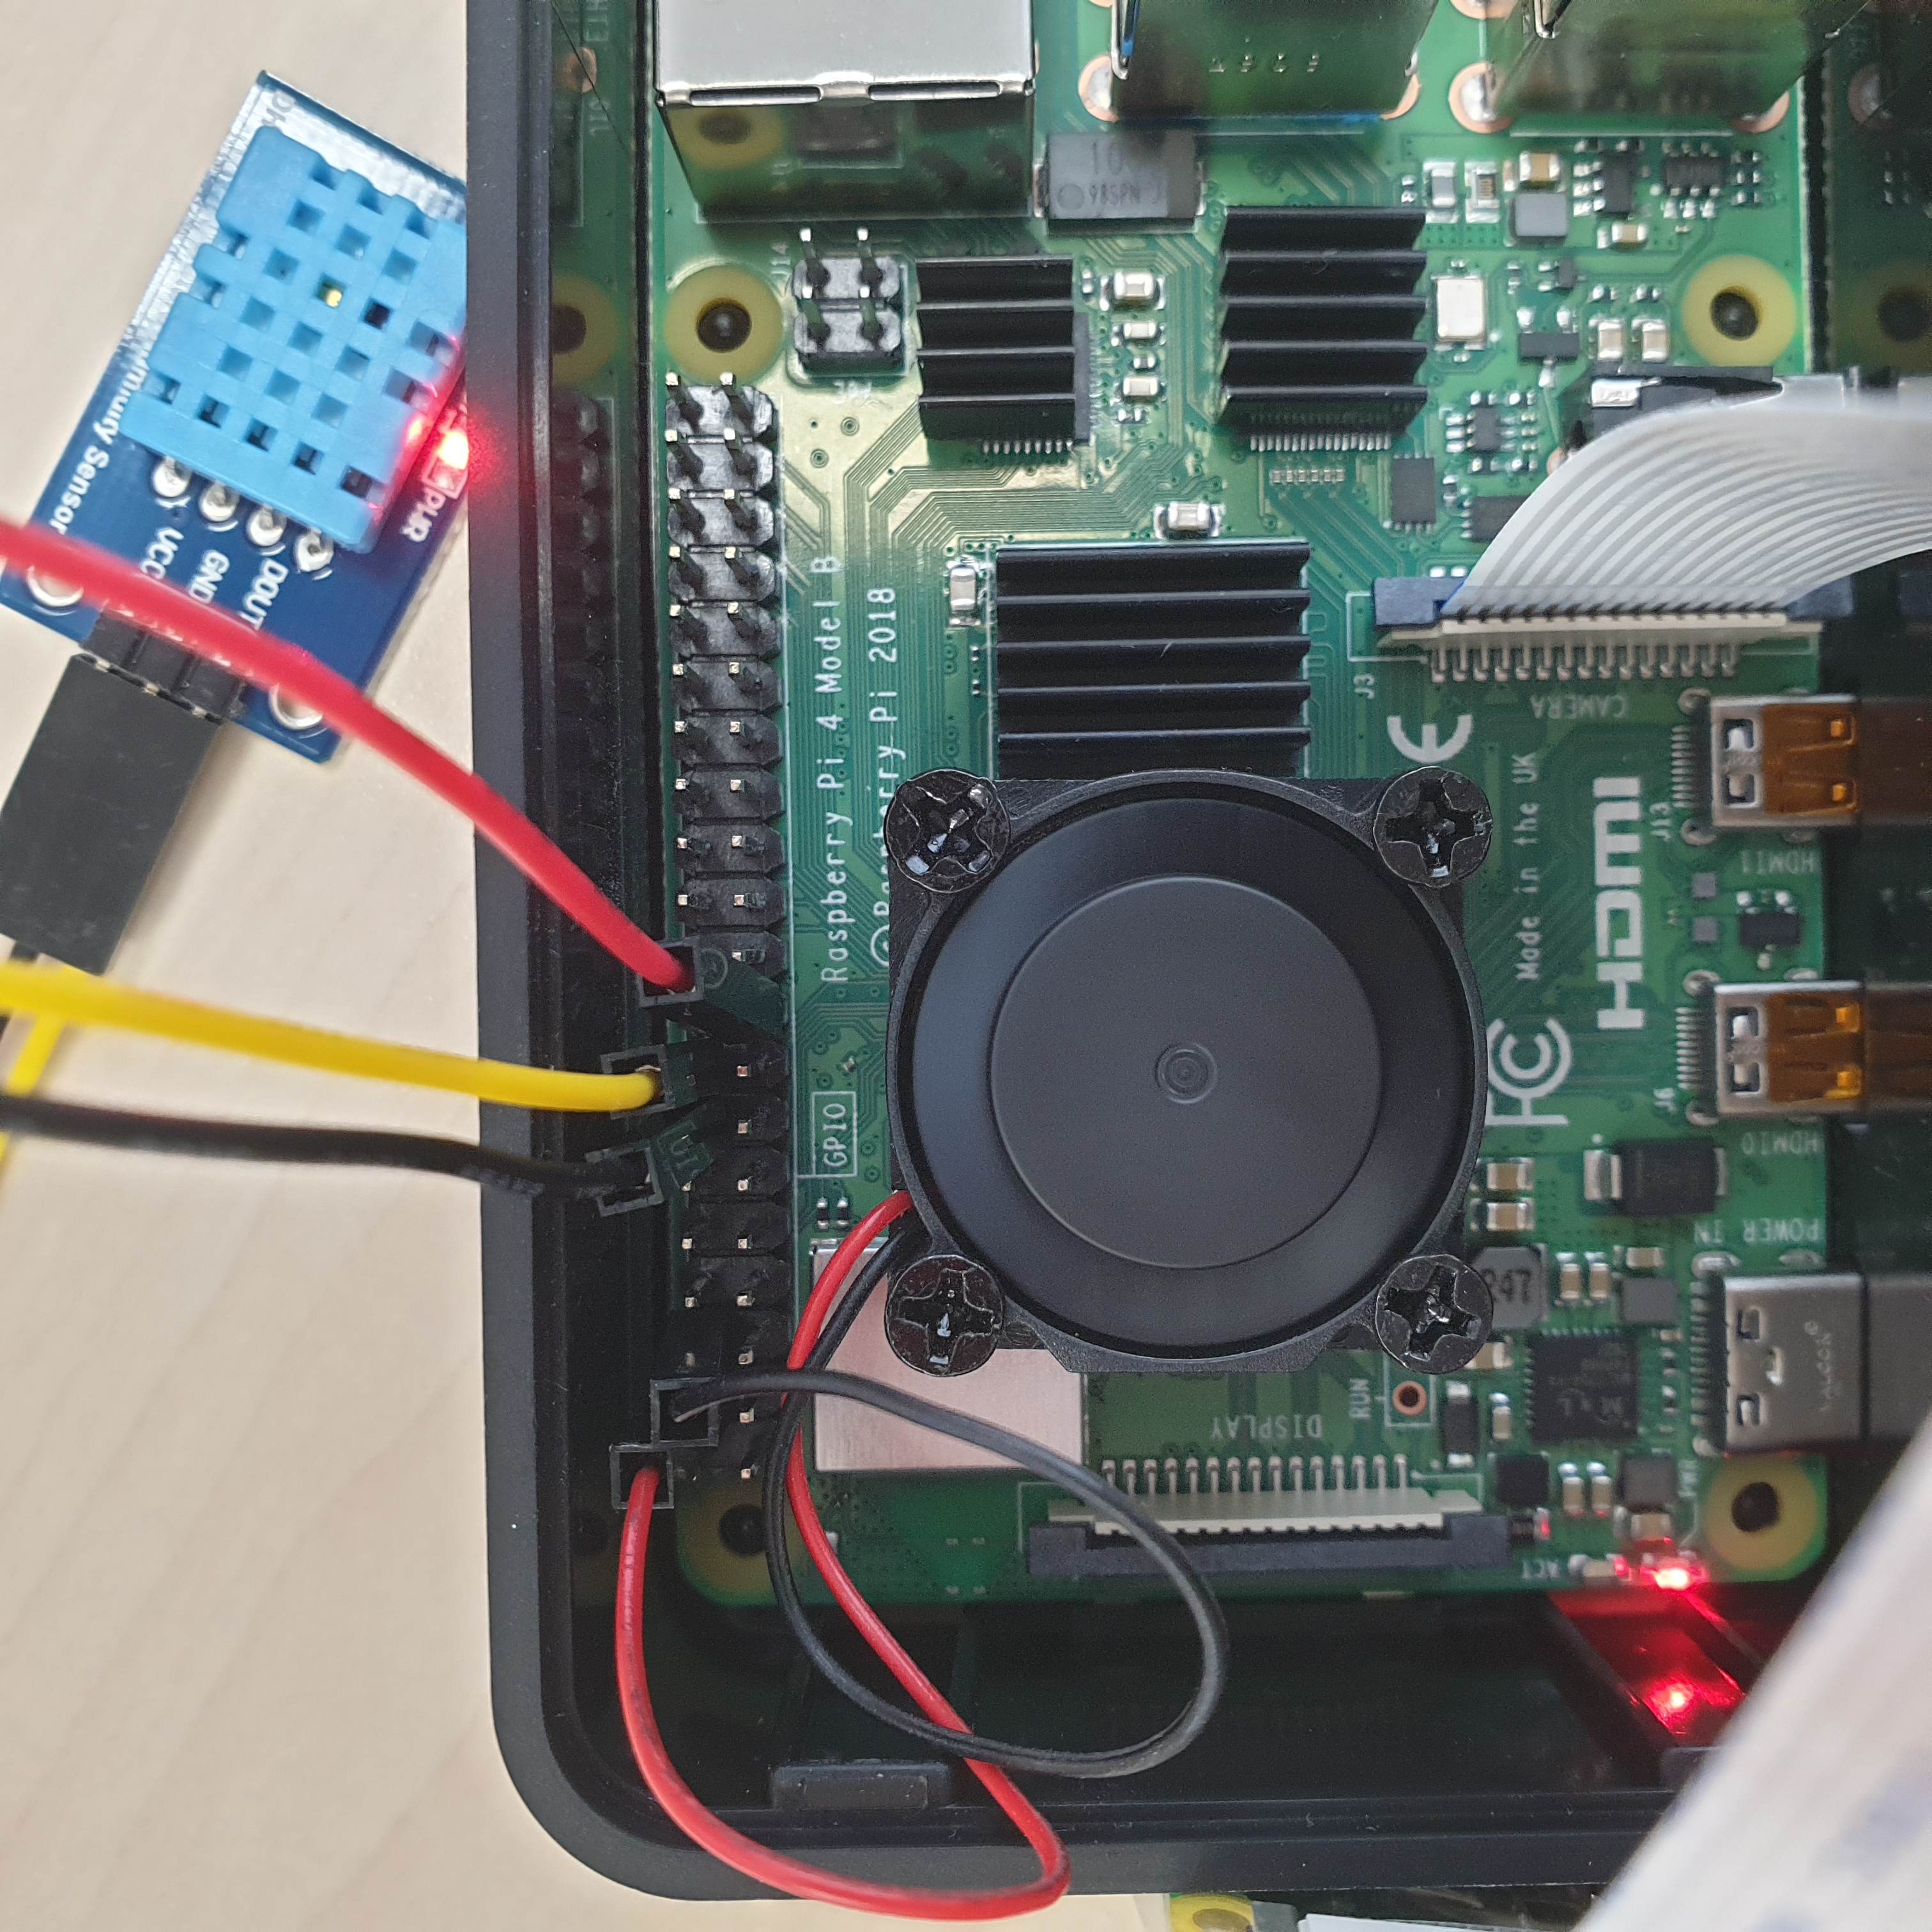
2. 온습도 센서 연결
https://blog.naver.com/PostView.nhn?blogId=emperonics&logNo=222092518468
글을 참고하였다.
사진처럼 연결하고
# SPDX-FileCopyrightText: 2021 ladyada for Adafruit Industries
# SPDX-License-Identifier: MIT
import time
import board
import adafruit_dht
# Initial the dht device, with data pin connected to:
dhtDevice = adafruit_dht.DHT11(board.D24) # DOUT 선을 꽂은 GPIO번호를 입력해줌!
# you can pass DHT22 use_pulseio=False if you wouldn't like to use pulseio.
# This may be necessary on a Linux single board computer like the Raspberry Pi,
# but it will not work in CircuitPython.
# dhtDevice = adafruit_dht.DHT22(board.D18, use_pulseio=False)
while True:
try:
# Print the values to the serial port
temperature_c = dhtDevice.temperature
temperature_f = temperature_c * (9 / 5) + 32
humidity = dhtDevice.humidity
print(
"Temp: {:.1f} F / {:.1f} C Humidity: {}% ".format(
temperature_f, temperature_c, humidity
)
)
except RuntimeError as error:
# Errors happen fairly often, DHT's are hard to read, just keep going
print(error.args[0])
time.sleep(2.0)
continue
except Exception as error:
dhtDevice.exit()
raise error
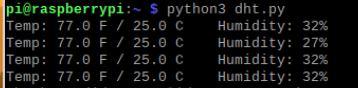
time.sleep(2.0)$ python dht.py 실행하면 아래처럼 결과 읽어옴.
주의! tonny python IDE에선 중단버튼을 누르면 제대로 중지되지 않은 상태여서인지 재시행이 안된다. 자세한 이유는 더 알아봐야할 것 같다.
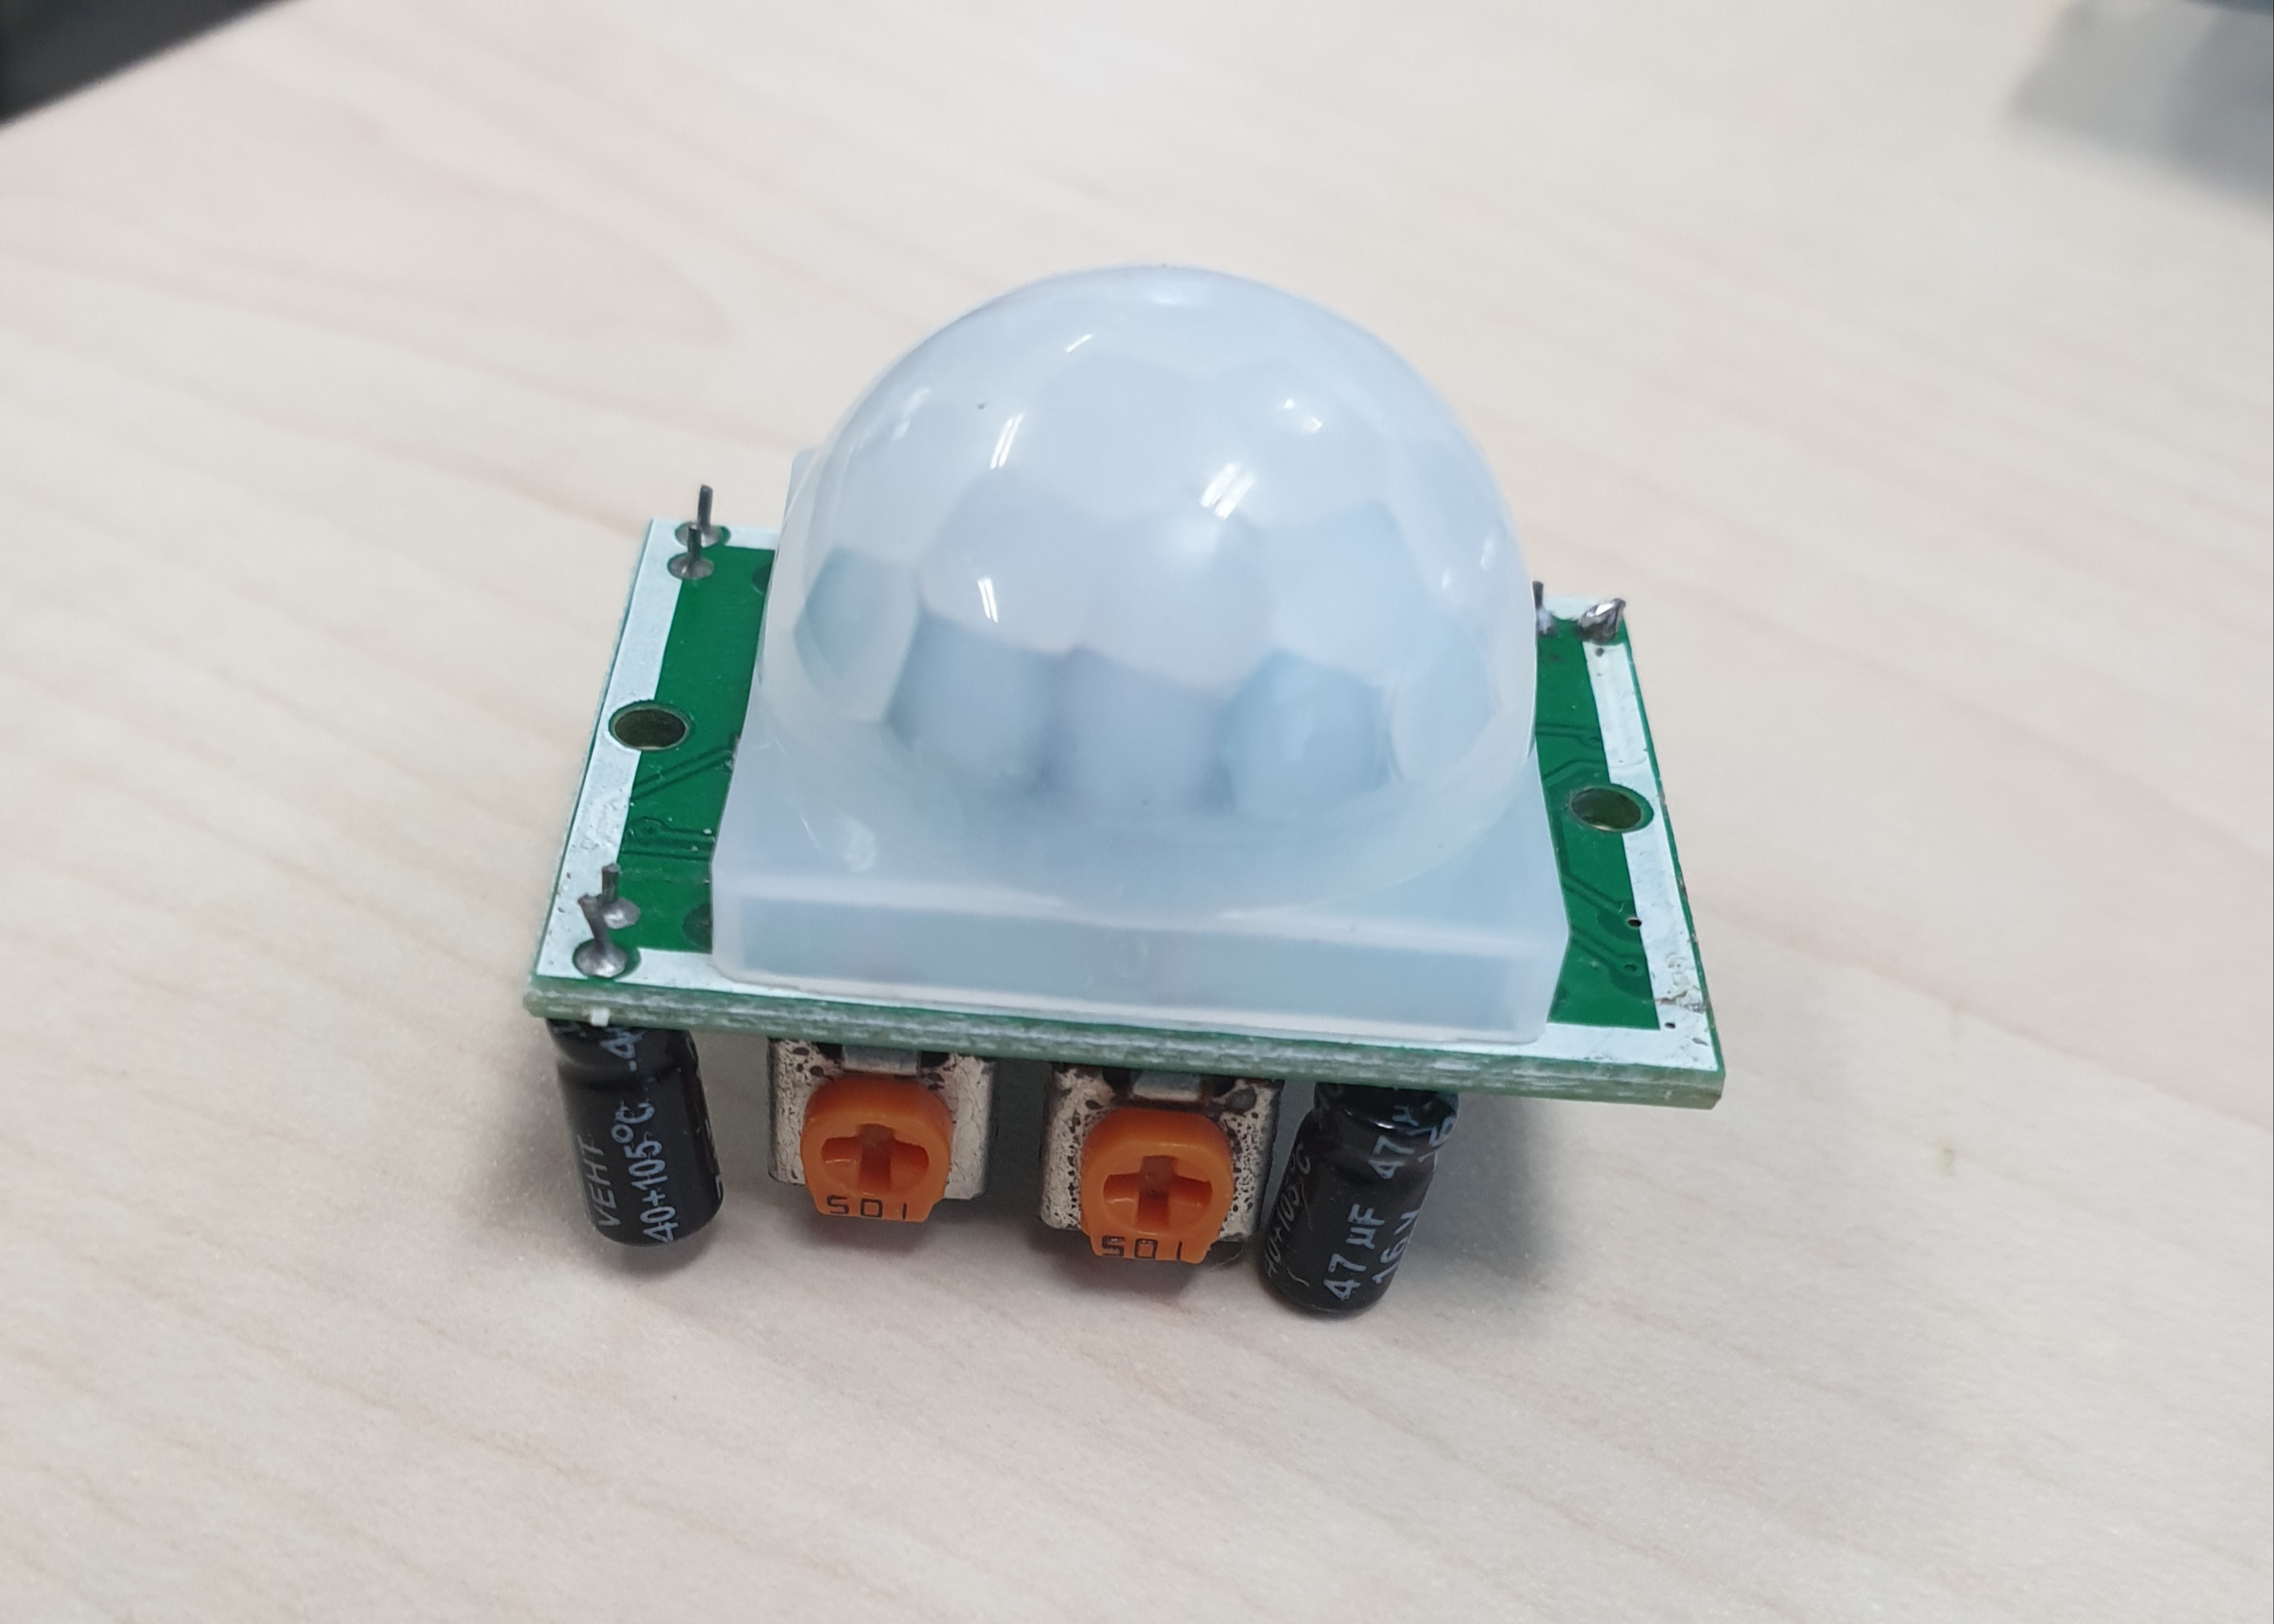
3. 적외선 센서(PIR 센서)
https://projects.raspberrypi.org/en/projects/physical-computing/11 참고함
가이드 따라하기
https://projects.raspberrypi.org/en/projects/physical-computing/11
연결까지 다 끝마쳤으면 예제를 시행해보자.
code
import time

GPIO.setmode(GPIO.BCM)
PIR_PIN = 4 # OUT pin number

GPIO.setup(PIR_PIN, GPIO.IN)

try:
    print ("PIR module test (CTRL+C to exit)")
    time.sleep(2)
    print ("ready")

    while True:
        if GPIO.input(PIR_PIN):
            t = time.localtime()
            print (" %d:%d:%d motion detected!" % (t.tm_hour, t.tm_min, t.tm_sec))
        time.sleep(0.05)

except KeyboardInterrupt:
    print (" quit")
    GPIO.cleanup()
실행 결과
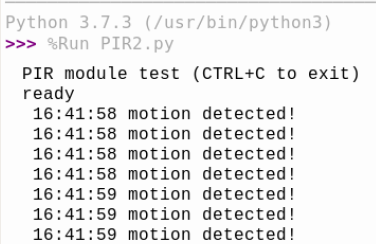
코드를 실행하고 센서 앞에서 손을 왔다갔다하면 실시간으로 움직임을 체크해서 감지했다고 출력해준다.
4. 초음파 센서
https://projects.raspberrypi.org/en/projects/physical-computing/12 참고함
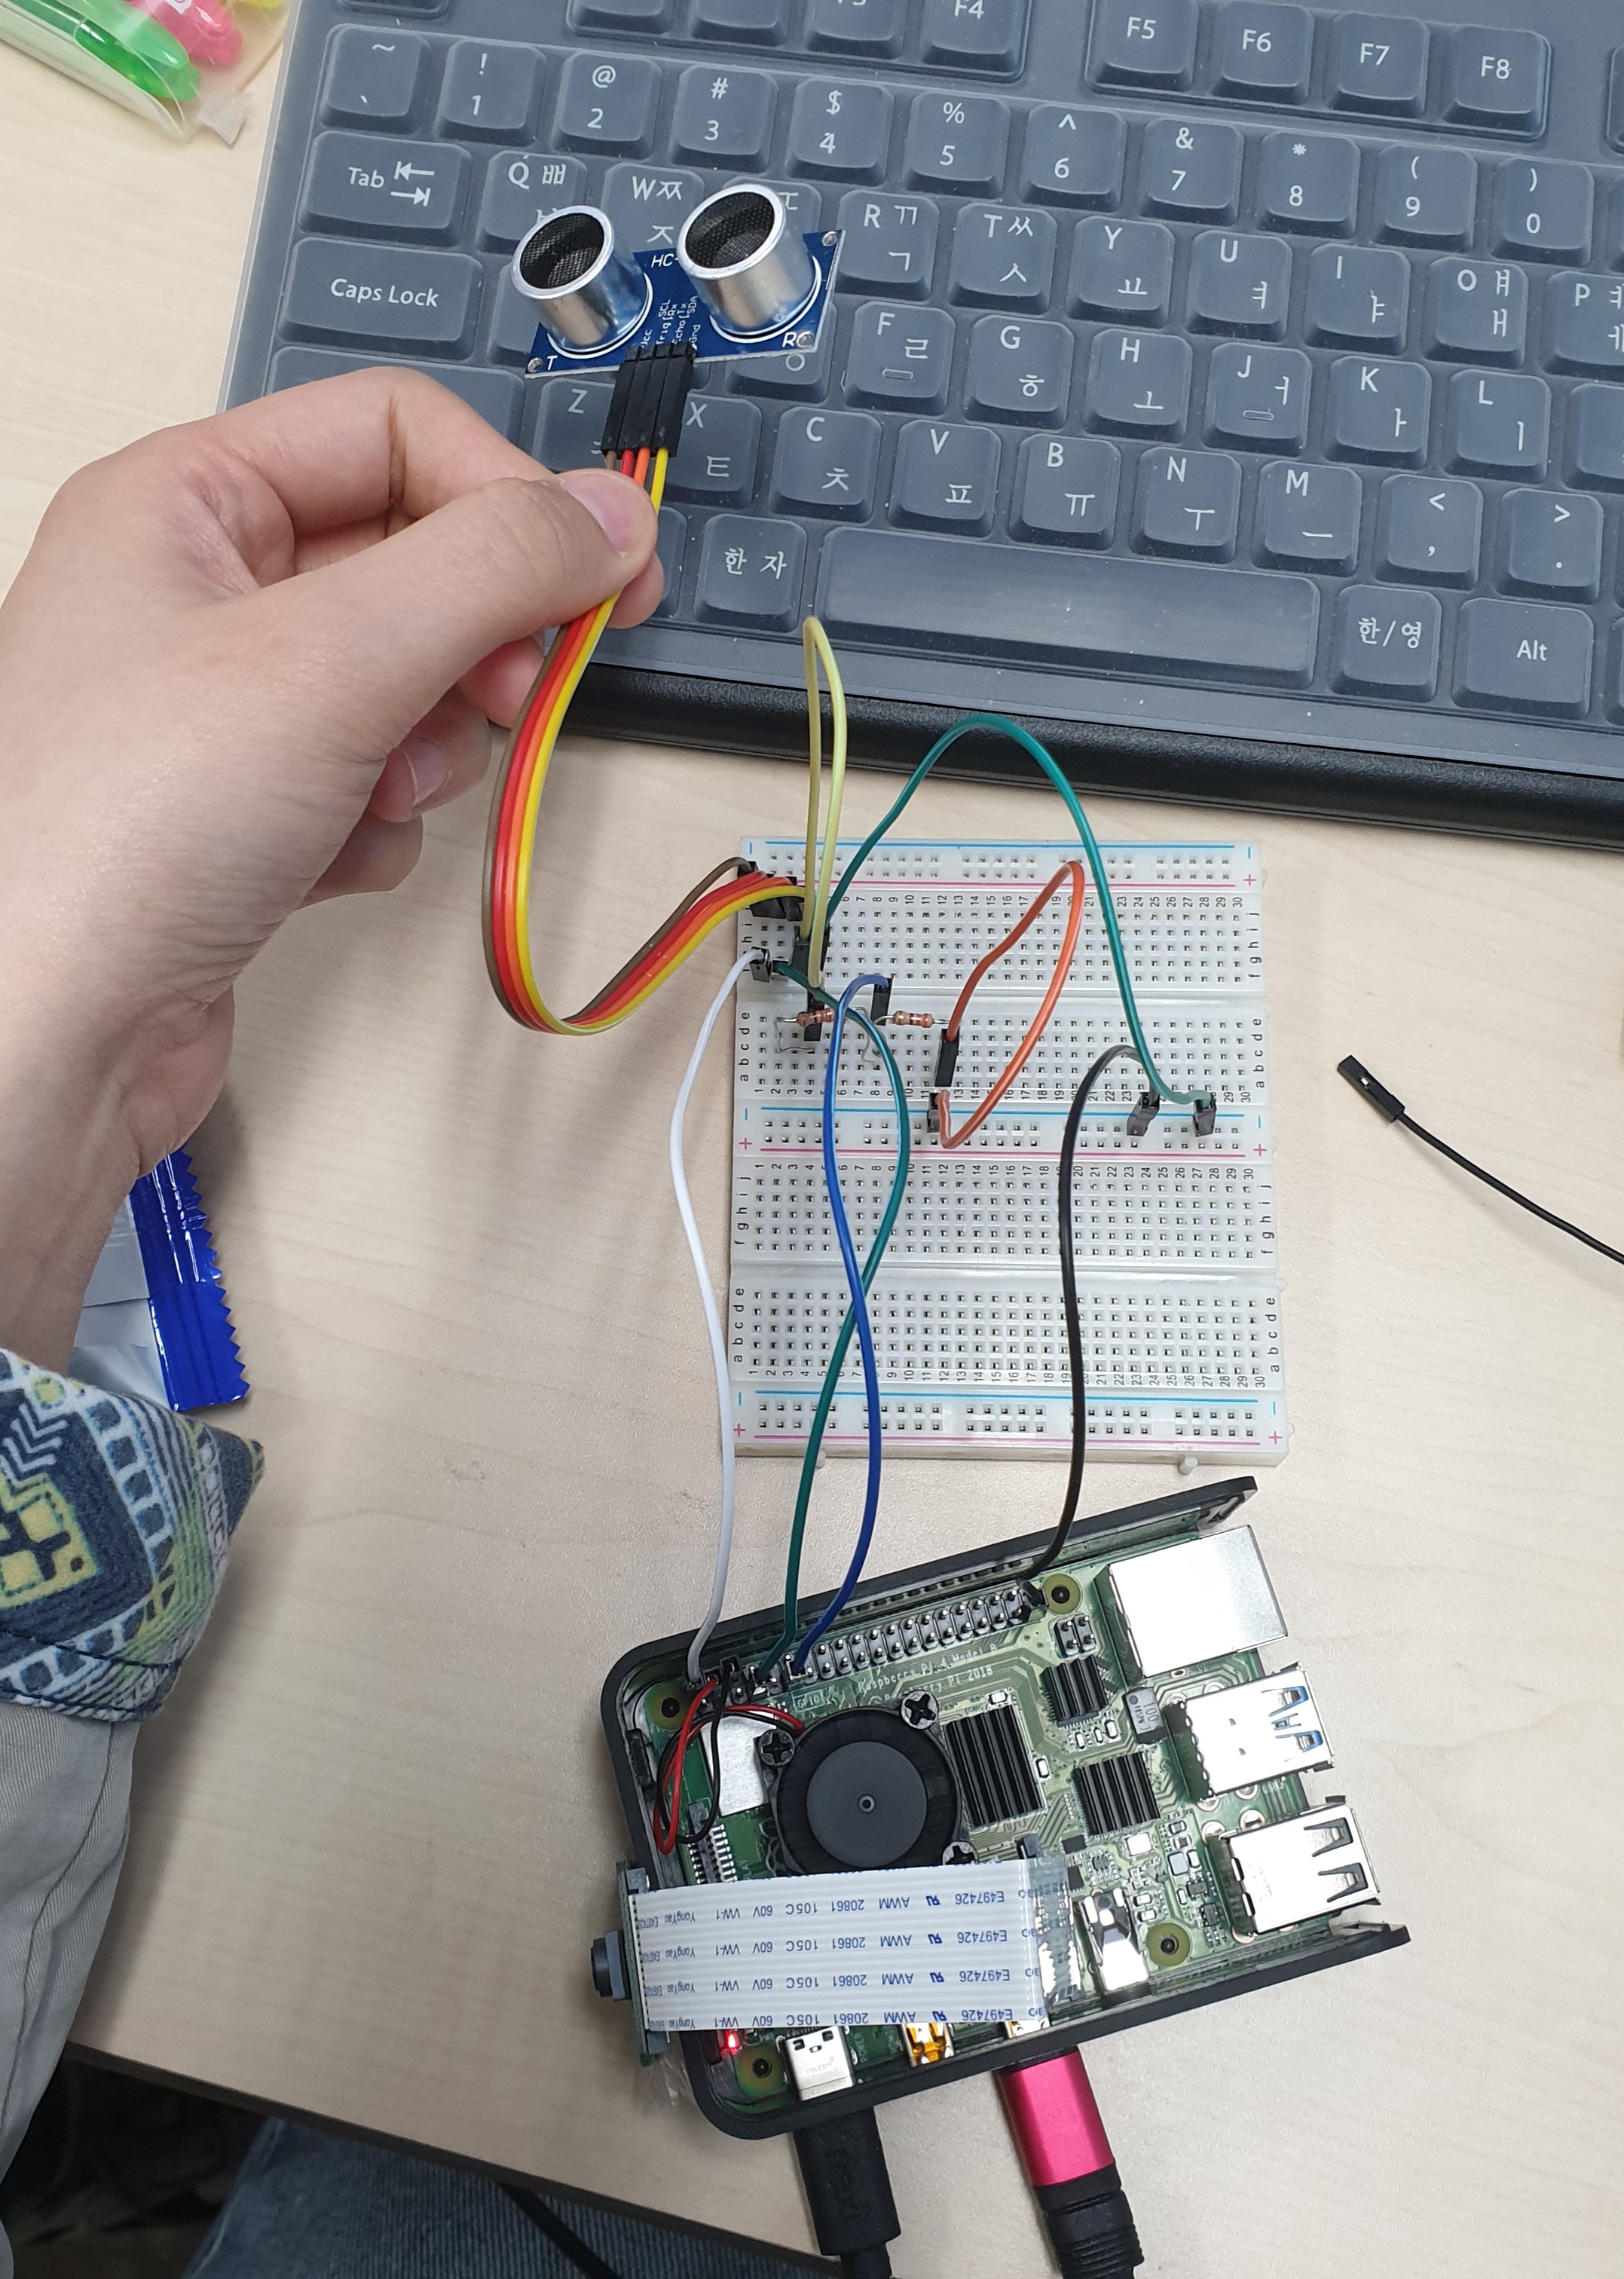
예제를 따라하며 익혀보자
code 1
from gpiozero import DistanceSensor
ultrasonic = DistanceSensor(echo=17, trigger=4)
while True: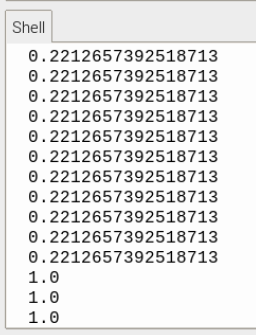
print(ultrasonic.distance)- 손이 센서에 가까울수록 값이 작아야 한다. 루프를 종료하려면 중지를 누르면 된다.
결과
센서 가까이에 아무것도 없으면 default 값 1.0이 출력된다.
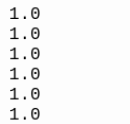
센서에 손을 가까이 대면 값이 변화되는데 거리에 따라 값이 계속 변동 되는 것을 확인할 수 있다. 손을 가까이, 멀리 왔다갔다 해보자.
code 2
from gpiozero import DistanceSensor
ultrasonic = DistanceSensor(echo=17, trigger=4)
while True:
    ultrasonic.wait_for_in_range()
    print("In range")
    ultrasonic.wait_for_out_of_range()
print("Out of range")- 센서 앞에서 손을 흔들어 보자. 손이 센서에서 점점 더 멀어질수록 "In range"와 "Out of range" 메시지가 전환되는 것을 확인할 수 있을 것이다.
결과

code 3 (인식 거리 설정)
from gpiozero import DistanceSensor
ultrasonic = DistanceSensor(echo=17, trigger=4)
ultrasonic.threshold_distance = 0.5 # 인식 거리 설정
while True:
    ultrasonic.wait_for_in_range()
    print("In range")
    ultrasonic.wait_for_out_of_range()
    print("Out of range")
손을 인식 하는 거리의 default 는 0.3이다.
위와 같이 ultrasonic.threshold_distance = 0.5을 추가하여 거리를 변경하거나
ultrasonic = DistanceSensor(echo=17, trigger=4, threshold_distance=0.5) 이렇게 작성하여 거리에 변화를 줄 수도 있다.
결과
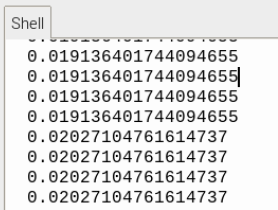
센서 앞에 손을 가까이 했다가 멀리했다가 하면서 변화되는 값을 확인해보자.

code 4 (code 2의 다른버전. 센서가 범위에서 들어오고 나갈 때 무언가를 하는 또다른 방법)
from gpiozero import DistanceSensor
ultrasonic = DistanceSensor(echo=17, trigger=4)
ultrasonic.threshold_distance = 0.5

def hello():
    print("Hello")

ultrasonic.when_in_range = hello

def bye():
    print("Bye")

ultrasonic.when_out_of_range = bye
결과
거리 안에 손이 있으면 Hello가 뜨고
벗어나면 Bye가 뜨는 거 확인!
error & solution
-
ModuleNotFoundError: No module named 'board' 에러
-> https://github.com/adafruit/Adafruit_CircuitPython_NeoPixel/issues/43 해결 -
gpio 가 계속 유지되어 있다고 하는 부분
-> https://post.naver.com/viewer/postView.nhn?volumeNo=31141845&memberNo=2534901 이 글의 clean up() 부분 참고! 왜 클린업해야하는지 체크. -
ImportError: No module named Adafruit DHT
-> https://www.sharedit.co.kr/posts/8407 따라해보기. 해결 -
cannot import name 'Beaglebone_Black_Driver' from 'Adafruit_DHT' 문제 -> https://stackoverflow.com/questions/63232072/cannot-import-name-beaglebone-black-driver-from-adafruit-dht 해결

안녕하세요. 좋은 글 감사합니다! 혹시 초음파 센서 관련 부분 따라해보고 싶어서 그런데, 글에서 사용하신 초음파 센서가 아래 제품이 맞을까요? HC-SR04P 초음파 거리 센서 모듈 3V 5.5V 호환
https://smartstore.naver.com/misoparts/products/10462897868?NaPm=ct%3Dm21xcsfc%7Cci%3Dfe5f27dfc8a9c5db86634fe3e61551f4e39c7207%7Ctr%3Dslsl%7Csn%3D1956020%7Chk%3Dc8dbe644ba77dece28c6272025b21a6bacc76cc7&nl-query=%EC%B4%88%EC%9D%8C%ED%8C%8C+%EC%84%BC%EC%84%9C