지극히 저의 관점으로 새롭게 느껴지거나 이건 꼭 기억해야 하는 것들만 적는 페이지로 지속적으로 업데이트 합니다!
인라인 함수 (inline)
매크로 함수는 정의하기가 복잡하니 일반함수처럼 정의가 가능한 방법을 쓸 수 있다.
방법은 그냥 함수 앞에 inline을 붙이는 것.
참고로 매크로를 이용한 함수의 인라인화는 전처리기에 의해서 처리되지만, 키워드 inline을 이용한 함수의 인라인화는 컴파일러에 의해서 처리가 된다.
따라서 컴파일러는 함수의 인라인화가 오히려 성능에 해가 된다고 판단하면 이 키워드를 무시한다고 한다.
또한 컴파일러는 필요한 경우 일부 함수를 임의로 인라인 처리하기도 한다.
하지만 매크로 함수는 자료형에 의존적이지 않는 함수라 int든 double이든 들어오면 알아서 데이터 손실없이 처리하지만 인라인 함수라면 자료형이 정해진 함수이기 때문에 데이터 손실이 발생할 수 있다.
물론 함수의 오버로딩을 사용하면 가능하지만 이러면 함수를 하나 더 만들어야한다.
하지만 C++에는 템플릿이라는 최고의 문법이 존재하므로 자료형에 의존하지 않는 함수를 만들 수 있게 된다.
네임스페이스 (namespace)
말그대로 이름을 붙여놓은 공간이다.
어떻게 사용하느냐.
namespace chanykim{
	void	func(void)
    {
    	std::cout << "함수명: chanykim"
    }
}

namespace chanyoung{
		void	func(void)
    {
    	std::cout << "함수명: chanyoung"
    }
}

int		main(void)
{
	chaykim::func();
    chayoung::func();
	return (0);
}
이런 식으로 이름을 정해 이름이 같아도 다른 함수를 만들어 사용가능하다.
같은 이름공간에 정의된 함수를 호출할 때는 이름공간을 넣지 않아도 된다.
나중에 using을 이용한 이름공간의 명시도 가능하다.
using namespace std; 라고 명시해두면 이름공간 std에 선언된 모든 것에 대해 이름공간 지정의 생략을 명령할 수 있다.
const의 의미
const 멤버함수는 클래스의 멤버를 업데이트하지 않는다고 명시해주는 효과가 있다.
- const int num = 10;
-> 변수 num을 상수화 - const int *ptr = &val;
-> 포인터 ptr을 이용해서 val의 값을 변경할 수 없음 - int * const ptr = &val;
-> 포인터 ptr가 상수화 됨. - const int * const ptr = &val;
-> 포인터 ptr가 상수화되었고, ptr을 이용해서 val의 값을 변경할 수 없다.
cont int * 나 int const * 나 동일하다.
const가 포인터를 중심으로 왼쪽이냐 오른쪽이냐로 달라진다.
const가 포인터의 오른쪽이면 변수명을 상수 취급, 왼쪽이면 값을 상수로 취급한다.
포인터가 없으면 자료형으로 구분할 수 있을 것 같다.
const객체들은 const 멤버함수만 호출할 수 있다.
const 멤버함수와 비 const멤버함수는 중복될 수 있다.
const 변수는 초기화를 해주어야 한다.
멤버함수 이름 뒤에 const를 붙이면 해당 멤버함수 내에서 모든 멤버 변수를 상수화 시킨다는 뜻이다. (지역변수는 변경가능)
참조자(&)
참조자는 이름을 하나 더 지어준 것과 같다. 별명 같은 것이다. 자신이 참조하는 변수를 대신 할 수 있는 또 하나의 이름인 셈이다.
int num1 = 2021;
int	*ptr = &num1; // 변수 num1의 주소 값을 반환해서 포인터 ptr에 저장하라.
int &num2 = num1; // 변수 num1에 대한 참조자 num2를 선언해라.
이러면 메모리에 할당된 공간에 2021이란 값을 가지고 이름을 num1, num2로 두 개의 이름을 가지게 되었다.
만약 num2 = 2022; 로 바꾼다면 num1 또한 2022로 바뀌게 된다.
별명에 제한이 있던가? 없다. 그러므로 참조자의 수에는 제한이 없고 참조자를 대상으로도 참조자를 선언할 수 있다.
대신에 참조자를 그냥 선언하면 안되고(int &num), NULL값을 참조할 수도 없으며(int &num = NULL), 변수에 대해서만 선언이 가능하고 상수로 선언이 불가능하다.(int &num = 20)
연산자 오버로딩
1. operator +( ) 함수
#include <iostream>
using namespace std;

class Point{
	int x;
	int y;

public:
	Point(int _x=0, int _y=0):x(_x), y(_y){ }
	void Print() const { cout << x << "," << y << endl; }
	const Point operator+(const Point &value) const {
		Point pv;
		pv.x = this->x + value.x;
		pv.y = this->y + value.y;
		return pv;
	}
/* 위의 operator+ 함수를 간결하게 나타낸 코드
    const Point operator+(const Point &value) const {
	return Point(x+value.x, y+value.y);
	}
*/
};

int main() {
	Point p1(3, 4), p2(5, 6);
	Point p3;

	p3 = p1 + p2; // p3=p1.operator+(p2)와 같다.
	p3.Print();

	p3 = p1.operator+(p2);
	p3.Print();
	return 0;
}
위의 코드 중
Point(int _x=0, int _y=0):x(_x), y(_y){ }이 코드는 변수 생성과 동시에 초기화 하는 코드입니다.
point( int _x=0, int _y=0 ){
    x=_x;
    y=_y;
}
위 코드와 동일한데 굳이 처음 나온 코드처럼 쓰는 이유는 생성과 동시에 초기화하므로 조금 더 빠르다고 합니다.
그리고 멤버변수가 const라던지 상속관계에서 자식클래스의 초기화에서 쓰이곤 합니다.
2. ++, --연산자 오버로딩
#include <iostream>
using namespace std;

class Point {
	int x;
	int y;

public:
	Point(int _x = 0, int _y = 0) :x(_x), y(_y) { }
	void Print() const { cout << x << "," << y << endl; }
	const Point operator ++(){ //전위 ++
		++x;
		++y;
		return *this;
	}

	const Point operator ++(int) { // 후위 ++
		Point pv(x,y);
		++x;
		++y;
		return pv;
	}

/* 중복 코드를 피하기 위한 방법 중 하나
	const Point operator ++(int) { // 후위 ++
		Point pv = *this;
		++*this;
		return pv;
	}
*/

};

int main() {
	Point p1(3, 4), p2(5, 6);
	Point p3;

	p3 = ++p1; //p1.operator++(); 과 같다.
	p1.Print();
	p3.Print();

	p3 = p2++; //p2.operator++(0);과 같다.
	p2.Print();
	p3.Print();
	return 0;
}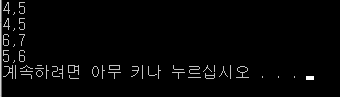
p1로 한 전위 ++연산자에서는 연산 후 값이므로 증가한 4,5가 출력된다.
p2로 한 후위 ++연산자에서는 연산 전의 값이므로 p3에서 결과는 똑같이 5,6이 출력된다.
중간에 6,7이 나온 것은 앞에서 연산하고 난 다음 출력값을 나타내므로 6,7이 출력된다.
--연산자 오버로딩은 ++연산자 오버로딩에서 ++를 --로 바꿔주면 된다.
#include <iostream>
using namespace std;

class Point {
	int x;
	int y;

public:
	Point(int _x = 0, int _y = 0) :x(_x), y(_y) { }
	void Print() const { cout << x << "," << y << endl; }
	const Point operator --() { //전위 --
		--x;
		--y;
		return *this;
	}

	const Point operator --(int) { // 후위 --
		Point pv(x, y);
		--x;
		--y;
		return pv;
	}
	/*
		const Point operator --(int) { // 후위 --
			Point pv = *this;
			--*this;
			return pv;
		}
	*/
};

int main() {
	Point p1(3, 4), p2(5, 6);
	Point p3;

	p3 = --p1; //p1.operator--(); 과 같다.
	p1.Print();
	p3.Print();

	p3 = p2--; //p2.operator--(0);과 같다.
	p2.Print();
	p3.Print();

	return 0;
}
3. ==, !=연산자 오버로딩
==연산자는 비교 연산으로 true 혹은 false로 결과가 반환되는 bool 타입이다.
반대로 !=은 ==연산자의 부정이므로 ==연산자를 조금만 바꿔주면 된다.
#include <iostream>
using namespace std;
class Point {
int x;
int y;
public:
Point(int _x = 0, int _y = 0) :x(_x), y(_y) { }
void Print() const { cout << x << "," << y << endl; }
bool operator==(const Point &value) const {
return x == value.x && y == value.y ? true : false;
}
bool operator!=(const Point &value) const {
return !(*this == value);
}
};
int main() {
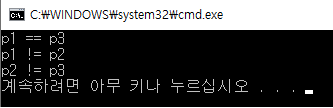
Point p1(3, 4), p2(5, 6), p3(3, 4);
if (p1 == p2) { //p1.operator==(p2)와 같다.
cout << "p1 == p2" << endl;
}
if (p2 == p3) { //p2.operator==(p3)와 같다.
cout << "p2 == p3" << endl;
}
if (p1 == p3) { //p1.operator==(p3)와 같다.
cout << "p1 == p3" << endl;
}
if (p1 != p2) { //p1.operator!=(p2)와 같다.
cout << "p1 != p2" << endl;
}
if (p2 != p3) { //p2.operator!=(p3)와 같다.
cout << "p2 != p3" << endl;
}
if (p1 != p3) { //p1.operator!=(p3)와 같다.
cout << "p1 != p3" << endl;
}
return 0;
}
4. 전역함수를 이용한 연산자 오버로딩
위의 +연산자 오버로딩을 이용하여 만들어 보면,
#include <iostream>
using namespace std;

class Point {
	int x;
	int y;

public:
	Point(int _x = 0, int _y = 0) :x(_x), y(_y) { }
	void Print() const { cout << x << "," << y << endl; }
	int GetX() const { return x; } //x의 getter
	int GetY() const { return y; } //y의 getter
};

const Point operator+ (const Point& valueL, const Point& valueR){
	return Point(valueL.GetX() + valueR.GetX(), valueL.GetY() + valueR.GetY());
}


int main() {
	Point p1(3, 4), p2(5, 6);
	Point p3;

	p3 = p1 + p2;
	p3.Print();

	return 0;
}
전역 함수를 이용하면 Point클래스의 private 멤버인 x,y에 접근할 수 없어서 getter를 이용하거나 프렌드 함수를 사용한다.
프렌드 함수는 private 및 protected 멤버에 접근할 수 있다.
#include <iostream>
using namespace std;
class Point {
int x;
int y;
public:
Point(int _x = 0, int _y = 0) :x(_x), y(_y) { }
void Print() const { cout << x << "," << y << endl; }
friend const Point operator+ (const Point& valueL, const Point& valueR);
};
const Point operator+ (const Point& valueL, const Point& valueR){
return Point(valueL.x + valueR.x, valueL.y + valueR.y);
}
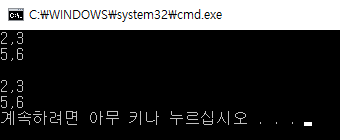
int main() {
Point p1(3, 4), p2(5, 6);
Point p3;
p3 = p1 + p2;
p3.Print();
return 0;
}5. 함수 호출 연산자 오버로딩(( )연산자)
객체를 함수처럼 동작하게 하는 연산자이다.
#include <iostream>
using namespace std;

struct FuncObject {
public:
	void operator()(int value) const{
		cout << "정수: " << value << endl;
	}
};

void Print1(int value) {
	cout << "정수: " << value << endl;
}

int main(){
	void(*Print2)(int) = Print1;
	FuncObject Print3;
	Print1(10); // 함수를 사용한 정수 출력
	Print2(10); // 함수 포인터를 사용한 정수 출력
	Print3(10); // 함수 객체를 사용한 정수 출력
	return 0;
}
몇 가지 함수 호출 연산자 오버로딩
#include <iostream>
using namespace std;

struct FuncObject {
public:
	void operator()(int value) const{
		cout << "정수: " << value << endl;
	}
	void operator()(int value1, int value2) const {
		cout << "정수: " << value1 <<',' << value2 << endl;
	}
	void operator()(int value1, int value2, int value3) const {
		cout << "정수: " << value1 << ',' << value2 <<',' << value3 << endl;
	}
};


int main(){
	FuncObject Print;
	Print(10); // 객체 생성 후 호출(암시적)
	Print(10, 20);
	Print(10, 20, 30);
	cout << endl;

	Print.operator()(10); // 객체 생성 후 호출(명시적)
	Print.operator()(10, 20);
	Print.operator()(10, 20, 30);
	cout << endl;

	FuncObject()(10); // 임시 객체로 호출(암시적)
	FuncObject()(10, 20);
	FuncObject()(10, 20, 30);
	cout << endl;

	FuncObject().operator()(10); // 임시 객체로 호출(명시적)
	FuncObject().operator()(10, 20);
	FuncObject().operator()(10, 20, 30);
	cout << endl;

	return 0;
}
6. 배열 인덱스 연산자 오버로딩([ ]연산자)
Point의 [ ]연산자 중복
#include <iostream>
using namespace std;

class Point {
	int x;
	int y;

public:
	Point(int _x = 0, int _y = 0) :x(_x), y(_y) { }
	void Print() const { cout << x << "," << y << endl; }

	int operator[](int idx) const {
		if (idx == 0) return x;
		else if (idx == 1) return y;
		else throw "안되잖아! 정지가 안돼!";
	}
};

int main() {
	Point pv(3, 4);
	pv.Print();

	cout << pv[0] << ',' // pv.operator[](0)호출
		<< pv[1] << endl; //pv.operator[](1)호출
	return 0;
}
정수를 저장하는 간단한 Array 클래스
#include <iostream>
using namespace std;

class Array {
	int *arr;
	int size;
	int capacity;

public:
	Array(int cap = 100) :arr(0), size(0), capacity(cap) {
		arr = new int[capacity];
	}
	~Array() {
		delete[] arr;
	}

	void Add(int data) {
		if (size < capacity) arr[size++] = data;
	}

	int Size() const {
		return size;
	}

	int operator[](int idx) const {
		return arr[idx];
	}
};

int main() {
	Array ar(10);

	ar.Add(10);
	ar.Add(20);
	ar.Add(30);

	for (int i = 0;i< ar.Size();i++) {
		cout << ar[i] << endl; // ar.operator[](i) 와 같다.
	}

	return 0;
}
ar[i]는 ar.operator를 호출해 ar 객체의 i번째 원소 객체를 반환받는다.
그래서 arr[0]은 10, arr[1]은 20, arr[2]은 30이다.
상수 객체를 반환하는 []연산자 오버로딩
#include <iostream>
using namespace std;

class Array {
	int *arr;
	int size;
	int capacity;

public:
	Array(int cap = 100) :arr(0), size(0), capacity(cap) {
		arr = new int[capacity];
	}
	~Array() {
		delete[] arr;
	}

	void Add(int data) {
		if (size < capacity) arr[size++] = data;
	}

	int Size() const {
		return size;
	}

	int operator[](int idx) const {
		return arr[idx];
	}
	int& operator[](int idx){
		return arr[idx];
	}
};

int main() {
	Array ar(10);

	ar.Add(10);
	ar.Add(20);
	ar.Add(30);

	cout << ar[0] << endl;
	cout << endl;

	const Array& ar2 = ar;
	cout << ar2[0] << endl;
	cout << endl;

	ar[0] = 100; //ar.operator[](int)를 호출
	//ar2[0] = 100; error! 상수 객체(값)를 반환하므로 대입 불가
	cout << ar[0] << endl;
	return 0;
}
7. 메모리 접근, 클래스 멤버 접근 연산자 오버로딩(*.-> 연산자)
point 클래스의 일반 포인터 사용
#include <iostream>
using namespace std;

class Point {
	int x;
	int y;

public:
	Point(int _x = 0, int _y = 0) :x(_x), y(_y) { }
	void Print() const { cout << x << "," << y << endl; }
};


int main() {
	Point *p1 = new Point(2, 3);// 메모리 할당
	Point *p2 = new Point(5, 6);// 메모리 할당

	p1->Print(); // p1의 멤버 함수 호출
	p2->Print(); // p2의 멤버 함수 호출

	delete p1; //메모리 제거
	delete p2; //메모리 제거

	return 0;
}
스마트 포인터 PointPtr 클래스 생성
#include <iostream>
using namespace std;

class Point {
	int x;
	int y;

public:
	Point(int _x = 0, int _y = 0) :x(_x), y(_y) { }
	void Print() const { cout << x << "," << y << endl; }
};

class PointPtr {
	Point *ptr;
public:
	PointPtr(Point *p):ptr(p){ }
	~PointPtr() {
		delete ptr;
	}

	Point * operator->() const {
		return ptr;
	}
};

int main() {
	PointPtr p1 = new Point(2, 3);// 메모리 할당
	PointPtr p2 = new Point(5, 6);// 메모리 할당

	p1->Print(); // p1.operator->() ->Print() 호출
	p2->Print(); // p2.operator->() ->Print() 호출

	//p1,p2의 소멸자에서 Point 동적 객체를 자동으로 메모리에서 제거한다.

	return 0;
}
*연산자 오버로딩
#include <iostream>
using namespace std;

class Point {
	int x;
	int y;

public:
	Point(int _x = 0, int _y = 0) :x(_x), y(_y) { }
	void Print() const { cout << x << "," << y << endl; }
};

class PointPtr {
	Point *ptr;
public:
	PointPtr(Point *p) :ptr(p) { }
	~PointPtr() {
		delete ptr;
	}

	Point * operator->() const {
		return ptr;
	}
	Point & operator*() const {
		return *ptr;
	}

};

int main() {
	Point* p1 = new Point(2, 3);// 메모리 할당
	PointPtr p2 = new Point(5, 6);// 메모리 할당

	p1->Print(); // p1->Print() 호출
	p2->Print(); // p2.operator->() ->Print() 호출
	cout << endl;

	(*p1).Print(); //(*p1).Print()호출
	(*p2).Print(); //p2.operator*().Print()호출

	delete p1;
	//p2의 소멸자에서 Point 동적 객체를 자동으로 메모리에서 제거한다.

	return 0;
}
C++ Cast
static cast
static_cast<바꿀 자료형>(대상);
기본 클래스에 대한 포인터를 파생 클래스에 대한 포인터로 변환하는 등의 작업에 사용할 수 있습니다.
int i = 1;
char c = i; //묵시적 캐스트
char c = (char)i; //C언어에서의 명시적 캐스트
char c = static_cast<char>(i); // c++ 명시적 캐스트
const_cast
const_cast<바꿀 자료형>(대상)
포인터에 const 속성을 부여하거나 제거할 때 사용합니다.
char arr[] = "Hello";
const char* c = arr;
char* cast = const_cast<char*>(c);
reinterpret_cast
reinterpret_cast<바꿀 자료형>(대상)
임의의 포인터 타입끼리 변환을 허용하는 캐스트 연산자입니다.
struct Data
{
	std::string	str;
	int			value;
};

uintptr_t	serialize(Data* ptr)
{
	return	reinterpret_cast<uintptr_t>(ptr);
}

Data* deserialize(uintptr_t raw)
{
	return reinterpret_cast<Data *>(raw);
}

int		main(void)
{
	Data	ptr;
	ptr.str = "serialization";
	ptr.value = 1234;

	uintptr_t raw = serialize(&ptr);
	Data *deserial = deserialize(raw);
}
dynamic_cast
dynamic_cast<바꿀 자료형>(대상)
상속 계층 관계를 가로지르거나 다운캐스팅시 사용되는 캐스팅 연산자입니다. 기본 클래스 객체에 대한 포인터(*)나 레퍼런스(&)의 타입을 자식 클래스, 혹은 형제 클래스의 타입으로 변환 할 수 있습니다.
void	identify(Base* p)
{
	if (dynamic_cast<A*>(p))
		std::cout << "A Pointer identify." << std::endl;
	else if (dynamic_cast<B*>(p))
		std::cout << "B Pointer identify." << std::endl;
	else if (dynamic_cast<C*>(p))
		std::cout << "C Pointer identify." << std::endl;
}

void	identify(Base& p)
{
	try
	{
		(void)dynamic_cast<A&>(p);
		std::cout << "A Reference identify." << std::endl;
	}
	catch(const std::exception& e){ }

	try
	{
		(void)dynamic_cast<B&>(p);
		std::cout << "B Reference identify." << std::endl;
	}
	catch(const std::exception& e){ }

	try
	{
		(void)dynamic_cast<C&>(p);
		std::cout << "C Reference identify." << std::endl;
	}
	catch(const std::exception& e){ }
}
여기서 포인터로 받아왔을 때는 if문으로 나눌 수 있지만 참조자로 받아오면 try catch문으로 나눠야 합니다.
Template
일반 템플릿 예제
함수 템플릿: 여러 함수를 만들어내는 함수의 틀
클래스 템플릿: 여러 클래스를 만들어내는 클래스의 틀
정수, 실수, 문자열 출력 오버로딩 함수와 함수 템플릿 비교
//정수, 실수, 문자열 출력 오버로딩 함수
#include <iostream>
using namespace std;

void Print(int a, int b) {
	cout << a << ", " << b << endl;
}

void Print(double a, double b) {
	cout << a << ", " << b << endl;
}
void Print(const char *a, const char *b) {
	cout << a << ", " << b << endl;
}
int main() {
	Print(10, 20); // 정수 출력
	Print(4.321, 11.234); // 실수 출력
	Print("LOVE", "you"); // 문자열 출력
	return 0;
}
//함수 템플릿
#include <iostream>
using namespace std;
template<typename T>
void Print(T a, T b) {
cout << a << ", " << b << endl;
}
int main() {
Print(10, 20); // 정수 출력
Print(4.321, 11.234); // 실수 출력
Print("LOVE", "you"); // 문자열 출력
return 0;
}
함수 템플릿 정의는 함수 앞에 template<typename T>라는 키워드를 붙인다.
T는 템플릿 매개변수이며 클라이언트에서 결정한다.
클라이언트가 직접 타입을 지정하고 명시적으로 함수를 호출할 수 있다.
결과는 아래와 같다.
함수 템플릿의 명시적 타입 지정 후 호출
//함수 템플릿의 명시적 타입 지정 후 호출
#include <iostream>
using namespace std;

template<typename T>
void Print(T a, T b) {
	cout << a << ", " << b << endl;
}

int main() {
	Print<int>(10, 20); // 정수 출력
	Print<double>(4.321, 11.234); // 실수 출력
	Print<const char*>("LOVE", "you"); // 문자열 출력
	return 0;
}
두 개의 매개변수를 갖는 함수 템플릿
//두 개의 매개변수를 갖는 함수 템플릿
#include <iostream>
using namespace std;
template <typename T1, typename T2>
void Print(T1 a, T2 b) {
cout << a << ", " << b << endl;
}
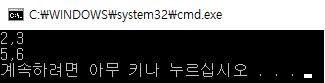
int main() {
Print(10, 11.123); // 정수, 실수 출력
Print("Hello", 28); // 문자열, 정수 출력
Print("LOVE", 100); // 문자열, 정수 출력
return 0;
}템플릿을 지정할 때 template<typename T>를 template<class T>로 사용할 수 있다.
Swap()함수를 템플릿 버전으로 만들 수 있다.
Swap()템플릿 함수
//Swap()템플릿 함수
#include <iostream>
using namespace std;
template <typename T>
void Swap(T &a, T &b) {
T temp = a;
a = b;
b = temp;
}
int main() {
int n1 = 10, n2 = 20;
double d1 = 1.1, d2 = 2.2;
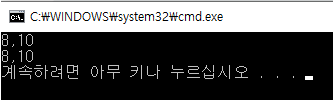
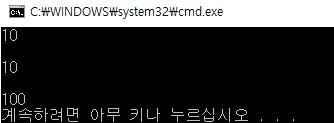
cout << n1 << ", " << n2 << endl;
Swap(n1, n2);
cout << n1 << ", " << n2 << endl;
cout << endl;
cout << d1 << ", " << d2 << endl;
Swap(d1, d2);
cout << d1 << ", " << d2 << endl;
return 0;
}
배열 출력 함수 템플릿
//배열 출력 함수 템플릿
#include <iostream>
using namespace std;
template<typename T, int size>
void PrintArray(T* arr) {
for (int i = 0; i < size; i++){
cout << "[" << i << "]: " << arr[i] << endl;
}
cout << endl;
}
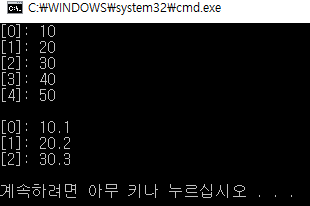
int main() {
int arr1[5] = {10, 20, 30, 40, 50};
PrintArray<int, 5>(arr1); //명시적 호출
double arr2[3] = {10.1, 20.2, 30.3};
PrintArray<double, 3>(arr2); //명시적 호출
return 0;
}
함수 템플릿 Print()의 특수화 버전
//Point 객체만의 함수 템플릿 특수화 지원
#include <iostream>
using namespace std;
class Point {
int x;
int y;
public:
explicit Point(int _x=0, int _y=0): x(_x), y(_y){ }
void Print() const { cout << x << "," << y << endl; }
};
//일반화 함수 템플릿
template<typename T>
void Print(T a) {
cout << a << endl;
}
//특수화 함수 템플릿
template< >
void Print(Point a) {
cout << "Print 특수화 버전: ";
a.Print();
}
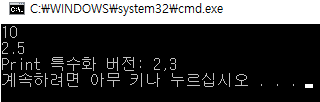
int main() {
int n(10);
double d(2.5);
Point pt(2, 3);
Print(n); //Print<int>(n) 일반화 버전 호출
Print(d); //Print<double>(d) 일반화 버전 호출
Print(pt); //Print<Point>(pt) 특수화 버전 호출, 특수화 함수 템플릿을 안했다면 에러남
return 0;
}
클래스 템플릿 ObjectInfo를 특수화해 string 정보만 출력하는 template<>class ObjectInfo<string>클래스를 추가한다.
일반화버전: template<typename T> class ObjectInfo
특수화버전: template<> class ObjectInfo<string>
//Objectinfo 특수화 버전
#include <iostream>
#include <string>
using namespace std;
template<typename T>
class ObjectInfo {
T data;
public:
ObjectInfo(const T& d) : data(d) { }
void Print() {
cout << "타입: " << typeid(data).name() << endl;
cout << "크기: " << sizeof(data) << endl;
cout << "값: " << data << endl;
cout << endl;
}
};
template< > //T를 string으로 특수화(클래스 템플릿 특수화)
class ObjectInfo<string> {
string data;
public:
ObjectInfo(const string& d) : data(d) { }
void Print() {
cout << "타입: " << "string" << endl;
cout << "문자열 길이: " << data.size() << endl;
cout << "값: " << data << endl;
cout << endl;
}
};
int main() {
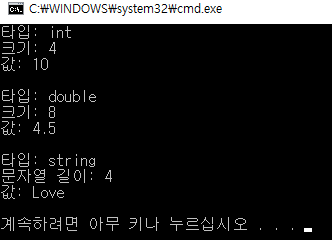
ObjectInfo<int> d1(10);
d1.Print(); // 객체 정보 출력
ObjectInfo<double> d2(4.5);
d2.Print(); // 객체 정보 출력
ObjectInfo<string> d3("Love");
d3.Print(); // 객체 정보 출력
return 0;
}
STL을 위한 템플릿 예제
함수 템플릿 For_each, Print
//함수 템플릿 For_each, Print
#include <iostream>
#include <string>
using namespace std;

template<typename IterT, typename Func>
void For_each(IterT begin, IterT end, Func pf) {
	while (begin != end) {
		pf(*begin++);
	}
}

template<typename T>
void Print(T data) {
	cout << data << " ";
}

int main() {
	int arr[5] = { 10, 20, 30, 40 ,50 };
	For_each(arr, arr + 5, Print<int>); // 정수 출력
	cout << endl;

	string sarr[3] = { "adc", "ADCDE", "Hello!" };
	For_each(sarr, sarr + 3, Print<string>); // 문자열 출력

	return 0;
}
함수 객체를 사용한 For_each()
//함수 객체를 사용한 For_each()
#include <iostream>
#include <string>
using namespace std;

template<typename IterT, typename Func>
void For_each(IterT begin, IterT end, Func pf) {
	while (begin != end) {
		pf(*begin++);
	}
}

template<typename T>
struct PrintFunctor {
	string sep; //출력 구분자 정보
	explicit PrintFunctor(const string& s=" "): sep(s){ }
	void operator()(T data) const {
		cout << data << sep;
	}
};

int main() {
	int arr[5] = { 10, 20, 30, 40 ,50 };
	For_each(arr, arr + 5, PrintFunctor<int>());
	cout << endl;

	string sarr[3] = { "adc", "ADCDE", "Hello!" };
	For_each(sarr, sarr + 3, PrintFunctor<string>("*\n"));
	cout << endl;
	return 0;
}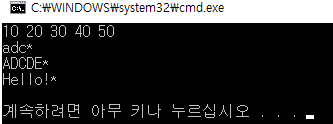
정수는 디폴트 출력 구분자로 " "(공백 문자열)을 사용하며 문자열은 출력 구분자로 "*\n"을 사용한다.
템플릿 Less, Greater
//템플릿 Less, Greater
#include <iostream>
#include <functional> //STL less와 greater 헤더
using namespace std;
template<typename T>
struct Less {
bool operator()(T a, T b) {
return a < b;
}
};
template<typename T>
struct Greater {
bool operator()(T a, T b) {
return a > b;
}
};
int main() {
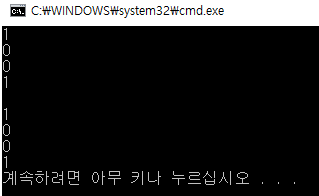
cout << Less<int>()(10, 20) << endl; //사용자 Less, Greater 사용
cout << Less<int>()(20, 10) << endl;
cout << Greater<int>()(10, 20) << endl;
cout << Greater<int>()(20, 10) << endl;
cout << endl;
cout << less<int>()(10, 20) << endl; //STL의 less, greater 사용
cout << less<int>()(20, 10) << endl;
cout << greater<int>()(10, 20) << endl;
cout << greater<int>()(20, 10) << endl;
return 0;
}
pair 클래스
//pair 클래스
#include <iostream>
#include <string>
using namespace std;
template<typename T1, typename T2>
struct UserPair {
T1 first;
T2 second;
UserPair(const T1& ft, const T2& sd): first(ft), second(sd){ }
};
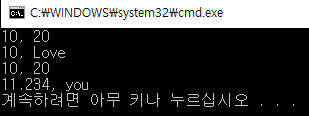
int main() {
UserPair<int, int> p1(10, 20);
cout << p1.first << ", " << p1.second << endl;
UserPair<int, string> p2(10, "Love");
cout << p1.first << ", " << p2.second << endl;
pair<int, int> p3(10, 20); // STL의 pair
cout << p3.first << ", " << p3.second << endl;
pair<double, string> p4(11.234, "you"); // STL의 pair
cout << p4.first << ", " << p4.second << endl;
return 0;
}