Node.js 서버에서 google drive api 사용
google drive api를 사용하면 node js 를 사용해서 구글드라이브를 조작할 수 있습니다
googleapis - npm (npmjs.com)
구글api 라이브러리
api를 사용하기위해서는 미리 구글 클라우드 플랫폼에 사용할 api가 활성화된 프로젝트가 필요하고
미리 인증방법에 대해 설정이되어 있어야 합니다
제가사용할 api 인증방법은 oauth입니다
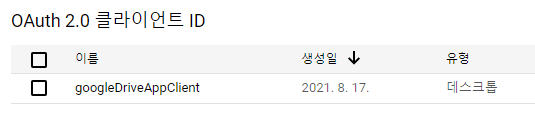
프로젝트 설정 내용은 구글 공식 문서와 유튜브에 자세하게 나와 있으니 생략하겠습니다
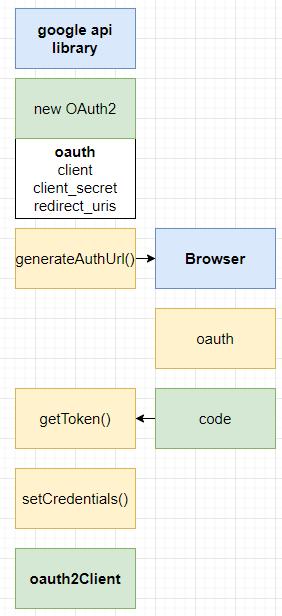
구글 api 라이브러리 oauth2 인증 과정
-
구글클라우드플랫폼에서 만든 oauth2 client 의 id, secret, redirect_uris 를 인자로 OAuth2 객체를 만든다
-
generateAuthUrl 메서드로 생성된 url에 브라우저로 접속한다
-
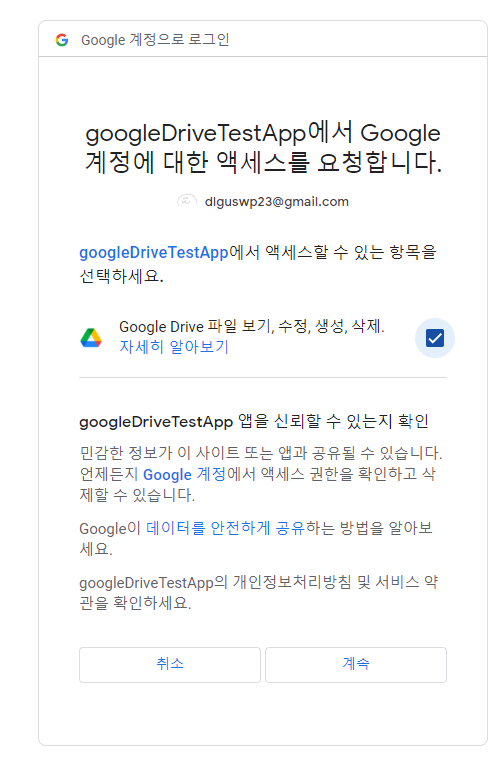
구글로그인후 oauth의 scope들에 대한 접근허가를 한다
-
받은 code를 getToken 메서드에 입력한다
-
받은 Credentials 를 OAuth2 객체에 setCredentials 메서드로 입력한다
OAuth2 인증
import { google } from 'googleapis'
import { readFile } from 'fs/promises';
import enableDestroy from 'server-destroy';
import open from 'open';

import http from 'http'
import url from 'url'

const SCOPES = [
    'https://www.googleapis.com/auth/drive',
];
const PORT = 3000

const CLIENT_INSTALLED_PATH = './client_secret.json'
// const TOKEN_PATH = './credentials.json'

function getJsonFile(filePath: string) {
    return readFile(filePath, { encoding: 'utf-8' })
        .then(str => JSON.parse(str))
        .catch((err) => false)
}

interface ClientKeys {
    client_id: string
    client_secret: string
    redirect_uris: string[]
}

interface ClientJson {
    installed: ClientKeys
}

let client: ClientJson | boolean = await getJsonFile(CLIENT_INSTALLED_PATH)
if (typeof client === 'boolean') {
    console.error('no client json file');
    process.exit(0)
}

let keys = client.installed

function GetCodeFromHttpServer(port: number): Promise<string> {
    return new Promise((resolve, reject) => {
        const server = http.createServer((req, res) => {
            if (!req.url) return;
            const qs = new url.URL(req.url, `http://localhost:${port}`).searchParams
            const code = qs.get('code')
            if (typeof code === 'string') {
                server.destroy(() => resolve(code))
            }
        }).listen(port)
        enableDestroy(server)
    })
}

function openBrowserGetOAuth2Code(authUrl: string) {
    open(authUrl, { wait: false}).then(cp => cp.unref());
}

async function authOAuth2(scopes: string[]) {
    const oauth2Client = new google.auth.OAuth2(
        keys.client_id,
        keys.client_secret,
        keys.redirect_uris[0]
    );

    openBrowserGetOAuth2Code(oauth2Client.generateAuthUrl({
        access_type: 'offline',
        scope: SCOPES.join(' '),
    }))

    const code = await GetCodeFromHttpServer(PORT)
    const { tokens } = await oauth2Client.getToken(code)
    oauth2Client.setCredentials(tokens)
    return oauth2Client
}


authOAuth2(SCOPES).then(console.log)

구글 인증 코드 복사

http로 코드 전송
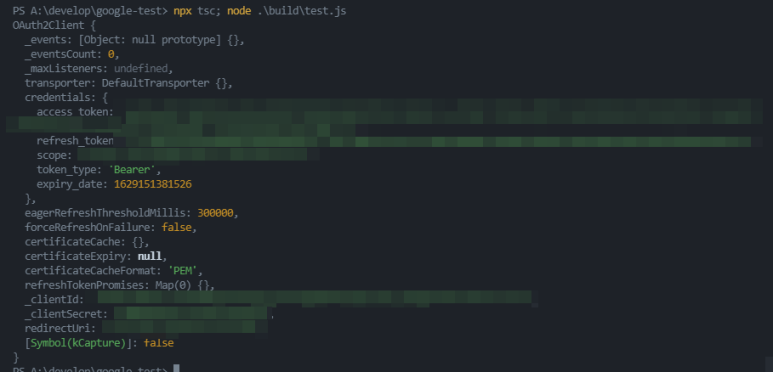
정상적으로 인증이 완료되었다면
OAuth2Client 객체의 credentials 에 위와같이 access_token 이 들어있습니다
매번 브라우저로 oauth 인증하는게 귀찮다면 한번만 인증을 한뒤
위 credentials를 따로 파일로 저장해두고
oauth2Client.setCredentials(JSON.parse(tokens))위와같이 불러와서 사용하면 됩니다
구글드라이브에 파일 업로드
const oauth2Client = await authOAuth2(SCOPES)

const drive = google.drive({
    version: 'v3',
    auth: oauth2Client
})

const res = await drive.files.create({
    requestBody: {
      name: 'textfile',
      mimeType: 'text/plain'
    },
    media: {
      mimeType: 'text/plain',
      body: 'Hello World Google Dirve Api'
    }
});
console.log(res);
저장된 파일 구글드라이브에서 확인

파일 내용 확인

자세한 정보는 구글드라이브 api 문서에서 확인할 수 있습니다

풀스택 개발자를 꿈꾸는 나링🐥