버전...
줌인 줌아웃 기능을 드디어 구현했다!!!
정말 온갖 깃허브와 구글링을 다 찾아서 드디어 해결했다...!!
분명히 pixi-viewport를 사용하면 줌인 줌아웃이 .wheel()이거로 쉽게 되어야 하는데, 계속 적용이 안됐다.
알고보니 버전 문제였고...
https://github.com/davidfig/pixi-viewport/issues/441
해당 이슈를 참고해서 해결했다.
인터렉션이 제대로 걸리지 않는 문제인데, 따라서 이벤트 객체를 다른 방식으로 선언해서 사용해야했다.
해결 키
	// 이 부분을 처리해주어야 했다.
    const events = new EventSystem(app.renderer);
    events.domElement = app.renderer.view as any;

    // Viewport 생성
    const viewport = new Viewport({
      screenWidth: width,
      screenHeight: height,
      worldWidth: 1000,
      worldHeight: 1000,
      events,
    });
    app.stage.addChild(viewport);

    viewport
      .drag({
        clampWheel: false,
      })
      .pinch()
      .wheel({
        percent: 0.1,
        trackpadPinch: true,
      })
      .decelerate()
      .clampZoom({
        minWidth: 100,
        minHeight: 100,
        maxWidth: 4000,
        maxHeight: 4000,
      });
완성된 코드
import React, { useEffect, useRef } from 'react';
import { Application, Graphics, EventSystem } from 'pixi.js';
import { Viewport } from 'pixi-viewport';
import {
  SimulationNodeDatum,
  forceCenter,
  forceCollide,
  forceLink,
  forceManyBody,
  forceRadial,
  forceSimulation,
  scaleOrdinal,
} from 'd3';
import { Graph, GraphLink, GraphNode } from '@/types/graph/GraphProps';

const PixiGraph = ({ nodes, links }: Graph) => {
  const pixiContainer = useRef(null);

  useEffect(() => {
    const width = window.innerWidth;
    const height = window.innerHeight;

    const app = new Application({
      innerWidth: width,
      innerHeight: height,
      backgroundAlpha: 0,
      antialias: true,
      resizeTo: window,
    });
    document.body.appendChild(app.view);

    const events = new EventSystem(app.renderer);
    events.domElement = app.renderer.view as any;

    // create viewport
    const viewport = new Viewport({
      screenWidth: width,
      screenHeight: height,
      worldWidth: 1000,
      worldHeight: 1000,
      // interaction: app.renderer.events,

      events, // the interaction module is important for wheel to work properly when renderer.view is placed or scaled
    });
    app.stage.addChild(viewport);

    viewport
      .drag({
        clampWheel: false,
      })
      .pinch()
      .wheel({
        smooth: 5,
        percent: 0.1,
        trackpadPinch: true,
      })
      .decelerate()
      .clampZoom({
        minWidth: 100,
        minHeight: 100,
        maxWidth: 4000,
        maxHeight: 4000,
      });

    // viewport.on('wheel', e => {
    //   console.log('Wheel event:', e);
    // });

    const starColors = [
      0xd6ad5c, // 노
      0x5c5cd6, // 남
      0x5cd65c, // 진초
      0xad5cd6, // 보라
      0x547b87, // 청록
      0xd65c5c, // 주
      0xc1a0b2, // 연핑크
      0xe4e6e7, // 거의 흰색
      0xc79ae5, // 연핑크
      0x6495ed, // 하늘
      0xadd65c, // 연초
      0xd65cd6, // 핑
    ];

    // const events = new EventSystem(app.renderer);
    // events.domElement = app.renderer.view as HTMLCanvasElement;

    const colorScale = scaleOrdinal(starColors);

    const linkGraphics = new Graphics();
    viewport.addChild(linkGraphics); // 링크를 노드 아래에 그립니다.

    // 그래프 노드인지
    function isGraphNode(node: SimulationNodeDatum): node is GraphNode {
      return (node as GraphNode).id !== undefined;
    }

    const simulation = forceSimulation(nodes)
      .force(
        'link',
        forceLink(links)
          .id((node: GraphNode) => {
            if (isGraphNode(node)) {
              return node.id;
            }
            return '';
          })
          .distance(40)
          .strength(0.9),
      )
      .force('charge', forceManyBody().strength(-50))
      .force('center', forceCenter(app.screen.width / 2, app.screen.height / 2))
      .force('collide', forceCollide().radius(25))
      .force('radial', forceRadial(0, app.screen.width, app.screen.height / 2));

    simulation.on('tick', () => {
      linkGraphics.clear(); // 링크 그래픽스를 클리어
      links.forEach(link => {
        if (link.source.x && link.source.y && link.target.x && link.target.y) {
          linkGraphics.lineStyle(1, 0x999999, 1); // 선 스타일 설정
          linkGraphics.moveTo(link.source.x, link.source.y);
          linkGraphics.lineTo(link.target.x, link.target.y);
        }
      });

      nodes.forEach((node: GraphNode) => {
        const nodeGraphics = node.graphics || new Graphics();
        nodeGraphics.clear();
        nodeGraphics.beginFill(colorScale(node.group));
        nodeGraphics.drawCircle(0, 0, 5);
        nodeGraphics.x = node.x;
        nodeGraphics.y = node.y;
        nodeGraphics.endFill();

        if (!node.graphics) {
          viewport.addChild(nodeGraphics);
          node.graphics = nodeGraphics;
        }
      });
    });
    return () => {
      app.destroy(true, {
        children: true,
        texture: true,
        baseTexture: true,
      });
    };
  }, [nodes, links]);

  return <div ref={pixiContainer} />;
};

export default PixiGraph;
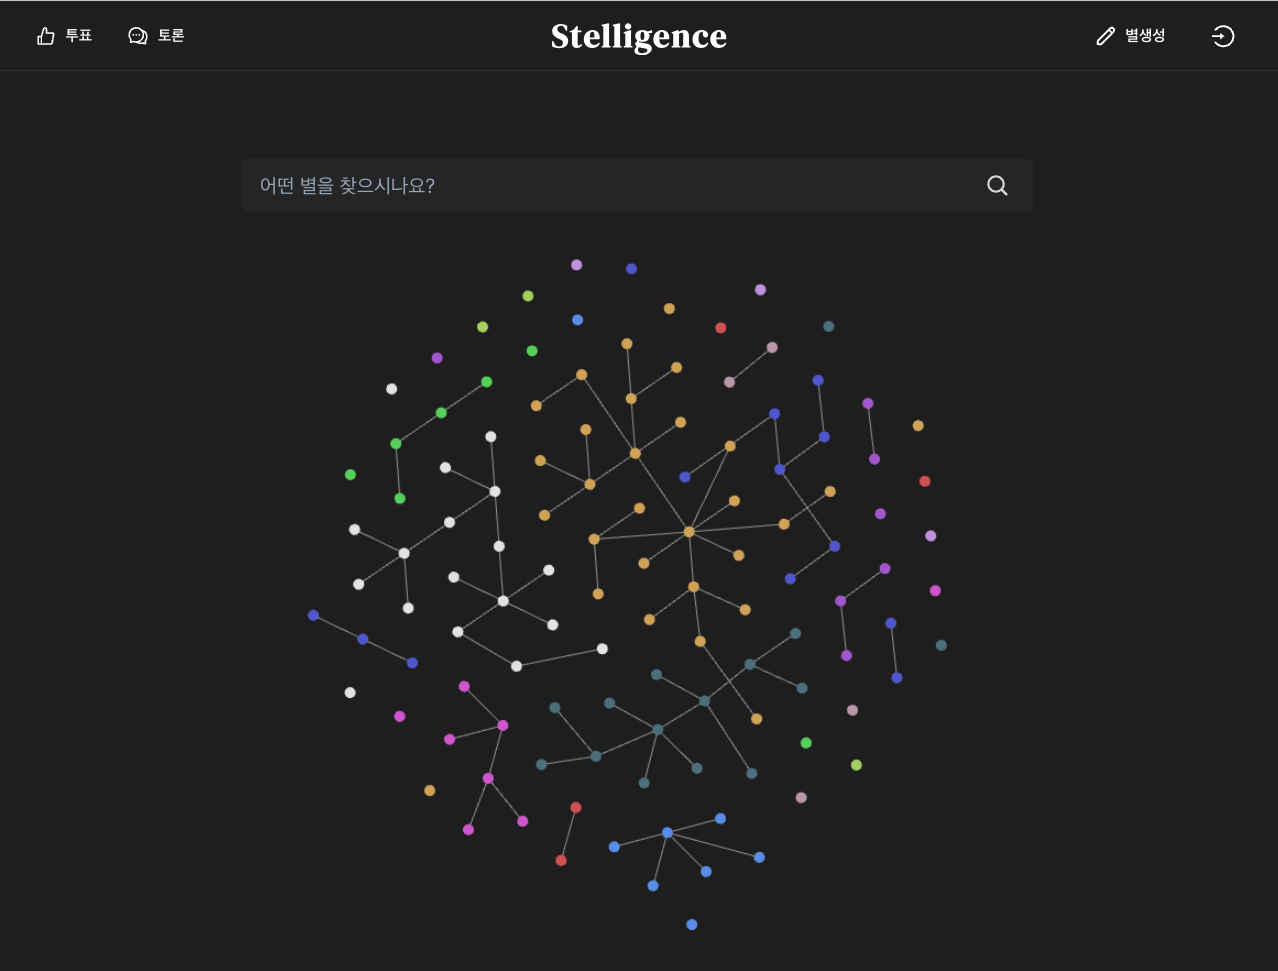
완성된 뷰
남은 일
이제 여기에 노드 클릭 시 해당 페이지로 이동 이벤트, 호버 시 그룹 색 설정 등의 인터렉션만 설정해주면 된다!!! 홧팅~~!!

개발은 즐거워
공부 잘하고 계신가요?