종이 시험지 자동 채점 프로그램 | Tensorflow Object Detection API | Ch3.5. 모델 학습 후 frozen_inference_graph.pb 로 inference 하기 & 모델 테스트
2021CapstoneDesign
모델 테스트를 위해서는 다음과 같은 과정이 필요합니다.
추론 그래프 추출
추론 그래프를 사용하여 객체 검출
추론그래프를 추출하기 위해서는 Tensorflow object Detection API에서 제공되는 export_inference_graph.py을 사용하면 됩니다.
추론그래프 추출
바로 본론으로 넘어가겠습니다. 챕터3에서 학습을 진행하면 체크포인트가 실행폴더에 저장되게 됩니다. 파일형태는 model.ckpt-xxxx와 같은 형태로 저장되며, 원하는 체크포인트 번호를 명령어에 입력해 추론그래프로 만들어주는 과정이 필요합니다. 명령어 코드는 아래에 작성되어 있으며, 제가 프로젝트를 진행하며 사용한 ipynb 코드는 깃허브를 통해 업로드 하였습니다.
! python export_inference_graph.py --input_type image_tensor --pipeline_config_path training/faster_rcnn_inception_resnet_v2_atrous_coco.config --trained_checkpoint_prefix samples/model.ckpt-xxxxx --output_directory inference_graph

이 과정에서 추론그래프를 생성할 수 있습니다. 추론그래프는 위와 같이 저장됩니다. 그 중 frozen_inference_graph.pb 파일이 모델 테스트를 위해 사용할 추론그래프 파일입니다.
추론 그래프를 이용한 객체 검출
추론그래프를 생성하였다면 test set으로 추론 결과를 시각화 하게 됩니다.
자세한 코드는 깃허브에 업로드 하였습니다.
추가로 각 코드에 대해 설명하겠습니다.
PATH_TO_FROZEN_GRAPH = 'inference_graph/frozen_inference_graph.pb'

detection_graph = tf.Graph()
with detection_graph.as_default():

    od_graph_def = tf.compat.v1.GraphDef()

    with tf.compat.v2.io.gfile.GFile(PATH_TO_FROZEN_GRAPH, 'rb') as f:

        serialized_graph = f.read()
        od_graph_def.ParseFromString(serialized_graph)

        tf.import_graph_def(od_graph_def, name = "")
먼저 앞에서 생성한 추론그래프를 불러옵니다.
PATH_TO_FROZEN_GRAPH 에서 저장된 추론그래프의 경로를 지정해주면 됩니다.
def run_inference_for_single_image(image, graph):
    with tf.compat.v1.Session(graph = graph) as sess:

        input_tensor = graph.get_tensor_by_name('image_tensor:0')

        target_operation_names = ['num_detections', 'detection_boxes',
                                  'detection_scores', 'detection_classes', 'detection_masks']
        tensor_dict = {}
        for key in target_operation_names:
            op = None
            try:
                op = graph.get_operation_by_name(key)

            except:
                continue

            tensor = graph.get_tensor_by_name(op.outputs[0].name)
            tensor_dict[key] = tensor

        if 'detection_masks' in tensor_dict:
            detection_boxes = tf.squeeze(tensor_dict['detection_boxes'], [0])

        output_dict = sess.run(tensor_dict, feed_dict = {input_tensor : [image]})

        output_dict['num_detections'] = int(output_dict['num_detections'][0])
        output_dict['detection_classes'] = output_dict['detection_classes'][0].astype(np.uint8)
        output_dict['detection_boxes'] = output_dict['detection_boxes'][0]
        output_dict['detection_scores'] = output_dict['detection_scores'][0]

        return output_dict
run_inference_for_single_image 함수입니다. 이 함수를 통해 output 딕셔너리를 return 하게 되는데, 이것은 하나의 이미지에 대해 객체가 있는 좌표, score, 클래스 number등을 정보에 저장하는 것입니다.
def draw_bounding_boxes(img, output_dict,count):
    boxlist = []
    height, width, _ = img.shape

    obj_index = output_dict['detection_scores'] > 0.8

    scores = output_dict['detection_scores'][obj_index]
    boxes = output_dict['detection_boxes'][obj_index]
    classes = output_dict['detection_classes'][obj_index]

    for i in range(len(boxes)):
      boxlist.append([boxes[i][0], boxes[i][1], boxes[i][2], boxes[i][3]])

    boxlist.sort(key=lambda x:x[1])
    print(boxlist)

    if(len(boxlist) >= 3):
      if(len(boxlist) == 4):
        if(boxlist[0][0] > boxlist[1][0]):
          boxlist[0], boxlist[1] = boxlist[1], boxlist[0]

        if(boxlist[2][0] > boxlist[3][0]):
          boxlist[2], boxlist[3] = boxlist[3], boxlist[2]
      else:
        if(boxlist[0][0] > boxlist[1][0]):
          boxlist[0], boxlist[1] = boxlist[1], boxlist[0]
    print(boxlist)

    count1 = 0
    for box in boxlist:
        count1 += 1

        cut_img = img[int(box[0] * height):int(box[2] * height), int(box[1] * width):int(box[3] * width)].copy()
        save_img = Image.fromarray(cut_img)
        save_img.save("data/images_choice/train/cut_jpgs/image_{0}{1}.jpg".format(count,count1))

    return img
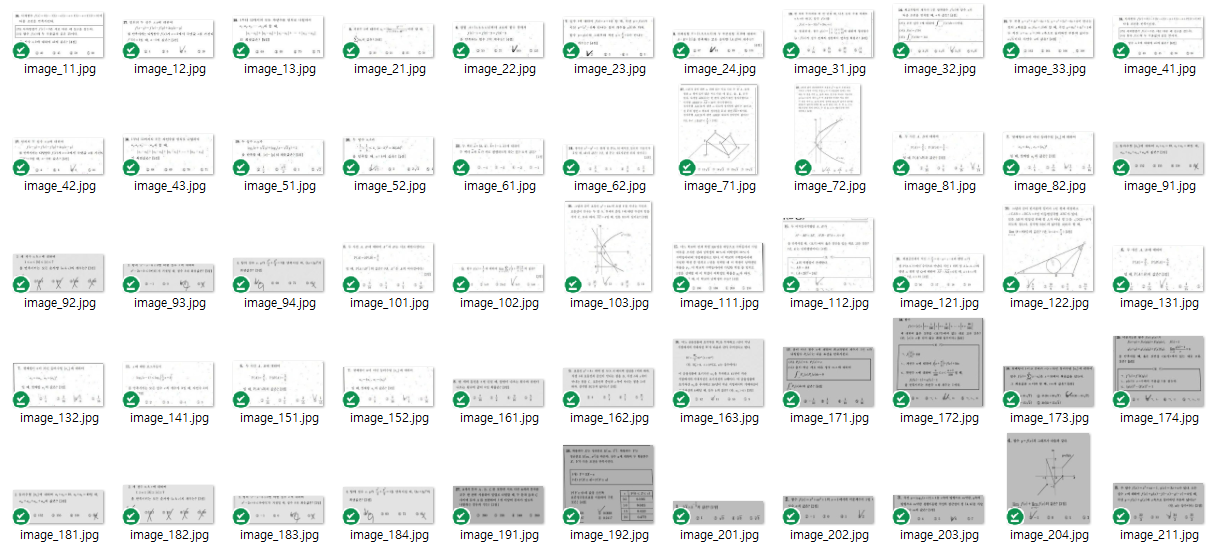
draw_bounding_boxes 함수입니다. 이것은 모델이 추론한 객체의 부분을 박스로 그려 return 하는 함수인데, 저는 이것에 추가로 박스 모양을 각각 잘라 저장하는 코드를 추가했습니다. 코드의 중간쯤에 if 문으로 작성된 코드는 위치별로 시험지 속 문제들을 순서대로 저장하기 위한 코드이며, 이 코드에 따라 페이지 속 문제들이 번호 순서대로 잘려 저장됩니다.
Cropping Question By Inference.ipynb

최종적으로 잘려진 이미지들은 위와 같이 디렉토리에 저장되고, 저는 이 이미지에서 항목들을 따로 라벨링하여 학습시켜주었습니다. 해당 내용은 챕터 4에 담겠습니다.
