Webpack + Vanilla JavaScript, HTML, CSS 개발 환경을 세팅해보자.
Webpack이란?
웹팩은 다수의 자바스크립트 파일(모듈)을 하나의 자바스크립트 파일로 묶어(번들링)주는 모듈 번들링이다.
요즘에는 페이지마다 html을 만들어서 뿌리는 형식이 아닌 하나의 html에 여러 자바스크립트를 연결해서 보여주는 SPA 형식으로 구현된 웹 페이지가 많다.
웹팩을 사용하면 여러 종속성으로 얽혀있는 자바스크립트 파일을 정리해서 하나로 빌드해주기 때문에 배포할 때도 엄청나게 \\ 유용하다.
Webpack 개발 환경 세팅
1. 초기 세팅
1-1. 프로젝트 폴더를 생성한다.
project
├── index.html
└── src
    └── index.js
1-2. npm을 초기화한다.
npm init -y
1-3. webpack을 설치한다.
npm install webpack-cli --save-dev
💡 최신 npm은
--save가 기본으로 설정되어 있어서 따로 적어주지 않아도 된다.
1-4. webpack 세팅을 위한 파일을 생성한다.
touch webpack.config.js
1-5. webpack 초기 세팅을 해준다.
(webpack.config.js)
// path 모듈 불러오기
const path = require('path');

module.exports = {
  entry: './src/index.js',
  output: {
    // 최종 번들링된 자바스크립트
    filename: 'main.js',
    // dist를 배포용 폴더로 사용
    path: path.resolve(__dirname, 'dist')
  }
}
- entry: 배포 전 작업용 자바스크립트 시작점
- output: 최종 배포용 번들링 파일 설정
1-6. package.json에서 build 명령어를 세팅해준다.
"scripts": {
  "build": "webpack"
},
1-7. build가 잘 되는지 테스트해본다.
npm run build
dist 폴더가 생성되는 것을 확인할 수 있다. 내부에는 main.js 파일이 생성되어 있다.
모든 자바스크립트 파일이 합쳐져서 main.js로 bundle될 것이다.
2. html 빌더 설치
2-1. html도 빌드될 수 있도록 플러그인을 설치해준다.
npm install html-webpack-plugin
2-2. webpack.config.js에 플러그인을 불러온 다음 설정해준다.
const path = require('path');
// html 플러그인을 불러오고
const HtmlWebpackPlugin = require('html-webpack-plugin');

module.exports = {
  entry: './src/index.js',
  output: {
    filename: 'main.js',
    path: path.resolve(__dirname, 'dist')
  },
  // 여기에 설정
  plugins: [new HtmlWebpackPlugin({
    template: "./index.html" // index.html을 기본 템플릿으로 반영할 수 있도록 설정
  })]
}
2-3. 다시 build하면 dist 폴더에 index.html도 생성되어 있는 것을 확인할 수 있다.
npm run build
base-project
├── dist
│   ├── index.html
│   └── main.js
├── index.html
├── package-lock.json
├── package.json
├── src
│   └── index.js
└── webpack.config.js
3. 화면에 실시간 업데이트 반영하기
webpack-dev-server를 설치하면 실시간으로 업데이트된 내용을 화면에서 확인할 수 있다.
3-1. webpack-dev-server를 설치한다.
npm install webpack-dev-server -D
💡
-D=--save-dav
3-2. webpack.config.js, package.json에 세팅해준다.
(webpack.config.js)
const path = require('path');
const HtmlWebpackPlugin = require('html-webpack-plugin');

module.exports = {
  entry: './src/index.js',
  output: {
    filename: 'main.js',
    path: path.resolve(__dirname, 'dist')
  },
  plugins: [new HtmlWebpackPlugin({
    template: "./index.html"
  })],
  devServer: {
    // 개발 서버가 dist 폴더를 제공할 수 있도록 설정
    static: {
      directory: path.resolve(__dirname, 'dist')
    },
    port: 8080
  }
}
(package.json)
"scripts": {
  "start": "webpack serve --open --mode=development",
  "build": "webpack --mode=production"
},
npm start: 개발 모드에서 사용하는 명령어이기 때문에--mode=development로 모드를 설정해준다.npm run build: 프로덕션 모드에서 사용하는 명령어이기 때문에--mode=production로 모드를 설정해준다.
3-3. 실행해본다.
npm start
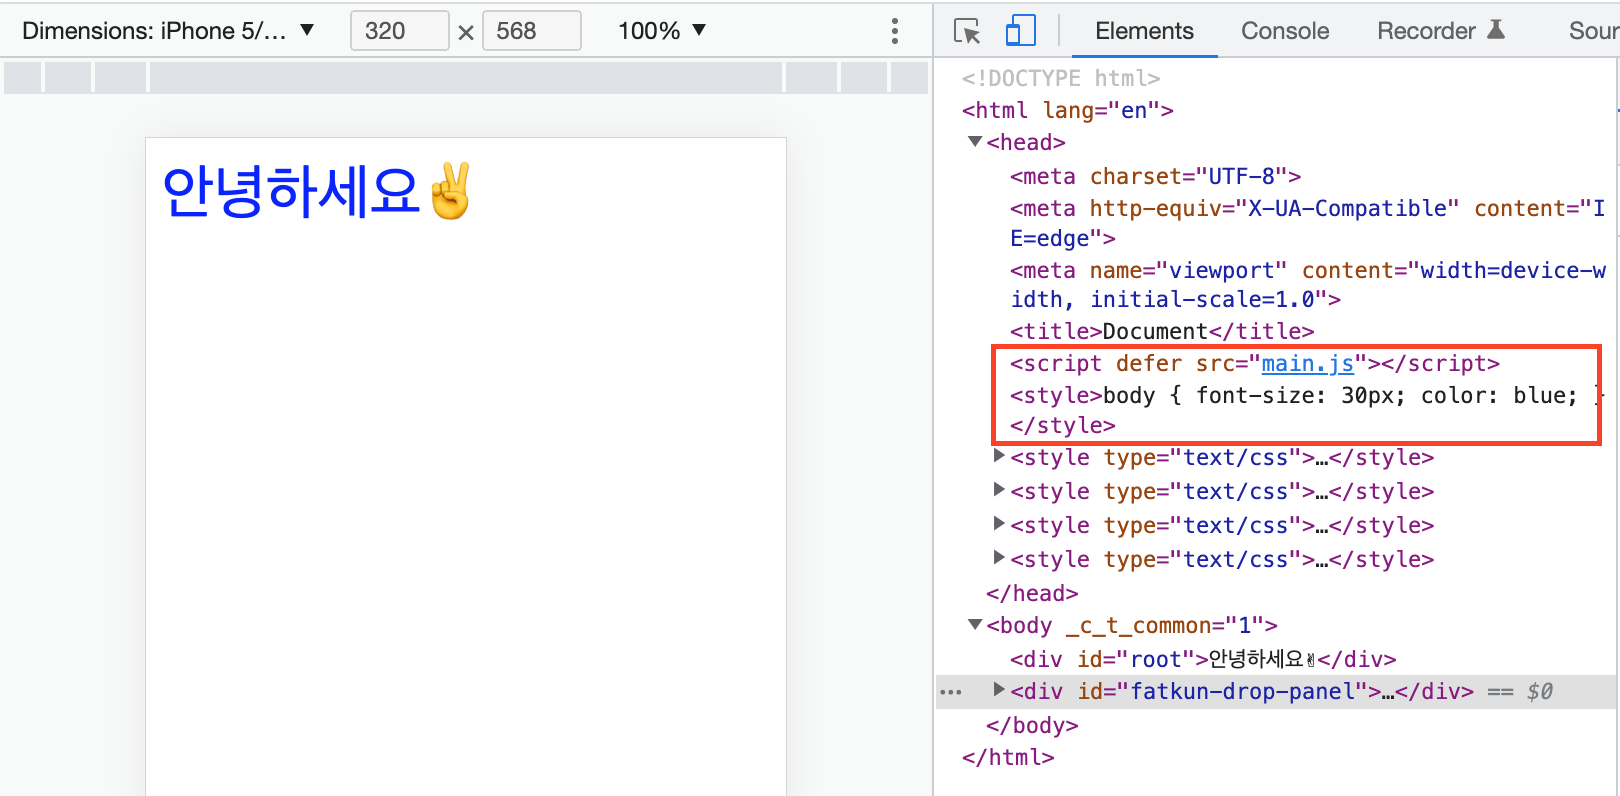
4. internal 방식 스타일 시트
head에 스타일을 직접 작성하는 방식으로 스타일을 적용해보자.
4-1. css-loader, style-loader 설치
npm install -D css-loader style-loader
- css-loader : css 파일을 읽어주는 역할
- style-loader : css를
<style>태그로 만들어서<head>내부에 삽입해준다.
4-2. 세팅
...

module.exports = {
  entry: './src/index.js',
  output: {
    ...
  },
  plugins: [new HtmlWebpackPlugin({
    ...
  })],
  module: {
    rules: [
      {
        test: /\.css$/,
		// use 배열은 뒤에서부터 적용된다.
        use: ["style-loader", "css-loader"]
      }
    ]
  },
  devServer: {
    ...
  }
}
4-3. src 폴더 안에 css를 생성 후 index.js에 import 해준다.
project
├── dist
│   ├── index.html
│   └── main.js
├── index.html
├── package-lock.json
├── package.json
├── src
│   ├── index.js
│   ├── style.css
│   └── util.js
└── webpack.config.js
(src/index.js)
// css를 가져온다
import './style.css'

document.getElementById("root").innerHTML = '안녕하세요✌️';
(src/style.css)
body {
	font-size: 30px;
	color: blue;
}
(index.html)
<!DOCTYPE html>
<html lang="en">
<head>
	<meta charset="UTF-8">
	<meta http-equiv="X-UA-Compatible" content="IE=edge">
	<meta name="viewport" content="width=device-width, initial-scale=1.0">
	<title>Document</title>
</head>
<body>
	<div id="root"></div>
	<!-- 스크립트를 삽입하지 않아도 웹팩에서 자동으로 스크립트를 삽입해준다. -->
	<!-- 아래 코드는 필요없다-->
	<!-- <script src="./dist/main.js"></script>  -->
</body>
</html>
4-4. 다시 실행해본다.
npm start
<head> 영역에 <script>와 <style>이 자동으로 들어와 있음을 확인할 수 있다.
5. external 방식 스타일 시트
외부 css 파일을 불러오는 방식으로 스타일을 적용해보자.
5-1. mini-css-extract-plugin 설치
npm install -D mini-css-extract-plugin
5-2. 세팅
(webpack.config.js)
const path = require('path');
const HtmlWebpackPlugin = require('html-webpack-plugin');
// 플러그인을 불러온다
const MiniCssExtractPlugin = require('mini-css-extract-plugin');

module.exports = {
  entry: './src/index.js',
  output: {
    ...
  },
  plugins: [
    new HtmlWebpackPlugin({
      template: "./index.html"
    }),
    // 플러그인 추가
    new MiniCssExtractPlugin({
      filename: "common.css",
    })
  ],
  module: {
    rules: [
      {
        test: /\.css$/,
        // 다시 설정한다.
        use: [MiniCssExtractPlugin.loader, "css-loader"]
      }
    ]
  },
  devServer: {
   ...
  }
}
5-3. 다시 실행해보면, 외부 파일로 삽입된 것을 확인할 수 있다.
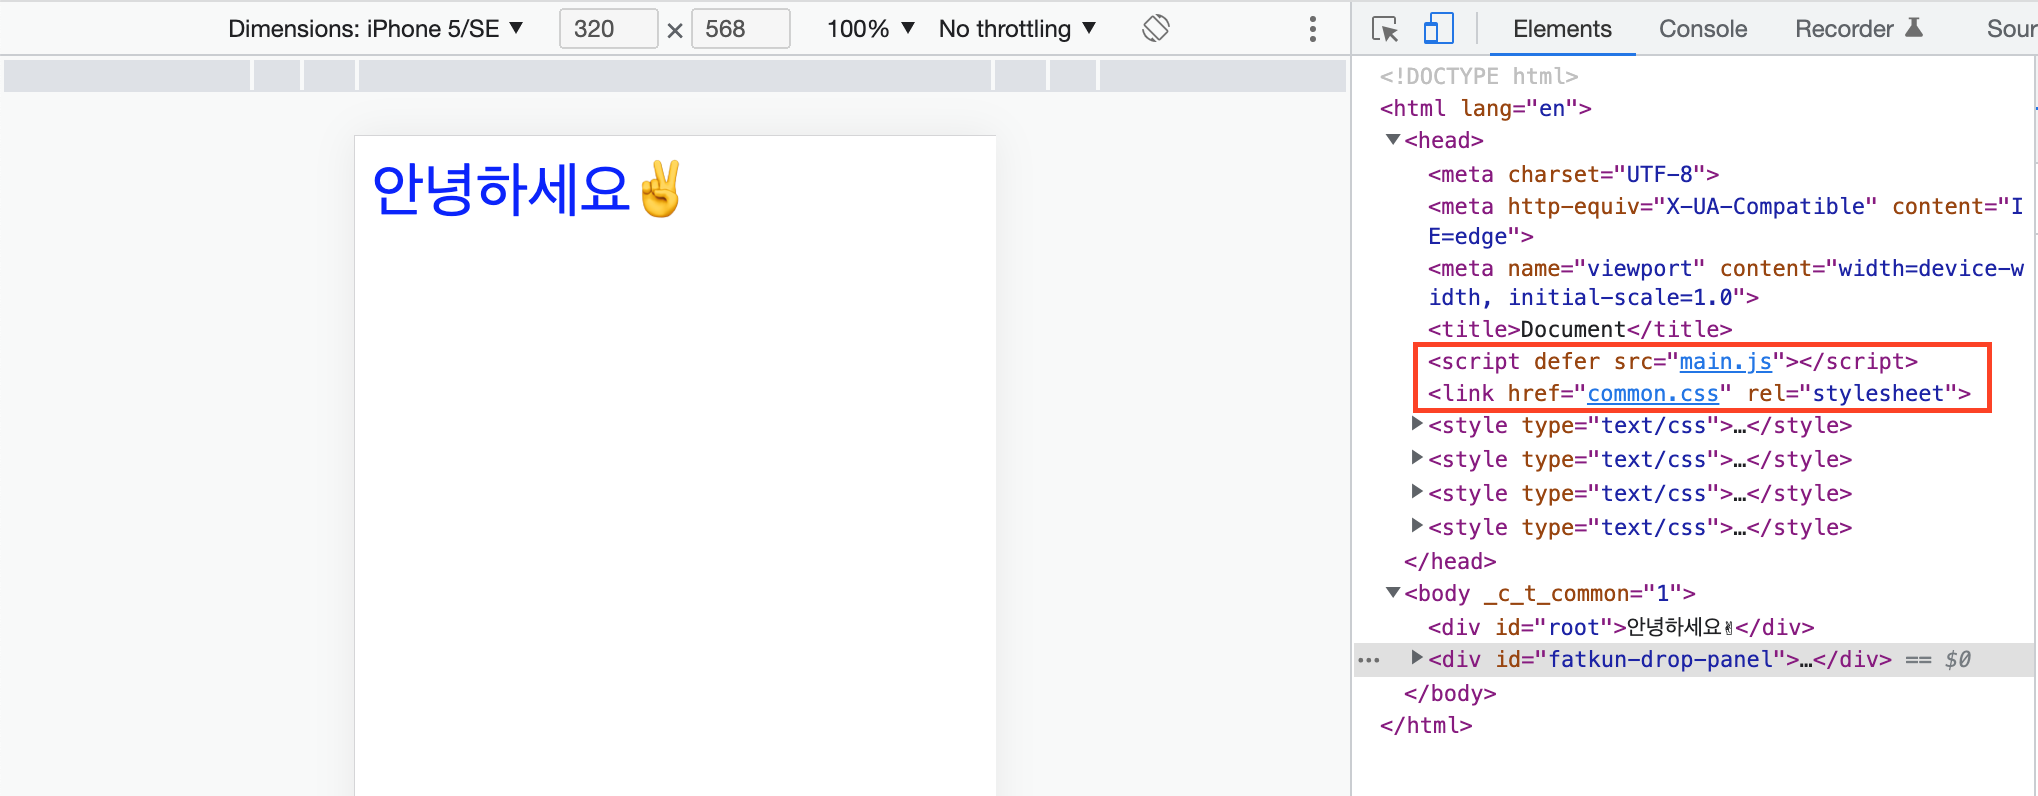
💡 internal 방식은 build 해도 CSS 파일이 따로 생성되지 않는다. 바로 head에 작성되기 때문이다.
반면, external 방식은 build 하면 별도의 CSS 파일이 생성된다.
6. 이미지 로더
이번에는 이미지를 빌드하기 위해 로더를 설치한다.
6-1. file-loader 설치
npm install -D file-loader
💡 Loader?
웹팩은 자바스크립트 파일뿐만 아니라 모든 웹 자원들도 모듈로 인식한다.
자바스크립트 파일에 이미지나 CSS 파일을 import해서 사용할 수 있게 해주는 게 바로 Loader다.
Loader는 빌드할 때 import한 자바스크립트 파일이 아닌 리소스들을 해석하고 변환해주는 역할을 한다.
6-2. 세팅
(webpack.config.js)
...

module.exports = {
  entry: './src/index.js',
  output: {
    ...
  },
  plugins: [
    ...
  ],
  module: {
    rules: [
      {
        test: /\.css$/,
        use: [MiniCssExtractPlugin.loader, "css-loader"]
      },
      // file-loader 세팅
      {
        test: /\.(png|jpe?g|gif|svg|webp)$/i,
        use: ['file-loader'],
      }
    ]
  },
  devServer: {
   ...
  }
}
7. 사용하지 않는 build 파일 자동으로 지우기
build에 포함됐던 파일이 필요 없어졌을 때 삭제하고 다시 build하면 그대로 남아있는 것을 확인할 수 있다.
사용하지 않는 build 파일을 자동으로 삭제해주는 플러그인을 설치해보자.
7-1. 설치
npm install -D clean-webpack-plugin
7-2. 세팅
(webpack.config.js)
...

module.exports = {
  entry: './src/index.js',
  output: {
    ...
  },
  plugins: [
    ...
  ],
  module: {
    rules: [
      {
        test: /\.css$/,
        use: [MiniCssExtractPlugin.loader, "css-loader"]
      },
      // file-loader 세팅
      {
        test: /\.(png|jpe?g|gif|svg|webp)$/i,
        use: ['file-loader'],
      }
    ]
  },
  devServer: {
   ...
  }
}
2개의 댓글

빌드 및 재빌드에 포함된 파일을 삭제해도 해당 파일이 여전히 남아 있는 것을 확인할 수 있습니다. 이것이 버그로 간주되어 반복되는 것일까요?@Poor Bunny
많은 도움 얻고 갑니다! 감사합니다!