
터미널과 같은 CLI 환경에서 명령어로 Google Cloud 리소스를 생성하고 관리하기 위해서는 gcloud CLI 설치가 필요하다.
공식 문서에 OS 별로 gcloud CLI 설치하는 방법이 자세히 나와있지만, macOS 에서 gcloud CLI 설치하는 방법에 대해서 함께 알아보자.
1. Python 버전 체크
먼저 로컬에 설치된 파이썬 버전이 3.5 에서 3.9 사이인지 체크해야 한다.
터미널에서 python3 -V 또는 python -V 를 실행하면 로컬에 설치된 파이썬 버전을 확인할 수 있다.
$ pyhton3 -V2. 패키지 파일 다운로드
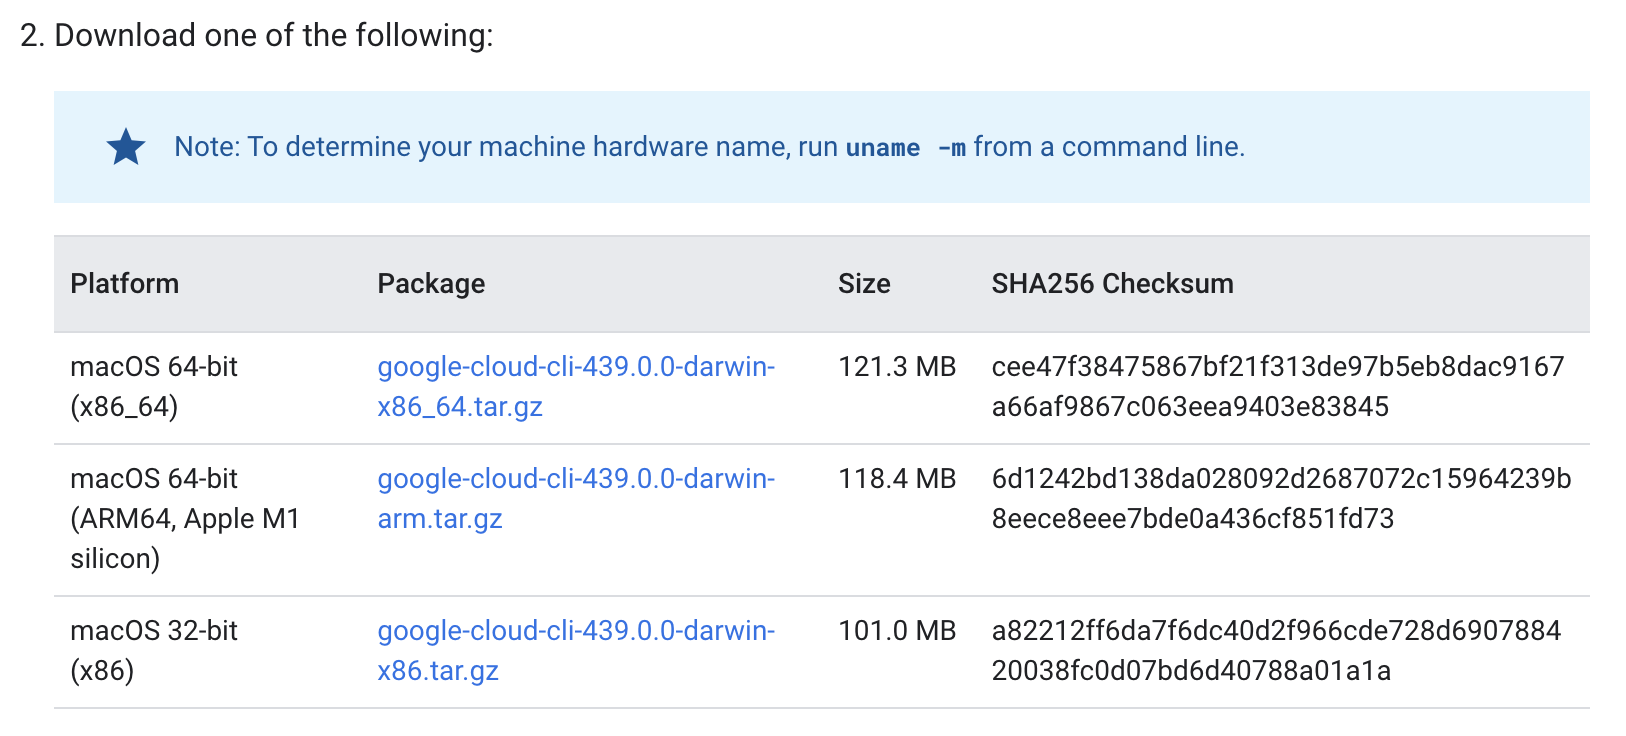
여기에서 자신의 OS 스펙에 맞는 패키지 파일을 다운로드받는다.
나는 맥북 m1 노트북을 쓰고 있기 때문에 중간에 있는 macOS 64-bit(ARM64, Apple M1 silicon) 용 파일을 다운로드했다.
3. 설치 스크립트 실행
다운로드된 .tar.gz 형식의 파일을 더블 클릭해서 압축을 풀어준다.
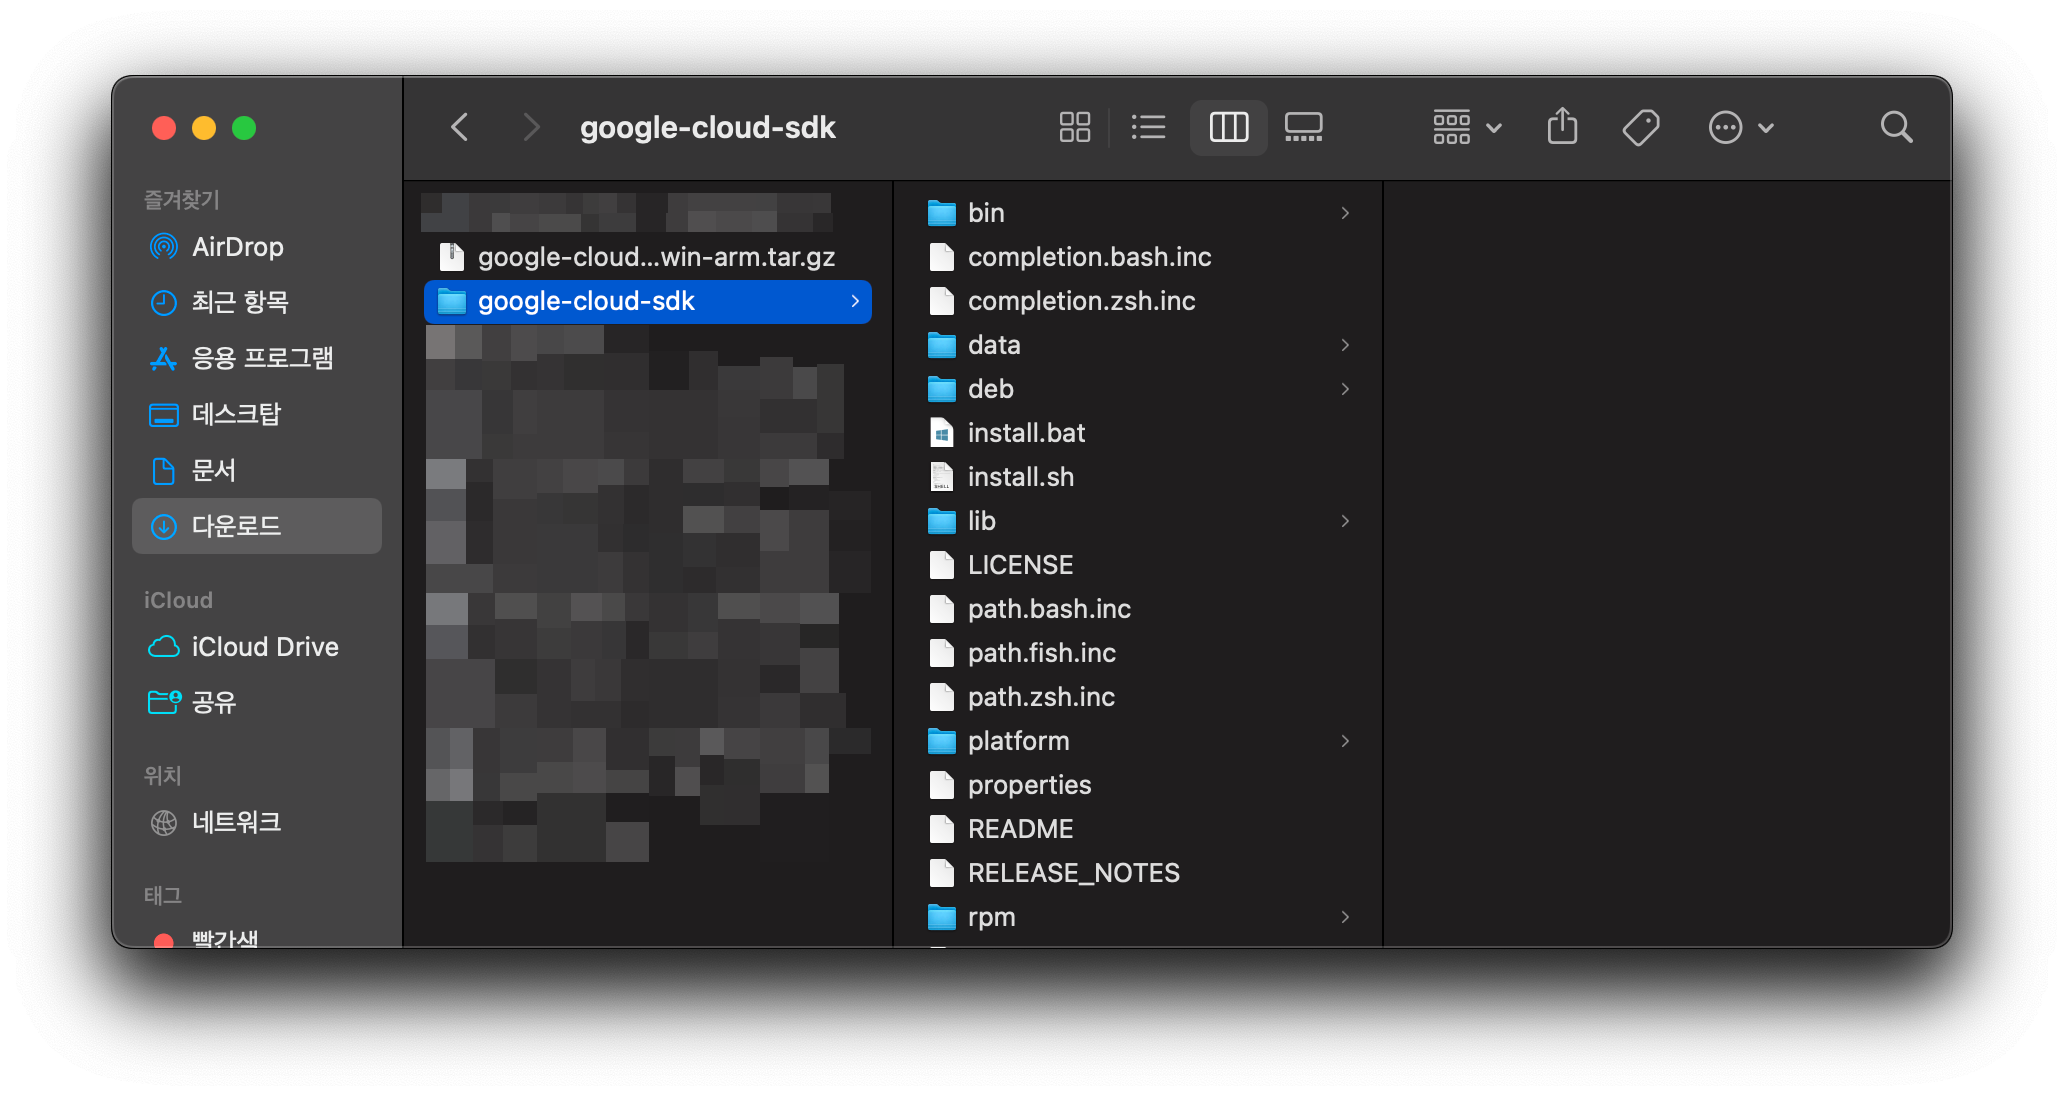
압축을 풀고나서 생긴 google-cloud-sdk 폴더를 홈 디렉토리로 옮겨준다.
$ mv ~/Downloads/google-cloud-sdk/ ~그리고 google-cloud-sdk 폴더 안에 있는 install.sh 스크립트 파일를 실행시킨다.
$ ~/google-cloud-sdk/install.sh사용자 통계 정보 수집에 동의하는지 묻는데, N 를 입력하고 엔터 친다.
To help improve the quality of this product, we collect anonymized usage data
and anonymized stacktraces when crashes are encountered; additional information
is available at <https://cloud.google.com/sdk/usage-statistics>. This data is
handled in accordance with our privacy policy
<https://cloud.google.com/terms/cloud-privacy-notice>. You may choose to opt in this
collection now (by choosing 'Y' at the below prompt), or at any time in the
future by running the following command:

    gcloud config set disable_usage_reporting false

Do you want to help improve the Google Cloud CLI (y/N)?  N
PATH 환경변수에 추가할지 묻는데, Y 를 입력하고 엔터 친다.
Modify profile to update your $PATH and enable shell command completion?

Do you want to continue (Y/n)?  Y
업데이트할 rc 파일 경로를 묻는데 그냥 엔터 친다.
The Google Cloud SDK installer will now prompt you to update an rc file to bring the Google Cloud CLIs into your environment.

Enter a path to an rc file to update, or leave blank to use [/Users/newwwbi/.zshrc]:
gcloud CLI 설치가 완료됐다.
4. gcloud CLI 설정 초기화
그 다음으로 gcloud CLI 설정을 초기화해줘야 한다.
gcloud init 을 실행해서 gcloud CLI 설정을 초기화한다.
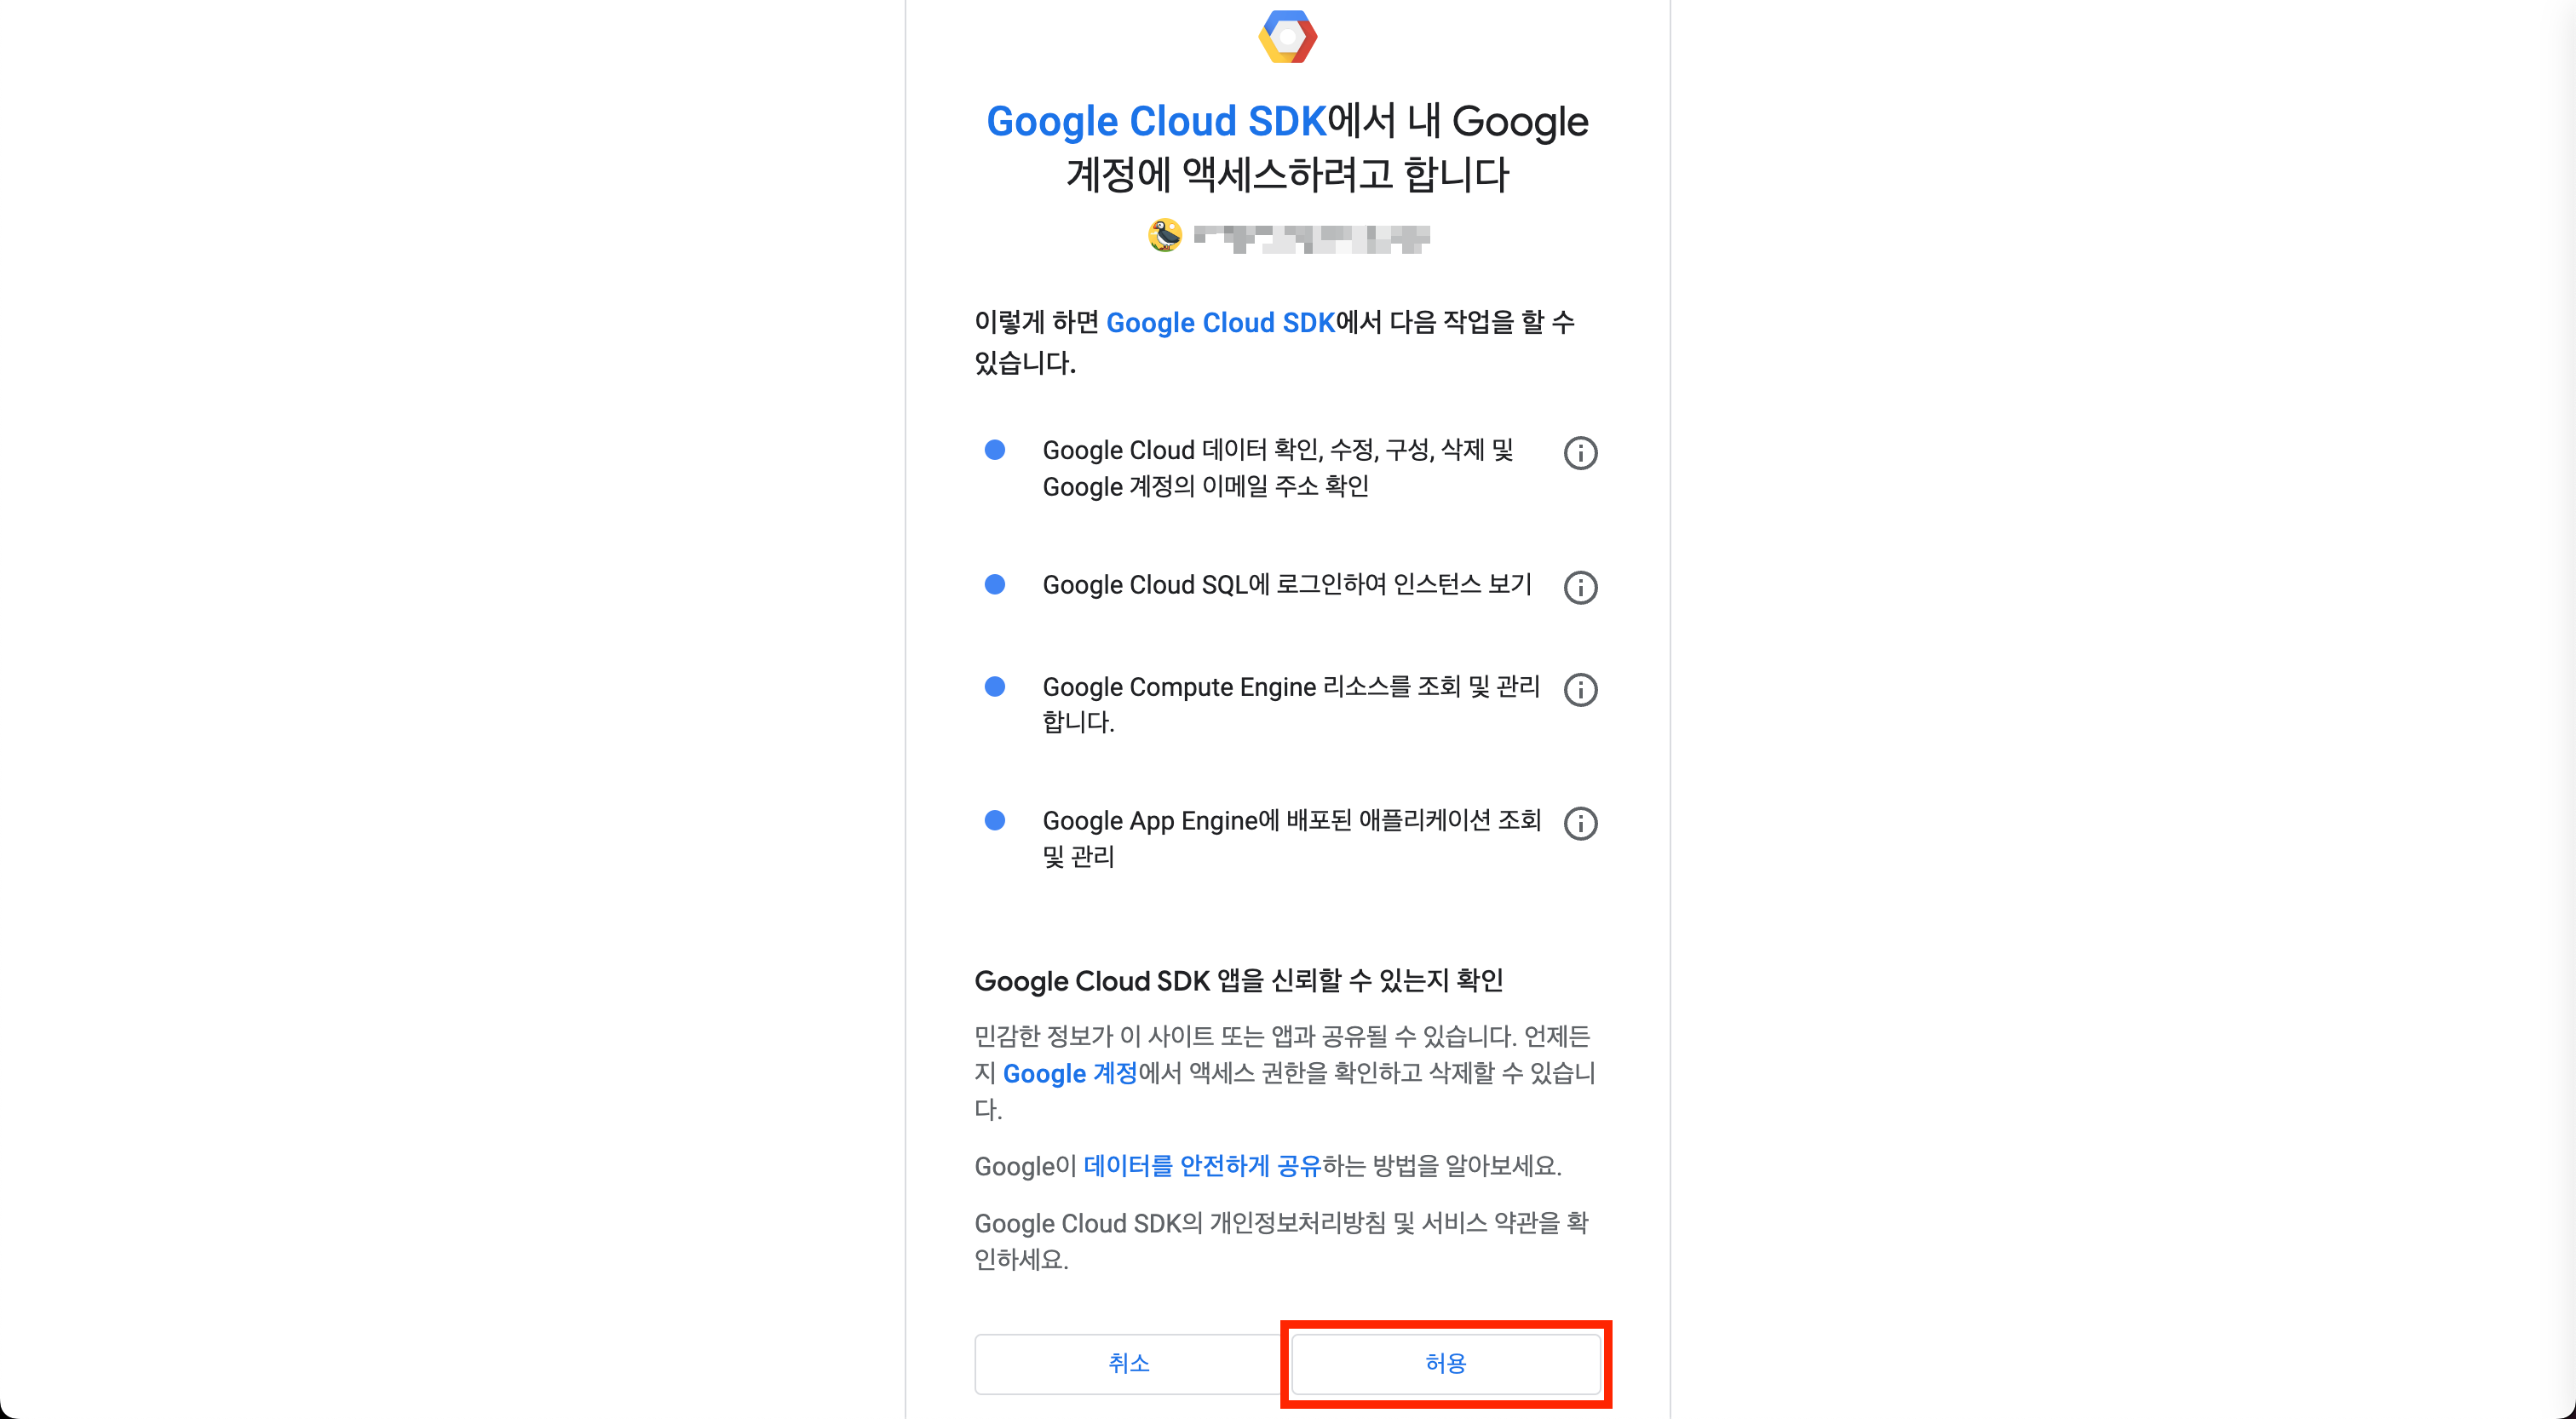
$ gcloud init구글 계정 로그인이 필요한데 Y 를 입력하고 엔터 쳐서 로그인을 수행한다.
You must log in to continue. Would you like to log in (Y/n)? Y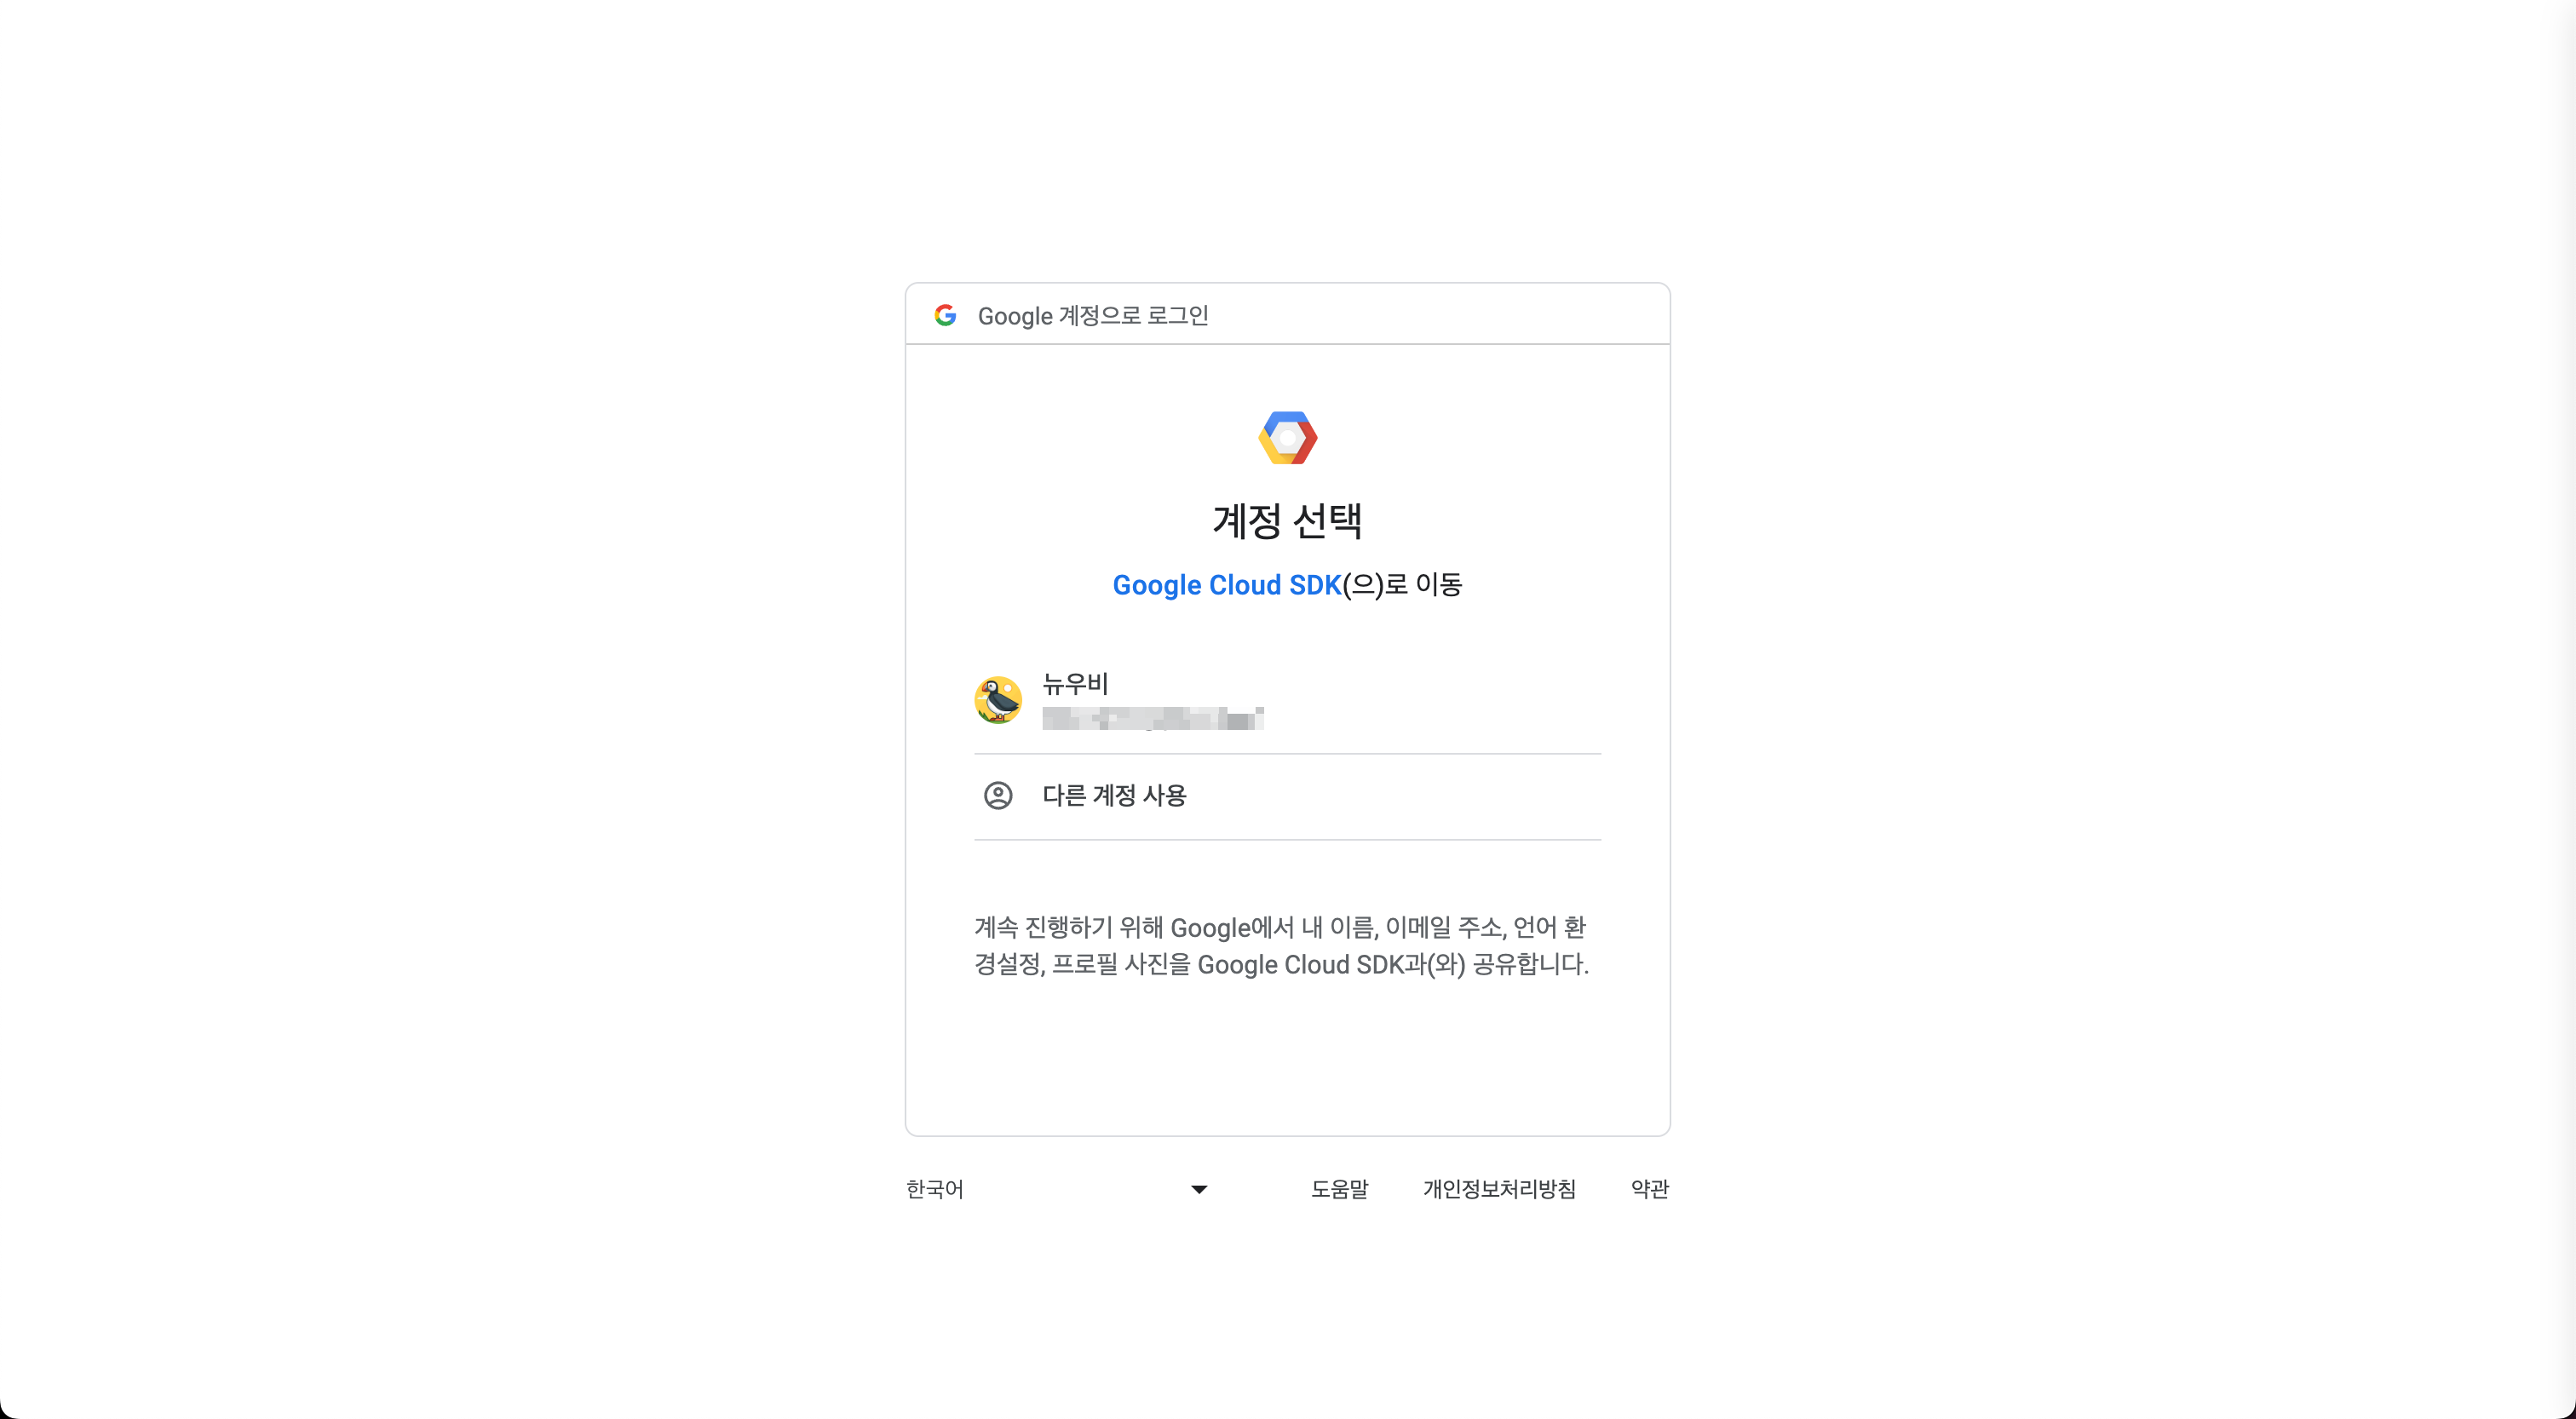
그리고 디폴트로 사용할 프로젝트를 선택한다.
미리 만들어둔 프로젝트가 있다면 해당 프로젝트의 번호를 입력하고, 없다면 새로운 프로젝트를 만든다.
미리 만들어둔 프로젝트가 없다고 가정하고 새로운 프로젝트를 만들어보겠다.
Pick cloud project to use:
 [1] lidi-playground
 [2] Enter a project ID
 [3] Create a new project
Please enter numeric choice or text value (must exactly match list item):  3
생성할 프로젝트 아이디를 입력하는 프롬프트가 뜬다.
프로젝트 아이디는 소문자(a-z), 숫자(0-9), 하이픈(-)로만 구성할 수 있다.
Enter a Project ID. Note that a Project ID CANNOT be changed later.
Project IDs must be 6-30 characters (lowercase ASCII, digits, or
hyphens) in length and start with a lowercase letter. create-app-engine-test
여기서 주의할 점은, 프로젝트 아이디는 Google Cloud 를 통틀어서 유니크해야 한다.
입력한 프로젝트 아이디가 중복된 아이디면 에러가 뿜어지며 프롬프트가 비정상적으로 종료된다.
ERROR: gcloud crashed (ValueError): Attempting to create a project that already exists.

If you would like to report this issue, please run the following command:
  gcloud feedback

To check gcloud for common problems, please run the following command:
  gcloud info --run-diagnostics
위와 같은 에러가 발생했을 경우, 4. gcloud CLI 설정 초기화 단계를 처음부터 다시 실시한다.
5. 끝
여기까지 아무 이상 없이 잘 따라왔다면 gcloud CLI 설치가 정상적으로 되었을 것이다.

유익한 글이었습니다.