Electron Docs를 기반으로 작성하였습니다.
일렉트론이란
일렉트론(Electron)은 HTML, CSS, JavaScript를 사용해 데스크톱 어플리케이션을 만드는 오픈소스 프레임워크이다. 일렉트론을 사용하면 자바스크립트로 Windows와 macOS 및 Linux에서 작동하는 크로스 플랫폼 앱을 만들 수 있다.
일렉트론은 오픈소스 웹 브라우저인 Chrominum, 자바스크립트 코드를 실행하는 런타임 환경인 Node.js로 구성된다.
어플리케이션 만들기
앞으로 구성할 프로젝트의 전체 코드는 electron/electron-quick-start 에서 확인할 수 있다.
프로젝트를 구성하기 전에 먼저 Node.js가 설치되어 있어야 한다.
프로젝트 구성하기
일렉트론 앱은 Node.js 프로젝트와 동일한 구조를 가진다. 먼저 폴더를 만들고 npm 패키지를 초기화해준다.
mkdir my-electron-app && cd my-electron-app
npm init
package.json에서 entry point는 main.js 여야 하고, author과 description은 어떤 값이든 상관이 없으나 패키징을 위해 필요하다.
{
  "name": "my-electron-app",
  "version": "1.0.0",
  "description": "Hello World!",
  "main": "main.js",
  "author": "niyu",
  "license": "MIT"
}
electron 패키지를 devDependencies에 추가한다.
npm install --save-dev electronpackage.json에 일렉트론을 실행하는 script를 추가한다.
{
  "scripts": {
    "start": "electron ."
  }
}
start 명령을 실행하면 개발 모드로 앱을 열 수 있다.
npm startmain 프로세스 실행
모든 일렉트론 어플리케이션의 진입점은 main.js이다. 이 스크립트는 Node.js 환경에서 실행되고, main 프로세스를 제어한다. main 프로세스는 앱의 수명 주기 제어 및 네이티브 인터페이스 표시, 권한 작업 수행, 렌더러(renderer) 프로세스 관리를 담당한다.
웹 페이지 생성
어플리케이션에 대한 window를 만들기 전에 해당 window에 로드할 컨텐츠를 만들어야 한다. 일렉트론에서 각 window은 로컬 HTML 파일 또는 원격 URL에서 로드할 수 있는 웹 컨텐츠를 표시한다.
프로젝트 루트 디렉토리에 index.html을 생성한다.
<!DOCTYPE html>
<html>
  <head>
    <meta charset="UTF-8">
    <!-- https://developer.mozilla.org/en-US/docs/Web/HTTP/CSP -->
    <meta http-equiv="Content-Security-Policy" content="default-src 'self'; script-src 'self'">
    <meta http-equiv="X-Content-Security-Policy" content="default-src 'self'; script-src 'self'">
    <title>Hello World!</title>
  </head>
  <body>
    <h1>Hello World!</h1>
    We are using Node.js <span id="node-version"></span>,
    Chromium <span id="chrome-version"></span>,
    and Electron <span id="electron-version"></span>.
  </body>
</html>
window에서 웹 페이지 열기
window에 웹 페이지를 로드하기 위해선 두 개의 일렉트론 모듈이 필요한데,
하나는 app 모듈, 다른 하나는 BrowserWindow 모듈이다. app은 어플리케이션의 이벤트 수명 주기를 제어하고 BrowserWindow은 window를 생성하고 관리한다.
// main.js

const { app, BrowserWindow } = require('electron');

function createWindow () {
  const win = new BrowserWindow({ width: 800, height: 600 });
  win.loadFile('index.html');
}

app.whenReady().then(() => {
  createWindow();
});
BrowserWindow 인스턴스에 index.html를 로드하는 createWindow 함수를 추가하고,
해당 함수를 호출해 window를 연다.
window는 app 모듈의 ready 이벤트가 실행된 후에만 생성할 수 있다. app 모듈의 whenReady 함수를 사용해 앱의 준비가 완료됐을 때 createWindow 함수가 호출될 수 있도록 한다.
window의 수명 주기 관리
window는 OS마다 다르게 작동한다. process의 platform 속성을 사용해 특정 운영 체제용 코드를 실행할 수 있다.
🔎 모든 window가 닫히면 앱을 종료하기 (Windows/Linux)
Windows와 Linux에서는 모든 window를 종료하면 일반적으로 어플리케이션이 완전히 종료된다.
window들이 모두 닫혔을 때 발생하는 이벤트인 window-all-closed 이벤트를 가지고 사용자가 macOS(darwin)를 사용하지 않는 경우 app.quit 함수를 호출하도록 한다.
// main.js
app.on('window-all-closed', function () {
  if (process.platform !== 'darwin') app.quit();
})
🔎 아무 것도 열려 있지 않으면 window 열기 (macOS)
macOS 앱은 일반적으로 window를 열지 않아도 계속 실행되며 사용할 수 있는 window가 없을 때 앱을 활성화하면 새 window가 열린다.
app 모듈의 activate 이벤트를 사용해 window가 열려 있지 않으면 createWindow 함수를 호출하도록 한다. ready 이벤트가 발생하기 전에는 window를 만들 수 없기 때문에, 기존의 whenReady 콜백 내에서 이벤트 리스너를 연결해 작업을 수행하도록 한다.
// main.js
app.whenReady().then(() => {
  createWindow();

  app.on('activate', function () {
    if (BrowserWindow.getAllWindows().length === 0) createWindow();
  })
})
preload 스크립트 생성
일렉트론에는 크게 main 프로세스와 renderer 프로세스 두 개의 프로세스 종류가 있다. main 프로세스는 window를 생성하고 관리하고, renderer 프로세스는 window 내에서 웹 페이지를 렌더링한다.
이때 main 프로세스에서는 renderer의 document 컨텍스트에 대한 접근 권한이 없어 DOM을 편집할 수가 없기 때문에 preload 스크립트를 이용해 DOM에 접근할 수 있도록 한다. preload 스크립트는 전역 window, document 에 접근할 수 있다.
preload.js 파일을 생성하고 다음과 같이 작성한다.
window.addEventListener('DOMContentLoaded', () => {
  const replaceText = (selector, text) => {
    const element = document.getElementById(selector);
    if (element) element.innerText = text;
  }

  for (const dependency of ['chrome', 'node', 'electron']) {
    replaceText(`${dependency}-version`, process.versions[dependency]);
  }
});
process.versions 객체에 접근해 HTML document에 버전 번호를 삽입한다.
BrowserWindow 생성자의 webPreferences.preload 옵션에 preload 스크립트의 경로를 설정한다.
// main.js
const path = require('path');

function createWindow () {
  const win = new BrowserWindow({
    width: 800,
    height: 600,
    webPreferences: {
      preload: path.join(__dirname, 'preload.js')
    }
  })

  win.loadFile('index.html');
}
__dirname 문자열은 현재 실행 중인 스크립트의 경로를 가리킨다. 위 예제의 경우 프로젝트의 루트 폴더를 가리킨다. path.join 함수를 사용해 모든 플랫폼에서 동작하는 path 문자열을 만든다.
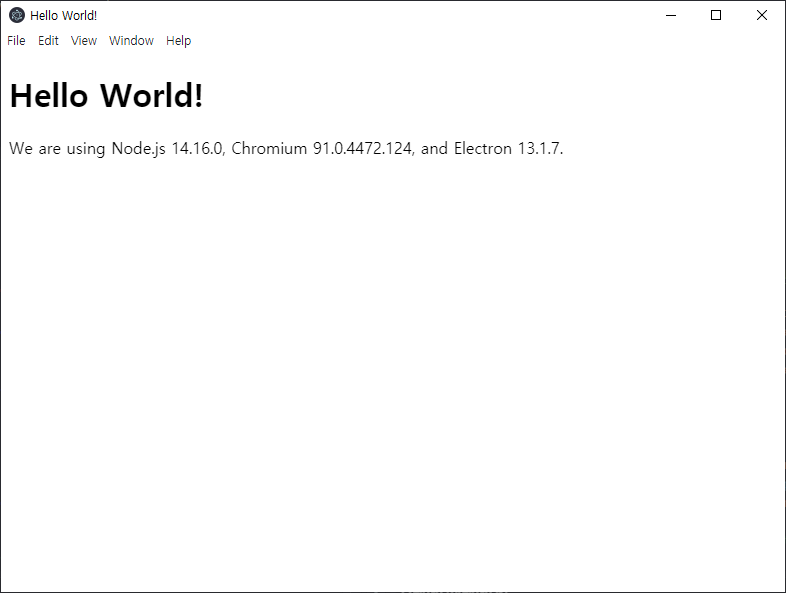
코드를 모두 작성하고 나면, 이제 다음과 같은 일렉트론 어플리케이션을 볼 수 있다.

어플리케이션 패키징 및 배포
Electron Forge를 사용해 앱을 배포할 수 있다.
package.json에 electron-forge를 devDependencies으로 추가하고 import 커맨드를 사용하여 Forge의 구조를 설정한다.
npm install --save-dev @electron-forge/cli
npx electron-forge import

✔ Checking your system
✔ Initializing Git Repository
✔ Writing modified package.json file
✔ Installing dependencies
✔ Writing modified package.json file
✔ Fixing .gitignore

We have ATTEMPTED to convert your app to be in a format that electron-forge understands.

Thanks for using "electron-forge"!!!
make 커맨드를 사용해 배포물을 만든다.
npm run make

> my-electron-app@1.0.0 make /my-electron-app
> electron-forge make

✔ Checking your system
✔ Resolving Forge Config
We need to package your application before we can make it
✔ Preparing to Package Application for arch: x64
✔ Preparing native dependencies
✔ Packaging Application
Making for the following targets: zip
✔ Making for target: zip - On platform: darwin - For arch: x64
빌드 파일은 기본적으로 out 디렉터리에 생성된다.
// Example for macOS
out/
├── out/make/zip/darwin/x64/my-electron-app-darwin-x64-1.0.0.zip
├── ...
└── out/my-electron-app-darwin-x64/my-electron-app.app/Contents/MacOS/my-electron-app