
Nginx
git bash 환경
nginx 사용
IP 서버 접속
ssh -i kt.pem ubuntu@00.00.000.00
nginx 설치
ubuntu $ sudo apt-get install nginx
nginx 실행 확인
ubuntu $ sudo systemctl status nginx
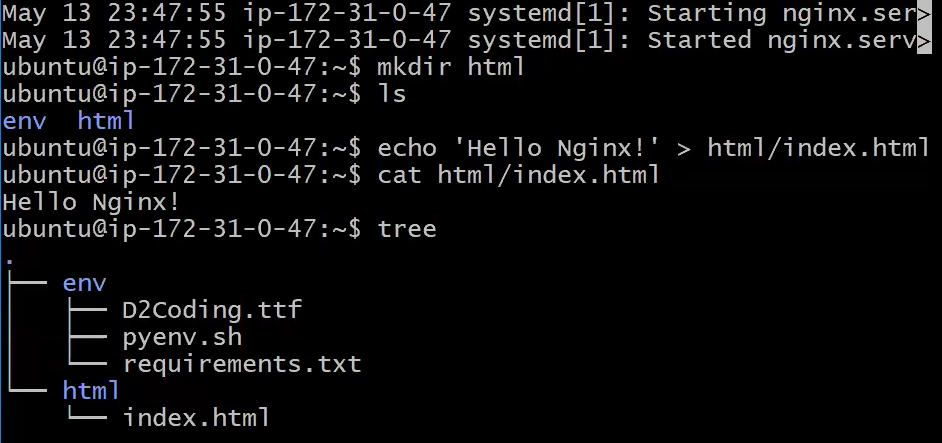
tree 설치 방법
sudo apt install tree
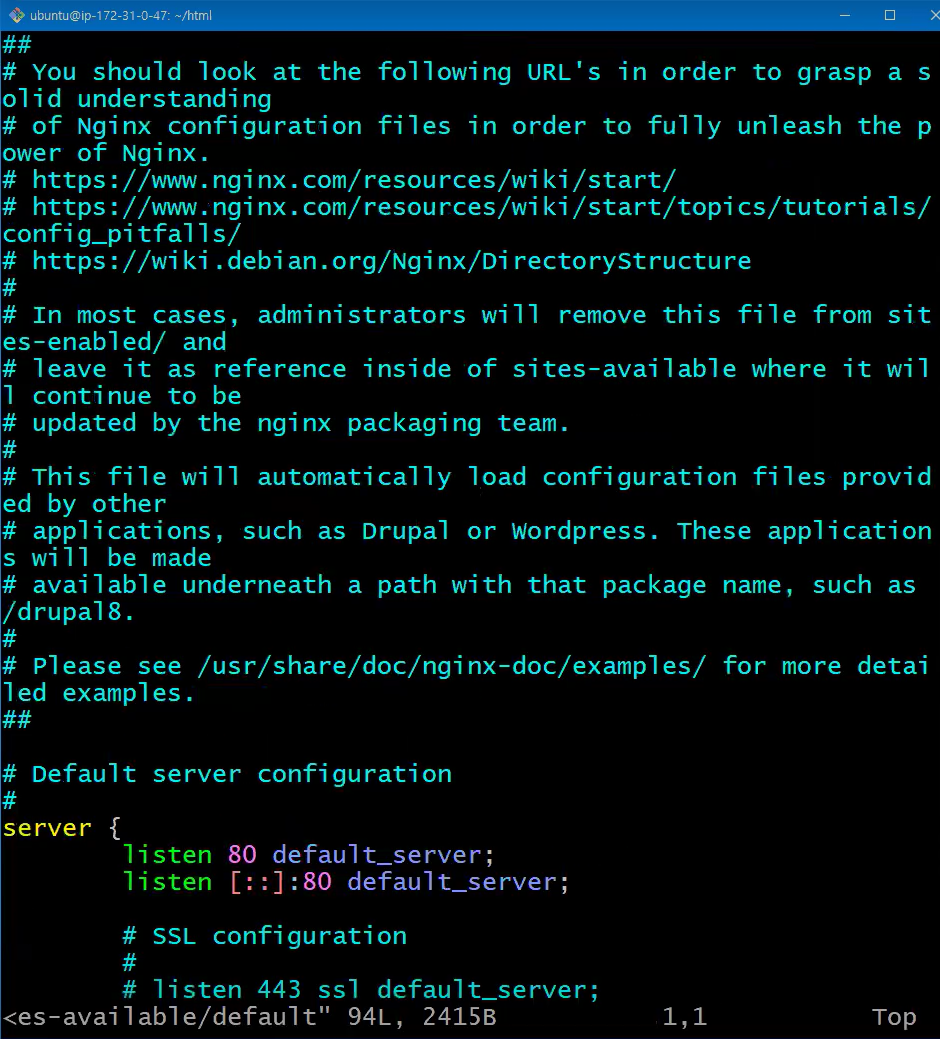
nginx 설정
ubuntu $ sudo vi /etc/nginx/sites-available/default
- 이러한 화면이 뜸
- G 입력으로 가장 밑으로 감
- 아래 정적파일 설정 입력
정적파일 설정
server {
	listen 8080;
	location / {
		root /home/ubuntu/web;
	}
}
- :wq
nginx 설정에서 오류가 있는지 확인
sudo systemct1 restart nginx
ubuntu 디렉토리 실행권한 추가
chmod +x /home/ubuntu
설정 적용을 위한 재시작
ubuntu $ sudo systemctl restart nginx
tmux 환경에서 주피터 노트북 사용
tmux new -s ai
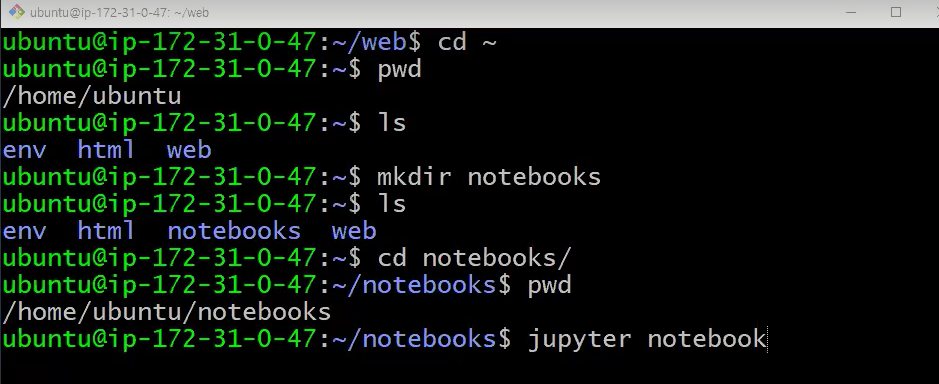
jupyter notebook
Decorator 함수
- 함수에서 코드를 변경하지 않고 기능을 추가, 수정하는 문법
- 함수 안에 중복 코드를 데코레이터 함수로 작성
# 함수 생성
def func1():
	print('code1')
    print('code2')
	print('code3')

def func2():
	print('code4')
    print('code5')
	print('code6')
func1
func2
>
code1
code2
code3
code4
code5
code6
# decorator 함수 생성
def deco(func):
def wrapper(*args, **kwargs):
print('code1')
func(*args, **kwargs)
print('code3')
return wrapper# decorator 함수 사용
@deco
def func1():
print('code2')
@deco
def func2():
print('code4')
func1
func2
>
code1
code2
code3
code1
code4
code3decorator 함수 응용
import time

# 코드가 출력되는데 걸리는 시간
start = time.time()
print('code')
end = time.time()
print(end - start)
>
code
0.0015552043914794922
# decorator 함수 생성
def show_time(func):
def wrapper():
start = time.time()
func()
end= time.time()
print(end - start)
return wrapper
# decorator 함수 사용
@show_time
def func1():
print('code2')
fuc1 = show_time(func1)
@show_time
def func2():
print('code4')
func1()
func2()
>
code2
0.002538442611694336
code4decorator 예제2
# decorator 함수 생성
def login(func):
	def wrapper():
    	pw = input('pw: ')
    	if kwargs['pw'] == '1234':
        	func()
        else:
        	print('wrong password')
    return wrapper
# decorator 함수 사용
@login
def fuc1()
print('code2')
func1()
>
pw 입력창에 1234 입력시
code2가 출력 된다.*args, **kwargs
- parameter: 여러개의 argument를 하나의 parameter(tuple, dict)로 받는 방법
- argument: 하나의 parameter(list, tuple, dict)를 여러개의 argument로 사용 방법
컬렉션 데이터 타입
- 식별자 1개, 데이터n개
def (n1, n2, n3):
	print(n1 + n2 + n3)
plus(1, 2, 3)
>
6
# args
def (*args): # parameter 1개
print(type(args), args)
print(sum(args))
plus(1, 2, 3) # args 3개
>
<class 'tuple'> (1, 2, 3)
6kwargs
# kwargs
def (*args, **kwargs):		# parameter 1개
	print(type(args), args)
    print(type(kwargs), kwargs)
    print(sum(args) + kwargs.values())

plus(1, 2, 3, n4=10, n5=20)				# args 3개
>
<class 'tuple'> (1, 2, 3)
<class 'dict'> {'n4': 10, 'n5': 20}
36
예제
def echo(*args, **kwargs):
	print(type(args), args)
    print(type(kwargs), kwargs)

# args
data1 = [1, 2, 3]
echo(data1)		# echo([1, 2, 3])
echo(*data1)	# echo(1, 2, 3)
>
<class 'tuple'> ([1, 2, 3],)
<class 'dict'> {}
<class 'tuple'> (1, 2, 3)
<class 'dict'> {}

# kwargs
data2 = {'n4': 10, 'n5': 20}
echo(data2)		# echo({'n4': 10, 'n5': 20})
echo(**data2)	# echo(n4=10, n5=20)
Flask
- 속도가 빠른 파이썬 경량 웹 어플리케이션 프레임워크
- 빠르고 간편하게 WAS 개발 가능
1. 프로젝트 생성
- static: 정적 파일 저장
- templates: html 코드 저장
- hello.py: 라우팅 코드 작성
# 디렉토리 생성
!mkdir -p hello/staic
!mkdir -p hello/templates

# 파일 생성
!touch hello/hello.py
!touch hello/templates/index.html
!tree hello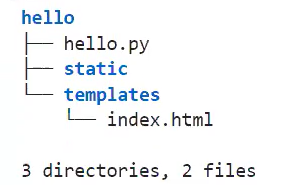
2. 라우팅 코드 작성
%%writefile helle/hello.py
from flask import *
app = Flask(__name__)
# 라우팅 코드
@app.route('/')
def hello():
return 'Hello Flask'
# 라우팅 코드를 요청했을때, index.html을 불러옴
@app.route('/user')
def user():
return render_template('index.html') # 랜더링을 통해 연결함
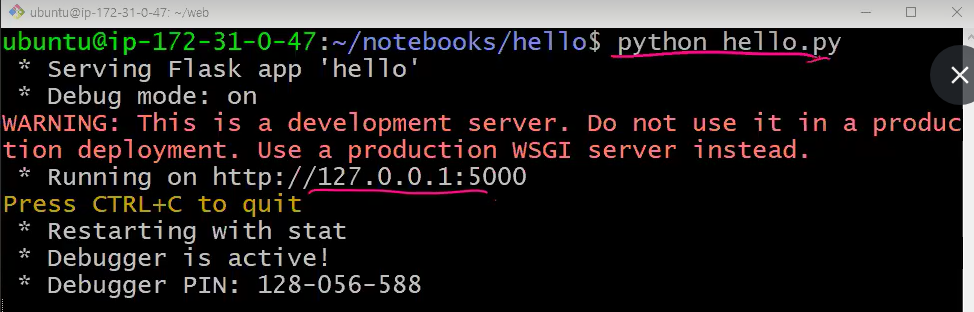
app.run(debug=True)# 실행 되는지 확인
!cat hello/hello.py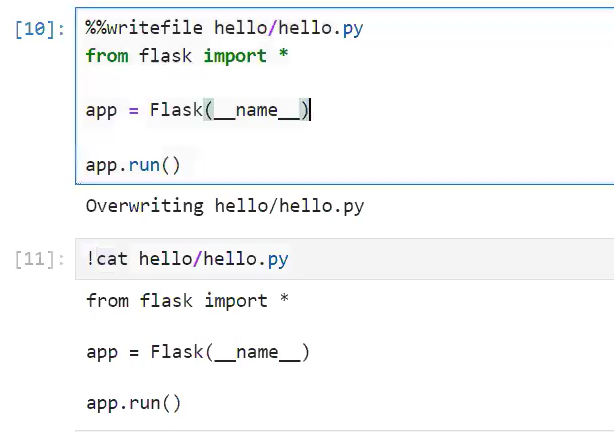
라우팅 서버 nginx 설정
- 라우팅에서 만든 걸 nginx에서 설정하여 서버를 생성
- tmux로 만든 서버에서 새로운 창을 생성하고
- sudo vi /etc/nginx/sites-available/default 로 ngnix 설정 활성화
server {
	listen 8081;
	location / {
		proxy_pass http://localhost:5000;
	}
}- 작성 후 :wq 저장 후 나오기
- sudo systemctl restart nginx 으로 오류 확인
- 8081 서버로 접속 시 라우팅 코드에서 만든 Hello Flask 출력
- user를 요청시 index.html을 불러 옴
3. 템플릿 코드 작성
%%writefile hello/templates/index.html
<!DOCTYPE>
<html>
	<head>
    	<title>Flask</title>
    </head>
    <body>
    	<p>Hello Flask!!!</p><hr>
    </body>
</html>
파일 사용

뒤늦게 프로그래밍을 시작한 응애