파일 이름과 타입 ajax로 보내기
	<h1>upload with ajax</h1>

	<div class="uploadDiv">
		<input type="file" name="uploadFile" multiple>
	</div>

	<div class="uploadResult">
		<ul>
			<!-- 업로드된 파일들이 여기 나열됨. -->
		</ul>
	</div>
위에 첨부되는 파일을 POST로 ajax를 통해 요청을 보내어
삭제하는 기능을 추가해보겠습니다.
첨부된 파일은 이미지 파일 오른 쪽에 대문자 X를 그냥 써서
해당 버튼 X를 클릭 시 삭제되도록
간단하게 적용해보았습니다.
VO 생성
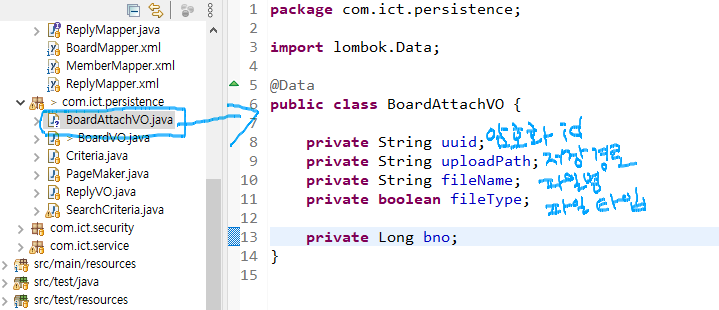
DB에 이미지 저장처리를 위해 BoardVO의 bno(글번호)를 저장하고
이미지의 정보를 담는 BoardAttachVO를 생성했습니다.
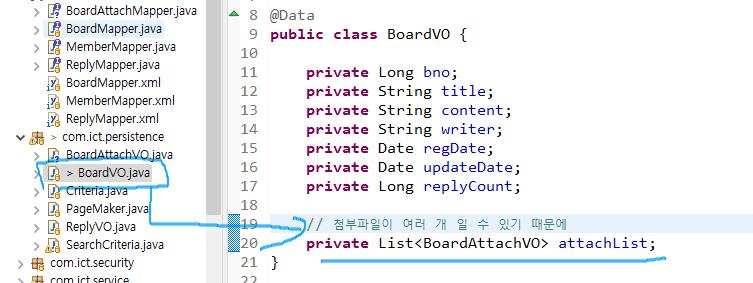
기존의 BoardVO 가 이미지 정보까지 가져와야 하며 이미지 정보가
글 하나에 여러 개가 될 수 있기 때문에
List로 BoardAttachVO를 선언합니다.
Mapper 생성
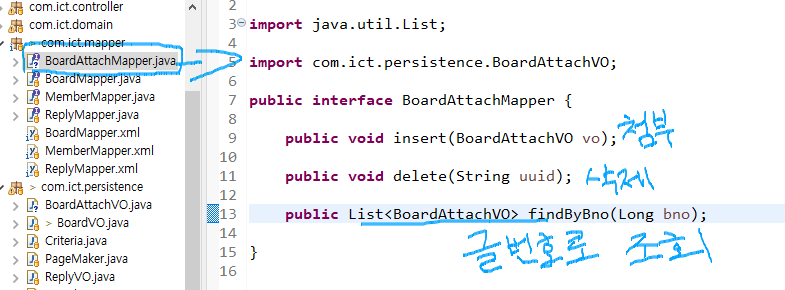
BoardAttachMapper 라는 interface를 생성하고 3개의 메서드를 선언합니다.
insert는 첨부 delete는 삭제
findByBno는 글번호로 VO를 조회합니다.
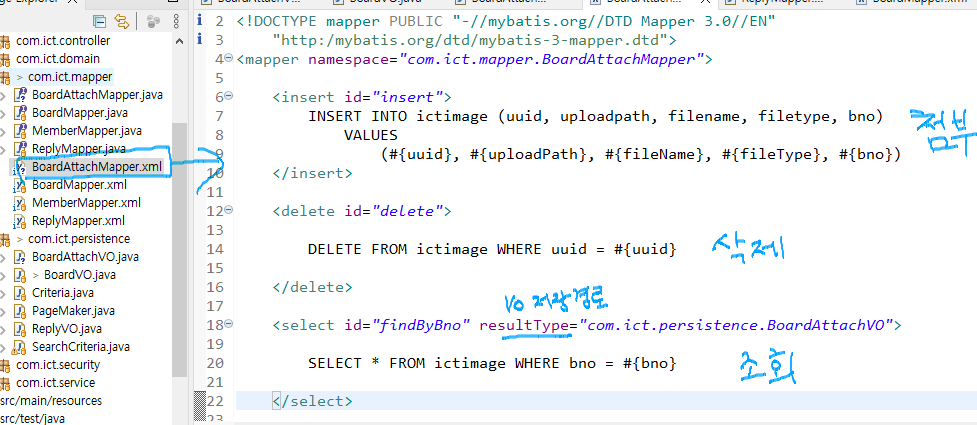
mapper의 xml파일을 생성해서 Mybatis로 쿼리문을 보낼 수 있도록 연결해줍니다.

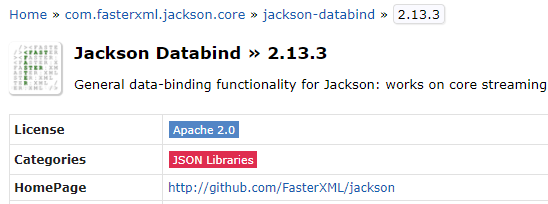

mvnrepository에서 위의 3개를 검색해 pom.xml에 추가해줍니다.
ajax를 이용한 파일 첨부요청과 썸네일 작업에 필요한 기능들입니다.
게시글 insert form에 첨부로직 생성
<%@ page language="java" contentType="text/html; charset=UTF-8"
pageEncoding="UTF-8"%>
<!DOCTYPE html>
<html>
<head>
<meta charset="UTF-8">
<title>Insert title here</title>
</head>
<body>
<!-- 글쓸때, 제목 글쓴이, 본문 을 채우고 submit을 눌러야 합니다.
vo에 적힌 명칭을 감안해서 제목, 글쓴이 본문을 쓸 수 있도록 폼태그를 완성시켜주세요. -->
<form action="" method="post">
<input type="text" name="title" requried/>
<input type="text" name="writer" required/>
<textarea name="content" required></textarea>
<input type="submit">
</form>
<div class="uploadDiv">
<input type="file" name="uploadFile" multiple>
</div>
<div class="uploadResult">
<ul>
<!-- 업로드된 파일들이 여기 나열됨. -->
</ul>
</div>
<button id="uploadBtn">Upload</button>
<script src="https://ajax.googleapis.com/ajax/libs/jquery/3.6.0/jquery.min.js"></script>
<script>
$(document).ready(function(){
// 정규표현식 : 예).com 끝나는 문장 등의 조건이 복잡한 문장을 컴퓨터에게 이해시키기 위한 구문
let regex = new RegExp("(.*)\.(exe|sh|zip|alz)$");
// 파일이름 . exe|sh|zip|alz 인 경우를 체크함
let maxSize =5242880; // 5Mb
function checkExtension(fileName, fileSize){
// 파일크기 초과시 종료시킴
if(fileSize >= maxSize){
alert("파일 사이즈 초과");
return false;// return이 있어서 아래쪽 구문은 실행 안됨
}
// regex에 표현해둔 정규식과 일치하는지 여부를 체크, 일치하면 true, 아니면 false
if(regex.test(fileName)){
alert("해당 확장자를 가진 파일은 업로드할 수 없습니다.");
return false;
}
return true;
}
let cloneObj = $(".uploadDiv").clone();
$('#uploadBtn').on("click", function(e){
let formData = new FormData();
let inputFile = $("input[name='uploadFile']");
let files = inputFile[0].files;
console.log(files);
// 파일 데이터를 폼에 집어넣기
for(let i = 0; i < files.length; i++){
if(!checkExtension(files[i].name, files[i].size)){
return false;// 조건에 맞지않은 파일 포함시 onclick 이벤트 함수자체를 종료시켜버림
}
formData.append("uploadFile", files[i]);
}
console.log("--------------파일 적재 후 formData 태그 -------------");
console.log(formData);
$.ajax({
url: '/uploadFormAction',
processData : false,
contentType: false,
data : formData,
dataType:'json',
type : 'POST',
success : function(result){
console.log(result);
showUploadedFile(result);
$(".uploadDiv").html(cloneObj.html());
}
}); // ajax
});// uploadBtn onclick
let uploadResult = $(".uploadResult ul");
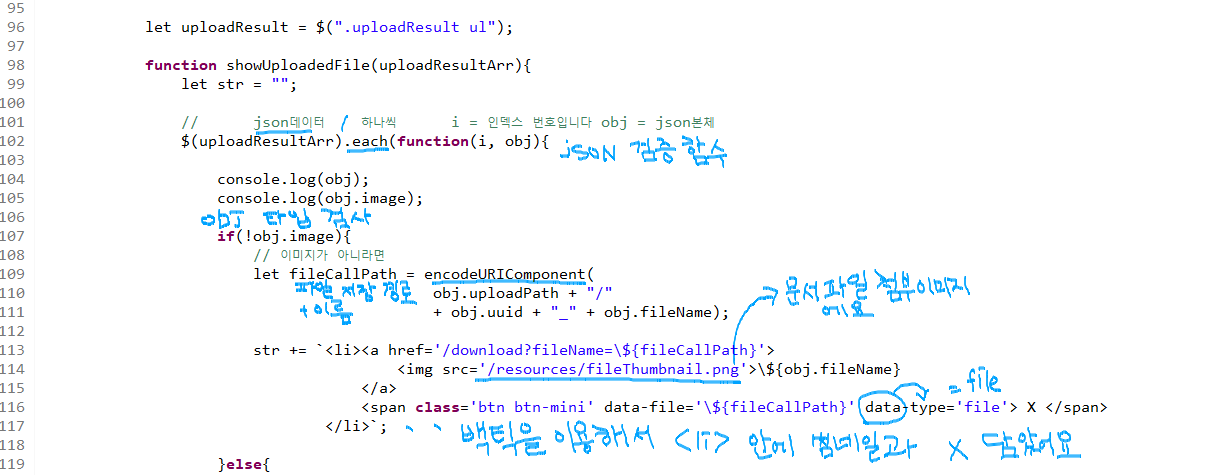
function showUploadedFile(uploadResultArr){
let str = "";
// json데이터 하나씩 i = 인덱스 번호입니다 obj = json본체
$(uploadResultArr).each(function(i, obj){
console.log(obj);
console.log(obj.image);
if(!obj.image){
// 이미지가 아니라면
let fileCallPath = encodeURIComponent(
obj.uploadPath + "/"
+ obj.uuid + "_" + obj.fileName);
str += `<li><a href='/download?fileName=\${fileCallPath}'>
<img src='/resources/fileThumbnail.png'>\${obj.fileName}
</a>
<span class='btn btn-mini' data-file='\${fileCallPath}' data-type='file'> X </span>
</li>`;
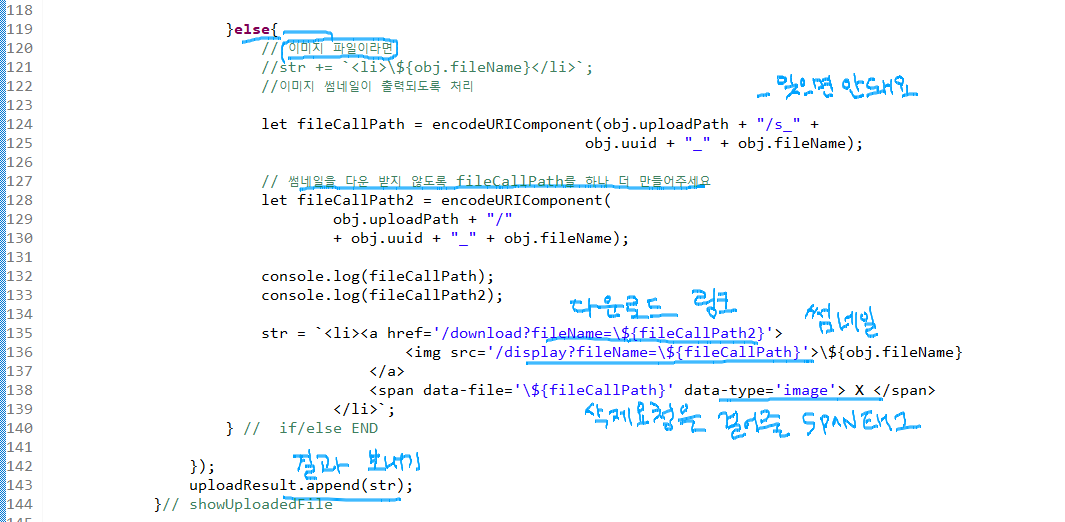
}else{
// 이미지 파일이라면
//str += `<li>\${obj.fileName}</li>`;
//이미지 썸네일이 출력되도록 처리
let fileCallPath = encodeURIComponent(obj.uploadPath + "/s_" +
obj.uuid + "_" + obj.fileName);
// 썸네일을 다운 받지 않도록 fileCallPath를 하나 더 만들어주세요
let fileCallPath2 = encodeURIComponent(
obj.uploadPath + "/"
+ obj.uuid + "_" + obj.fileName);
console.log(fileCallPath);
console.log(fileCallPath2);
str += `<li><a href='/download?fileName=\${fileCallPath2}'>
<img src='/display?fileName=\${fileCallPath}'>\${obj.fileName}
</a>
<span data-file='\${fileCallPath}' data-type='image'> X </span>
</li>`;
} // if/else END
});
console.log(str);
uploadResult.append(str);
}// showUploadedFile
$(".uploadResult").on("click", "span", function(e){
// .data 는 데어터 뒤에 있는 것 data-type의 type, date-file의 file을 가져옵니다.
let targetFile = $(this).data("file");
let type = $(this).data("type");
// 클릭한 span 태그와 엮여있는 li를 지정
let targetLi = $(this).closest("li");
$.ajax({
url : '/deleteFile',
//fileName이란 이름으로 targetFile, type이란 이름으로 type 보내기
data : {fileName: targetFile, type:type},
dataType : 'text',
type : 'POST',
success: function(result) {
alert(result);
// 클릭한 li요소를 화면에서 삭제하는 remove(화면에서 삭제됨)
targetLi.remove();
}
}); // ajax
}); // .uploadResult onclick span END
}); // document ready END
</body>
</html>insertForm.jsp에 지금껏 js 스크립트를 다 때려넣었습니다.
여기서 조금씩 더 수정해나가면서
파일 첨부가 게시물과 연동되도록 해보겠습니다.
배울 게 참 많네요.
3