VMware 자격증: VCP-DCV
VMware 환경 구축
1. vars.yaml -> 변수 설정
2. Switching yaml
3. Routing yaml
4. Window Server for Data Center yaml
5. Make Domain Controller yaml
6. Add DNS record yaml
7. ...
YAML을 이용한 Server 구축
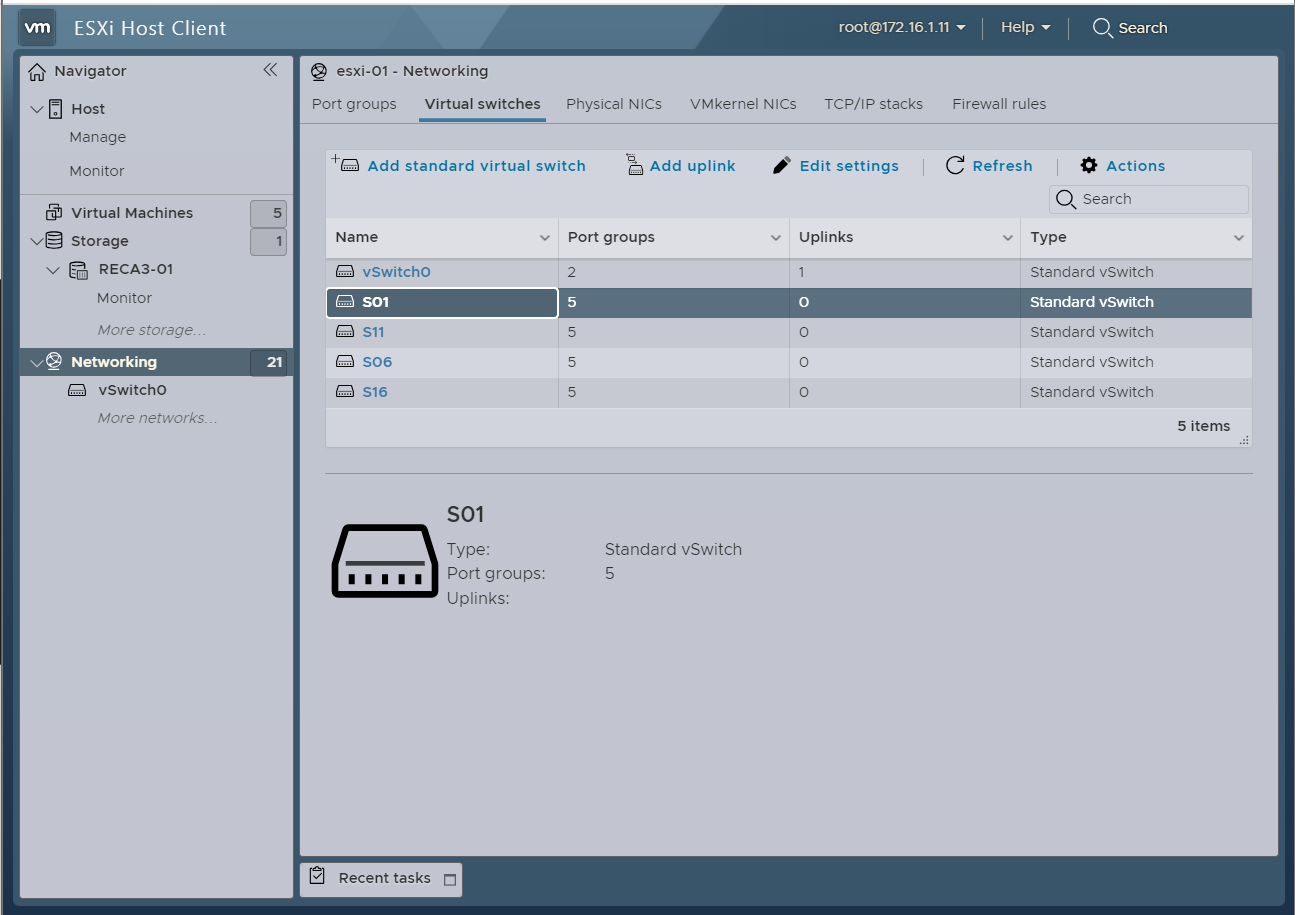
YAML of Switching
VMware의 vSwitch Module에 대한 ansible 공식 문서: https://docs.ansible.com/ansible/latest/collections/community/vmware/vmware_vswitch_module.html
ansible을 통해 설정할 수 있는 주요 항목:
- esxi_hostname
- nics
- password
- port
- proxy_host
- switch
- teaming
- load_balancing
- network_failure_detection
- beacon_probig: - standby_adapters
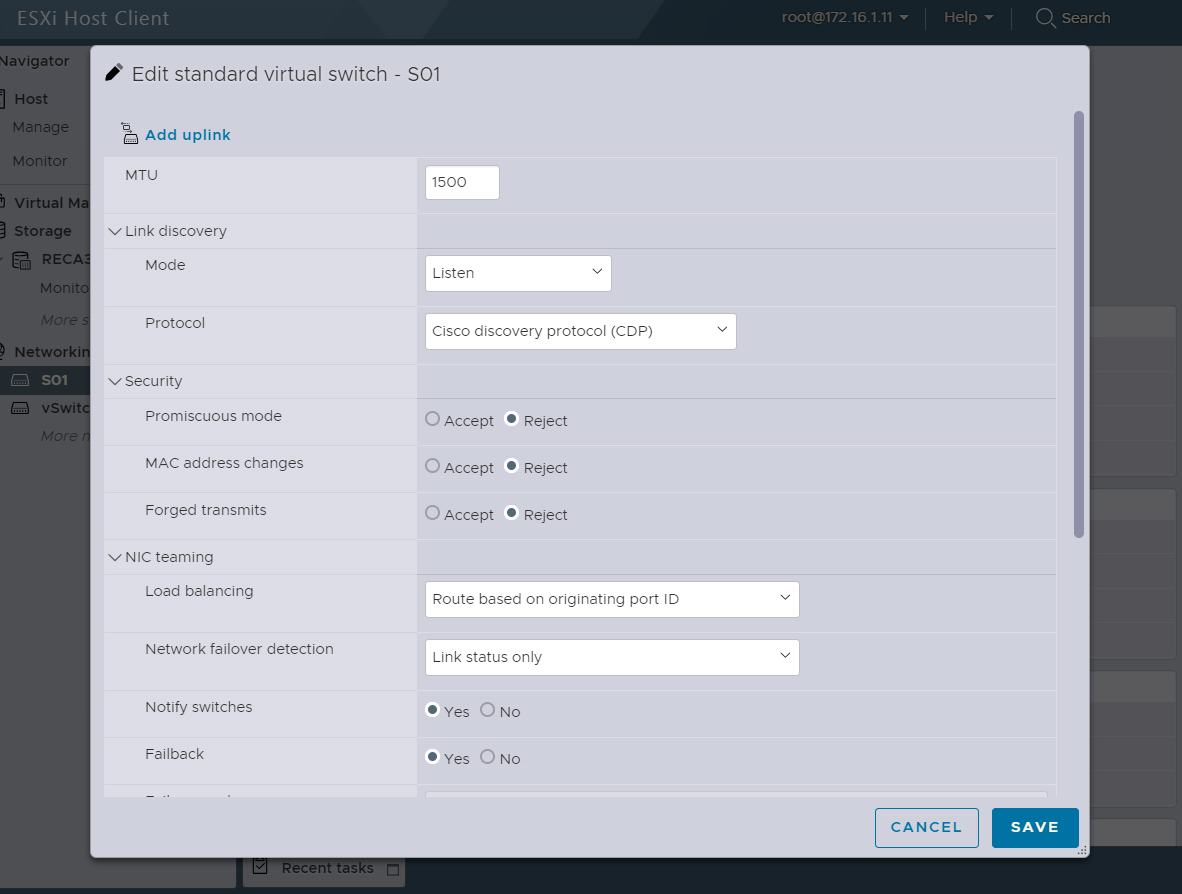
위 설정값들을 UI에서 설정하는법
log 보는 법
grep -i error /var/log/hostd.log | tail
grep -i error /var/log/vpxa.log | tail
tail /var/log/vmkwarning.log
grep -i error: error가 포함된 것들을 출력
/var/log/hostd.log: log가 기록되는 디렉토리중 하나 -> 여러 파일 확인을 통해 오류 확인이 필요함.
tail: log를 최신순 정렬
TMI
-
OS에 따라 TTL 값이 다르게 나옴
-
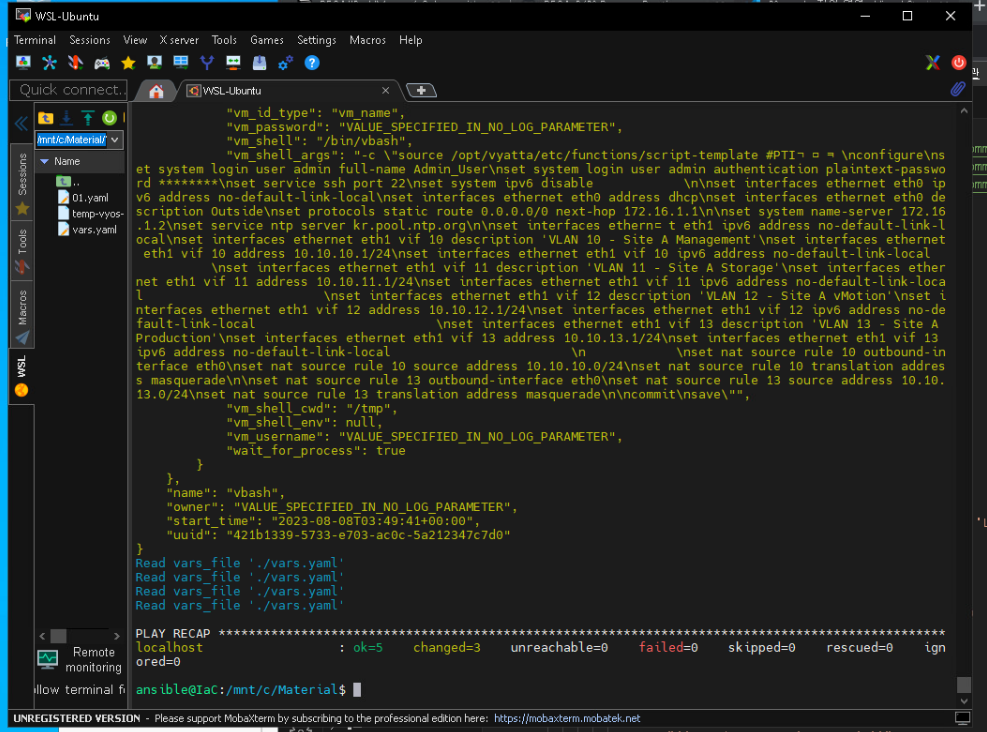
이미 실행된 yaml파일을 시작하는 경우 결과가 changes가 아닌 ok만 출력

Switching
vlan_id: 4095 : 4095 -> 0번과 같이 system이 쓰는 vlan
Routing
Window Server
윈도우 서버 설치 - Domain Controller로 사용.
yaml 파일 내용: datacenter 이름, folder 위치, 인증서 확인 여부, Network 설정
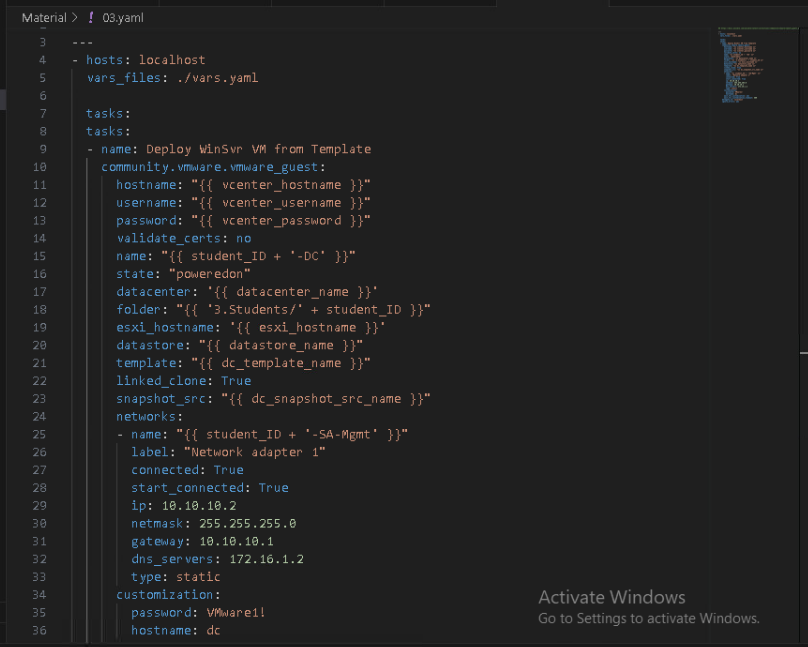
yaml 실행
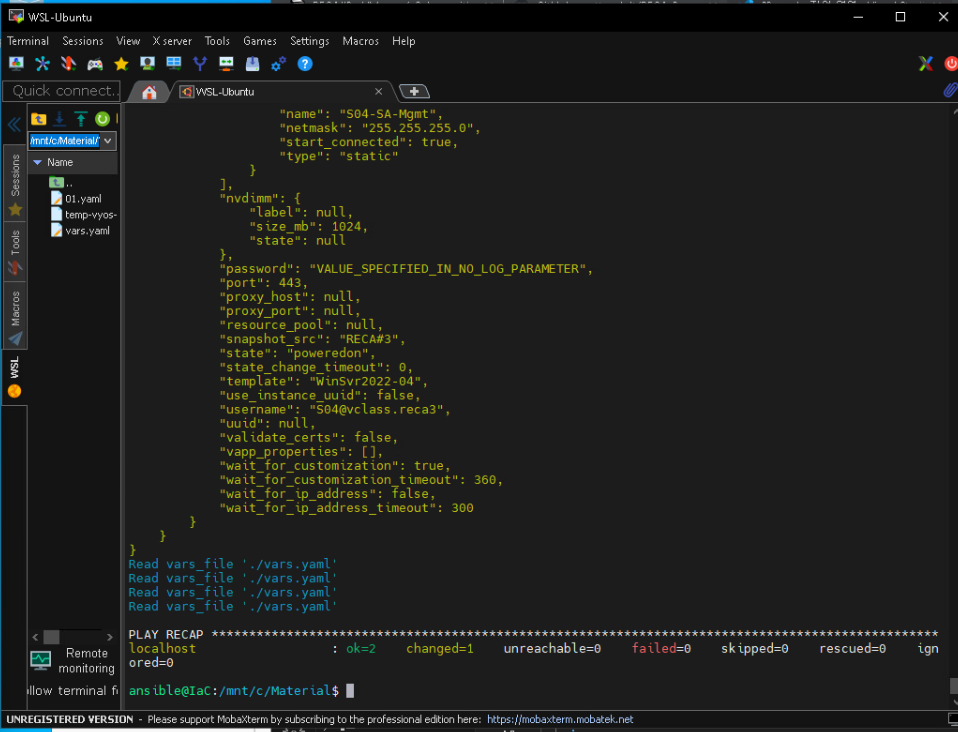
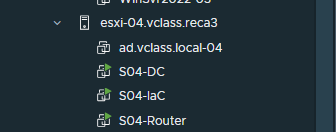
yaml 실행 후 DataCenter가 생성된 모습.
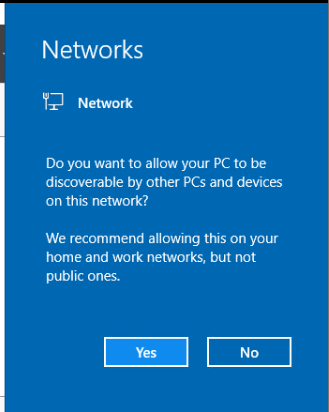
Window Server 입장.
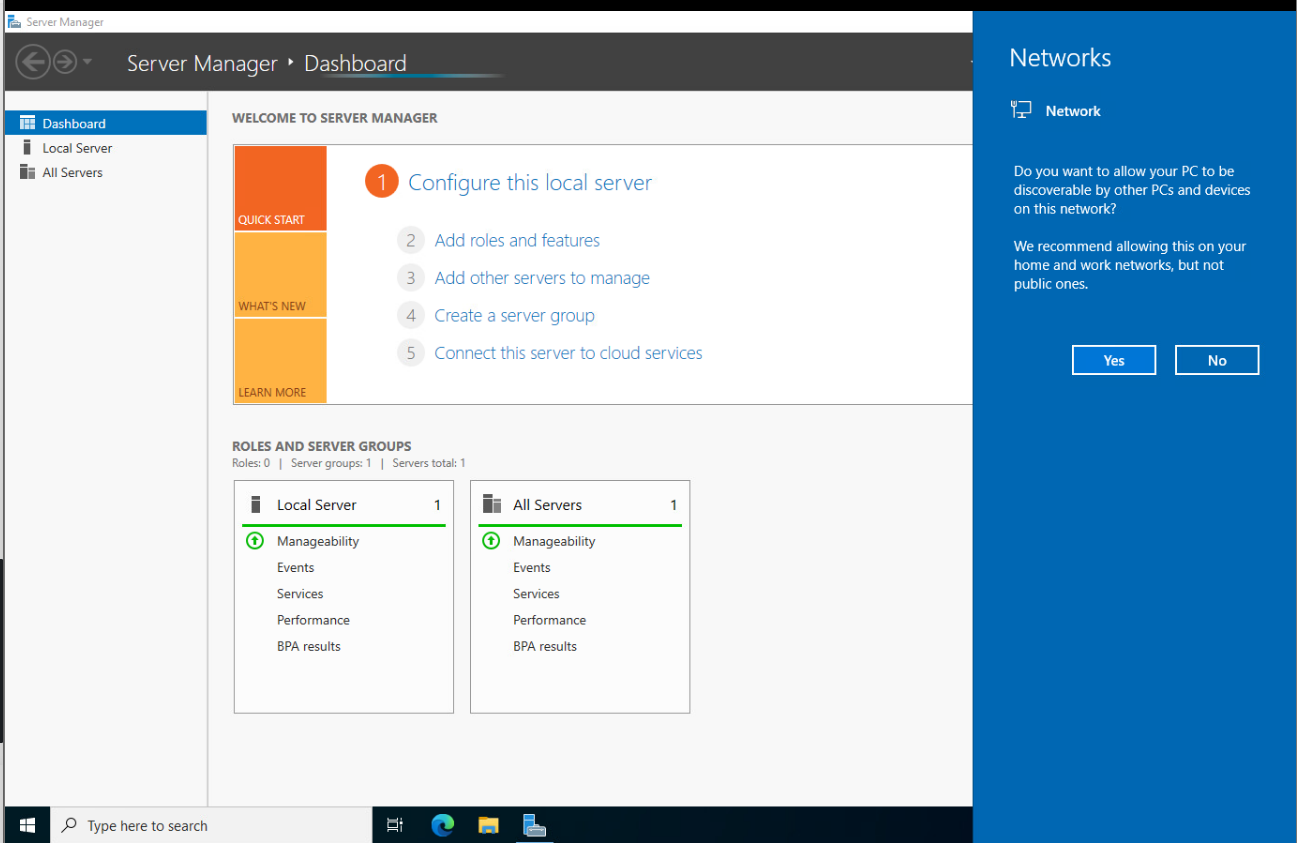
Yes 선택
Domain Controller
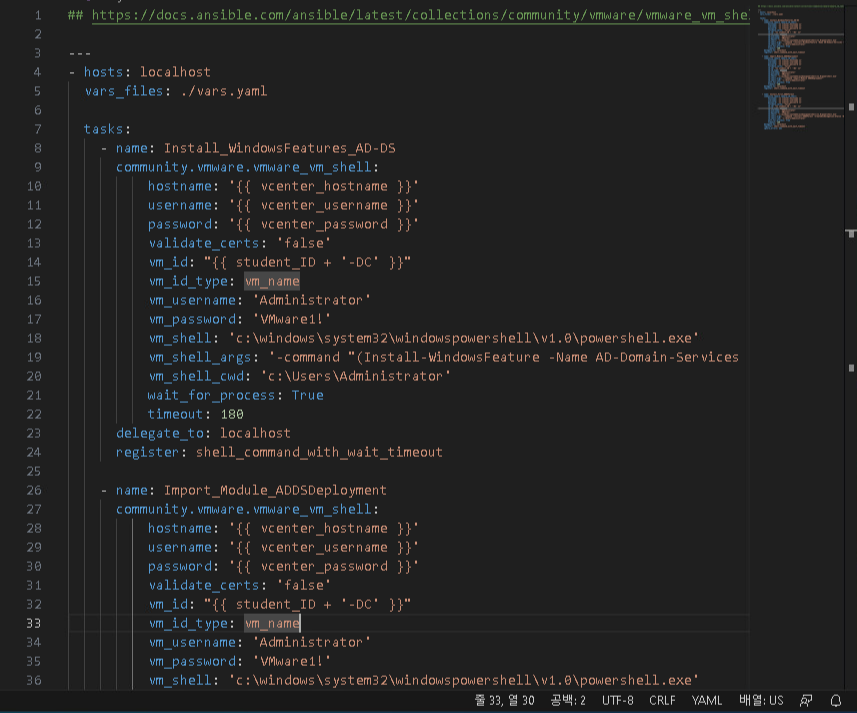
Window Server가 Domain Controller 동작을 할 수 있도록 기능을 활성화.
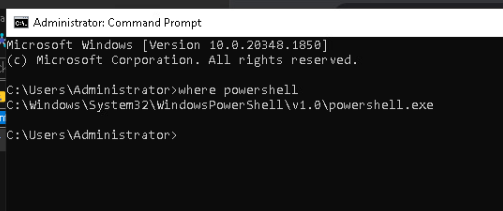
특징: Window Server OS를 사용하기 때문에 PowerShell의 명령어를 사용함

powershell 위치
## https://docs.ansible.com/ansible/latest/collections/community/vmware/vmware_vm_shell_module.html#ansible-collections-community-vmware-vmware-vm-shell-module
---
- hosts: localhost
vars_files: ./vars.yaml
tasks:
- name: Install_WindowsFeatures_AD-DS
community.vmware.vmware_vm_shell:
hostname: '{{ vcenter_hostname }}'
username: '{{ vcenter_username }}'
password: '{{ vcenter_password }}'
validate_certs: 'false'
vm_id: "{{ student_ID + '-DC' }}"
vm_id_type: vm_name
vm_username: 'Administrator'
vm_password: 'VMware1!'
vm_shell: 'c:\windows\system32\windowspowershell\v1.0\powershell.exe'
vm_shell_args: '-command "(Install-WindowsFeature -Name AD-Domain-Services -IncludeManagementTools)"'
vm_shell_cwd: 'c:\Users\Administrator'
wait_for_process: True
timeout: 180
delegate_to: localhost
register: shell_command_with_wait_timeout
- name: Import_Module_ADDSDeployment
community.vmware.vmware_vm_shell:
hostname: '{{ vcenter_hostname }}'
username: '{{ vcenter_username }}'
password: '{{ vcenter_password }}'
validate_certs: 'false'
vm_id: "{{ student_ID + '-DC' }}"
vm_id_type: vm_name
vm_username: 'Administrator'
vm_password: 'VMware1!'
vm_shell: 'c:\windows\system32\windowspowershell\v1.0\powershell.exe'
vm_shell_args: '-command "Import-Module ADDSDeployment"'
vm_shell_cwd: 'c:\Users\Administrator'
wait_for_process: True
timeout: 180
delegate_to: localhost
register: shell_command_with_wait_timeout
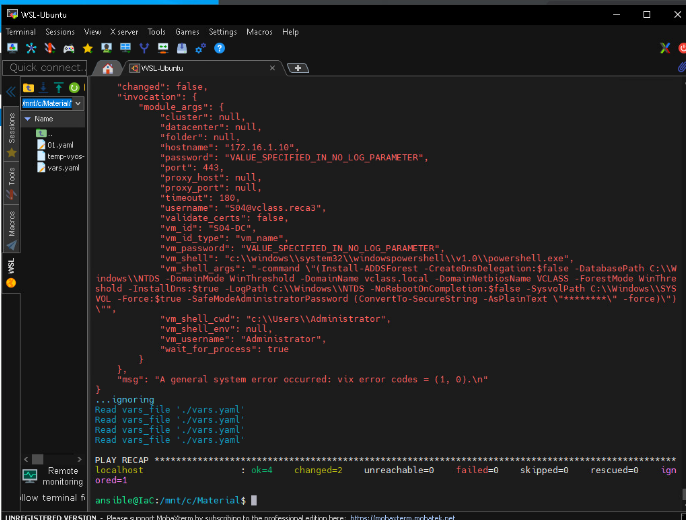
- name: Install_First_ADDSForest
community.vmware.vmware_vm_shell:
hostname: '{{ vcenter_hostname }}'
username: '{{ vcenter_username }}'
password: '{{ vcenter_password }}'
validate_certs: 'false'
vm_id: "{{ student_ID + '-DC' }}"
vm_id_type: vm_name
vm_username: 'Administrator'
vm_password: 'VMware1!'
vm_shell: 'c:\windows\system32\windowspowershell\v1.0\powershell.exe'
vm_shell_args: '-command "(Install-ADDSForest -CreateDnsDelegation:$false -DatabasePath C:\Windows\NTDS -DomainMode WinThreshold -DomainName vclass.local -DomainNetbiosName VCLASS -ForestMode WinThreshold -InstallDns:$true -LogPath C:\Windows\NTDS -NoRebootOnCompletion:$false -SysvolPath C:\Windows\SYSVOL -Force:$true -SafeModeAdministratorPassword (ConvertTo-SecureString -AsPlainText "VMware1!" -force)")"'
vm_shell_cwd: 'c:\Users\Administrator'
wait_for_process: True
timeout: 180
delegate_to: localhost
register: shell_command_with_wait_timeout
ignore_errors: yes DSRM: Directory Services Remote Mode
Additional Options
yaml로 설정
yaml 작성
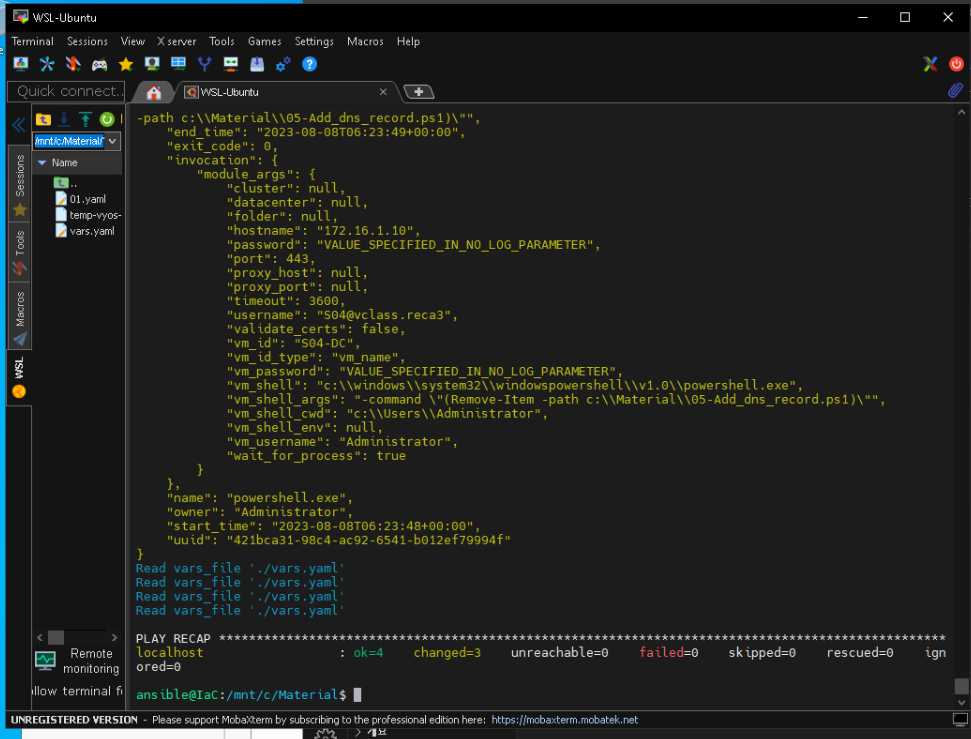
yaml 실행: 붉은 글씨로 출력되는 부분이 있지만, failed가 아닌 error 메세지이므로 설정은 정상적으로 진행됨.
실행 후 Domain Controller 서버 확인
서버의 시간 설정

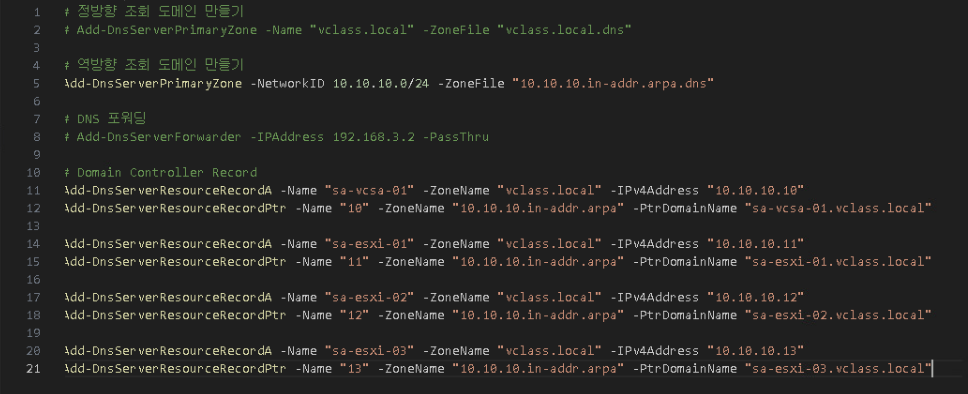
DNS 추가 방법
정방향, 역방향...
1. yaml
2. dnsmgmt.msc 에서 직접 추가
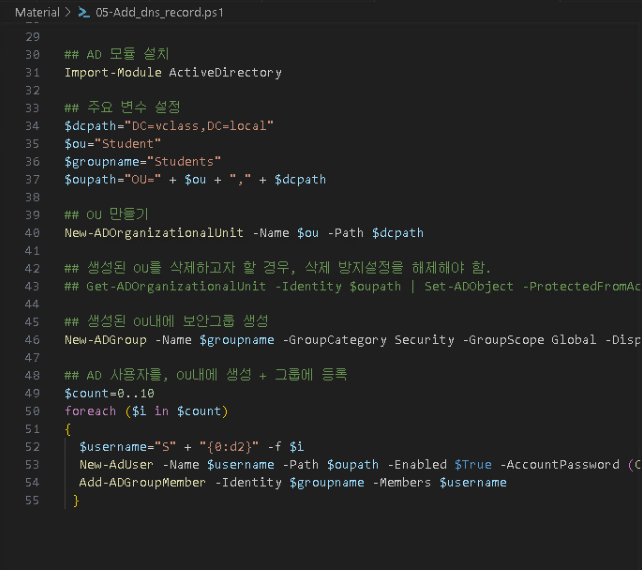
yaml
powershell 파일 생성 - 주의 사항: 주석을 한글로 작성한 경우, 마지막에 빈칸(space bar)을 추가하지 않으면 아래 줄 내용이 올라오는 경우가 있음.
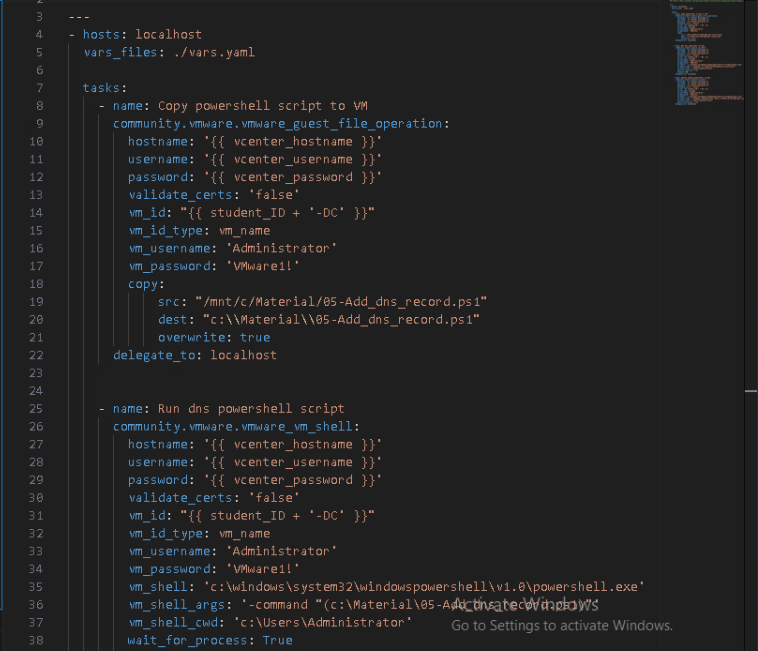
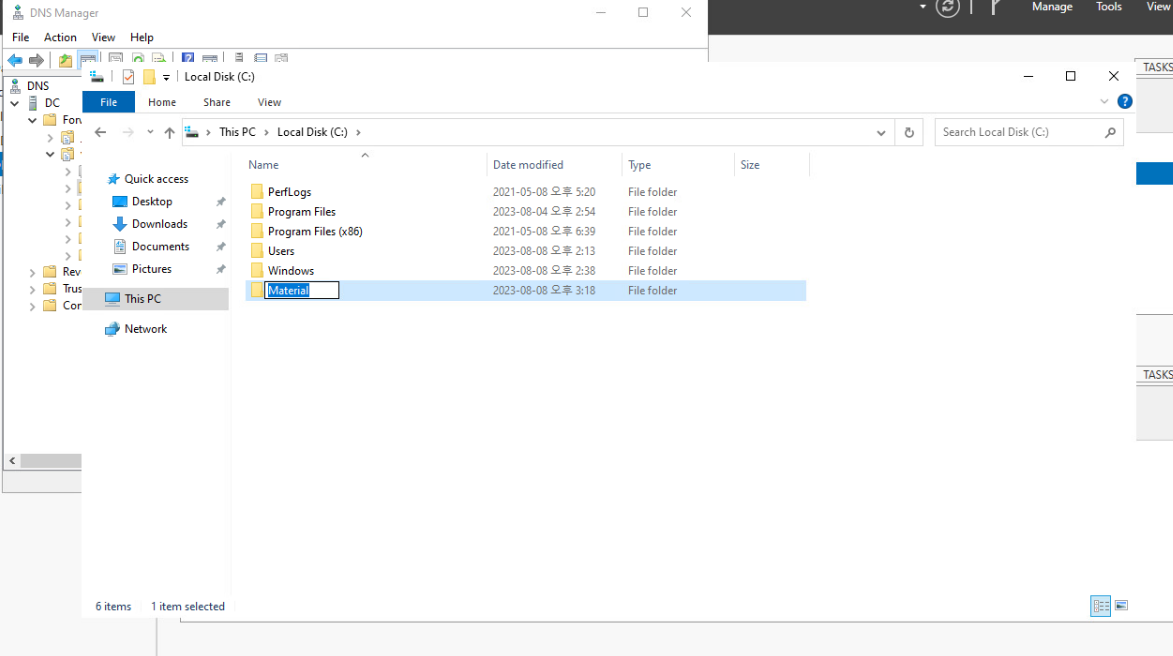
DNS 복사를 위해 폴더 생성
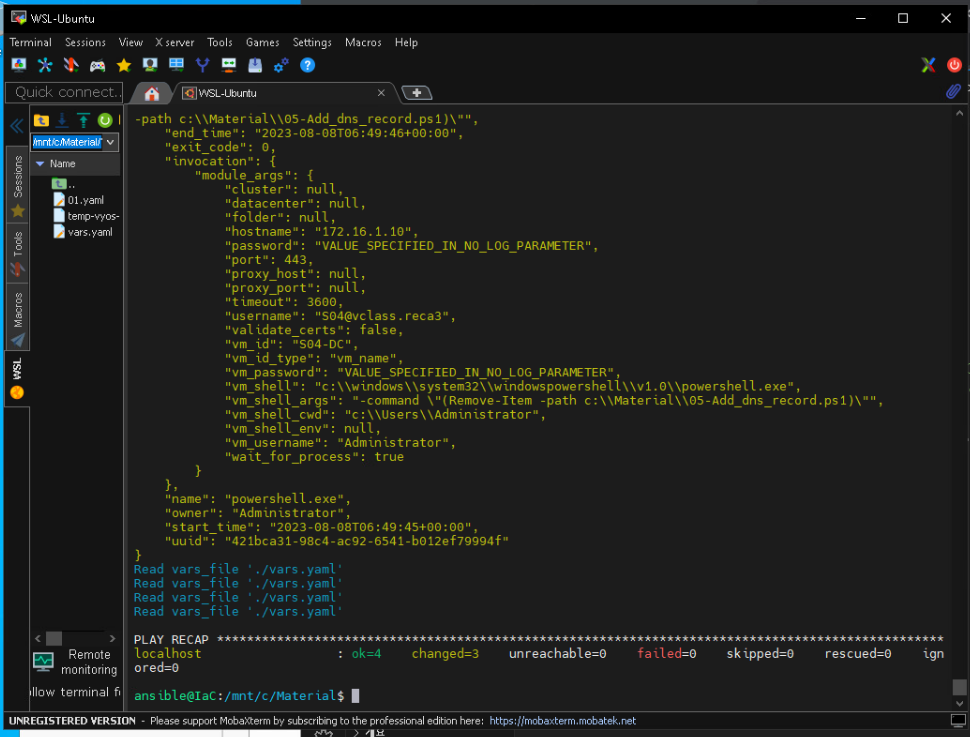
yaml 실행
생성되고

사라짐
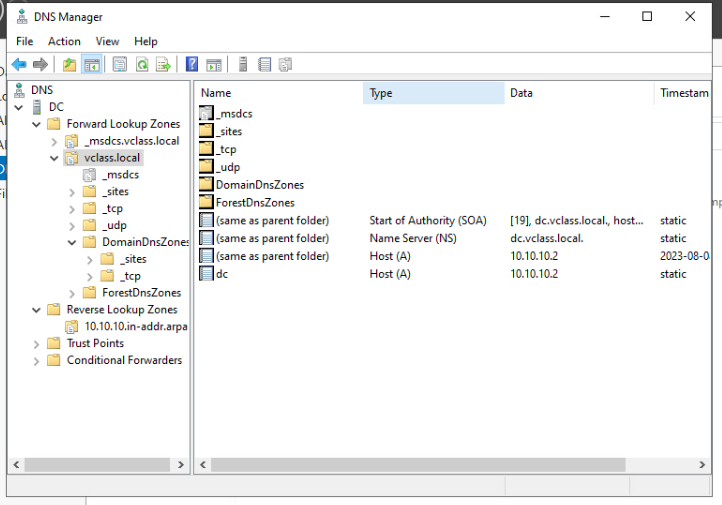
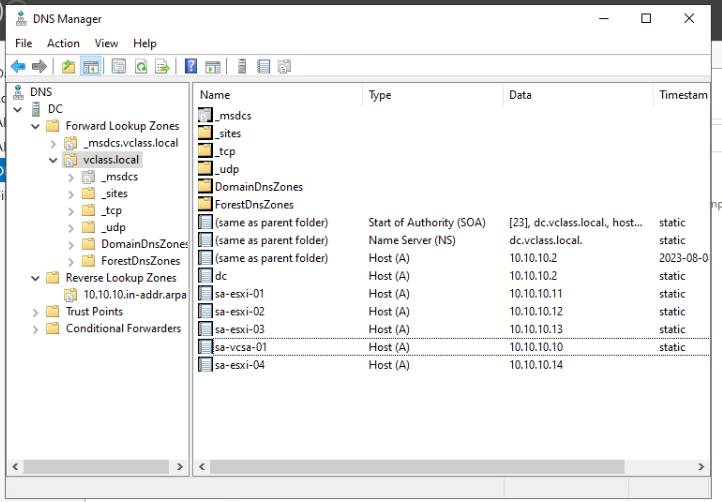
DNS Manager에서 확인(before)
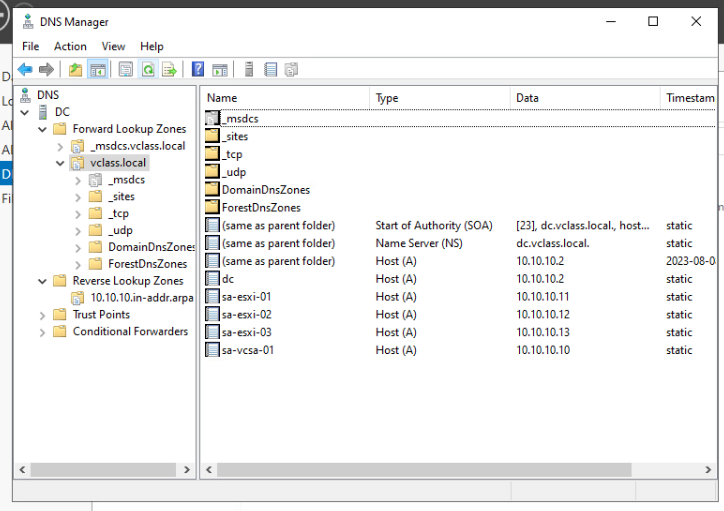
(after)
ps파일 내용을 DNS 추가가 아니라 AD User 추가로 바꿔도 스크립트는 실행되기 떄문에 오류가 발생하지 않음
ps파일 수정
yaml 실행
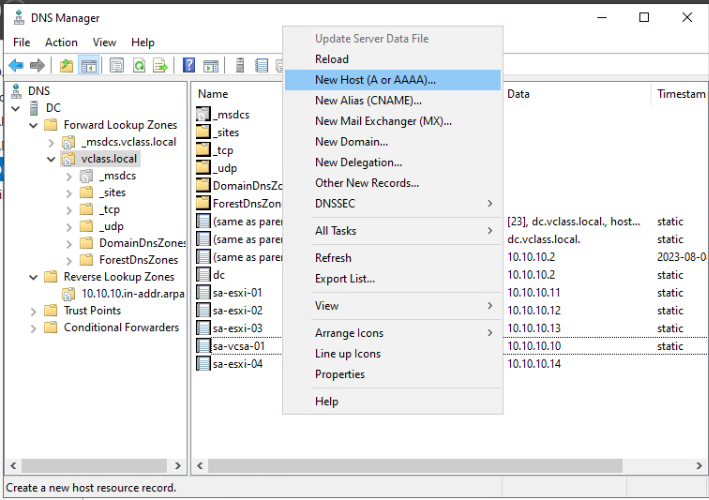
직접 추가
DNS Manager에서 New Host 클릭
Host 정보 입력
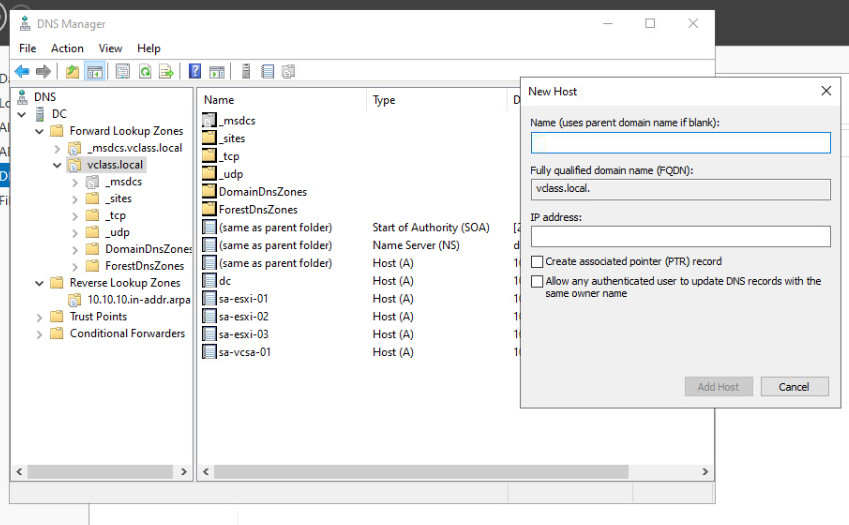
생성
User 설정 가능.
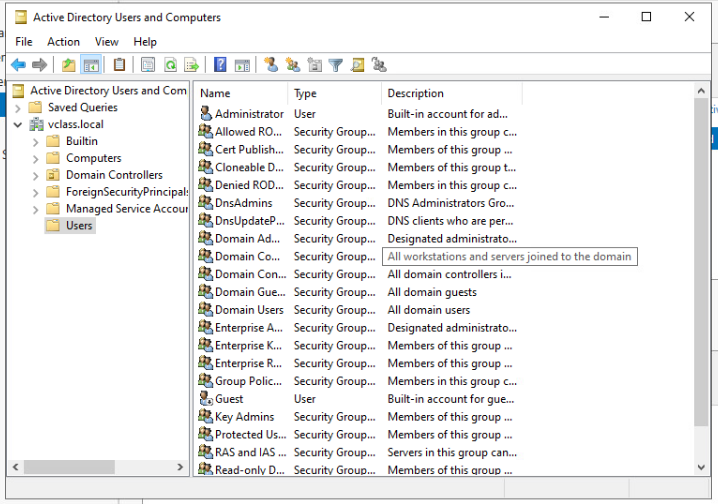
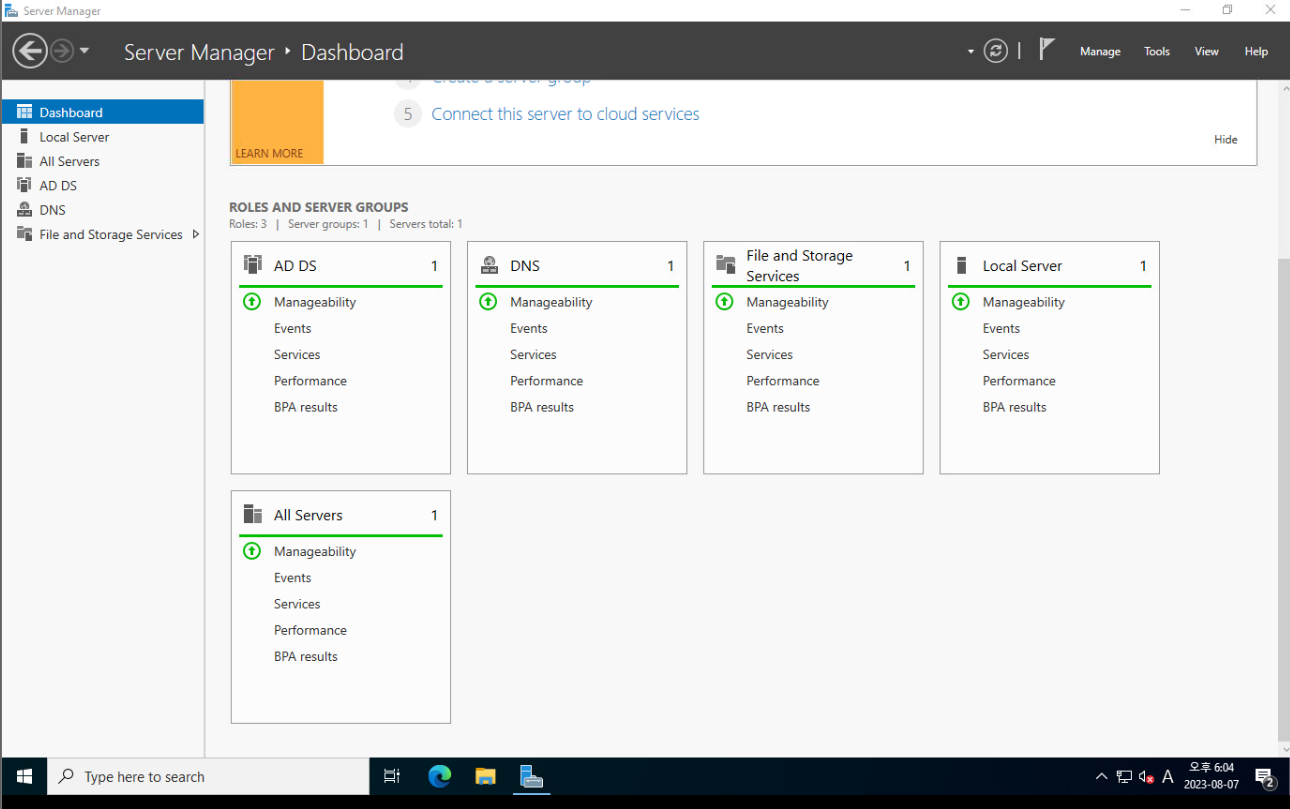
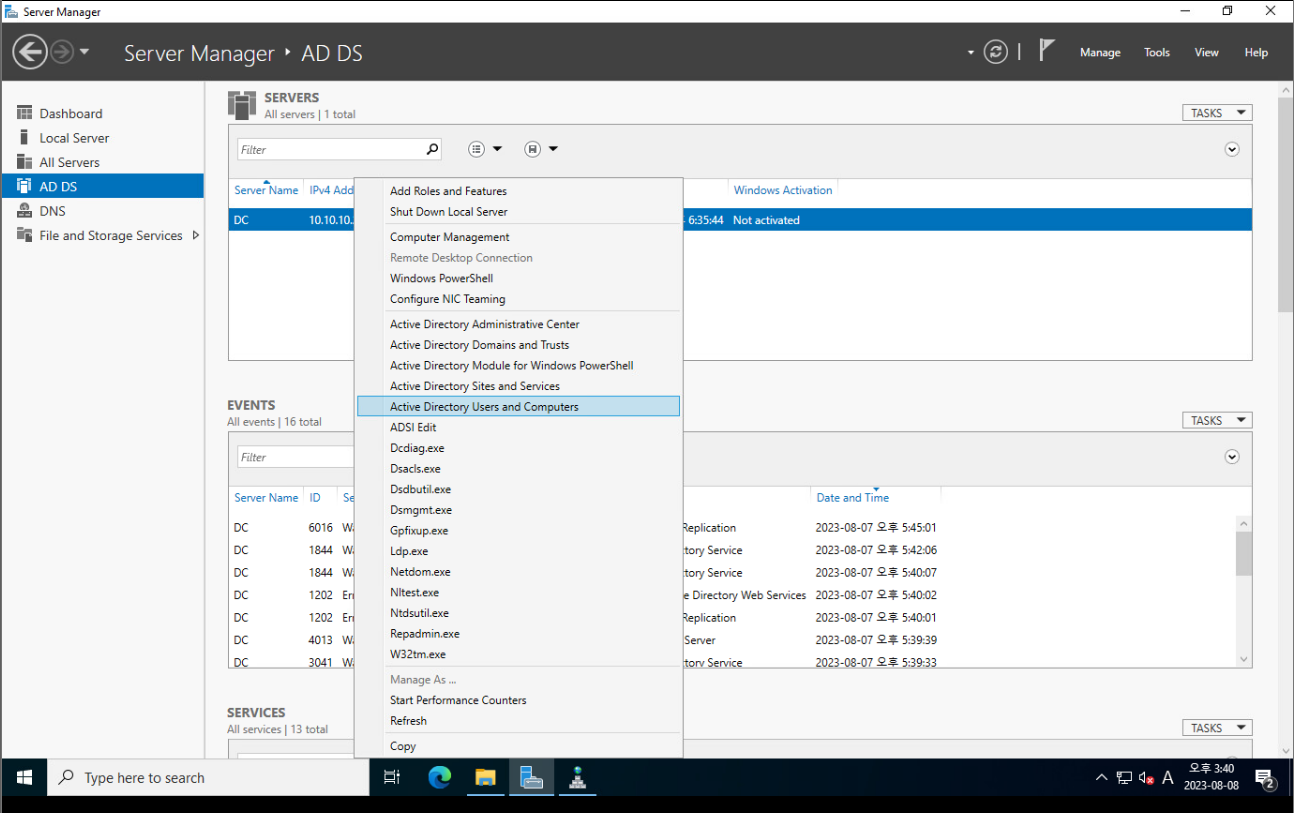
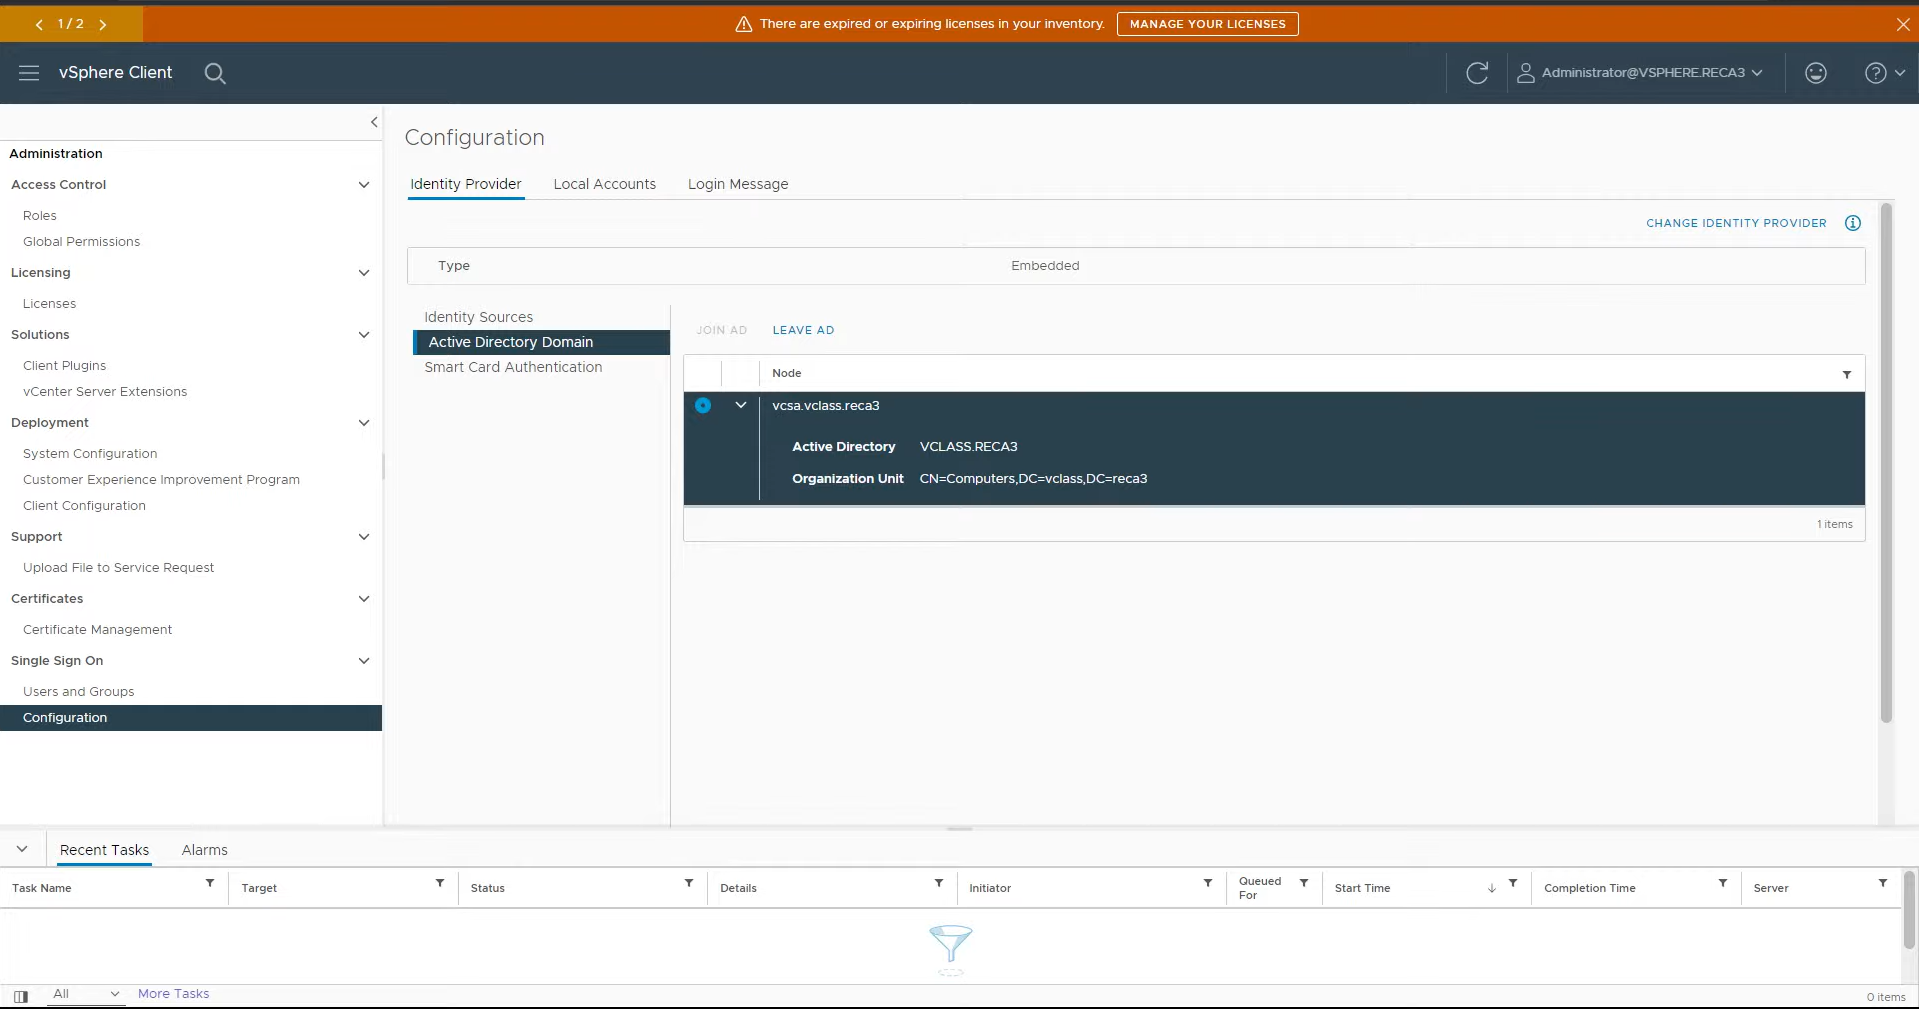
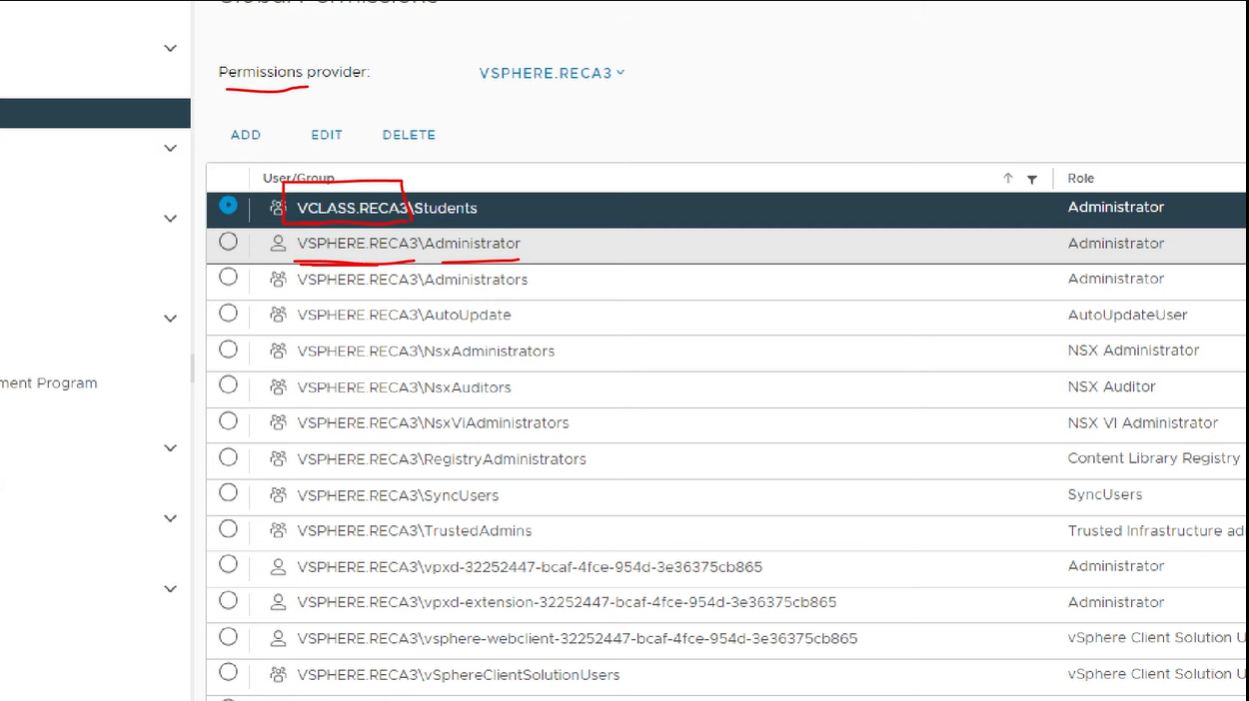
vSphere에서 Admin 계정으로 로그인하면 Acrive Direstory Domain 목록 확인 가능.
ESXi 생성
방법 1) ESXi 옵션을 직접 설정
주요 옵션
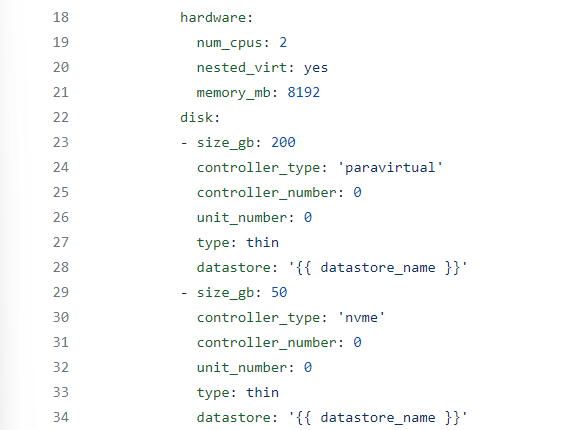
nvme 설정 시 unit_number를 추가하는 이유: vSAN에서 사용하기 위해
---
- hosts: localhost
vars_files: ./vars.yaml
tasks:
- name: Create ESXi VMs
community.vmware.vmware_guest:
hostname: "{{ vcenter_hostname }}"
username: "{{ vcenter_username }}"
password: "{{ vcenter_password }}"
validate_certs: 'false'
datacenter: '{{datacenter_name}}'
folder: '{{ folder_prefix + student_ID }}'
name: '{{ item.vmname }}'
state: poweredoff
guest_id: vmkernel7Guest
esxi_hostname: "{{ esxi_hostname }}"
hardware:
num_cpus: 2
nested_virt: yes
memory_mb: 8192
disk:
- size_gb: 200
controller_type: 'paravirtual'
controller_number: 0
unit_number: 0
type: thin
datastore: '{{ datastore_name }}'
- size_gb: 50
controller_type: 'nvme'
controller_number: 0
unit_number: 0
type: thin
datastore: '{{ datastore_name }}'
- size_gb: 50
controller_type: 'nvme'
controller_number: 0
unit_number: 1
type: thin
datastore: '{{ datastore_name }}'
- size_gb: 200
controller_type: 'nvme'
controller_number: 0
unit_number: 2
type: thin
datastore: '{{ datastore_name }}'
- size_gb: 200
controller_type: 'nvme'
controller_number: 0
unit_number: 3
type: thin
datastore: '{{ datastore_name }}'
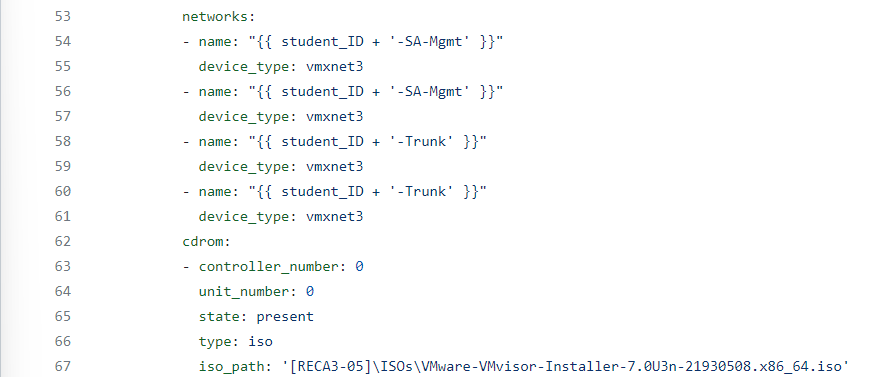
networks:
- name: "{{ student_ID + '-SA-Mgmt' }}"
device_type: vmxnet3
- name: "{{ student_ID + '-SA-Mgmt' }}"
device_type: vmxnet3
- name: "{{ student_ID + '-Trunk' }}"
device_type: vmxnet3
- name: "{{ student_ID + '-Trunk' }}"
device_type: vmxnet3
cdrom:
- controller_number: 0
unit_number: 0
state: present
type: iso
iso_path: '[RECA3-05]\ISOs\VMware-VMvisor-Installer-7.0U3n-21930508.x86_64.iso'
with_items:
- {vmname: "{{ student_ID + '-SA-ESXi-01' }}" }
- {vmname: "{{ student_ID + '-SA-ESXi-02' }}" }
- {vmname: "{{ student_ID + '-SA-ESXi-03' }}" }
delegate_to: localhost
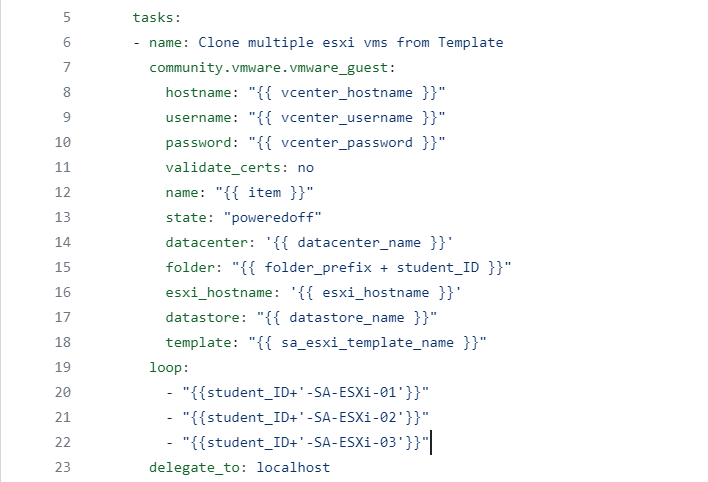
register: deploy_vm방법 2) 이미 있는 ESXi를 복제
주요 내용
Full Clone에 대한 내용
Network 설정
powershell script 실행
yaml 실행 완료
---
- hosts: localhost
vars_files: ./vars.yaml
tasks:
- name: Clone multiple esxi vms from Template
community.vmware.vmware_guest:
hostname: "{{ vcenter_hostname }}"
username: "{{ vcenter_username }}"
password: "{{ vcenter_password }}"
validate_certs: no
name: "{{ item }}"
state: "poweredoff"
datacenter: '{{ datacenter_name }}'
folder: "{{ folder_prefix + student_ID }}"
esxi_hostname: '{{ esxi_hostname }}'
datastore: "{{ datastore_name }}"
template: "{{ sa_esxi_template_name }}"
loop:
- "{{student_ID+'-SA-ESXi-01'}}"
- "{{student_ID+'-SA-ESXi-02'}}"
- "{{student_ID+'-SA-ESXi-03'}}"
delegate_to: localhost
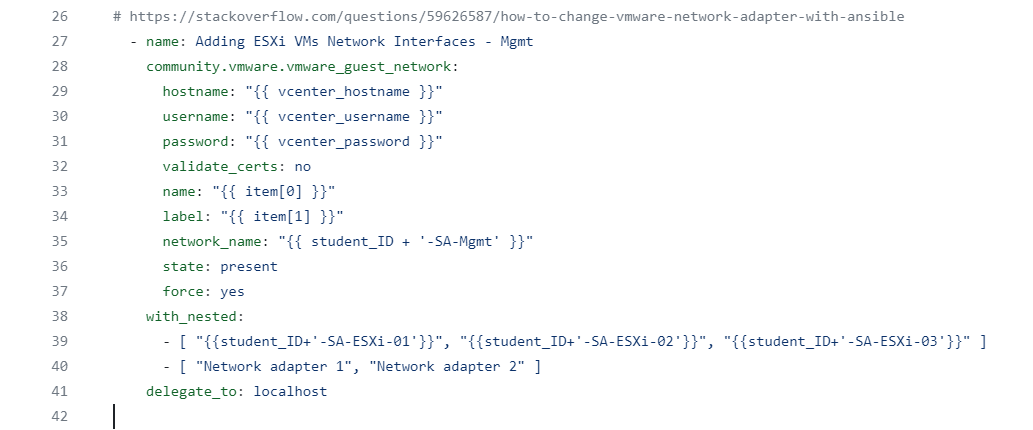
# https://stackoverflow.com/questions/59626587/how-to-change-vmware-network-adapter-with-ansible
- name: Adding ESXi VMs Network Interfaces - Mgmt
community.vmware.vmware_guest_network:
hostname: "{{ vcenter_hostname }}"
username: "{{ vcenter_username }}"
password: "{{ vcenter_password }}"
validate_certs: no
name: "{{ item[0] }}"
label: "{{ item[1] }}"
network_name: "{{ student_ID + '-SA-Mgmt' }}"
state: present
force: yes
with_nested:
- [ "{{student_ID+'-SA-ESXi-01'}}", "{{student_ID+'-SA-ESXi-02'}}", "{{student_ID+'-SA-ESXi-03'}}" ]
- [ "Network adapter 1", "Network adapter 2" ]
delegate_to: localhost
# https://stackoverflow.com/questions/59626587/how-to-change-vmware-network-adapter-with-ansible
- name: Adding ESXi VMs Network Interfaces - Trunk
community.vmware.vmware_guest_network:
hostname: "{{ vcenter_hostname }}"
username: "{{ vcenter_username }}"
password: "{{ vcenter_password }}"
validate_certs: no
name: "{{ item[0] }}"
label: "{{ item[1] }}"
network_name: "{{ student_ID + '-Trunk' }}"
state: present
force: yes
with_nested:
- [ "{{student_ID+'-SA-ESXi-01'}}", "{{student_ID+'-SA-ESXi-02'}}", "{{student_ID+'-SA-ESXi-03'}}" ]
- [ "Network adapter 3", "Network adapter 4" ]
delegate_to: localhost
# https://docs.ansible.com/ansible/latest/collections/community/vmware/vmware_guest_module.html
- name: Power on ESXi VMs
community.vmware.vmware_guest:
hostname: "{{ vcenter_hostname }}"
username: "{{ vcenter_username }}"
password: "{{ vcenter_password }}"
validate_certs: no
name: "{{ item }}"
state: "poweredon"
loop:
- "{{student_ID+'-SA-ESXi-01'}}"
- "{{student_ID+'-SA-ESXi-02'}}"
- "{{student_ID+'-SA-ESXi-03'}}"
delegate_to: localhost
- name: Waiting boot-up
wait_for:
timeout: 120
delegate_to: localhost
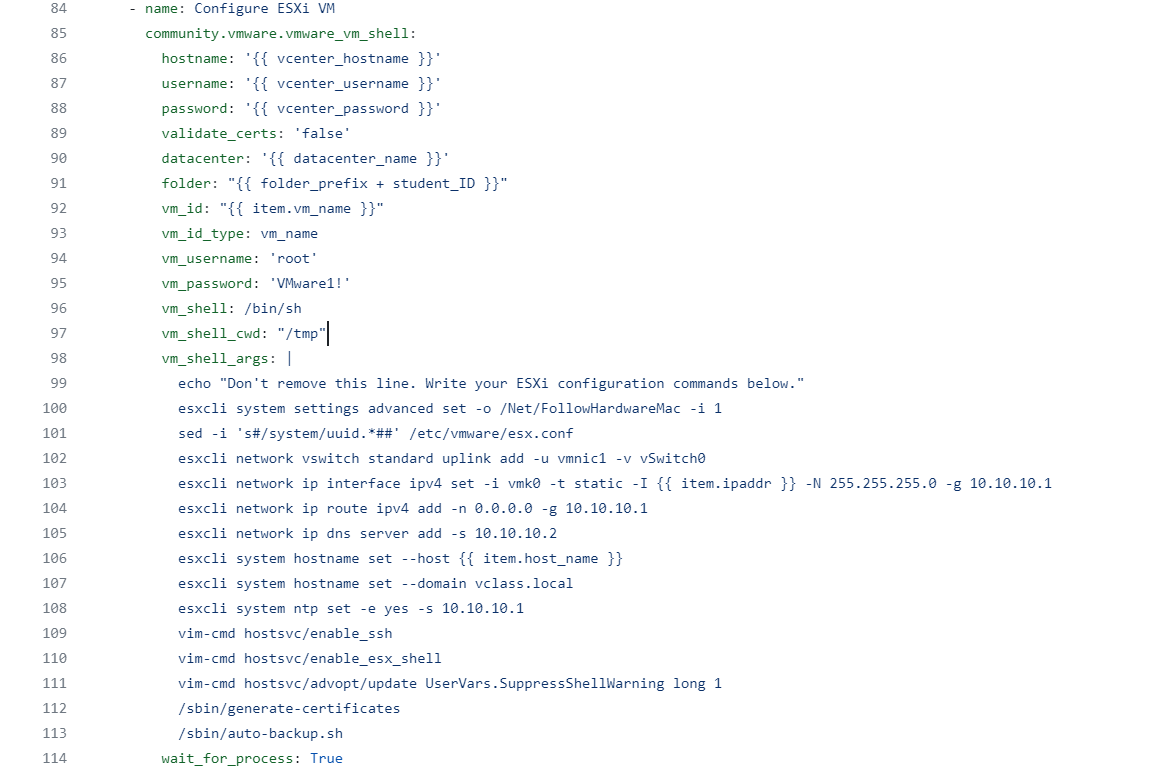
- name: Configure ESXi VM
community.vmware.vmware_vm_shell:
hostname: '{{ vcenter_hostname }}'
username: '{{ vcenter_username }}'
password: '{{ vcenter_password }}'
validate_certs: 'false'
datacenter: '{{ datacenter_name }}'
folder: "{{ folder_prefix + student_ID }}"
vm_id: "{{ item.vm_name }}"
vm_id_type: vm_name
vm_username: 'root'
vm_password: 'VMware1!'
vm_shell: /bin/sh
vm_shell_cwd: "/tmp"
vm_shell_args: |
echo "Don't remove this line. Write your ESXi configuration commands below."
esxcli system settings advanced set -o /Net/FollowHardwareMac -i 1
sed -i 's#/system/uuid.*##' /etc/vmware/esx.conf
esxcli network vswitch standard uplink add -u vmnic1 -v vSwitch0
esxcli network ip interface ipv4 set -i vmk0 -t static -I {{ item.ipaddr }} -N 255.255.255.0 -g 10.10.10.1
esxcli network ip route ipv4 add -n 0.0.0.0 -g 10.10.10.1
esxcli network ip dns server add -s 10.10.10.2
esxcli system hostname set --host {{ item.host_name }}
esxcli system hostname set --domain vclass.local
esxcli system ntp set -e yes -s 10.10.10.1
vim-cmd hostsvc/enable_ssh
vim-cmd hostsvc/enable_esx_shell
vim-cmd hostsvc/advopt/update UserVars.SuppressShellWarning long 1
/sbin/generate-certificates
/sbin/auto-backup.sh
wait_for_process: True
with_items:
- { vm_name: "{{student_ID+'-SA-ESXi-01'}}", host_name: sa-esxi-01, ipaddr: 10.10.10.11 }
- { vm_name: "{{student_ID+'-SA-ESXi-02'}}", host_name: sa-esxi-02, ipaddr: 10.10.10.12 }
- { vm_name: "{{student_ID+'-SA-ESXi-03'}}", host_name: sa-esxi-03, ipaddr: 10.10.10.13 }
# esxcli network vswitch standard portgroup set -p 'Management Network' -v 10
# esxcli network vswitch standard portgroup set -p 'VM Network' -v 10
- name: Reboot ESXi VM
community.vmware.vmware_guest_powerstate:
hostname: "{{ vcenter_hostname }}"
username: "{{ vcenter_username }}"
password: "{{ vcenter_password }}"
validate_certs: 'false'
folder: "{{ folder_prefix + student_ID }}"
name: "{{ item }}"
state: reboot-guest
loop:
- "{{student_ID+'-SA-ESXi-01'}}"
- "{{student_ID+'-SA-ESXi-02'}}"
- "{{student_ID+'-SA-ESXi-03'}}"
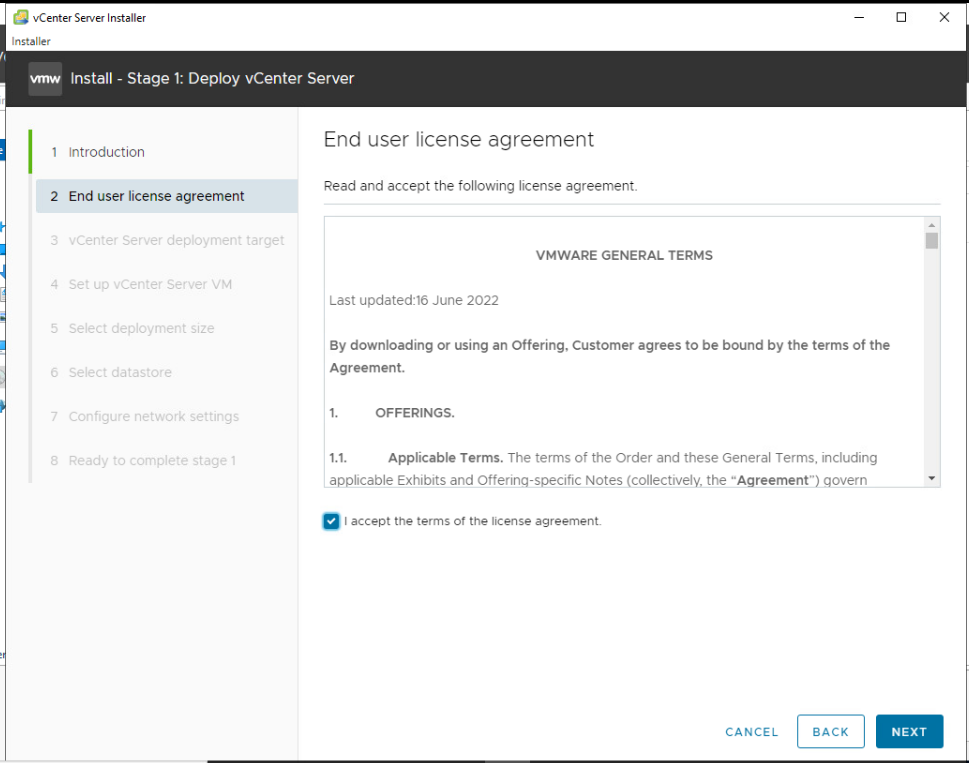
delegate_to: localhostVCSA 설치
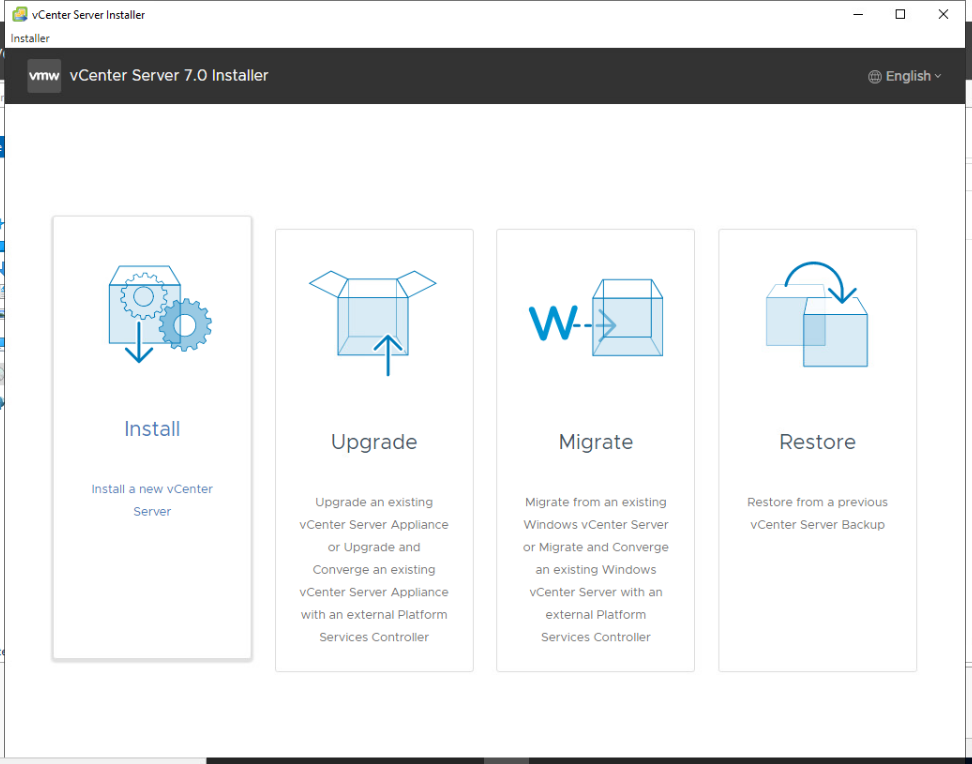
직접
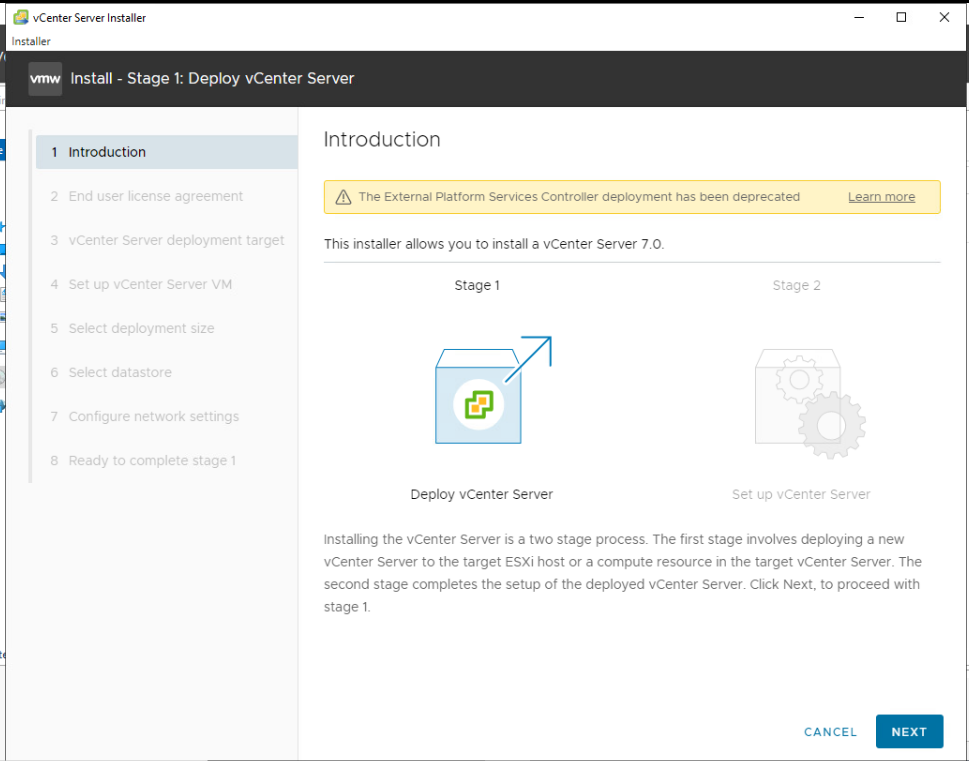
stage 1. Deploy new vCenter Server
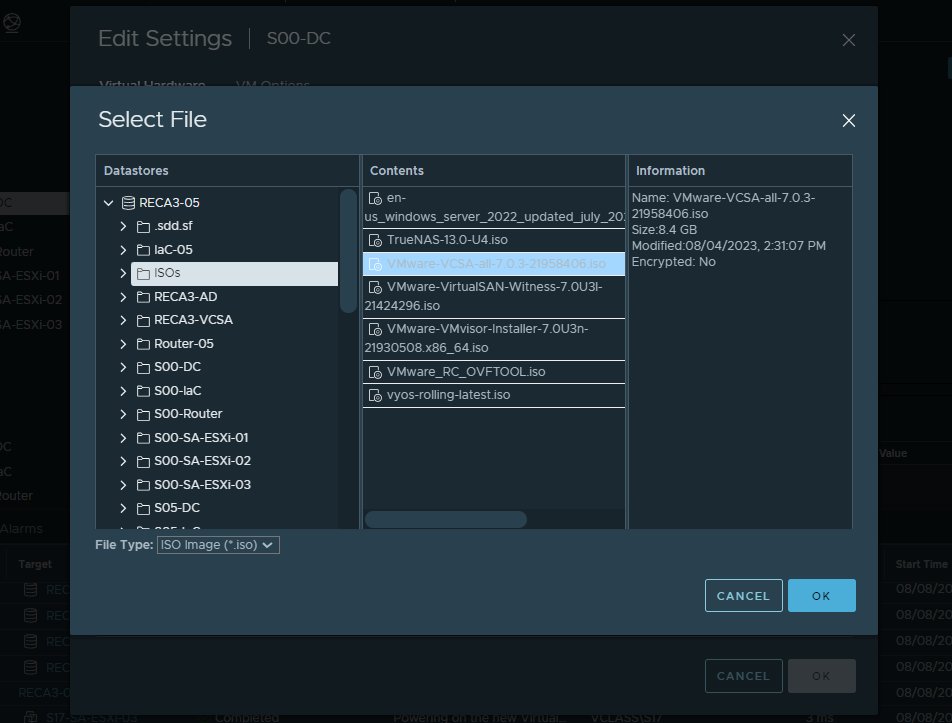
VCSA-all iso 파일 선택
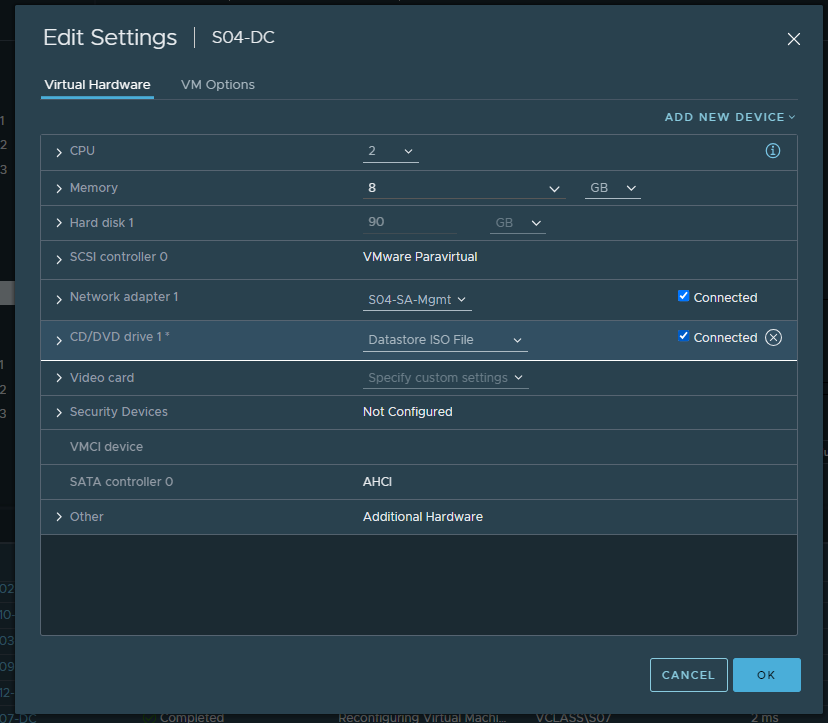
Connected 선택
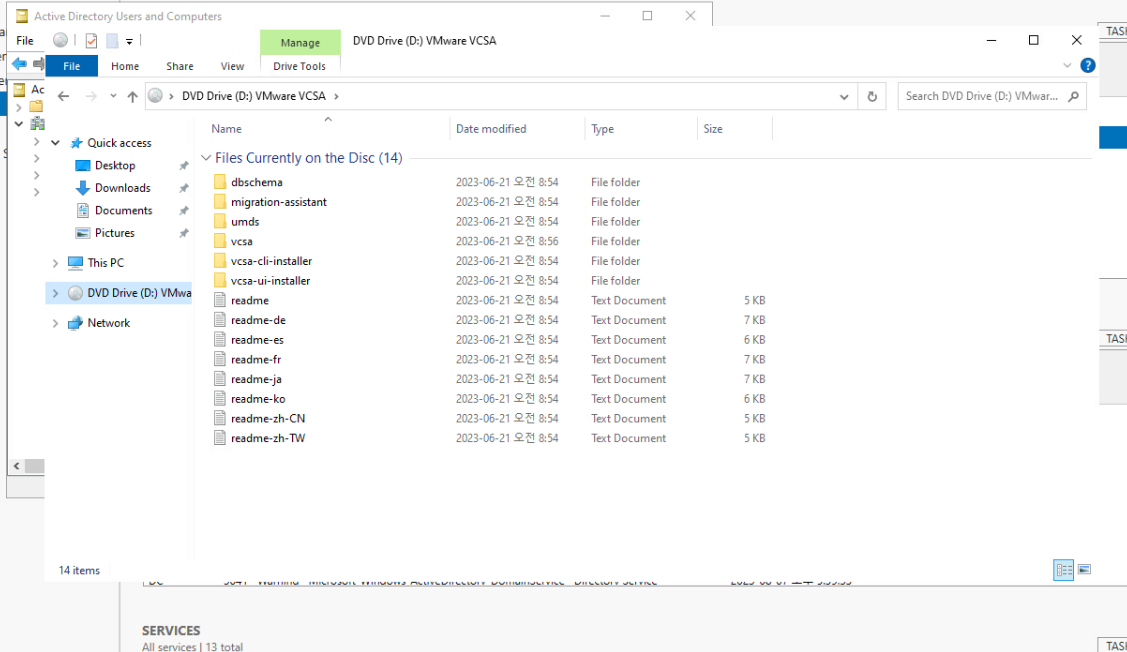
Window DC Server 접속
VMware VCSA 생성 확인
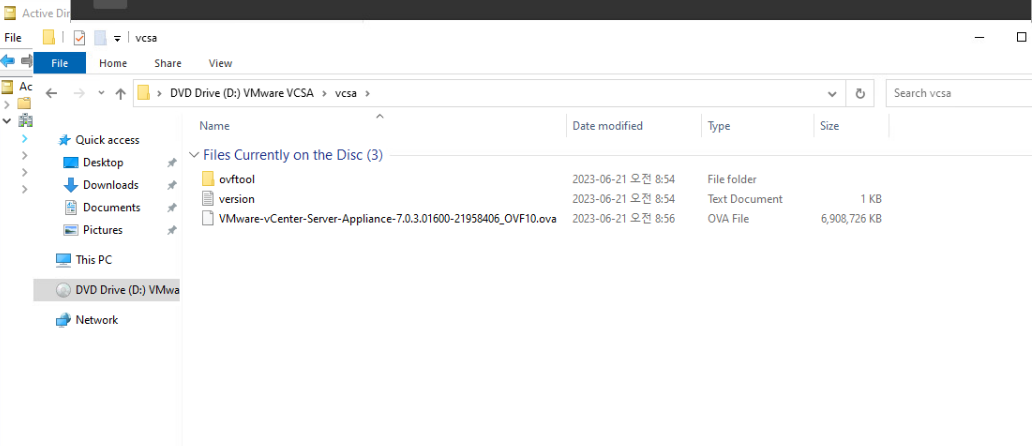
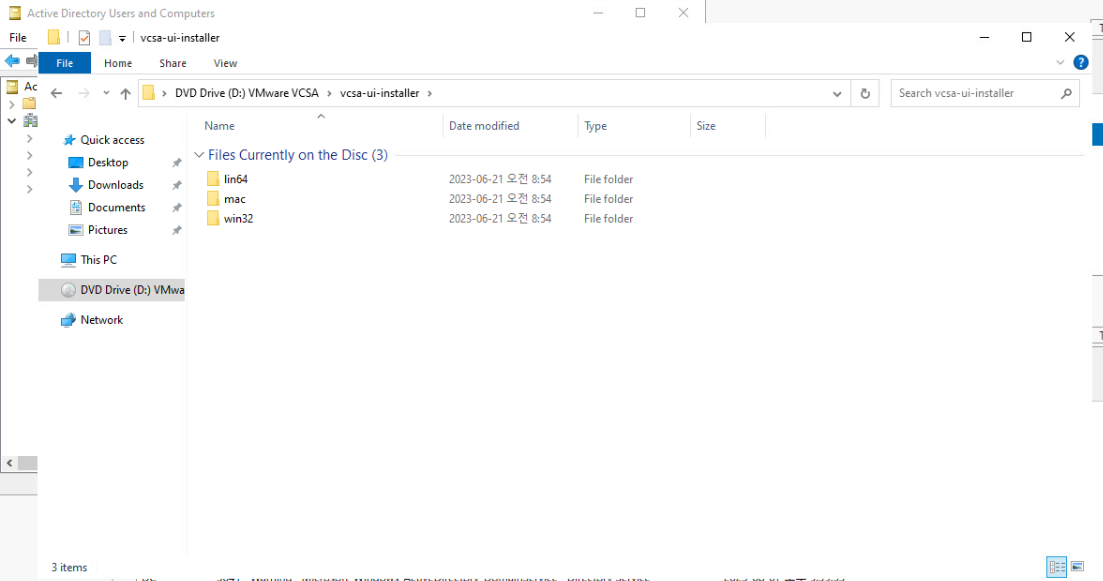
vCenter-Server-Appliance 이미지 파일 확인
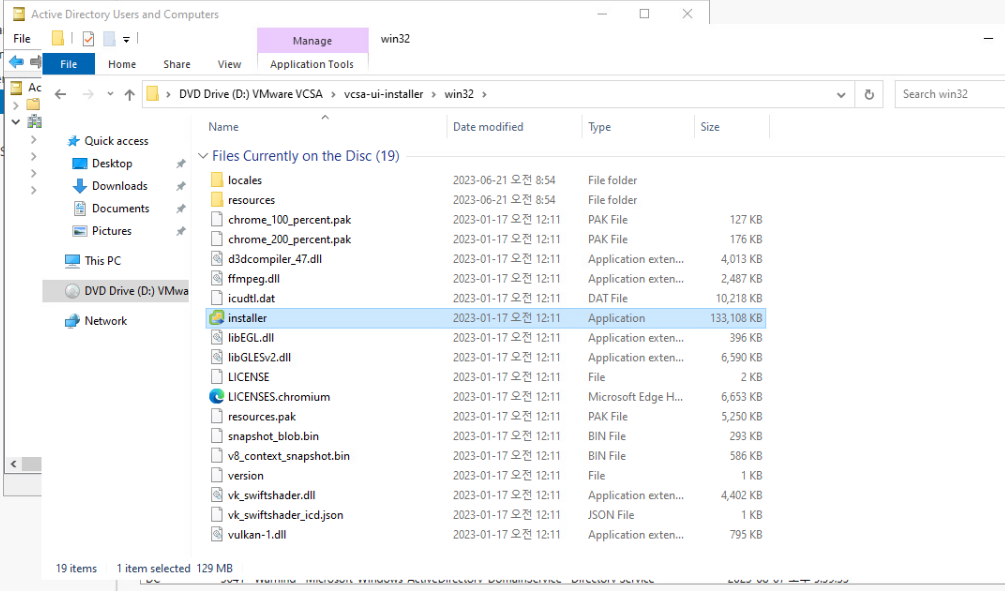
win32 선택
installer 선택
install 순서
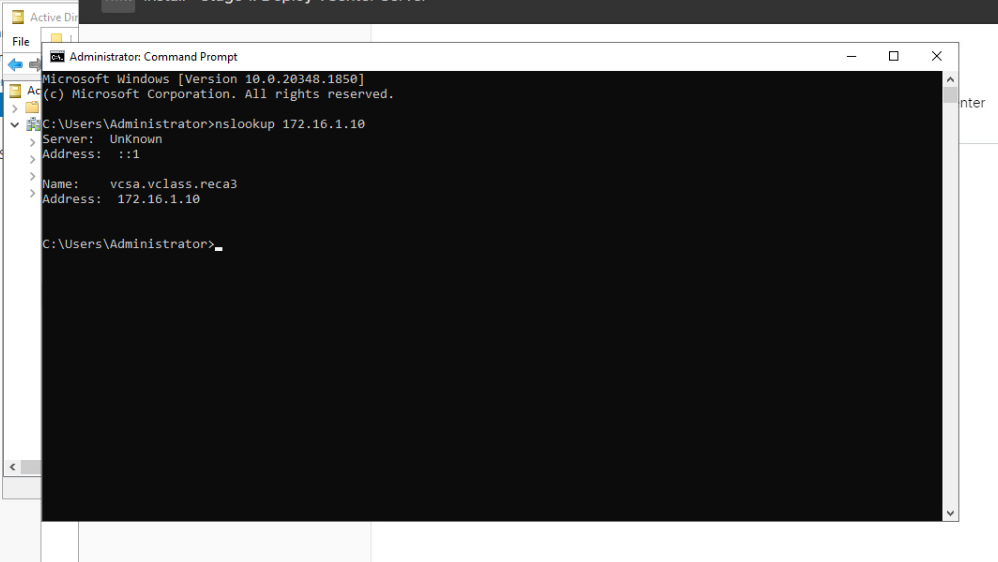
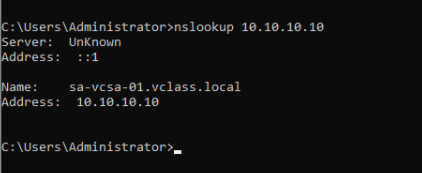
설치할 위치 확인: cmd -> nslookup 입력 -> 주소 확인
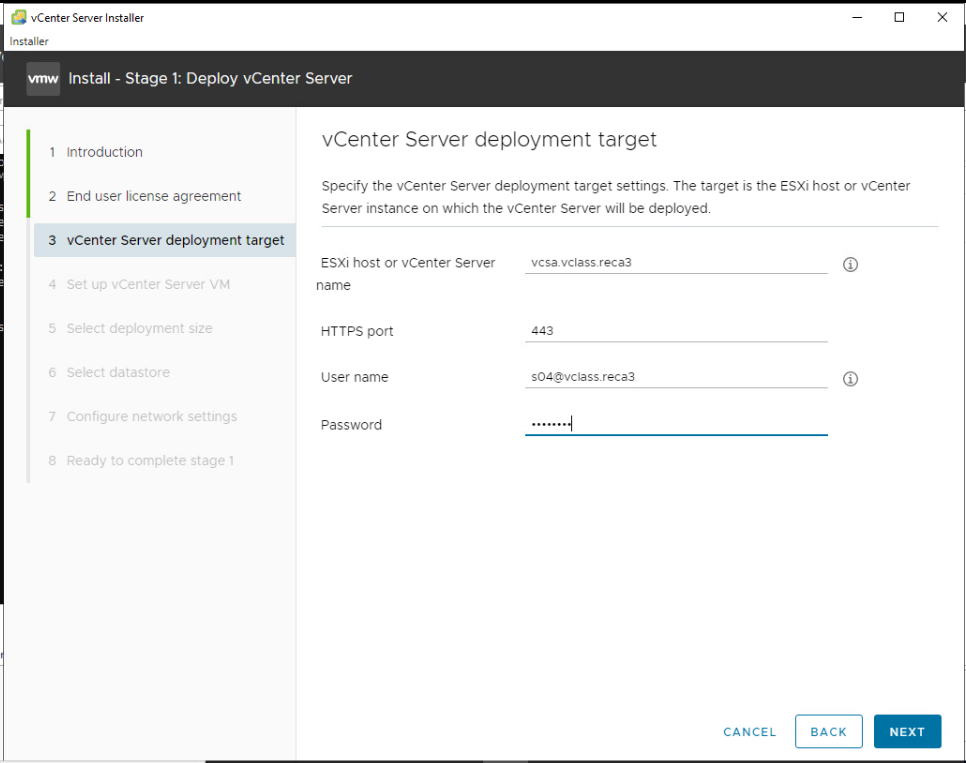
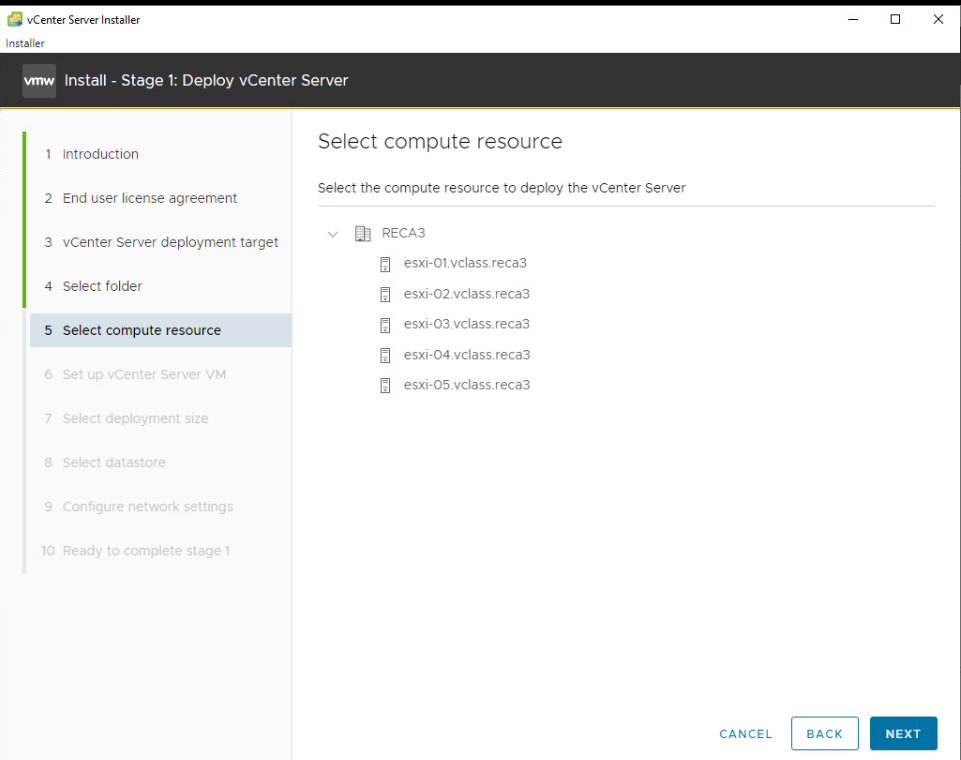
vCenter 배포 위치 입력
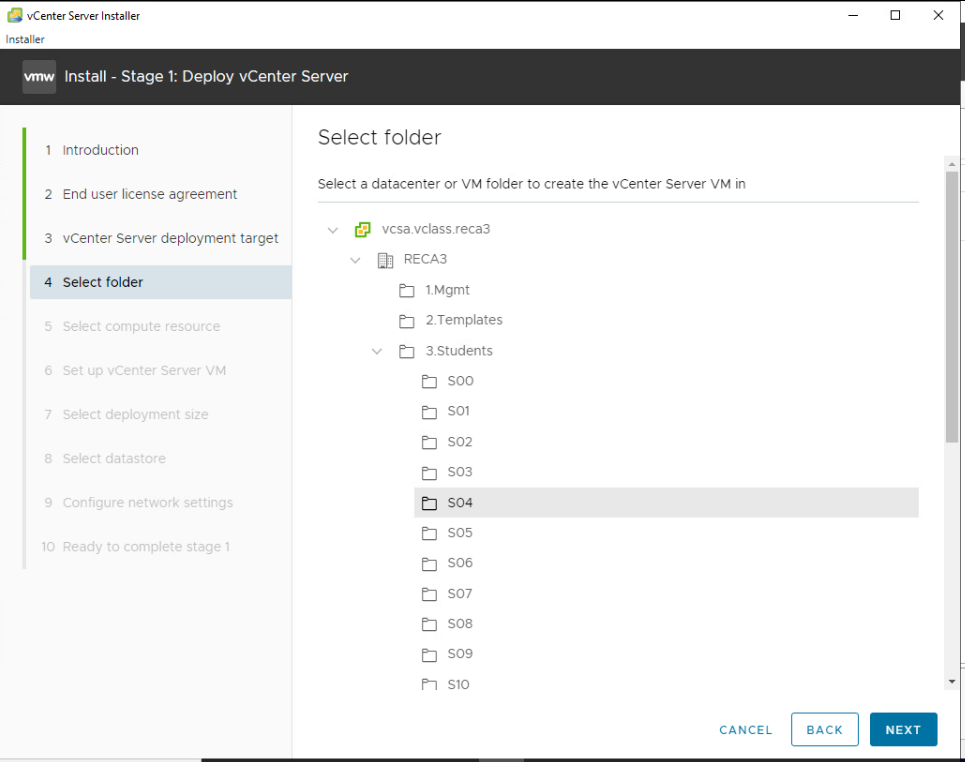
폴더 지정
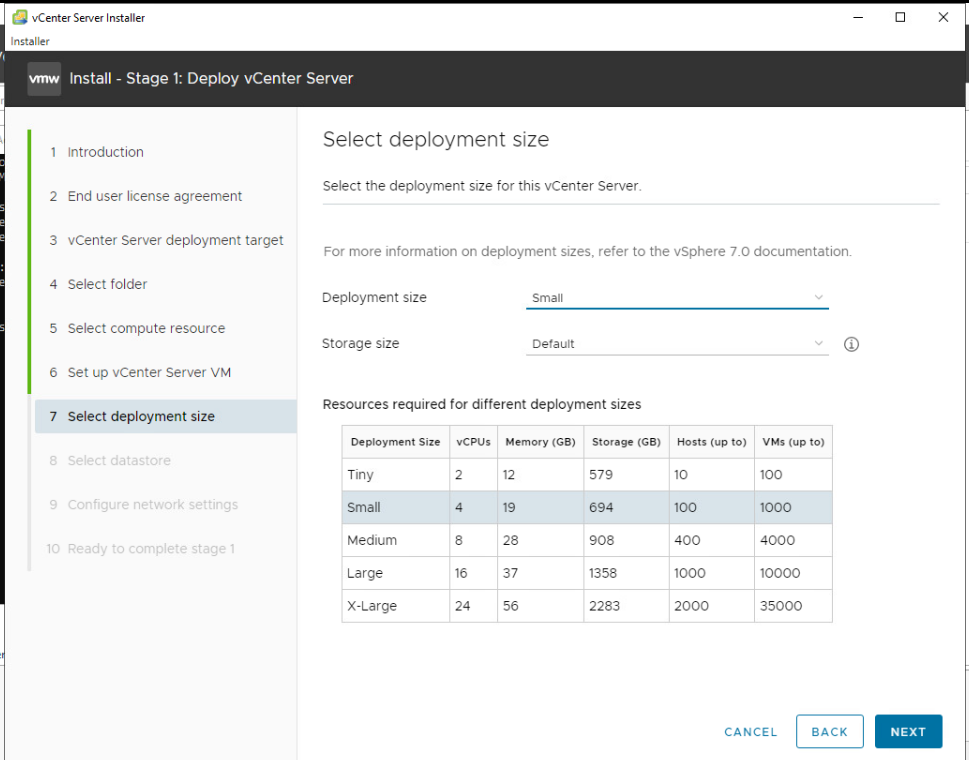
Deployment size 선택(경우에 따라 Storage size도 변경 가능)
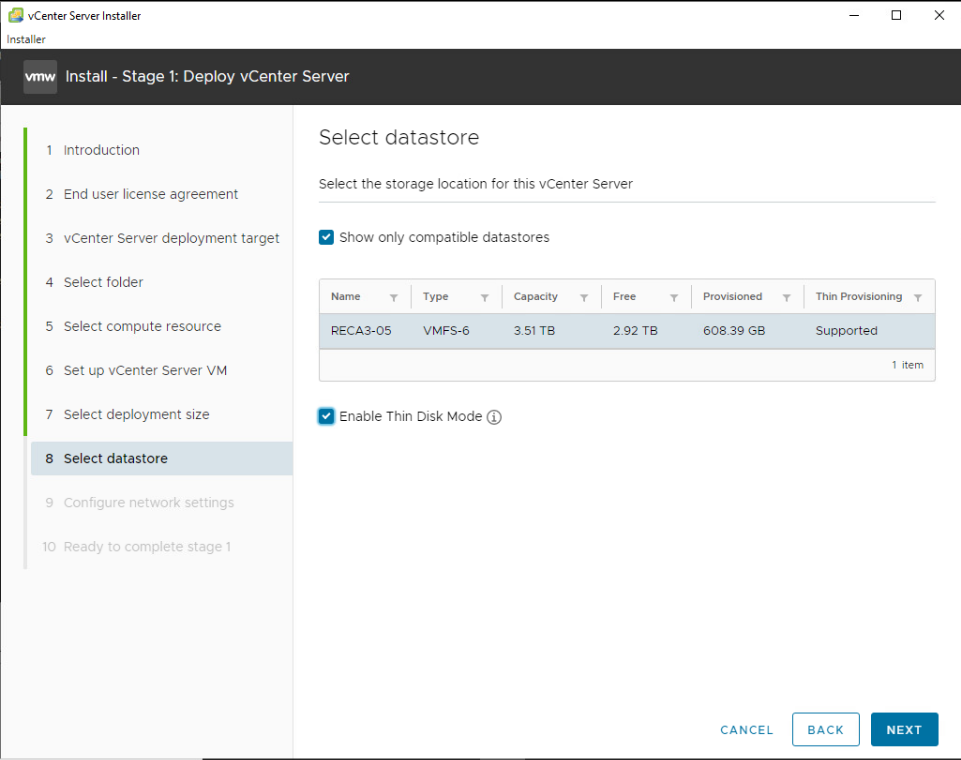
Data Store 설정
FQDN 주소 확인
Network setting
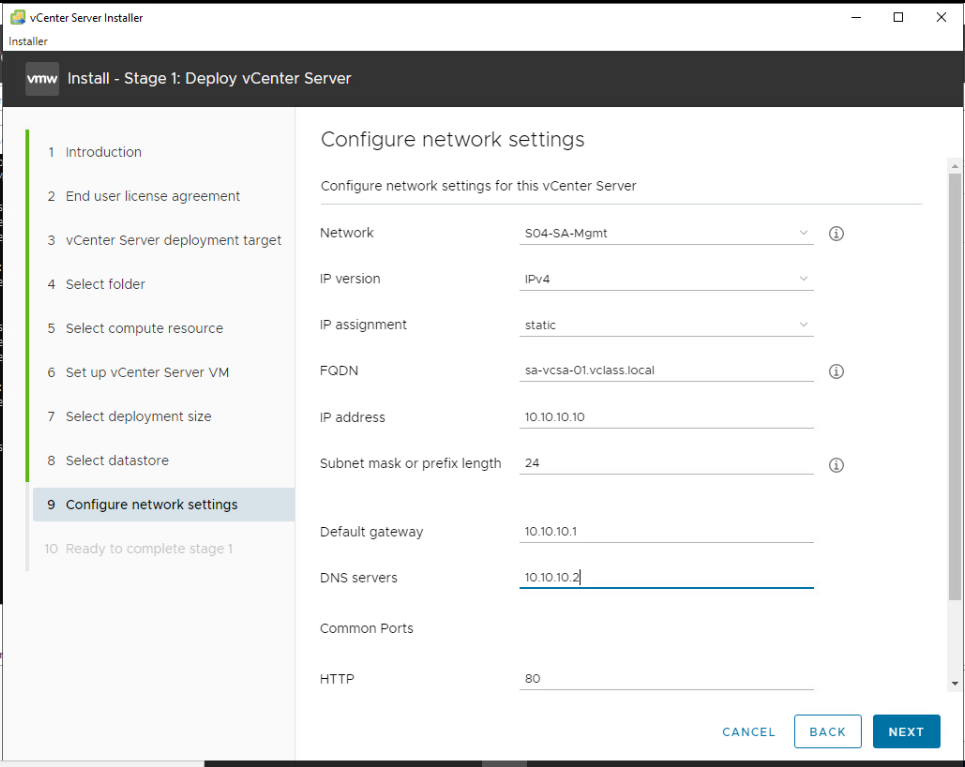
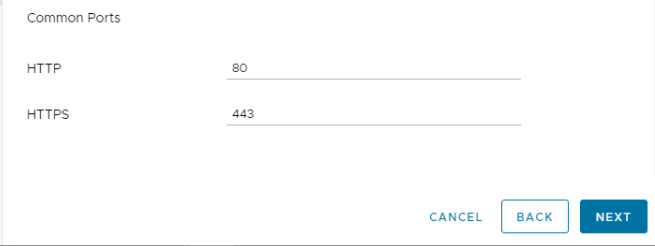
Common Ports 설정시 80과 443 포트는 너무 잘 알려져있는 포트라 변경할 필요가 있을 수 있음. 하지만 생성 후 변경은 불가능 하기 때문에 포트 번호의 변경 필요성은 생성 전에 확인해야함.
생성전 옵션 확인
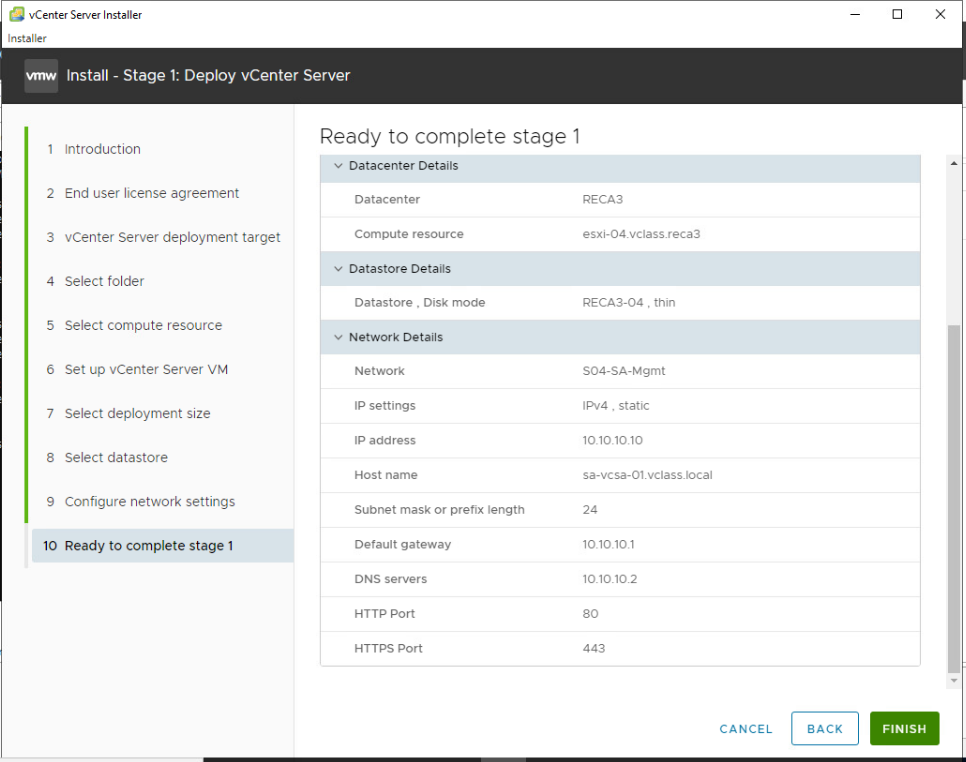
생성
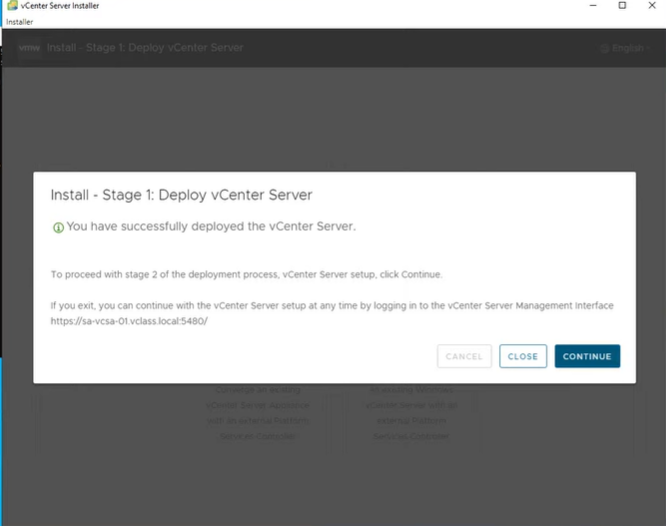
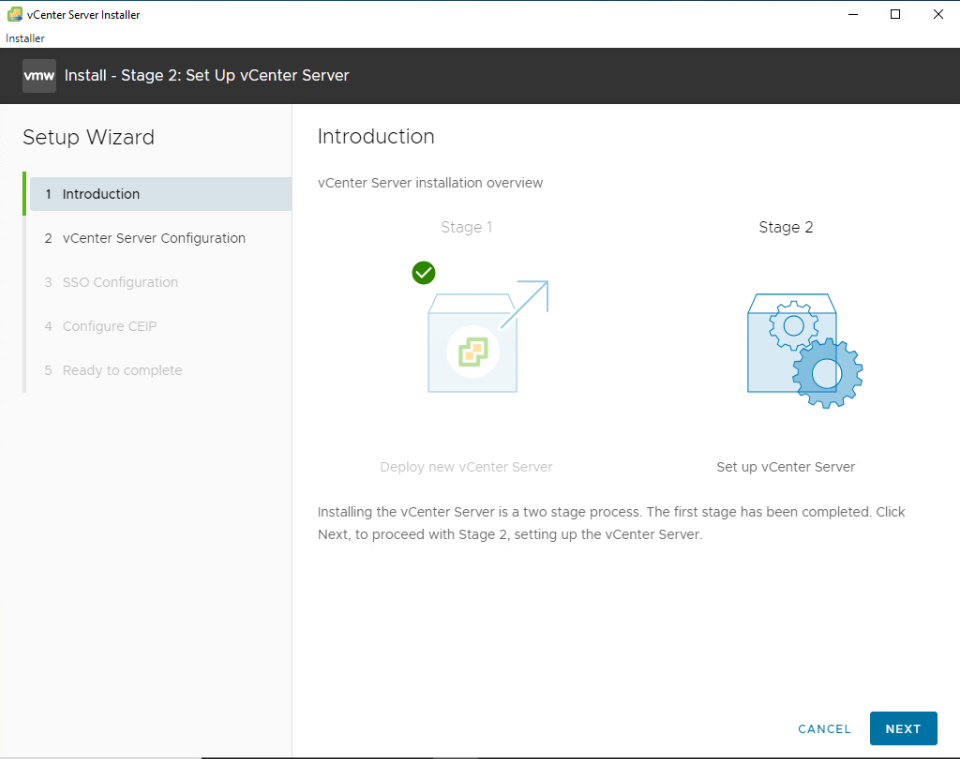
stage 2. Set up vCenter Server
서버 시간 설정 - NTP 서버로 설정, SSH access는 Enabled

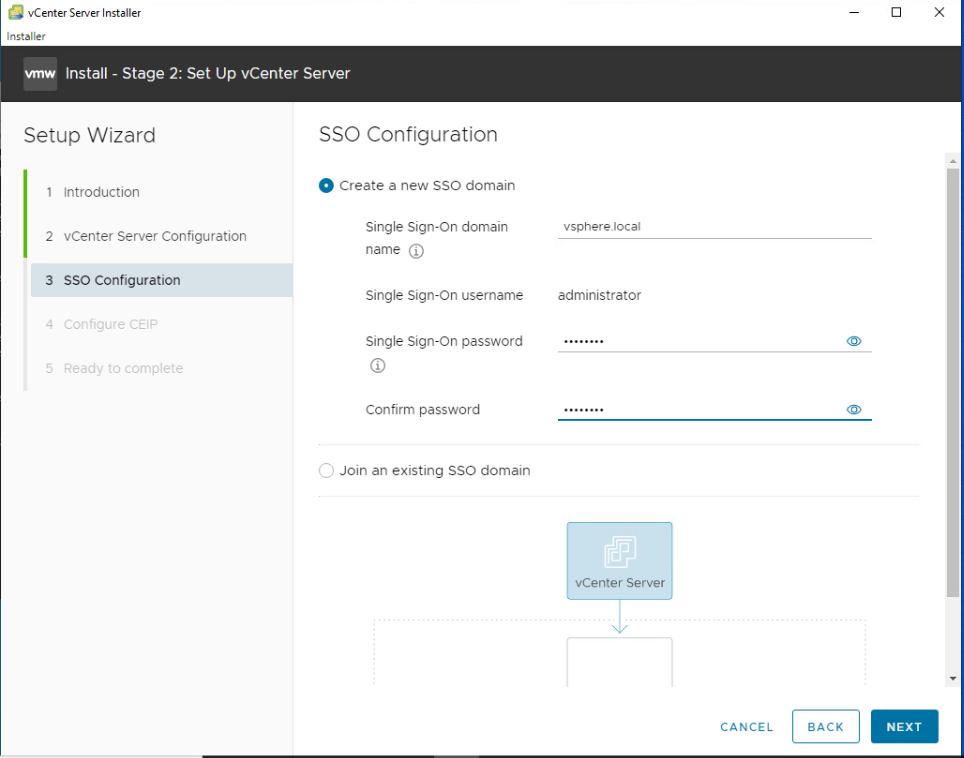
SSO Configuration 설정
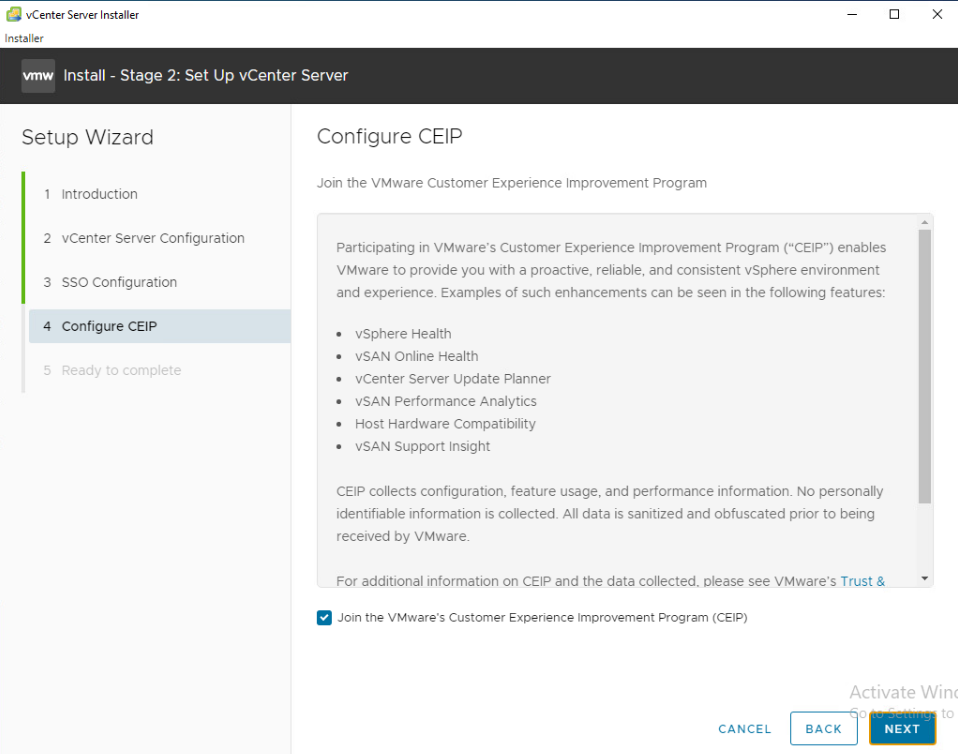
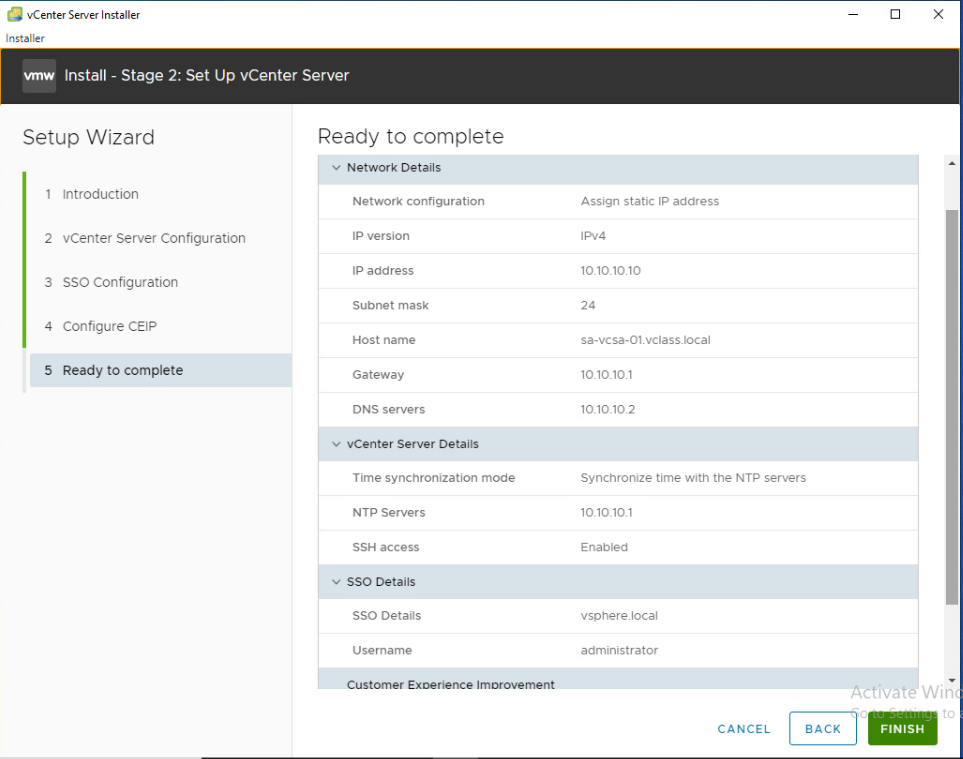
옵션 확인
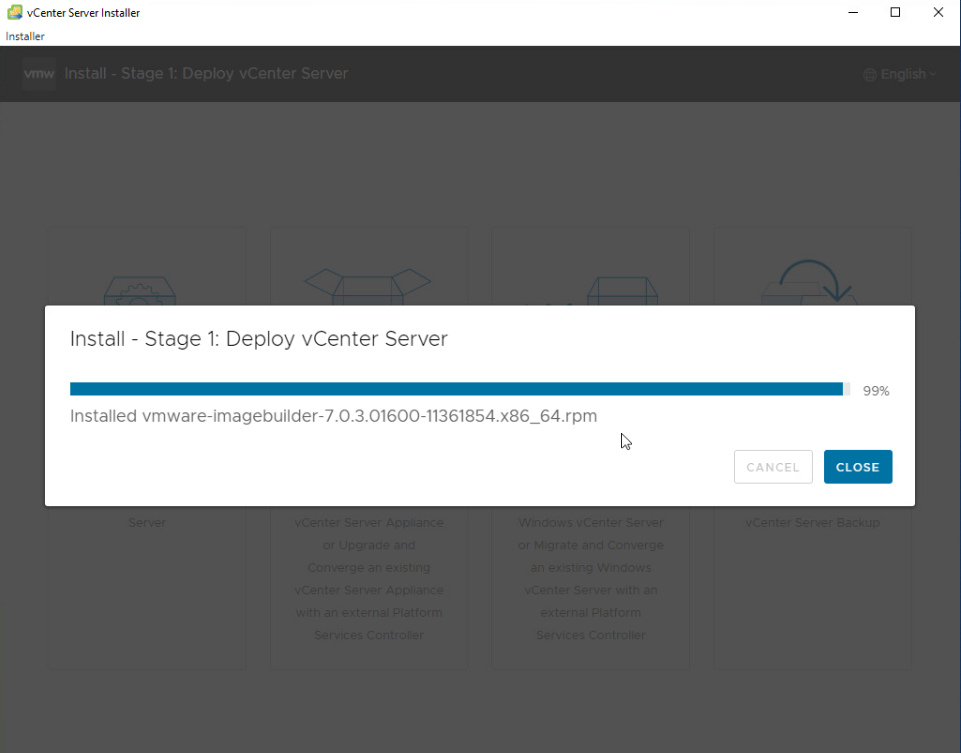
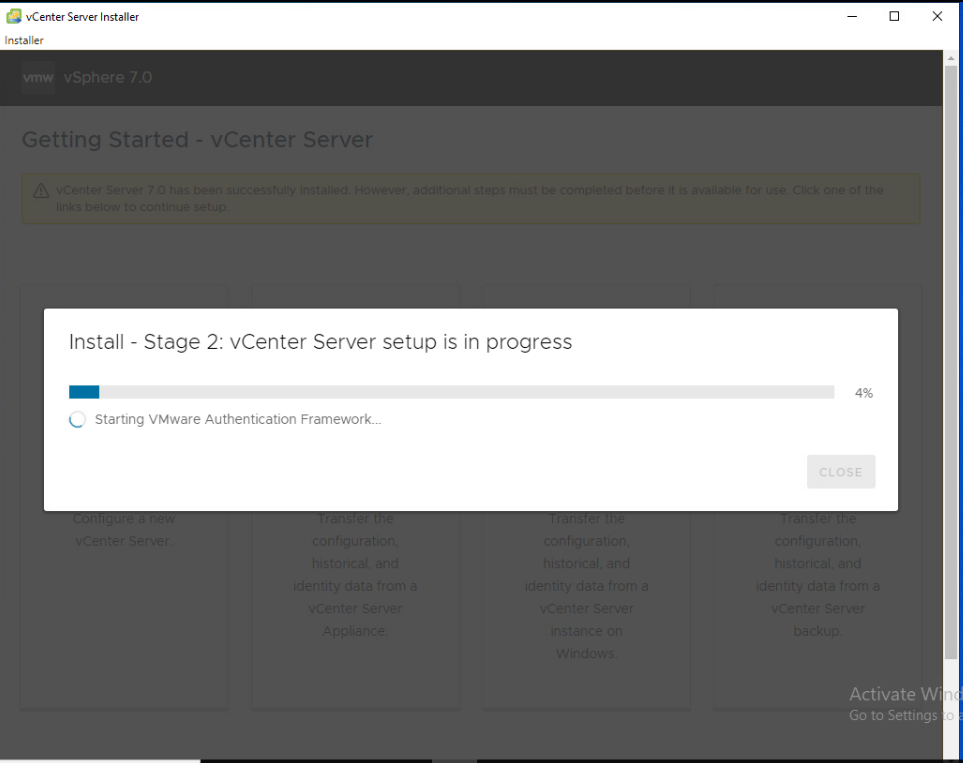
설치 진행
yaml 사용
---
- hosts: localhost
  vars_files: ./vars.yaml

  tasks:
  - name: Deploy vCenter Server Appliance VM from Template
    community.vmware.vmware_guest:
      hostname: "{{ vcenter_hostname }}"
      username: "{{ vcenter_username }}"
      password: "{{ vcenter_password }}"
      validate_certs: no
      name: "{{ student_ID + '-VCSA' }}"
      state: "poweredoff"
      datacenter: '{{ datacenter_name }}'
      folder: "{{ folder_prefix + student_ID }}"
      esxi_hostname: '{{ esxi_hostname }}'
      datastore: "{{ datastore_name }}"
      template: "{{ vcsa_template_name }}"
      linked_clone: True
      snapshot_src: "{{ vcsa_snapshot_src_name }}"
    delegate_to: localhost

  - name: Change Network Interfaces
    community.vmware.vmware_guest_network:
      hostname: "{{ vcenter_hostname }}"
      username: "{{ vcenter_username }}"
      password: "{{ vcenter_password }}"
      validate_certs: no
      name: "{{ student_ID + '-VCSA' }}"
      label: "Network adapter 1"
      network_name: "{{ student_ID + '-SA-Mgmt' }}"
      state: present
      force: yes
    delegate_to: localhost

  - name: Poweron VCSA VM
    community.vmware.vmware_guest:
      hostname: "{{ vcenter_hostname }}"
      username: "{{ vcenter_username }}"
      password: "{{ vcenter_password }}"
      validate_certs: no
      name: "{{ student_ID + '-VCSA' }}"
      state: "poweredon"
      state_change_timeout: 60
    delegate_to: localhost