JQuery
01. Mouse Wheel Scroll Event
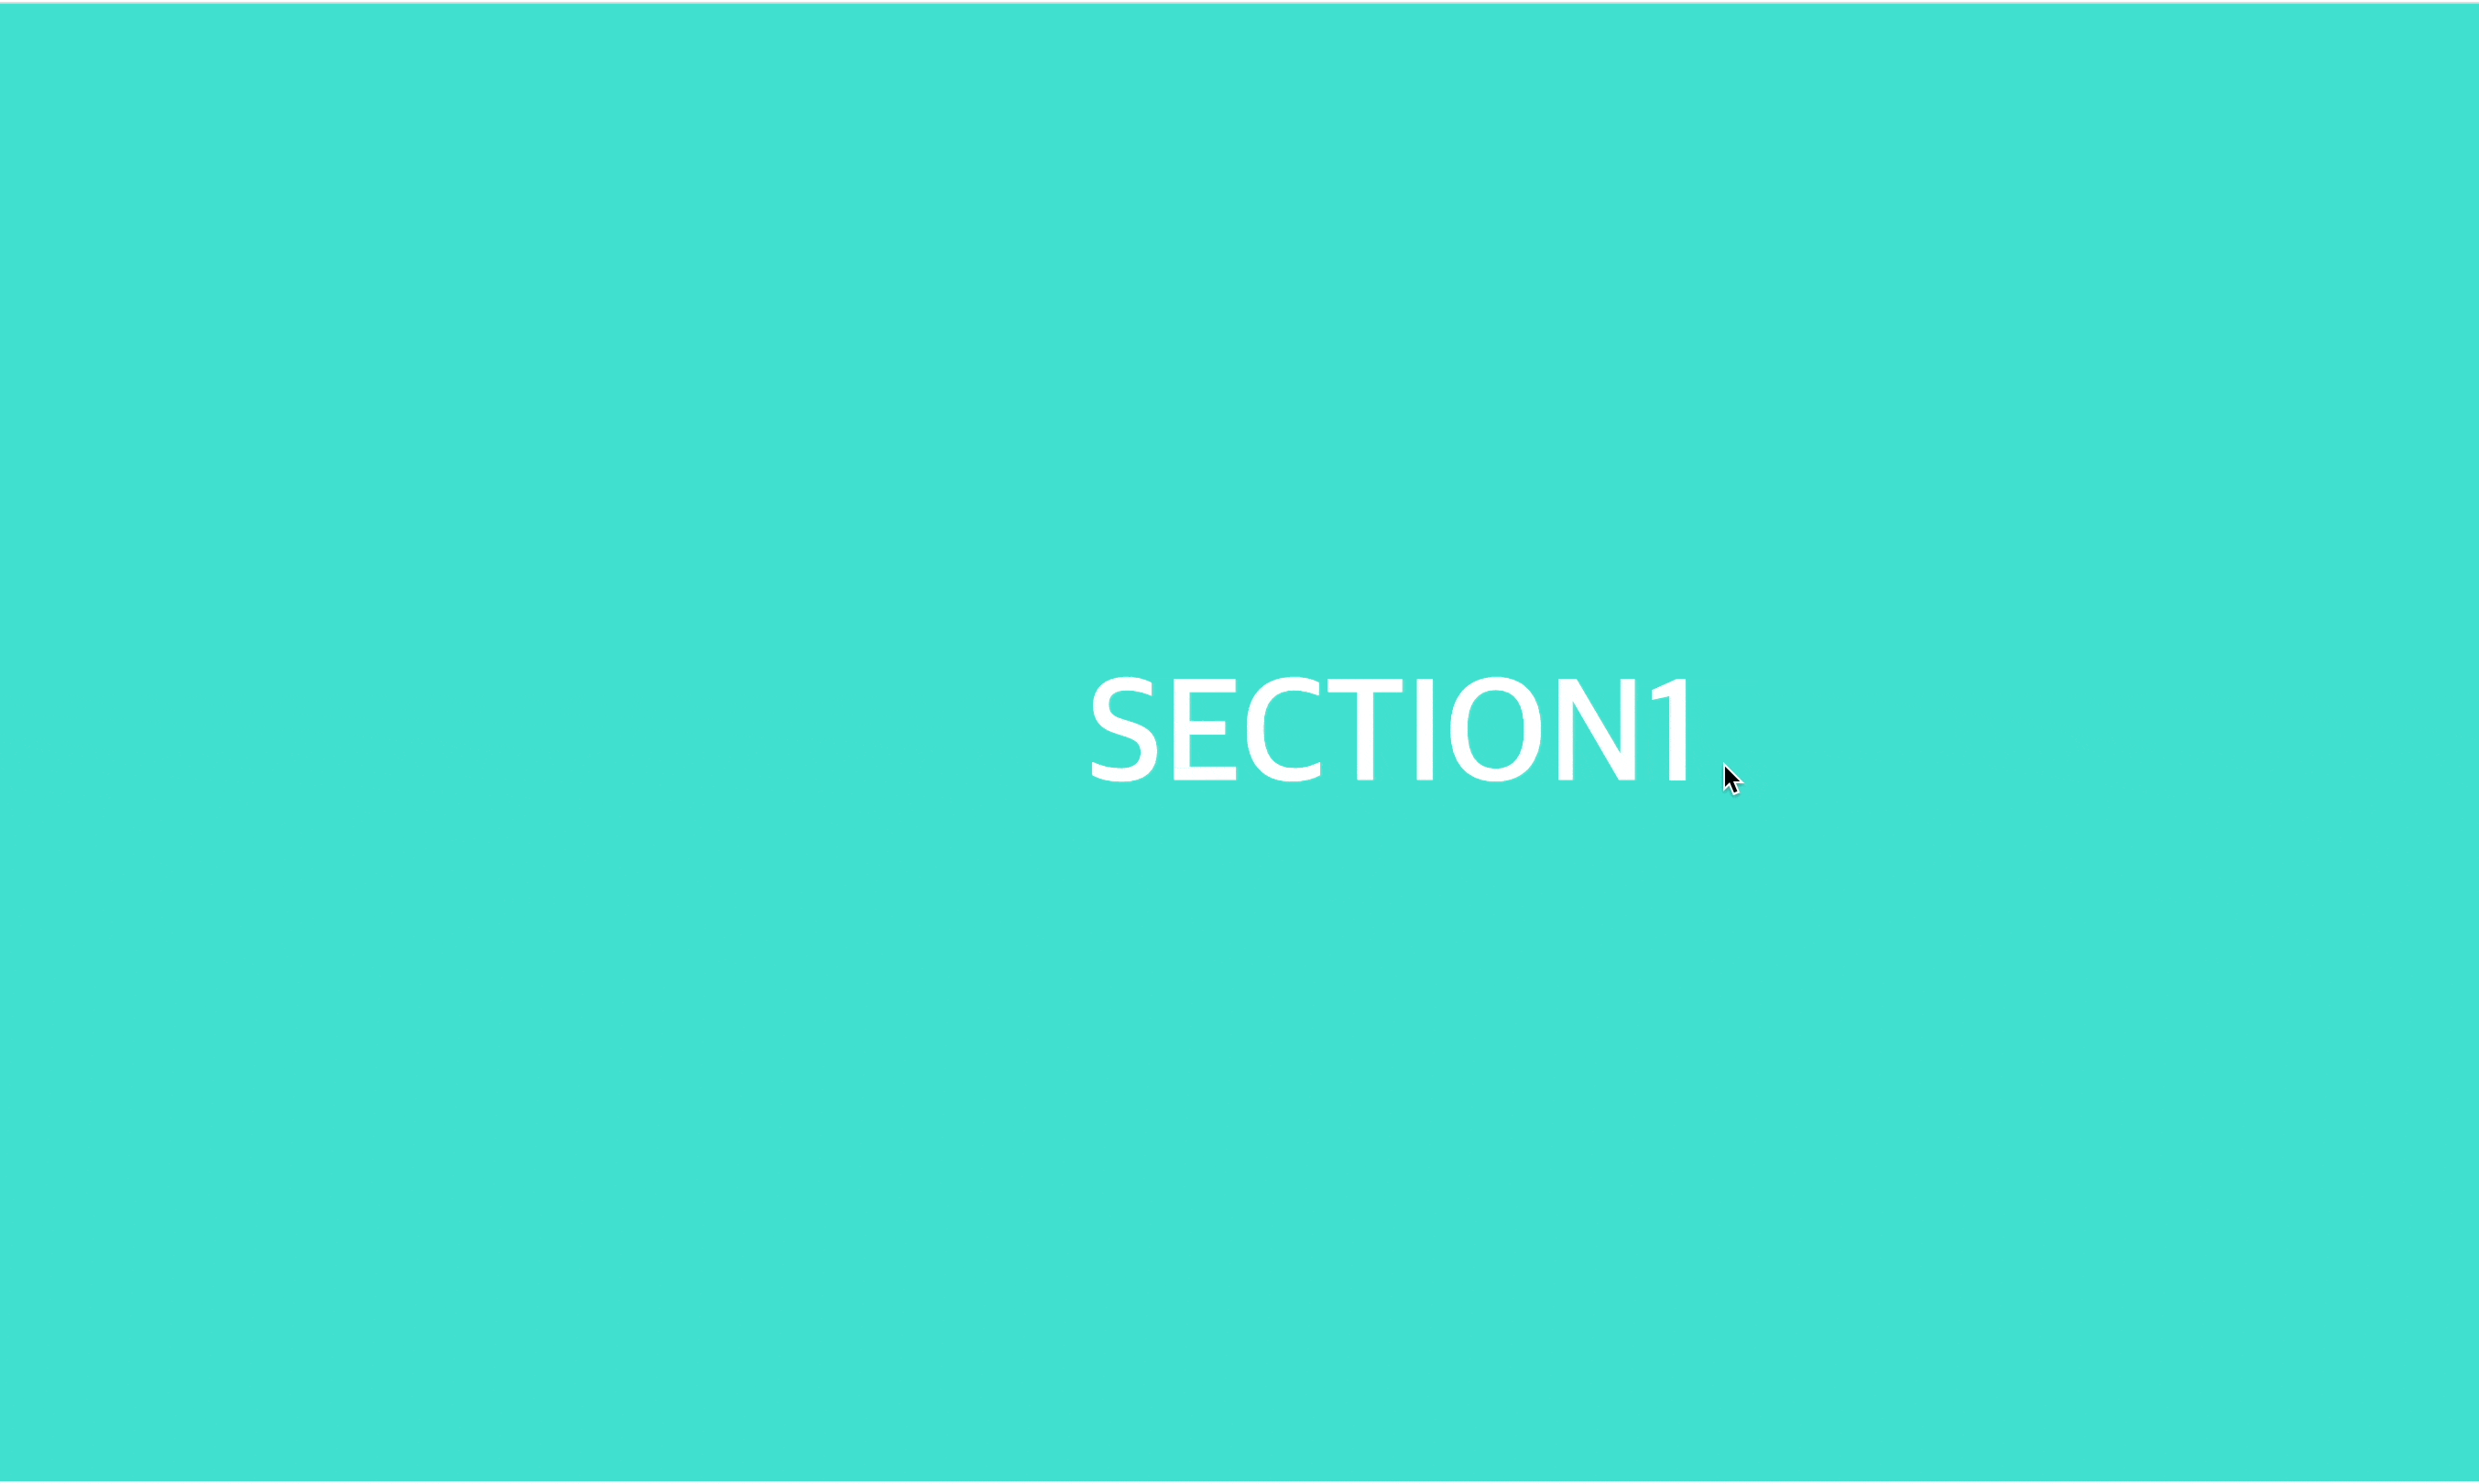
결과
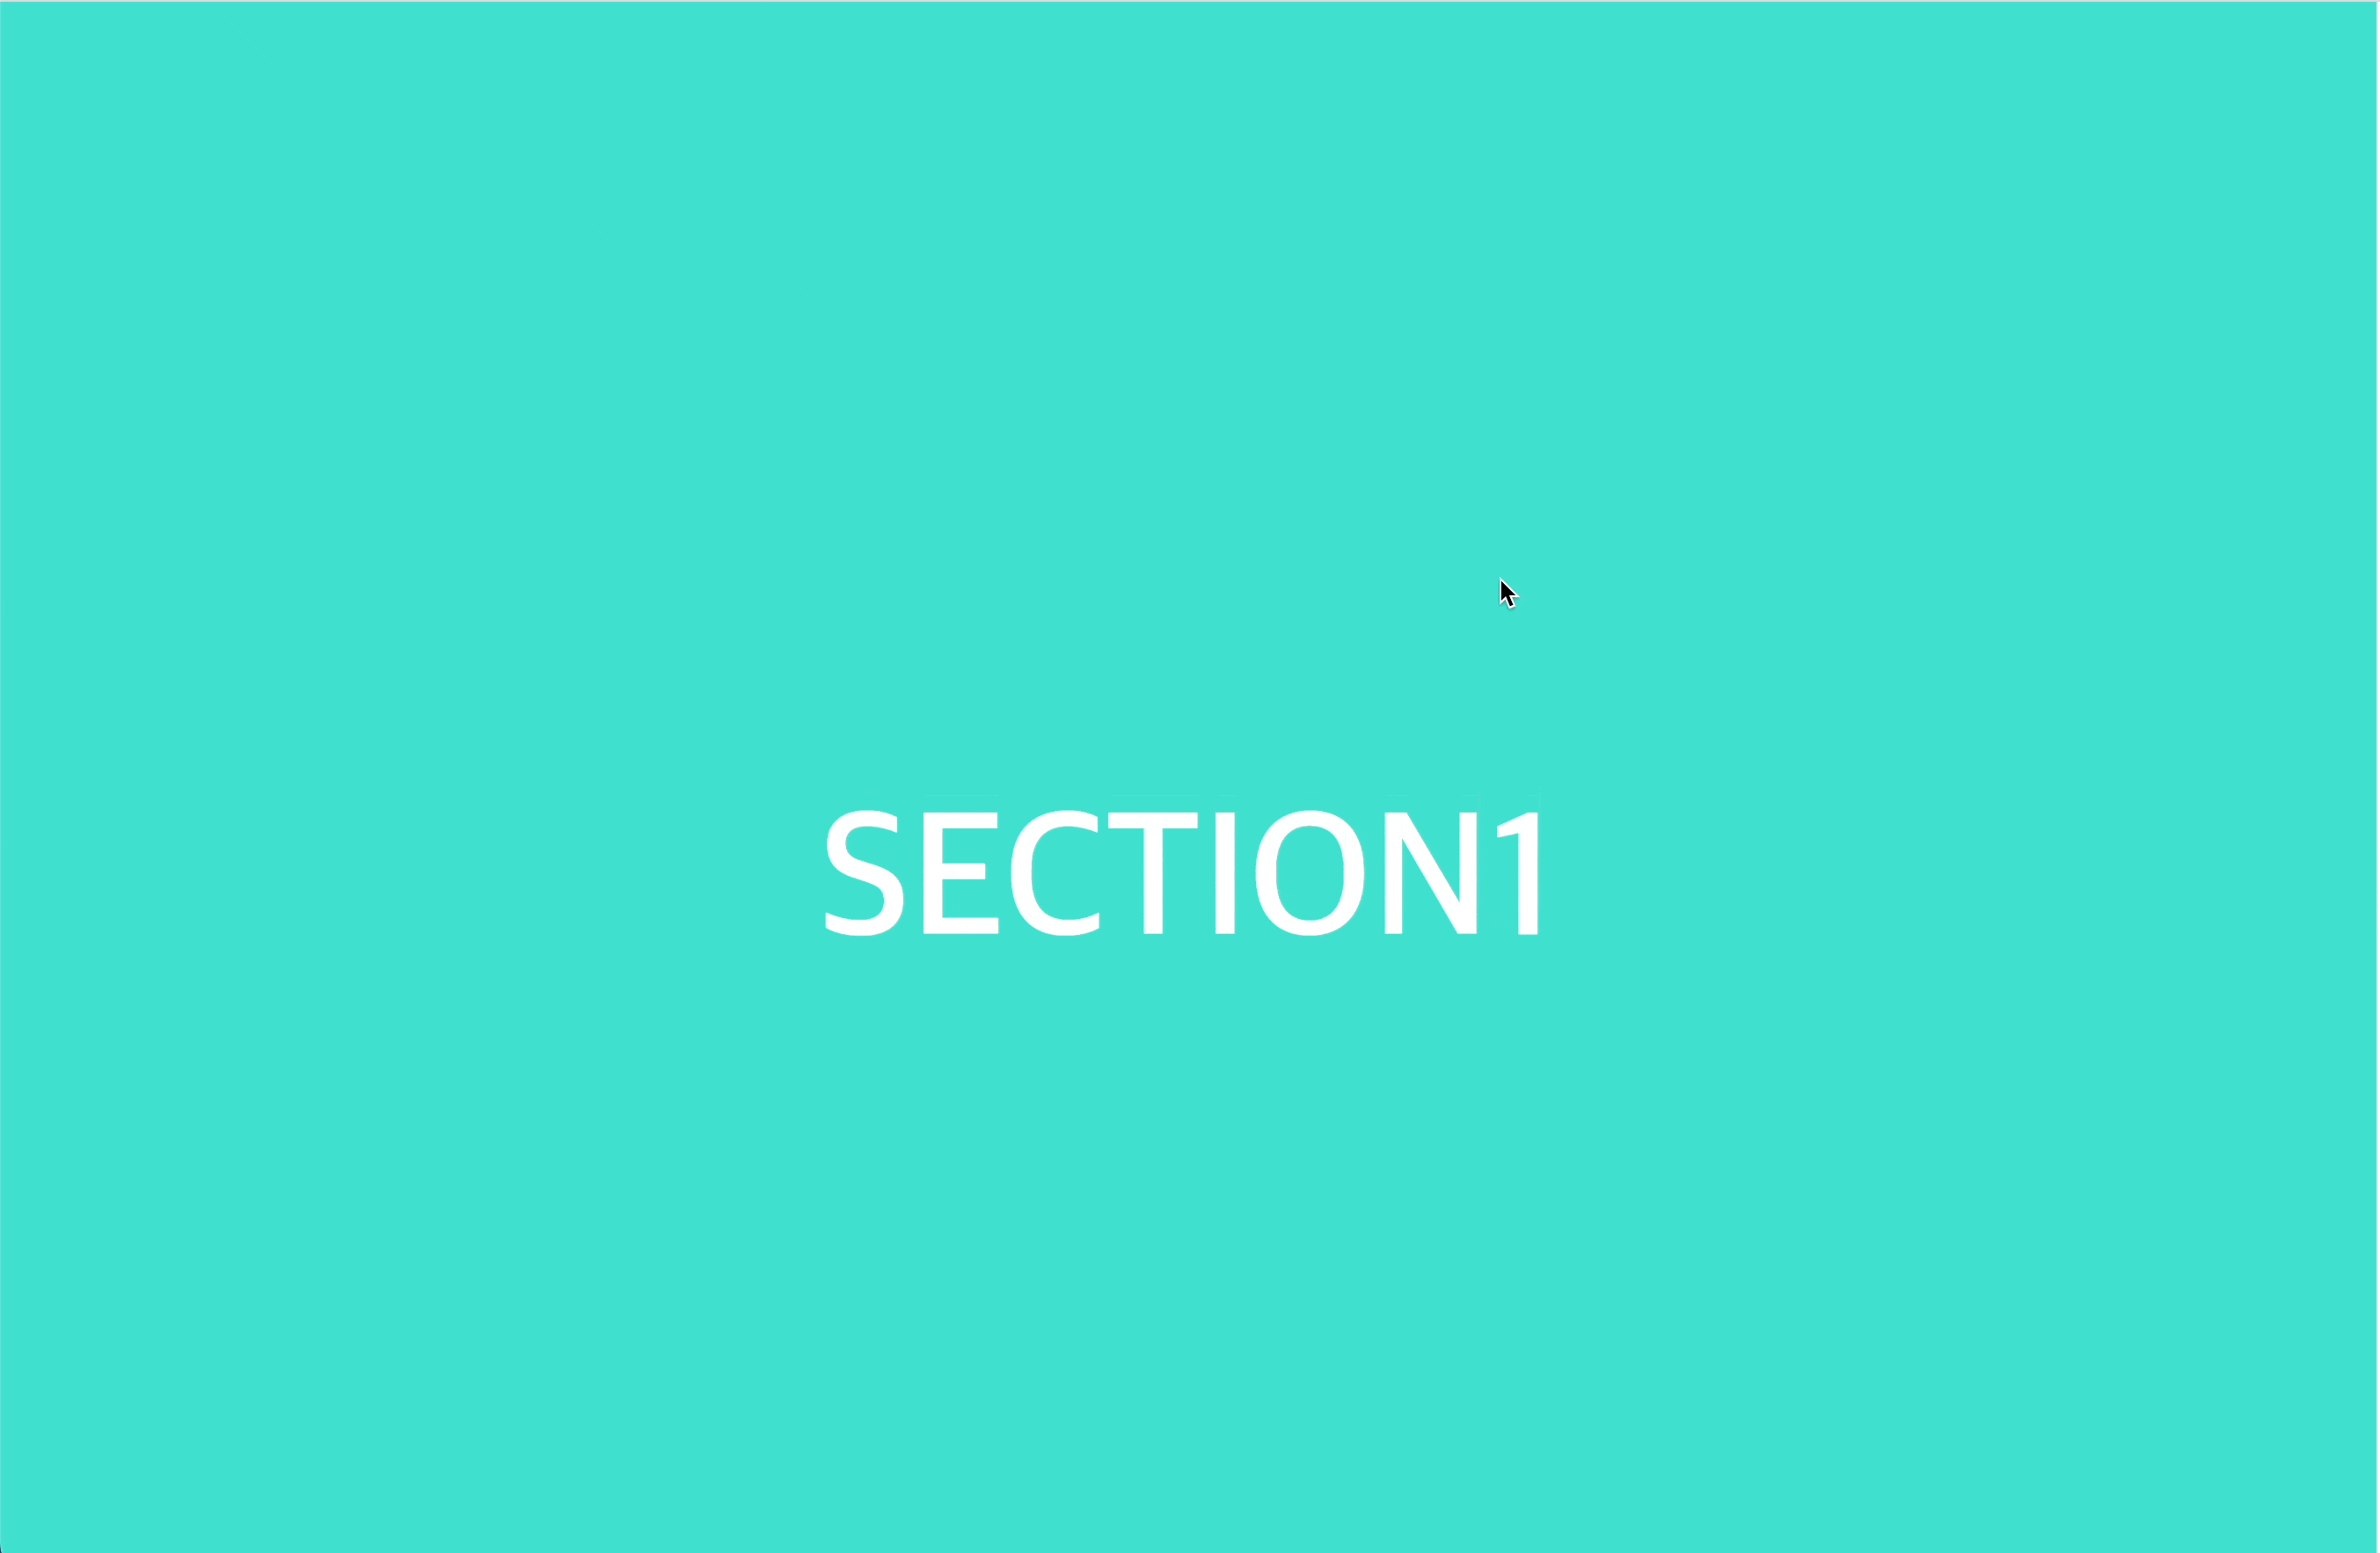
휠을 내리게 되면 다음
Section#상단을 top:0 left:0에 맞춰 내려간다.
HTML
<div id="warp">
        <section id="section1" class="section">section1</section>
        <section id="section2" class="section">section2</section>
        <section id="section3" class="section">section3</section>
        <section id="section4" class="section">section4</section>
        <section id="section5" class="section">section5</section>
        <section id="section6" class="section">section6</section>
        <section id="section7" class="section">section7</section>
        <section id="section8" class="section">section8</section>
        <section id="section9" class="section">section9</section>
    </div>
CSS
*{margin: 0; padding: 0;}
.section{position: relative; width: 100%; color: #fff; text-align: center; font-weight: 600; text-transform: uppercase; font-size: 100px; line-height: 1008px;}
#section1{background: turquoise;}
#section2{background: tomato;}
#section3{background: plum;}
#section4{background: teal;}
#section5{background: salmon;}
#section6{background: firebrick;}
#section7{background: darkkhaki;}
#section8{background: lightcoral;}
#section9{background: thistle;}
script
$(function(){
    let wheelDelta=0; //휠이벤트 발생시 반환값 확인 변수
    let browser=0; //파이어폭스 브라우저 판별
    //9개의 섹션 클래스 배열 처리
    //마우스 휠을 아래로(-120)
    //다음(next) 섹션으로 스크롤이벤트
    //마우스 휠을 위로(120)
    //이전(prev) 섹션으로 스크롤이벤트
    //Browser[Event - mousewheel] : 크롬, 익스, 사파리, 오페라 등... //쓰면 120의 값이 나오는데
    //Browser[Event - DOMMouseScroll] : 파이어폭스...
    //파이어폭스 : 휠을 아래(3) 위(-3) 다른 브라우저 반대로 수행
    //브라우저 판별 : window.navigator.userAgent // 이 작업을 해야함

    $('.section').each(function(index){
        $(this).on('mousewheel DOMMouseScroll', function(event){
            event.preventDefault();
            console.log(event);

            //사용자가 사용중인 브라우저 종류 뭔지 판별하기 위한
            browser=window.navigator.userAgent.toLowerCase().indexOf('firefox')
            console.log(browser);
            if(browser>=0){ //이 조건은 숫자 0~양수를 가지면 브라우저가 firefox임
                wheelDelta=-event.detail*40;
                //파이어폭스는 위(-3)아래(3) 이고
                //크롬은 반대로 위(120)아래(-120) 이기 때문에
                //if문으로 같게 만들어주기 위해 -값*40으로 만든다.
            }
            else{//마이너스 값을 가지면 브라우저가 firefox가 아님
                //(즉-1값을 가지면 파이어폭스브라우저가 아님을 뜻함)
                wheelDelta=event.originalEvent.wheelDelta;
            }
            console.log(wheelDelta);

            if(wheelDelta<0){ // 0보다 작다는건 -120 아래로 내리면
                if(index < $('.section').length-1){
                    $('html,body').stop().animate({scrollTop: $(this).next().offset().top},500)
                }
            }else{ //120 위로 올리면
                if(index>0){
                    $('html,body').stop().animate({scrollTop: $(this).prev().offset().top},500)
                }
            }
        });
    });
});
script에 설명된 주석을 참고
만약 가로로 스크롤을 만들고 싶다면??
결과
HTML
<div id="warp">
        <div id="section_wrap">
            <section id="section1" class="section">section1</section>
            <section id="section2" class="section">section2</section>
            <section id="section3" class="section">section3</section>
            <section id="section4" class="section">section4</section>
            <section id="section5" class="section">section5</section>
        </div>
    </div>
CSS
html{overflow: hidden;}
*{margin: 0; padding: 0;}
#section_wrap{width: calc(1920px*9); display: flex;}
.section{position: relative; width: 100%; max-width: 1920px; color: #fff; text-align: center; font-weight: 600; text-transform: uppercase; font-size: 100px; line-height: 1008px;}
#section1{background: turquoise;}
#section2{background: tomato;}
#section3{background: plum;}
#section4{background: teal;}
#section5{background: salmon;}
script
if(wheelDelta<0){ // 0보다 작다는건 -120 아래로 내리면
                if(index < $('.section').length-1){
                    $('html,body').stop().animate({scrollLeft: 	$(this).next().offset().left},500)
                }
            }else{
                if(index>0){
                    $('html,body').stop().animate({scrollLeft: $(this).prev().offset().left},500)
                }
            }
        });
    });
});
scrollLeft값만 바꿔주면 동작이 된다.
02. Typing Effect
결과

HTML
<span id="typed"></span>CSS
body{background: #ccc;}
        #typed{font-size: 40px; margin-left: 50px; font-weight: bold; color: tomato;}
        .typed-cursor{
        font-size: 40px;
        color: aqua;
        opacity: 1;
        -webkit-animation: blink 0.7s infinite;
        -moz-animation: blink 0.7s infinite;
        animation: blink 0.7s infinite;
        }
script
 $('#typed').typed({
            strings:["안녕하세요 ","NuyHes Velog입니다."],
            typeSpeed: 10,
            backDelay: 1,
            loop: true,
            cursorChar: "|"
        });
Typed.JS
Typing 효과를 나타나게 하는 효과이다.
CDN은 구글링을 통해 가져온다. 정해진 공식 페이지는 없는듯 하다.
<script src="https://cdn.jsdelivr.net/npm/typed.js@2.0.12"></script>
$('#typed').typed를 쓰고({안에strings:["안녕하세요 ","NuyHes Velog입니다."],typeSpeed:10,backDelay:1,loop:true,cursorChar:"|"
을 작성한다.
03. Scale Effect
결과
그림 예제는 참고만 부탁드립니다..
우리는 이 방법을 알고있다. 바로 CSS에서 말이다. 동일하다 스크립트에서 CSS를 제어한다.
HTML
    <div id="wrap">
        <div>
            <img class="hover" src="./img/1.JPG" alt="">
        </div>
    </div>
CSS
*{margin: 0; padding: 0;}
#wrap{width: 500px; height: 400px; margin: 200px auto;}
#wrap div{width: 100%; height: 100%; border: 5px solid red; overflow: hidden;}
#wrap div img{width: 100%; height: 100%; vertical-align: bottom;  transition: .3s;}
script
$('#wrap > div .hover').hover(
    function(){
        $(this).css({transform:'scale(1.2)'})
    },
    function(){
        $(this).css({transform:'scale(1)'})
});
04. Mouse Cursor Change
결과
바꾸고 싶은 마우스 커서의 이미지를
png로 다운 받거나 만든다. 크기는 가로세로 100px 이하로만 된다. (정확한 값은 아님) 대략적으로 70~80px정도 돼야 되는거 같음..
HTML
    <div class="box">
    </div>
은 딱히 뭐 없다..
CSS
.box{width: 100%; height: 1008px; background: tomato; text-align: center;}script
$('body').css({cursor:'url(1.png),auto'})여기서 css cursor의 url을 바꿔주면 커서가 변경된다. 앞에 선택자를 body로 해서 전부 저모양의 커서로 변경됐지만 원하면 해당 선택자에서만 커서가 변경되게도 가능하다.