[Front-end] 수업 #069일 5-5
React
함수형 컴포넌트 상태관리
🕵️♀️ 전시간에는 클래스형 컴포넌트 상태관리를 배워보았다. 이번에는 함수형 컴포넌트 상태관리를 배워본다.
전체 코드 구성
function App(){
    return (
        <div id='app' style={appStyle.init.mainStyle}>
            <h1 style={appStyle.init.h1Style}>나는 컴포넌트야</h1>
            <CountComponent/>
        </div>
    );
};
function CountComponent(){
    const[cnt,setCnt]=React.useState(0);
    const{mainStyle,h1Style,h2Style,countStyle,btnStyle}=appStyle.init;
	const countAddEvent=()=>{
        setCnt(cnt=>cnt+1)
	}
    const countRemoveEvent=()=>{
        setCnt(cnt=>cnt-1)
    }
    return(
        <div id='count'>
            <h1 style={h1Style}>카운트 컴포넌트</h1>
            <button style={btnStyle} onClick={countAddEvent}>+</button>
            <button style={btnStyle} onClick={countRemoveEvent}>-</button>
            <ViewComponent cnt={cnt}/>
        </div>
    );

}
function ViewComponent(props){
const{mainStyle,h1Style,h2Style,countStyle,btnStyle}=appStyle.init;
return(
    <div id='view'>
        <h1 style={countStyle}>{props.cnt}</h1>
    </div>
)
}
const appStyle={
    init: {
        mainStyle:{
            textAlign:'center',
        },
        h1Style:{
            fontSize:'40px',
            color:'red',
            padding:'20px 0'
        },
        h2Style:{
            fontSize:'30px',
            color:'green',
            padding:'20px 0'
        },
        countStyle:{
            fontSize:'100px',
            color:'#39c',
            padding:'0 0 30px 0'
        },
        btnStyle:{
            fontSize:'20px',
            color:'#fff',
            padding: '10px 20px',
            cursor:'pointer',
            background:'#000',
            margin:'0 10px'
        }
    }
}
ReactDOM.render(
    <App/>,
    document.getElementById('root')
);
👨💻전체 코드 구성은 위와 같고 하나하나 코드를 복습을 해나가면서 작성한다.
AppComponent
function App(){
    return (
        <div id='app' style={appStyle.init.mainStyle}>
            <h1 style={appStyle.init.h1Style}>나는 컴포넌트야</h1>
            <CountComponent/>
        </div>
    );
};
부모컴포넌트인 AppComponent이다 return문 안에 구조분해할당된 appStyle 스타일이 들어가 있으며 h1타이틀이 있고 CountComponent가 있다.
CountComponent
function CountComponent(){
    const[cnt,setCnt]=React.useState(0);
    const{mainStyle,h1Style,h2Style,countStyle,btnStyle}=appStyle.init;
	const countAddEvent=()=>{
        setCnt(cnt=>cnt+1)
	}
    const countRemoveEvent=()=>{
        setCnt(cnt=>cnt-1)
    }
    return(
        <div id='count'>
            <h1 style={h1Style}>카운트 컴포넌트</h1>
            <button style={btnStyle} onClick={countAddEvent}>+</button>
            <button style={btnStyle} onClick={countRemoveEvent}>-</button>
            <ViewComponent cnt={cnt}/>
        </div>
    );

}
AppComponent 안에 있는 CountComponent이다. 카운팅이 될 state를 만들어준다. cnt , setCnt 위에서 import를 하지 않고 바로 사용 할 경우 React.useState 를 적어준다.
카운팅 될 cnt의 useState의 초기값은 0 이다. 다음 appStyle.init을 구조 분해 할당으로 스타일의 값을 할당했고 각 태그에 적용했다.
클래스형 컴포넌트의 예제와 마찬가지로 증가버튼 과 감소버튼 이 있다.
countAddEvent 함수와 countRemoveEvent 함수가 있다 각각 1증가와 1감소의 함수이다.
state로 초기값을 부여한 useState를 움직여야한다.
👩🏫 [tip] : 클래스형과 함수형의 함수는 다르다
클래스형 컴포넌트 함수
this.setState({cnt:this.state.cnt+1})
함수형 컴포넌트 함수
setCnt(cnt=>cnt+1)
그래서 이번 함수형 컴포넌트시간에서는 setCnt(cnt=>cnt+1) 함수를 사용한다.
감소가 되는 함수의 경우 동일하고 마지막 -1 만 변경해주면 된다.
이제 함수를 만들었고 버튼에 적용해본다.
<button style={btnStyle} onClick={countAddEvent}>+</button>
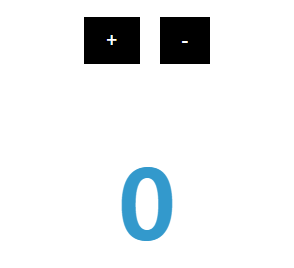
<button style={btnStyle} onClick={countRemoveEvent}>-</button>초기값
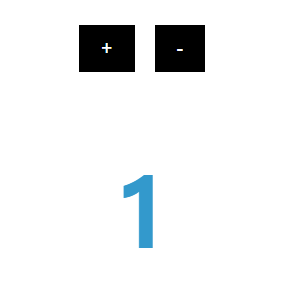
1증가 버튼 onClick 이벤트
1감소 버튼 onClick 이벤트

1증가와 1감소가 잘되는 모습을 볼 수 있다.
CountComponent 안에는 ViewComponent가 있다. 다음 컴포넌트를 알아보자.
ViewComponent
function ViewComponent(props){
const{mainStyle,h1Style,h2Style,countStyle,btnStyle}=appStyle.init;
return(
    <div id='view'>
        <h1 style={countStyle}>{props.cnt}</h1>
    </div>
)
}
이번 View컴포넌트는 카운팅 되는 값을 나타내는 부분이다. 위 예제의 파란색 숫자부분이다.
다른 방법들도 찾아본다.
1번 방법
<h1 style={countStyle}>{props.cnt}
2번 방법
<h1 style={countStyle}>{cnt}</h1>
3번 방법
function ViewComponent({cnt}){
  const {cnt}=props;
  return(
      <div id='view'>
          <h1 style={countStyle}>{cnt}</h1>
      </div>
  )```
함수에 props로 받는것이 아니라 cnt로 받아서 cnt를 props로 담아서 쓴다.